Humboldt H-2987H User manual

product manual
11.16
H-2987H
Concrete Rebound Hammer

Using the Humboldt Concrete Rebound Hammer
Always hold the Concrete Rebound Hammer in both hands while in use. Also,
when in use, keep the hammer perpendicular to the surface you are testing with
the scale pointing up, making it easier to read.
Before the Hammer can be used for testing, the piston must be released out of
the hammer into the testing position. Typically during storage and transporta-
tion, the Hammer piston will be locked inside the Rebound Hammer and will
need to be released from the storage position. If the piston is not extended into
the test position, place the end of the piston against a stiff surface and gently
press the Rebound Hammer firmly against the surface. You will hear a click, and
the piston will extend into the test position.
Figure 2: Always hold the Rebound Hammer with both hands
perpendicular to the surface
Figure 1: The Concrete Rebound Hammer

To perform a test, make sure the piston is extended and gently press the
Rebound Hammer against the concrete surface to be tested. When the piston
is pressed all the way into the Rebound Hammer, continue to push harder until
you hear a rattling sound. Keep the Rebound Hammer firmly pressed against
the concrete surface and read the rebound number on the scale.
As long as you hold the Rebound Hammer firmly against the concrete, the
rebound number will remain on the scale. Record your reading. When you pull
the hammer away and allow the piston to re-extend, the scale will return to zero.
The Rebound Hammer is now ready for another test. If desired, once you get a
reading, you may press the button on the handle to lock the piston in place.
This makes your test results easier to read, as it will also lock the indicator. Do
not touch the button until you get a reading. To release the piston again for the
next test, press against a hard surface. When you are finished using the Rebound
Hammer, lock the piston inside the Rebound Hammer for storage, as described
above.
Taking a Measurement
Selecting a Surface for Testing
Select a concrete surface that is:
• Smooth, dry, and fixed in place
• At least 4 inches (or 102 mm) thick
• Mature— at least 14 days old
• Free of any decay or scaling
If necessary grind a section of rough concrete smooth before taking your
readings. A grind stone in a plastic case is provided with the hammer for this
purpose.
Figure 3: Push the piston in as far as it will go

Surfaces to Avoid
Avoid testing concrete that is:
• Frozen
• Honeycombed or excessively porous
• Known to have rebar 2cm or less below the surface
• Carbonated on the surface
If you must test a mature concrete surface that is damp from rain or flowing
water, or if you must test new concrete, keep in mind that you will probably get
rebound numbers that are lower than they should be. Using the Rebound Ham-
mer on new concrete may damage it if the strength is less than 1,000 PSI.
If you are testing concrete with a lot of surface carbonation, the rebound read-
ings will be significantly higher than normal. The thicker the layer of carbonated
concrete, the higher the rebound numbers.
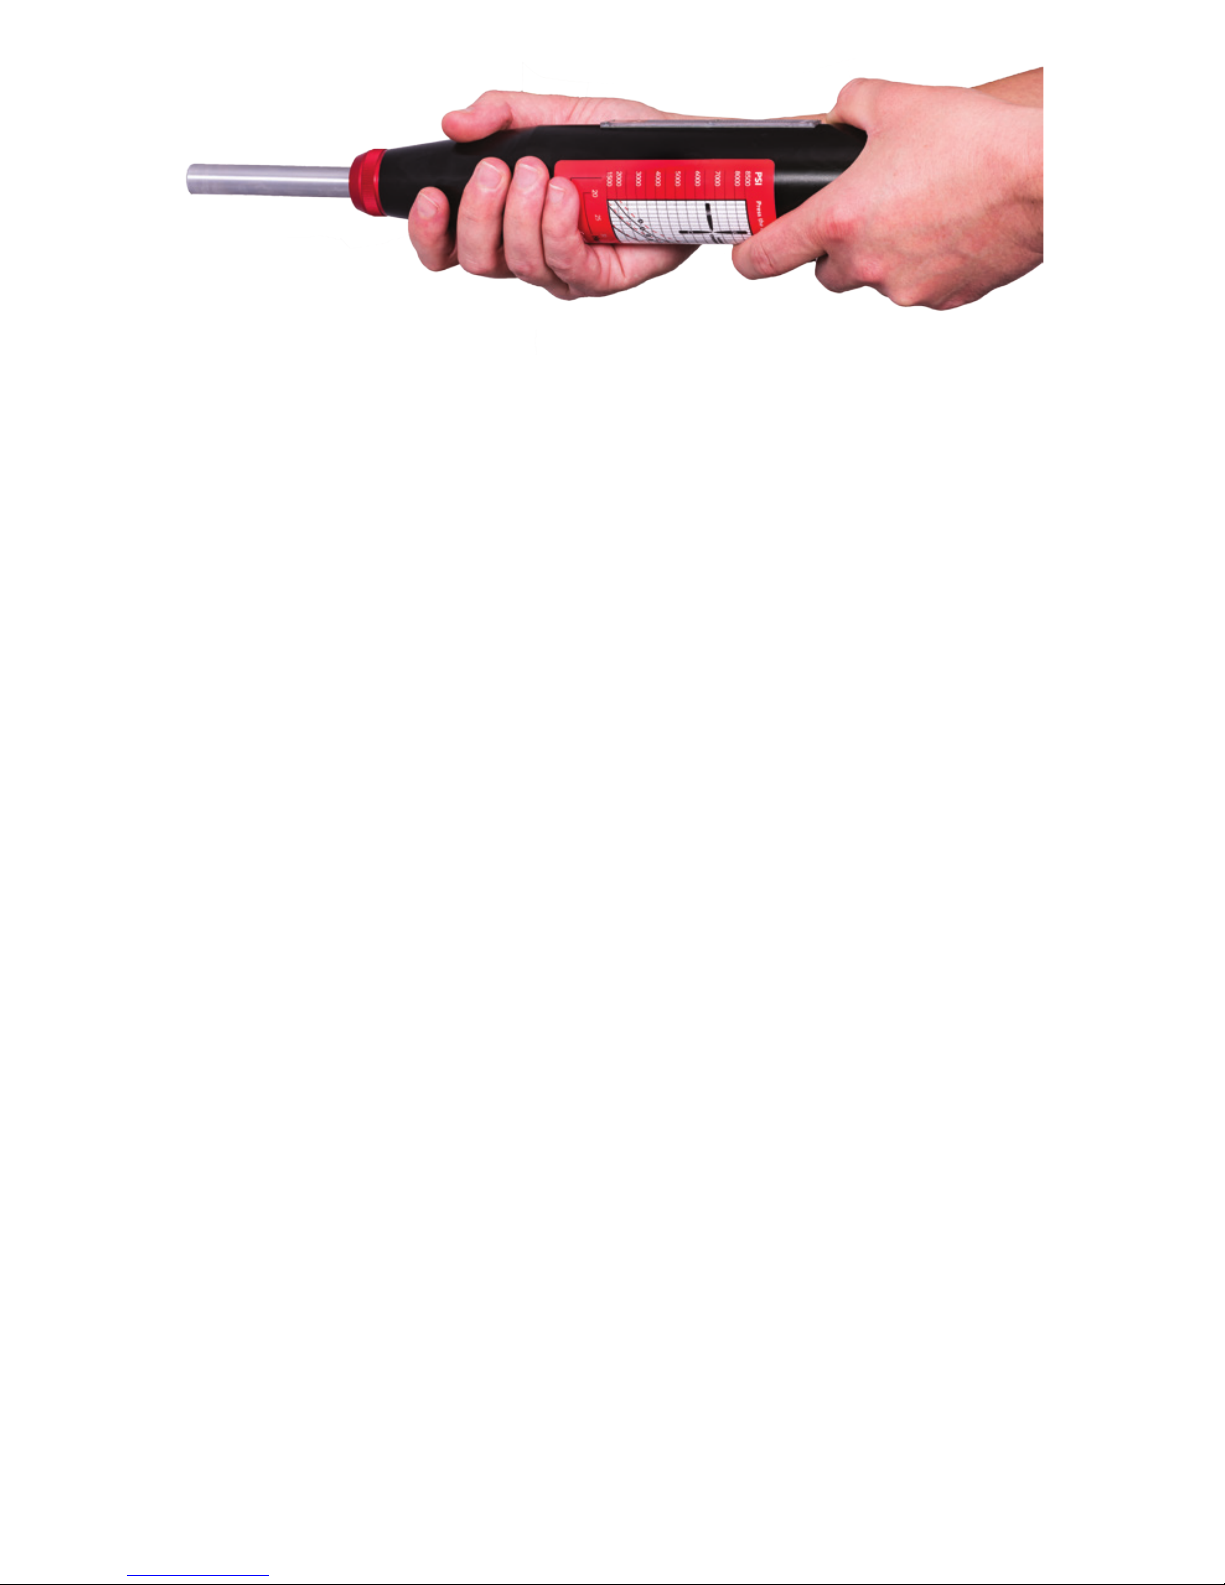
Holding the Rebound Hammer against Walls, Ceilings, and Floors
The Rebound Hammer will work against any concrete surface as long as you
keep it perpendicular to that surface. The Rebound Hammer can be used
against a ceiling (upward), a floor (downward), or a wall (forward). You will
need to consider gravity when estimating the compressive strength of concrete.
The rebound number found when pressing up against a ceiling will differ from
the number that appears if you are pressing down against a floor. Please review
the strike angles A, B, and C and the correlation curves in “Reading your
Results” below.
Specialty Concrete
The Rebound Hammer is designed to estimate the compressive strength of
standard concrete. The correlation diagram for standard concrete is printed on
the side of your Concrete Rebound Hammer. It shows the correlation curves
determined when the compressive strength of standard concrete, as measured
with your Rebound Hammer, is directly compared to the compressive strength
from laboratory tests of concrete cylinders or cubes.
This diagram is not designed for use with:
• Light weight concrete
• Concrete using artificial aggregates
• High performance concrete
In order to gain an accurate rebound number for these specialty materials, you
will need to create your own correlation curves diagram intended for this use.
See the standards ACI 228.1R-2010 and ASTM C-805-08.

Figure 4: Concrete Rebound Hammer correlation curves
Reading your Results
Make at least ten readings from a concrete surface and discard the highest and
lowest rebound numbers. Average the remaining eight numbers. If desired, take
a few test readings before you complete your series of ten regular tests. Use the
average rebound number to estimate the strength of the concrete. Compare
your average rebound number to the chart shown on your Concrete Rebound
Hammer. Consider the diagram shown here:
Rebound Number
Correlation curves. This diagram shows the relationship between the
compressive strength for concrete, measured directly in a laboratory using
concrete cylinders or concrete cubes, and the rebound numbers you receive
using your Rebound Hammer.
Arefers to using the Rebound Hammer against a concrete floor (downward).
Brefers to using it against a concrete wall (forward).
Crefers to using it against a concrete ceiling (upward).

The strength values shown in this diagram are directly based on compressive
strength testing in a laboratory, using concrete 14 to 56 days old. The tests use
concrete cylinders, 6 inches wide and 12 inches high (15cm x 20cm), or concrete
cubes six inches high.
According to ASTM C-805-08, you should discard any readings that differ
from the average value rebound number by more than six units. Then, take an
average for the remaining readings. If more than two readings differ by more
than six units from the average value, throw out all of your readings and perform
the test over again. Take ten new readings with your Rebound Hammer in a
different section of the concrete but in the same test area.
Note that some countries have set their own national standards for calculating
test results. Therefore, follow the standards of the country where you are using
your Rebound Hammer.
Maintenance
We recommend that you calibrate your Rebound Hammer regularly using
the Humboldt Calibration Anvil, H-2972, ordered separately. For a Rebound
Hammer, you should start verifying the readings after approximately 2,000
uses (or completed tests). You should also verify the readings if you have
reason to suspect that your Rebound Hammer is giving you false data.
Verifying Performance of Rebound Hammer
When tested against the Anvil, the rebound number must be a value of 80 ±2.
As the Rebound Hammer approaches 2,000 uses, it may start to read outside of
the range of 80 ±2 on the test Anvil. At this point an inspection by our service
center is suggested.
Safety:
• When using this device wear safety glasses
• Do not fire the Rebound Hammer against any body part
Specifications:
Humboldt Concrete Rebound Hammer: H-2987H
Weight: 2lbs (0.9 kilograms)
Size: 10.5" (267mm) with plunger retracted
Shipping weight: Six pounds (2.7 kilograms)
Carrying case: 15½ inches x 11½ inches x 2½ inches

Humboldt provides Repair and
calibration services for concrete
rebound hammers, Call: 1.800.544.7220
H-2987 Replacement Parts
Key Description Part#
1 Impact Plunger H-2975.1
3 Housing, complete H-2975.3
4 Rider with Guide Rod H-2975.4
6 Push-button, complete H-2975.6
7 Hammer Guide Bar H-2975.7
8 Guide Disk H-2975.8
9 Cap H-2975.9
10 Two-part Ring H-2975.10
11 Rear Cover H-2975.11
12 Compression Spring H-2975.12
13 Pawl H-2975.13
14 Hammer Mass H-2975.14
15 Retaining Spring H-2975.15
16 Impact Spring H-2975.16
17 Guide Sleeve H-2975.17
18 Felt Washer H-2975.18
19 Plexiglass Window H-2975.19
20 Trip Screw H-2975.20
21 Lock Nut H-2975.21
22 Pin H-2975.22
23 Pawl Spring H-2975.23
11
21
20
13
22
6
7
3
14.1
14.2
16
10
18
1
9
17
15
4
19
8
23
12

www.humboldtmfg.com
HUMBOLDT
Testing Equipment for Construction Materials
Humboldt Mfg. Co.
3801 North 25th Avenue
Schiller Park, Illinois 60176 U.S.A.
U.S.A. Toll Free: 1.800.544.7220
Voice: 1.708.456.6300
Fax: 1.708.456.0137
Email: [email protected]
Warranty
Humboldt Mfg. Co. warrants its products to be free from defects in material or
workmanship. The exclusive remedy for this warranty is Humboldt Mfg. Co.,
factory replacement of any part or parts of such product, for the warranty of this
product please refer to Humboldt Mfg. Co. catalog on Terms and Conditions
of Sale. The purchaser is responsible for the transportation charges. Humboldt
Mfg. Co. shall not be responsible under this warranty if the goods have been
improperly maintained, installed, operated or the goods have been altered or
modified so as to adversely affect the operation, use performance or durability
or so as to change their intended use. The Humboldt Mfg. Co. liability under
the warranty contained in this clause is limited to the repair or replacement of
defective goods and making good, defective workmanship.
Table of contents
Other Humboldt Tools manuals