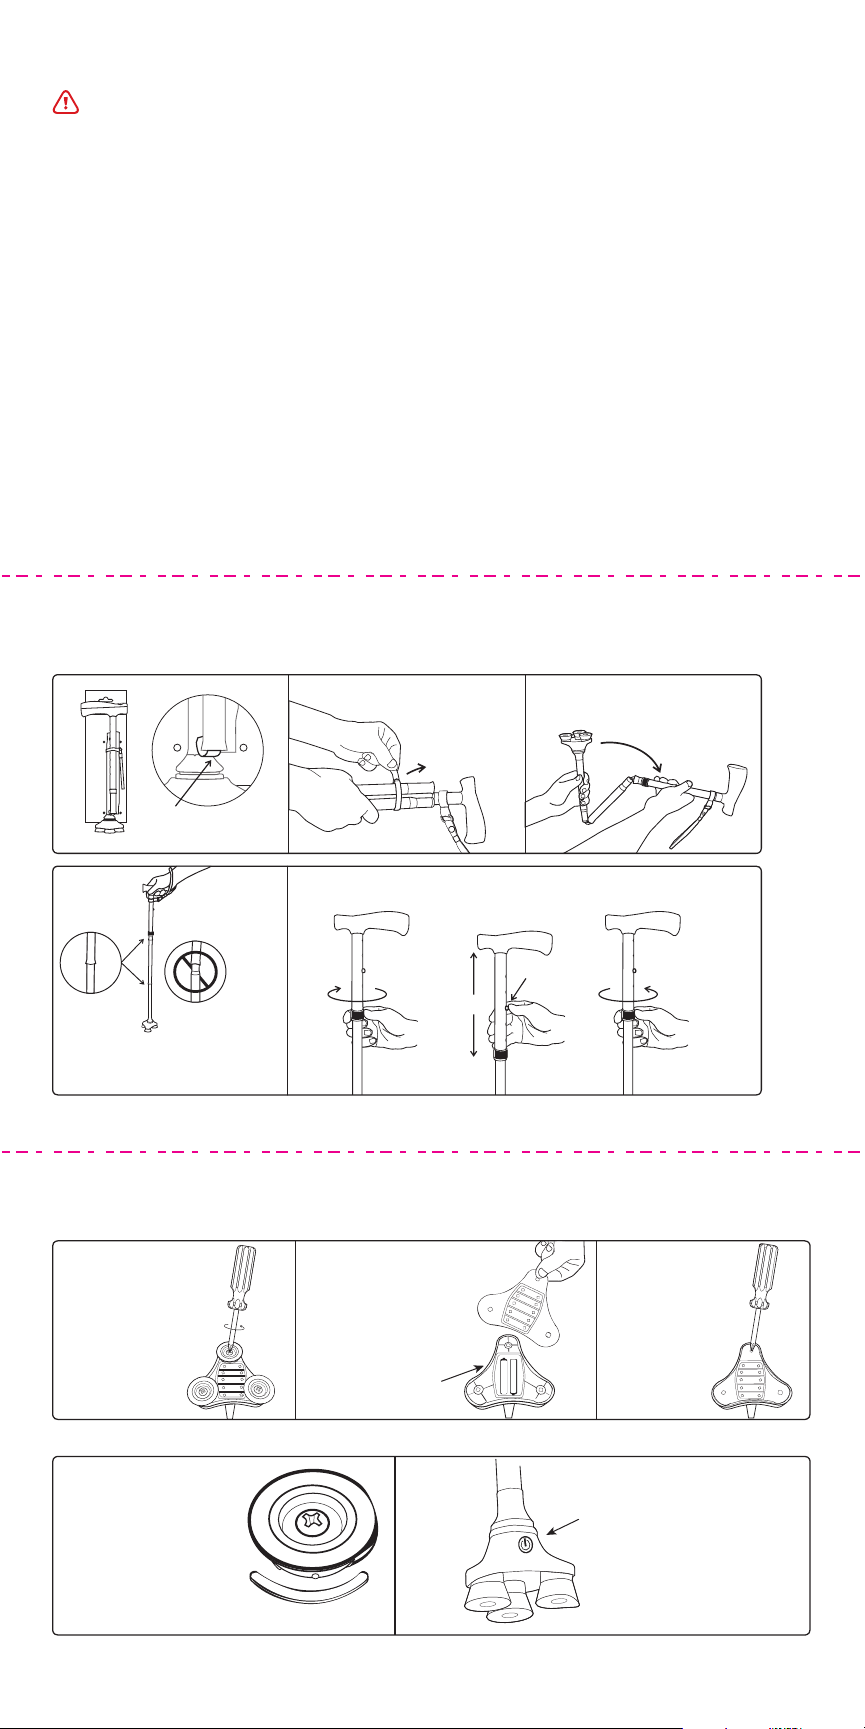
6A) To install or
replace the batteries,
first unscrew and
remove each foot
(Figure 6).
6C) Insert two (2)
AAA batteries.
6B) Remove the clear
battery cover (Figure 7).
*Note: The clear battery cover
can be dicult to remove by
hand. You can use a screw
driver to gently prop up
the cover (Figure 8).
6D) Place the clear
battery cover back
on the cane base.
6E) Put the feet back
on the base. Orient
them so the gap
in the foot matches
up with the base
plate rib (Figure 9).
Tighten the screws.
6F) Turn the light on or o
by touching the power
sensor (Figure 10).
Figure 6 Figure 7 Figure 8
Figure 9
Figure 10
WARNING: To minimize the risk of injury from improper and unsafe use of this cane,
read theseinstructions and safety precautions before using. Also, go to HurryCane.com
and view the tips and tricks videos.
INSTRUCTIONS AND SAFETY PRECAUTIONS
Intended Use and Limitations:
•This cane is a walking aid and is not intended to absorb the full weight of the user.
• Not to be used by persons heavier than 350 lbs (158 kg).
• Not intended for use on ice or other slippery surfaces as it has the potential to slip.
Safety Precautions:
•Consult a physician before using any assisted mobility device.
• Do not use unless individual segments are securely joined together and push
button is fully engaged.
• When assembling individual segments, keep fingers away to avoid being pinched.
• Do not stretch theinternal elastic cord more than necessary to assemble or
disassemble the segments.Do not use cane if elastic cord is cut, frayed, or damaged.
• Applying downward pressure on the base (e.g. stepping on the base) while
lifting up on the handle can causethe cane segments to separate and the
cane to collapse, possibly causing you to fall.
• If the handleorbottom base becomes loose, stop using cane immediately
and contact HurryCane customer service.
SETUP INSTRUCTIONS Two (2) AAA Batteries are Required For Use
6
Unfold
Adjust
Push
Tighten
(Counterclockwise)
Loosen
(Clockwise)
Adjust Height
SETUP INSTRUCTIONS Read before setting up and using.
1
Pull Up and
Slide to Right
32
Check that Joints
are Secure
4 5
Remove Tab
Before Use
IMPORTANT: Be sure segments
are securely joined and that
push button is fully engaged.


