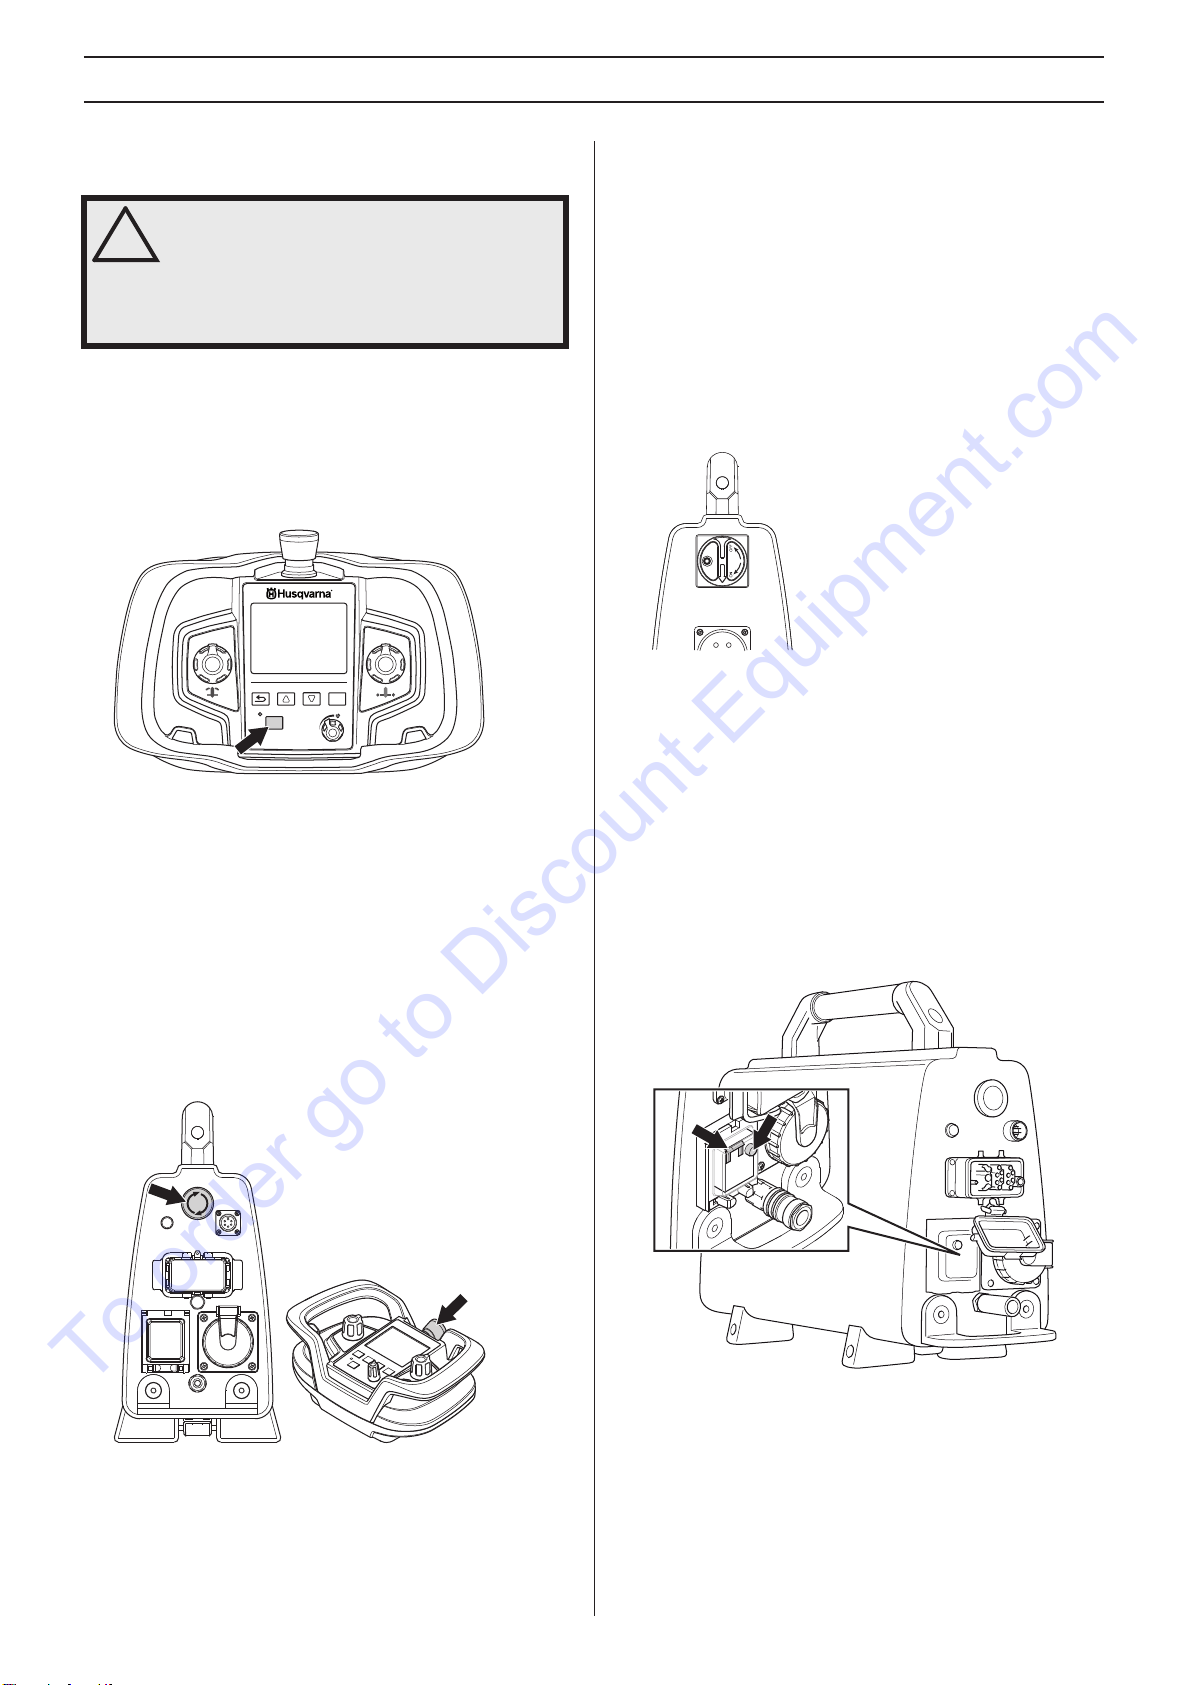
Husqvarna PP 480 HF User manual

UU
UUSS
SS
FF
FFRR
RR
EE
EESS
SS
PP 480 HF
US
FR
Operator’s manual
Please read the operator’s manual carefully and make sure you
understand the instructions before using the machine.
Manuel
d’utilisation
Lire attentivement et bien assimiler le manuel d’utilisation
avant d’utiliser la machine.
Manual de
instrucciones
Lea detenidamente el manual de instrucciones y asegúrese de
entender su contenido antes de utilizar la máquina.
ES
To order go to Discount-Equipment.com

We sell worldwide for the brands: Genie, Terex, JLG, MultiQuip, Mikasa, Essick, Whiteman,
Mayco, Toro Stone, Diamond Products, Generac Magnum, Airman, Haulotte, Barreto, Power
Blanket, Nifty Lift, Atlas Copco, Chicago Pneumatic, Allmand, Miller Curber, Skyjack, Lull,
Skytrak, Tsurumi, Husquvarna Target, Stow, Wacker, Sakai, Mi-T-M, Sullair, Basic, Dynapac,
MBW, Weber, Bartell, Bennar Newman, Haulotte, Ditch Runner, Menegotti, Morrison, Contec,
Buddy, Crown, Edco, Wyco, Bomag, Laymor, EZ Trench, Bil-Jax, F.S. Curtis, Gehl Pavers, Heli,
Honda, ICS/PowerGrit, IHI, Partner, Imer, Clipper, MMD, Koshin, Rice, CH&E, General Equip-
ment ,Amida, Coleman, NAC, Gradall, Square Shooter, Kent, Stanley, Tamco, Toku, Hatz,
Kohler, Robin, Wisconsin, Northrock, Oztec, Toker TK, Rol-Air, APT, Wylie, Ingersoll Rand /
Doosan, Innovatech, Con X, Ammann, Mecalac, Makinex, Smith Surface Prep,Small Line,
Wanco, Yanmar
Discount-Equipment.com is your online resource for
commercial and industrial quality parts and equipment sales.
561-964-4949
visit us on line @ www.discount-equipment.com
TO PURCHASE THIS PRODUCT PLEASE CONTACT US
Select an option below to find your Equipment
Equipment Financing and
Extended Warranties Available

2 – English
KEY TO SYMBOLS
Symbols on the machine
WARNING! The machine can be a
dangerous tool if used incorrectly or
carelessly, which can cause serious or
fatal injury to the operator or others.
Please read the operator’s manual
carefully and make sure you understand
the instructions before using the machine.
Always wear:
• Approved protective helmet
• Approved hearing protection
• Protective goggles or a visor
WARNING! Live parts.
Environmental marking. Symbols on the
product or its packaging indicate that this
product cannot be handled as domestic
waste. It must instead be submitted to an
appropriate recycling station for the recovery
of electrical and electronic equipment.
By ensuring that this product is taken care of
correctly, you can help to counteract the
potential negative impact on the environment and people that
can otherwise result through the incorrect waste
management of this product.
For more detailed information about recycling this product,
contact your municipality, your domestic waste service or the
shop from where you purchased the product.
Other symbols/decals on the machine refer to special
certification requirements for certain markets.
Explanation of warning levels
The warnings are graded in three levels.
WARNING!
CAUTION!
NOTICE!
!
WARNING! Used if there is a risk of serious
injury or death for the operator or damage to
the surroundings if the instructions in the
manual are not followed.
!
CAUTION! Used if there is a risk of injury to
the operator or damage to the surroundings
if the instructions in the manual are not
followed.
NOTICE! Used if there is a risk of damage to materials or
the machine if the instructions in the manual are not
followed.
To order go to Discount-Equipment.com

English – 3
CONTENTS
Contents
KEY TO SYMBOLS
Symbols on the machine ............................................. 2
Explanation of warning levels ...................................... 2
CONTENTS
Contents ...................................................................... 3
PRESENTATION
Dear customer! ............................................................ 4
Features ....................................................................... 4
PRESENTATION
What is what on the power pack? ................................ 5
MACHINE´S SAFETY EQUIPMENT
General ........................................................................ 6
Start button .................................................................. 6
Emergency stop and stop button ................................. 6
Main switch .................................................................. 6
Ground fault circuit interrupter ..................................... 6
ASSEMBLING AND ADJUSTMENTS
Connect a power source .............................................. 7
Connect water cooling ................................................. 7
Battery ......................................................................... 7
Software settings ......................................................... 8
OPERATING
Protective equipment ................................................... 9
General safety precautions .......................................... 9
Work safety .................................................................. 10
Basic working techniques ............................................ 11
Transport and storage .................................................. 11
MENU SYSTEM
General ........................................................................ 12
Menu overview ............................................................. 12
DRIVE CHOICES ......................................................... 13
SETTINGS ................................................................... 13
STARTING AND STOPPING
Before starting ............................................................. 14
Starting ........................................................................ 14
Stopping ....................................................................... 15
MAINTENANCE
General ........................................................................ 16
Daily maintenance ....................................................... 16
Service ......................................................................... 16
Error messages ............................................................ 16
TECHNICAL DATA
PP 480 HF ................................................................... 18
US WARRANTY STATEMENT
WARRANTY POLICY .................................................. 20
EQUIPMENT ................................................................ 20
To order go to Discount-Equipment.com

PRESENTATION
Dear customer!
Thank you for choosing a Husqvarna product!
It is our wish that you will be satisfied with your product and
that it will be your companion for a long time. A purchase of
one of our products gives you access to professional help with
repairs and services. If the retailer who sells your machine is
not one of our authorised dealers, ask him for the address of
your nearest service workshop.
This operator’s manual is a valuable document. Make sure it
is always at hand at the work place. By following its content
(using, service, maintenance etc) the life span and the
second-hand value of the machine can be extended. If you
ever lend or sell this machine, make sure that the borrower or
buyer gets the operator′s manual, so they will also know how
to properly maintain and use it.
More than 300 years of innovation
Husqvarna AB is a Swedish company based on a tradition
that dates back to 1689, when the Swedish King Charles XI
ordered the construction of a factory for production of
muskets. At that time, the foundation was already laid for the
engineering skills behind the development of some of the
world's leading products in areas such as hunting weapons,
bicycles, motorcycles, domestic appliances, sewing
machines and outdoor products.
Husqvarna is the global leader in outdoor power products for
forestry, park maintenance and lawn and garden care, as well
as cutting equipment and diamond tools for the construction
and stone industries.
User responsibility
It is the owner’s/employer’s responsibility that the operator
has sufficient knowledge about how to use the machine
safely. Supervisors and operators must have read and
understood the Operator’s Manual. They must be aware of:
• The machine’s safety instructions.
• The machine’s range of applications and limitations.
• How the machine is to be used and maintained.
National legislation could regulate the use of this machine.
Find out what legislation is applicable in the place where you
work before you start using the machine.
The manufacturer’s reservation
All information and all data in the Operator’s Manual were
applicable at the time the Operator’s Manual was sent to print.
Husqvarna AB has a policy of continuous product
development and therefore reserves the right to modify the
design and appearance of products without prior notice.
4 – English
Features
Values such as high performance, reliability, innovative
technology, advanced technical solutions and environmental
considerations distinguish Husqvarna's products.
Some of the unique features of your product are described
below.
Power pack
• PP 480 HF is a power pack specially developed to be
used with the electric wall saw WS 482 HF.
• It has a compact design and weighs just 23 kg (51 lb).
• Use 32 A for a 400 V system for full power.
• The power pack is connected to the saw with only a power
lead and a water coolant hose.
• Equipped with a 230 V power outlet and a terminal for
CAN-cable.
• Equipped with an electric water valve which is controlled
from the remote control.
Wireless remote control
• Allows the operator freedom of movement and enables
good overview of the work done.
• Easy to control, even when wearing gloves. Setting
changes and operation are easy to perform using just a
few buttons.
• 3.5 inch colour screen.
To order go to Discount-Equipment.com

English – 5
PRESENTATION
What is what on the power pack?
1
7
8
15
16
13
17
6
12
9
11
19
20
21
4
3
2
5
18
14
10
1 Power pack
2 Main switch
3 Electrical socket
4 Water connector, in
5 Handle
6 Power indicator
7 Emergency stop
8 CAN port
9 Cable connection
10 Ground-fault circuit breaker - Only 5-pin machines
11 Single phase socket - Only 5-pin machines
12 Water connector, out
13 CAN cable
14 Remote control
15 Battery charger
16 Power cable
17 Water hose
18 Battery (2)
19 Adjustable carry strap
20 Operator’s manual
21 DVD - Product user guide
To order go to Discount-Equipment.com

6 – English
MACHINE´S SAFETY EQUIPMENT
General
This section describes the machine′s safety equipment, its
purpose, and how checks and maintenance should be carried
out to ensure that it operates correctly.
Start button
The button is used to activate the remote control.
Checking the start button
• Activate the remote control by pressing the ”ON/OFF”
button. Allow the remote control to fully charge and await
the home screen.
• Turn off the remote control by pressing the ”ON/OFF”
button.
Emergency stop and stop button
The power pack is equipped with an emergency stop and the
remote control with a stop button. These are used to be able
to quickly shut down the power pack.
Checking the emergency stop and stop
button
• Start the blade rotation.
• Push the emergency stop on the power pack and check
that the blade rotation stops. Check the stop button on the
remote control in the same way.
Main switch
The main switch is used to switch the electricity supply to the
power pack on and off. The main switch must be in the "0"-
position when the incoming cable is connected.
Checking the main power switch
• Turn the main switch to the "0"-position.
• Try to start the saw.
The saw must not start.
Ground fault circuit interrupter (Only
on 5-pin machines)
The single phase socket on the power unit is fitted with a
ground fault circuit interrupter.Ground fault circuit interrupters
are for protection in case an electrical fault should occur.
Check the ground fault circuit interrupter
• Turn the main switch to "1"-position.
• Press the yellow test button. The ground fault circuit
interrupter must trigger and the automatic fuse must
switch off.
• Reset the ground fault circuit interrupter by folding up the
automatic fuse.
!
WARNING! Never use a machine with faulty
safety equipment.The machine’s safety
equipment must be checked and maintained
as described in this section. If your
machine fails any of these checks contact
Discount-equipment to get it repaired.
OK
ON/OFF
0
To order go to Discount-Equipment.com

English – 7
ASSEMBLING AND ADJUSTMENTS
Connect a power source
When the machine has been transported to a suitable site, it
should be connected:
• Turn the main switch to the "0"-position.
• Connect the incoming power cable (380-480 V, 32 A
European connector). Power packs equipped with a
single phase socket (230 V) must also have a neutral wire
in order for the socket to work. The power pack functions
even it there is no neutral wire present.
To be able to use full power output, the power unit must be
connected to a 32 A fuse. With a 16 A or 25 A fuse the
power output is lower so as not to overload the fuse. This
is selected when starting up the power pack.
Connect water cooling
•Connect the water hose to the incoming water connector.
The power pack is equipped with an electric water valve,
which is closed when the power pack is activated. When
the power pack is without electricity, the valve is open to
be able to drain water coolant if there is a risk of freezing.
• Connect the supplied power lead and water hose from the
power pack to the saw unit.
Battery
The battery is a Li-ion type. Operating time is about 8-10
hours per charge.Extreme cold impairs the battery’s capacity
and operating time. Operating time is also affected by the
extent to which the display has been active.
Use only original batteries for this product. Contact
Discount-equipment for more information.
An exhausted battery must not be disposed of as household
garbage! Leave it at your nearest service agent or collection
point.
Insert / remove battery
• Insert / remove the battery.
Charge the battery
Before using the remote control for the first time the battery
has to be charged.
To charge with the battery charger
To order go to Discount-Equipment.com

8 – English
ASSEMBLING AND ADJUSTMENTS
Charging time for a flat battery is approx.2-3 hours.The diode
is orange when charging starts and becomes green when the
battery is fully charged. When the battery is fully charged the
charger supplies the battery with maintenance current until
the battery is removed from the charger.
Keep the battery charger dry and protected against
temperature fluctuations.
To charge with the CAN cable
The battery is charged when the CAN cable from the power
unit is connected to the remote control. This is indicated by a
red battery symbol in the remote control.
If the battery is removed while the remote control is
connected to the CAN cable, the battery symbol in the remote
control will be stricken through to indicate that there is not
battery available.
Software settings
Pair the remote control with the power unit
The first time the remote control is connected, the remote
control and the power unit must be paired. This is a safety
measure to guarantee that the power unit can only be
controlled by one remote control. The remote control cannot
be used until this step has been performed.
• Connect the remote control using the supplied CAN-
cable. Tighten the cable connector screws by hand.
• Allow the remote control to fully charge and await the
home screen.
• Press the ”OK” button to access the menu.
• Go to "SETTINGS”. Browse with the arrow keys and
confirm with "OK".
• Go to ”PAIR RADIO”. Browse with the arrow keys and
confirm with "OK".
A message is displayed on the screen to indicate if the pairing
was successful or not. Try again if the pairing fails.
Other software settings
A number of further settings should be made before the
power unit is commissioned. See instructions in the "Menu
system" section for additional information.
• Set time and date. (SETTINGS>TIME & DATE)
• Select the required display language. (SETTINGS>SET
LANGUAGE)
• Select the required units. (SETTINGS>SET UNITS)
>MENU 20 DEC 20:55
DRIVE CHOICES
SETTINGS
SERVICE
OK
ON/OFF
0
>MENU 20 DEC 20:55
DRIVE CHOICES
SETTINGS
SERVICE
>>SETTINGS
20 DEC 20:55
PAIR RADIO
SET ROT. DIR.
[STANDARD]
SET WATER VALVE
[AUTO]
SET FUSE
[32A]
To order go to Discount-Equipment.com

English – 9
OPERATING
Protective equipment
General
Do not use the machine unless you are able to call for help in
the event of an accident.
Personal protective equipment
You must use approved personal protective equipment
whenever you use the machine. Personal protective
equipment cannot eliminate the risk of injury but it will reduce
the degree of injury if an accident does happen. Ask your
dealer for help in choosing the right equipment.
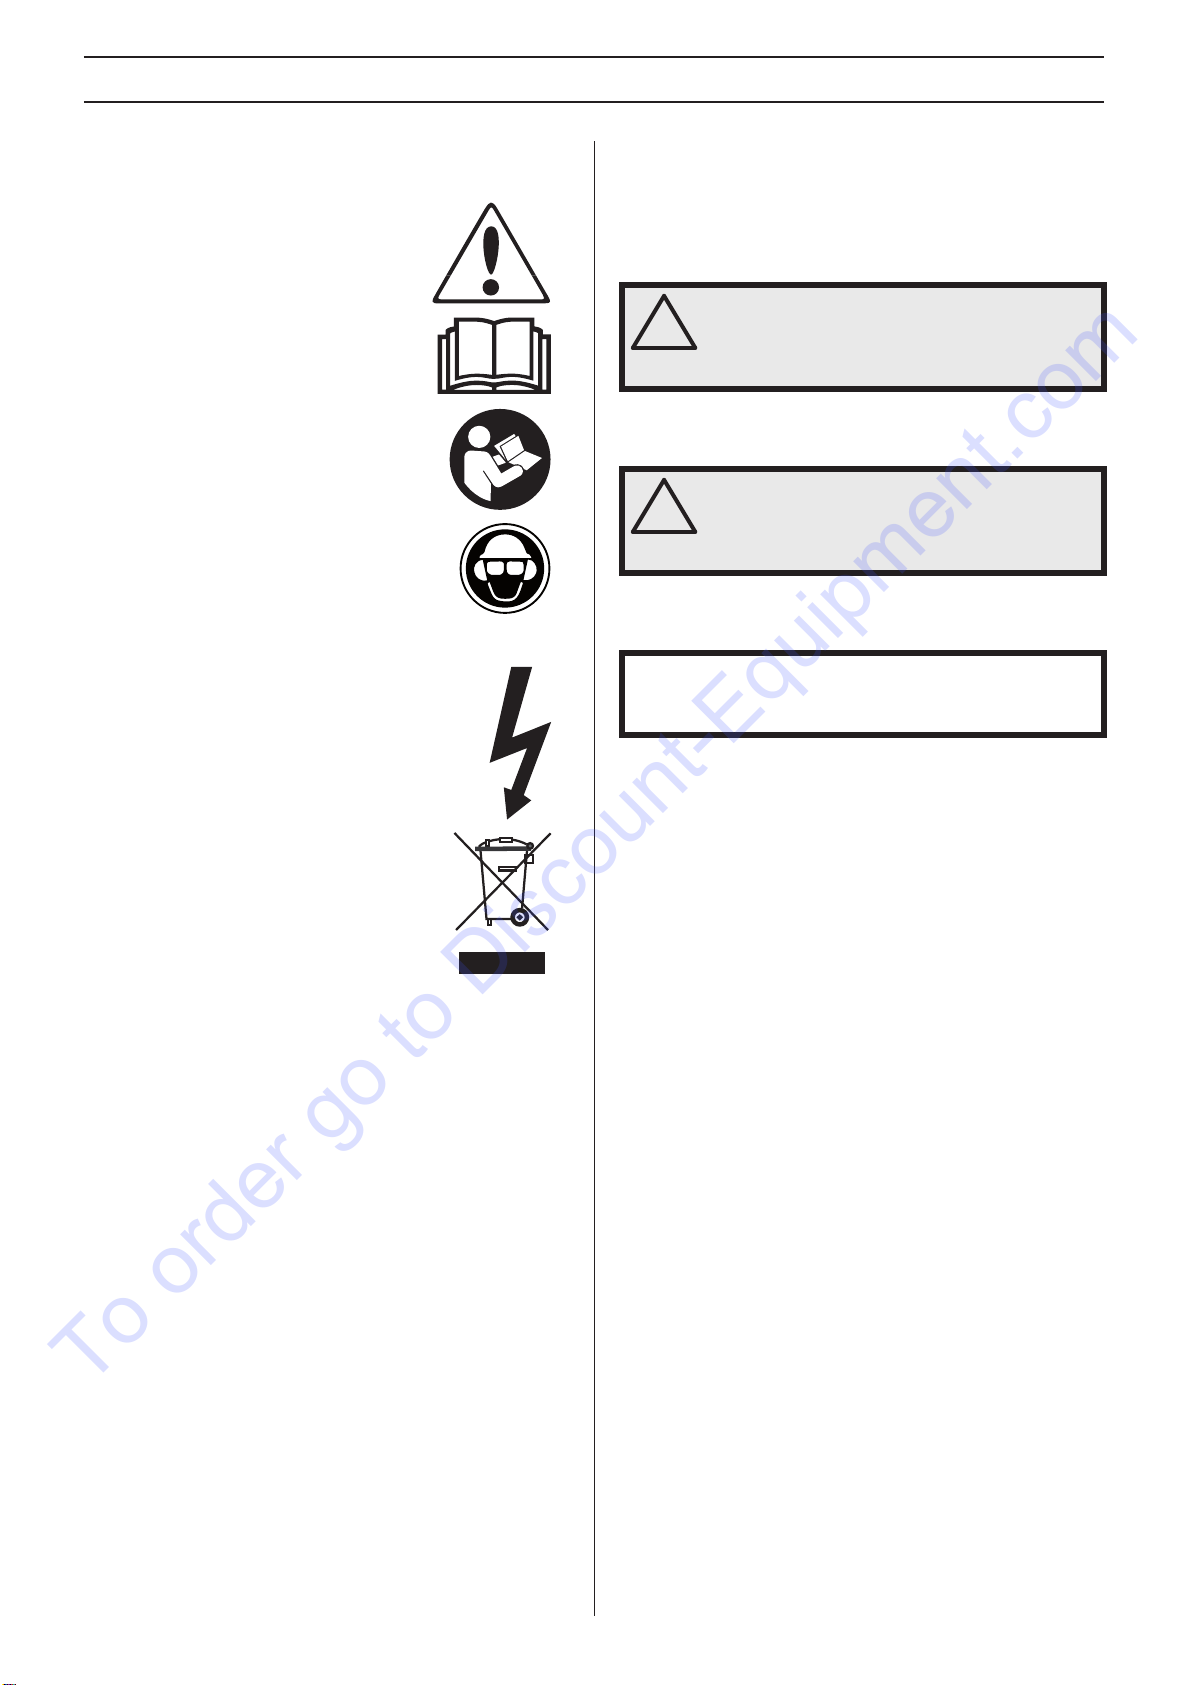
Always wear:
• Protective helmet
• Hearing protection
• Protective goggles or a visor
• Breathing mask
• Heavy-duty, firm grip gloves.
• Tight-fitting, heavy-duty and comfortable clothing that
permits full freedom of movement.
• Boots with steel toe-caps and non-slip sole
Be careful as clothing, long hair, and jewellery can get caught
in moving parts.
Other protective equipment
• Fire fighting equipment
• Always have a first aid kit nearby.
General safety precautions
This section describes basic safety directions for using the
machine. This information is never a substitute for
professional skills and experience.
• Please read the operator’s manual carefully and make
sure you understand the instructions before using the
machine.
• Read through the manual supplied with the wall saw
before starting to use the hydraulic unit.
• Keep in mind that the operator is responsible for accidents
or hazards occuring to other people or their property.
• All operators shall be trained in the use of the machine.
The owner is responsible for ensuring that the operators
receive training.
• The machine must be kept clean. Signs and stickers must
be fully legible.
!
WARNING! The use of products such as
cutters, grinders, drills, that sand or form
material can generate dust and vapours
which may contain hazardous chemicals.
Check the nature of the material you intend
to process and use an appropriate breathing
mask.
!
WARNING! Long-term exposure to noise can
result in permanent hearing impairment. So
always use approved hearing protection.
Listen out for warning signals or shouts
when you are wearing hearing protection.
Always remove your hearing protection as
soon as the engine stops.
!
WARNING! There is always a risk of crush
injuries when working with products
containing moving parts. Wear protective
gloves to avoid body injuries.
!
WARNING! Sparks may appear and start a
fire when you work with the machine. Always
keep fire fighting equipment handy.
!
WARNING! Read all safety warnings and all
instructions. Failure to follow the warnings
and instructions may result in electrtic
shock, fire and/or serious injury.
!
WARNING! The machine can be a dangerous
tool if used incorrectly or carelessly, which
can cause serious or fatal injury to the
operator or others.
Never allow children or other persons not
trained in the use of the machine to use or
service it. Never allow anyone else to use the
machine without first ensuring that they
have understood the contents of the
operator’s manual.
Never use the machine if you are fatigued,
while under the influence of alcohol or
drugs, medication or anything that could
affect your vision, alertness, coordination or
judgement.
!
WARNING! Unauthorized modifications and/
or accessories may lead to serious injury or
death to the user or others.
Do not modify this product or use it if it
appears to have been modified by others.
Never use a machine that is faulty. Carry out
the checks, maintenance and service
instructions described in this manual. Some
maintenance and service measures must be
carried out by trained and qualified
specialists. See instructions under the
heading Maintenance.
Always use genuine accessories.
To order go to Discount-Equipment.com

10 – English
OPERATING
Always use common sense
It is not possible to cover every conceivable situation you can
face. Always exercise care and use your common sense. If
you get into a situation where you feel unsafe, stop and
seek expert advice. Contact Discount-equipment, service
agent or an experienced user. Do not attempt any task that
you feel unsure of!
Work safety
Work area safety
•Keep work area clean and well lit. Cluttered or dark areas
invite accidents.
• Always check and mark out where gas pipes are routed.
Cutting close to gas pipes always entails danger. Make
sure that sparks are not caused when cutting in view of
the risk of explosion. Remain concentrated and focused
on the task. Carelessness can result in serious personal
injury or death.
• Do not use the machine in environments where there is a
risk of explosion.
• Make sure that no pipes or electrical wires are routed in
the work piece or in the working area.
• Check that electrical cables within the working area are
not live.
• Observe your surroundings to ensure that nothing can
affect your control of the machine.
• Do not use the machine in bad weather, such as dense
fog, heavy rain, strong wind, intense cold, etc.Working in
bad weather is tiring and can lead to dangerous
conditions, e.g. slippery surfaces.
• Do not use the machine in wet or humid surroundings,
close to water, in the rain or snow.
• Never start to work with the machine before the working
area is clear and you have a firm foothold.
Electrical safety
• Always connect the machine through an ground fault
circuit interrupter with personal protection, i.e. an ground
fault circuit interrupter that trips at an ground fault of 30
mA.
• The machine should be connected to an earthed outlet
socket.
• Check that the mains voltage corresponds with that stated
on the rating plate on the machine.
• Check that the cord and extension cord are intact and in
good condition. Always use extension cables that are
approved for outdoor use.
• Never use the machine if any cable or plug is damaged,
but hand it in to an authorized service workshop for repair.
• To avoid overheating do not use the extension cord while
it is rolled up.
•Never drag the machine by means of the cord and never
pull out the plug by pulling the cord.
•Keep all cords and extension cords away from water, oil
and sharp edges. Make sure the cord is not pinched in
doors, fences or the like.Otherwise it can cause the object
to become live.
Personal safety
•Never use the machine if you are fatigued, while under the
influence of alcohol or drugs, medication or anything that
could affect your vision, alertness, coordination or
judgement.
• Prevent unintentional starting. Ensure the switch is in the
OFF-position.
• Never leave the machine unsupervised with the motor
running.
•Always unplug the machine during longer work breaks.
• Never work alone, always ensure there is another person
close at hand. Apart from being able to receive help to
assemble the machine, you can also get help if an
accident should occur.
• People and animals can distract you causing you to lose
control of the machine. For this reason, always remain
concentrated and focused on the task.
• Always saw in a manner that permits easy access to the
emergency stop.
Use and care
• This machine is ideal for drilling holes in concrete, bricks
and various stone materials. It can be used both as a
hand-held drill or fitted to a drill stand.
• The machine is intended for use in industrial applications
by experienced operators.
• Inspection and/or maintenance should be carried out with
the motor switched off and the plug disconnected.
•The machine has a very high torque.This demands good
concentration during work, as serious personal injuries
can occur if the drill bit suddenly jams.
• Do not overload the machine. Overloading can damage
the machine.
•Always switch off the machine before you move it.
• Observe care when lifting.You are handling heavy parts,
which implies the risk of pinch injuries or other injuries.
• Do not expose the machine to temperatures exceeding
45°C or to direct sunlight.
!
WARNING! There is always a risk of shocks
from electrically powered machines. Avoid
unfavourable weather conditions and body
contact with lightning conductors and metal
objects. Always follow the instructions in the
Operator’s manual to avoid damage.
!
WARNING! Do not wash the machine with
water, as water can enter the electrical
system or the engine and cause damage to
the machine or short circuit.
To order go to Discount-Equipment.com

English – 11
OPERATING
• Check that all couplings, connections and cables are
intact and free from dirt.
• Check that all cables and the water supply are correctly
connected to the machine before starting it.
• Never pull out the power cable without first switching off
the power pack and waiting for the engine to come to a
complete halt. If an emergency situation should arise
anyway, push the red emergency stop button on the power
pack or the stop button on the remote control.
• Keep all parts in good working order and ensure that all
fixtures are properly tightened.
Basic working techniques
The following can be operated using the control levers on the
remote control:
• Travel feed
• Arm feeding
• Blade/wire rotation Start the rotation of the blade/wire by
holding the "back" button in while turning the rotation
control clockwise. The rotation speed is controlled with a
potentiometer.
• Read through the manual supplied with the wall saw for
further instructions in sawing technique. See the supplied
DVD for working technique tips.
Transport and storage
• Always switch of the power pack and pull out the electric
cable before moving the equipment.
• Use the cases provided to store the equipment.
• Secure the equipment during transportation in order to
avoid transport damage and accidents.
• Store the equipment in a lockable area so that it is out of
reach of children and unauthorized persons.
• Store the machine and its equipment in a dry and frost
proof place.
• Do not expose the machine to temperatures exceeding
45°C or to direct sunlight.
OK
ON/OFF
0
OK
ON/OFF
0
OK
ON/OFF
0
To order go to Discount-Equipment.com

12 – English
MENU SYSTEM
General
Use the arrow keys (2) to scroll in the menus and the "OK" button (1) to confirm the selection. Use the ”back” button (3) to go back
in the menus.
The menu system for the remote control can be accessed by pressing the "OK" button.
The menu system comprises the following submenus:
• DRIVE CHOICES
• SETTINGS
• SERVICE
The service menu is password protected. Service personnel only have access to the settings in this menu to perform servicing.
Menu overview
OK
ON/OFF
0
123
>MENU 20 DEC 20:55
DRIVE CHOICES
SETTINGS
SERVICE
RUN TIME
TIME & DATE
[20:51 2010-01-12]
LANGUAGE
[ENGLISH]
SET UNITS
[METRIC]
RADIO CHANNEL
[0]
>>SETTINGS 20 DEC 20:55
SET GEAR
[GEAR 1]
SET DRIVE MODE
[BLADE]
SET ROT. DIR.
[STANDARD]
SET FUSE
[32A]
PAIR RADIO
SET WATER VALVE
[AUTO]
>>DRIVE CHOICES 20 DEC 20:55
20 DEC 20:55
CHANGE NUMBER WITH
STEP FORWARD WITH OK
09317 OK
To order go to Discount-Equipment.com

English – 13
MENU SYSTEM
DRIVE CHOICES
SET GEAR (WS 482 HF)
WS 482 HF is fitted with two mechanical gears. State which
gear is set. Choose from between the following options:
• 1. (600-900 rpm)
• 2. (800-1200 rpm)
SET DRIVE MODE
Set the required drive mode depending on if the power unit
will be used for wall sawing or wire cutting. Choose from
between the following options:
• BLADE (wall sawing)
• WIRE (wire cutting)
NOTE! Performance cannot be guaranteed if the drive choice
and the application do not match.
SET ROT. DIR.
The direction of rotation can only be altered when the blade/
wire is not moving.
Select the required direction of rotation. Choose from
between the following options:
• STANDARD
• REVERSE
SET FUSE
State which fuse the power unit is connected to. Choose from
between the following options:
• 16A
• 25A
• 32A
To be able to use full power output, the power unit must be
connected to a 32 A fuse.With a 16 A or 25 A fuse the power
output is lower so as not to overload the fuse.
SET WATER VALVE
Used to control the water valve in the power unit.
• ”ON” - The water valve is always open.
• ”AUTO” - The water valve opens when the rotation control
is turned up from its zero setting. Otherwise the water
valve is closed.
The water flow is adjusted with the ball valve at the incoming
water connector on the power pack.
SETTINGS
RUN TIME
STOP WATCH
On activation, a stop-watch is started to count the time the
blade/wire rotates and at least one feed is active.
RESET STOP-WATCH
Used to reset the stop-watch.
TIME & DATE
SET TIME
State the current time.
SET DATE
State the current date.
TIME FORMAT
Select the required time format. Choose from between the
following options:
• 12 h
• 24 h
DATE FORMAT
Select the required date format. Choose from between the
following options:
• YYYY-MM-DD
• YYYY/DD/MM
• DD/MM/YYYY
SET LANGUAGE
Select the required display language.
SET UNITS
Select the required units. Choose from between the following
options:
• AMERICAN
• METRIC
PAIR RADIO
Pair remote control with machine.
RADIO CHANNEL
The remote control must be connected to machine with a
CAN cable.
Select the required radio channel. Choose from between the
following options:
• 0 (2.410 GHz)
• 1 (2.415 GHz)
• ...
• 11 (2.465 GHz)
To order go to Discount-Equipment.com

14 – English
STARTING AND STOPPING
Before starting
•Perform daily maintenance.See instructions in the section
"Maintenance".
Before starting the saw, check that:
• The incoming electrical cable has been connected to a
fuse rated at least 16 A.
• All controls on the remote control have been set to zero
position. If this is not done, a message in the display will
prompt this when the start button is pushed.
Starting
•Check that the emergency stop button on the power pack
and the stop button on the remote control are not pressed
by turning the them clockwise.
• Turn the main switch to "1"-position.
• The power pack is activated and this is shown by the
indicator light shining. If the water valve is set to ”AUTO” it
is now shut off. This valve opens again when the blade
rotation is started.
• Activate the remote control by pressing the ”ON/OFF”
button.
• WS 482 HF is fitted with two mechanical gears. State
which gear is set. (DRIVE CHOICES>SET GEAR) For
more information on recommended blades and speeds,
see "Recommended blade speeds" in the "Technical data"
section.
!
WARNING! Please read the operator’s
manual carefully and make sure you
understand the instructions before using the
machine.
Wear personal protective equipment. See
instructions under the heading ”Personal
protective equipment”.
Make sure no unauthorised persons are in
the working area, otherwise there is a risk of
serious personal injury.
Check that the machine is assembled
correctly and do not show any signs of
damage. See instructions in the section
"Assembling and adjustments".
!
CAUTION! A higher speed than the
recommended speed can result in personal
injury and damage to the equipment.
OK
ON/OFF
0
SET GEAR
[GEAR 1]
SET DRIVE MODE
[BLADE]
SET ROT. DIR.
[STANDARD]
SET FUSE
[32A]
>>DRIVE CHOICES 20 DEC 20:55
To order go to Discount-Equipment.com

English – 15
STARTING AND STOPPING
• Set the required drive mode depending on if the power
unit will be used for wall sawing or wire cutting. (DRIVE
CHOICES>SET DRIVE CHOICES)
• Select the required direction of rotation. The direction of
rotation can only be altered when the blade/wire is not
moving. (DRIVE CHOICES>SET ROT. DIR.)
• State which fuse the power unit is connected to. (DRIVE
CHOICES>SET FUSE)
• Start the rotation of the blade/wire by holding the "back"
button in while turning the rotation control clockwise.
If the water valve is set to ”AUTO” there is a 3 second
delay before the blade rotation begins.The delay is to cool
down the power pack which can get hot when active and
no cooling water is circulating.
The water flow is adjusted with the ball valve at the
incoming water connector on the power pack.
Stopping
• To switch off the blade rotation, turn the blade rotation
control anti-clockwise back to its zero position.
• The water coolant is turned off automatically with a 3 sec
delay. Applies only if the water valve is set to ”AUTO”.
• Turn off the remote control by pressing the ”ON/OFF”
button.
• Turn the main switch on the power pack to "0"-position.
SET GEAR
[GEAR 1]
SET DRIVE MODE
[BLADE]
SET ROT. DIR.
[STANDARD]
SET FUSE
[32A]
>>DRIVE CHOICES 20 DEC 20:55
SET GEAR
[GEAR 1]
SET DRIVE MODE
[BLADE]
SET ROT. DIR.
[STANDARD]
SET FUSE
[32A]
>>DRIVE CHOICES 20 DEC 20:55
SET GEAR
[GEAR 1]
SET DRIVE MODE
[BLADE]
SET ROT. DIR.
[STANDARD]
SET FUSE
[32A]
>>DRIVE CHOICES 20 DEC 20:55
OK
ON/OFF
0
OK
ON/OFF
0
OK
ON/OFF
0
To order go to Discount-Equipment.com

16 – English
MAINTENANCE
General
The life span of the machine can be reduced and the risk of
accidents can increase if machine maintenance is not carried
out correctly and if service and/or repairs are not carried out
professionally. If you need further information please
contact Discount-equipment.
Daily maintenance
• Check that the machine’s safety equipment is
undamaged. See instructions in the section "Machine’s
safety equipment".
• Check that the cord and extension cord are intact and in
good condition.
• Always clean all the equipment at the end of the working
day. Use a heavy-duty hand-held brush or a large paint
brush.
• Make sure to keep the connectors and pins clean. Clean
with a rag or brush.
Service
After 100 hours of operation, the message "Time for
servicing" is displayed. The entire equipment shall then be
taken to an authorized Husqvarna dealer for servicing. The
message reappears 100 hours after each service.
Error messages
In case of any defects, an error message appears on the
display. Follow the directions supplied or contact Discount-
equipment.
!
WARNING! The user must only carry out the
maintenance and service work described in
this manual. More extensive work must be
carried out by an authorized service
workshop.
NOTICE! Do not use a high pressure washer to clean the
machine.The high pressure jet can damage seals and lead
to water and dirt permeating into the machine, resulting in
serious damage.
!
WARNING! All types of repairs may only be
carried out by authorised repairmen.This is
so that the operators are not exposed to
great risks.
To order go to Discount-Equipment.com

English – 17
MAINTENANCE
Fault
Code Error message Procedure Steps
F01 MOTOR OVERHEATED Water coolant lacking/
insufficient to saw motor.
Check that the water coolant flows to the saw
motor and that it is max. 25°C and min 3.5 l/
min.
F02 POWER PACK OVERHEATED Water coolant lacking/
insufficient to power pack.
Check that the water coolant flows to the
power pack and that it is max 25°C and min
3.5 l/min. If the message pops up when the
blade rotation is started - go to the operations
menu and ”Water coolant” and select ”ON”.
Let the water coolant circulate the power pack
for a minute before you turn the blade rotation
on again.
F03 LOW VOLTAGE Low voltage supply to the
power pack.
Check the voltage during operation. Check
that all three phases exist. Check that
incoming cables have sufficient cross-
sectional area.
F04 HIGH VOLTAGE High voltage supply to the
power pack.
Check the voltage during operation. This
message is shown mainly when using a
generator as power source.
F05 OVER CURRENT Over current to saw motor
Check that the power lead is fitted correctly
and that it is not damaged.The message can
appear in case of a loose contact.
F06 NO HALLSENSOR LENGTH Fault on HALL-sensor card for
travel feed
Take the equipment to an authorized service
shop.
F07 NO HALLSENSOR ARM Fault on HALL-sensor card for
depth feeding
Take the equipment to an authorized service
shop.
F08 TRAVEL MOTOR OVERLOADED Travel motor overloaded.
To reset, reverse the feeding function. If the
fault message returns, grease the feeder
gears, clean the rails and adjust the saw
carriage. If this does not help, hand in the
equipment to an authorized Husqvarna
service workshop.
F09 DEPTH MOTOR OVERLOADED Depth motor overloaded.
To reset, reverse the feeding function. If the
fault message returns, grease the feeder
gears. If this does not help, hand in the
equipment to an authorized Husqvarna
service workshop.
F10 BLADE JAM Blade can not rotate. Remove the blade from the cut and start the
blade rotation.
F11 GROUND FAULT OR NO SAW HEAD
Incorrect earthing of power
pack/saw or no saw unit
connected to the power pack.
Check the incoming electrical connection to
the power pack and that the saw unit is
connected to the power pack. If this does not
help, hand in the equipment to an authorized
Husqvarna service workshop.
F12 NON-COMPATIBLE SAW UNIT Incorrect saw unit connected
to the power pack.
Connect a compatible saw unit to the power
pack.
F13 NO CONTACT CHECK CAN-CABLE No contact between power
pack and remote control Replace the CAN-cable.
F14 NO RADIO CONTACT
No radio contact between
remote control and power
pack.
Check that the power pack is activated and
that the green indicator light is on. If this does
not help, hand in the equipment to a
Husqvarna service workshop. The machine
can be used with the CAN cable between the
power pack and remote control.
To order go to Discount-Equipment.com

18 – English
TECHNICAL DATA
PP 480 HF
Dimensions
Max. output, kW 20 (32 A)
Rated current, A 16-32
Input voltage, V 380-480 V, 50-60 Hz
Output voltage, V 340 V, 0-500 Hz
Sec. output voltage, V 24 V, 0-1500 Hz
Power supply 3P+PE (4-pin) / 3P+N+PE (5-pin)
1x230V one phase outlet Only 5-pin machines
Effect generator - min., kWA
400V, 16A 12
400V, 25A 20
400V, 32A 24
Weight, kg/lbs
Power pack 23/51
Remote control, with battery, without carry strap 1,1/2,4
Water cooling
Cooling water pressure - max, bar 7
Water coolant flow min., l/min 3,5
Max cooling water temperature at 3,5 l/min, ºC 25
Control system
Control type Remote control
Signal transmission Wireless/cable
422 mm
680 mm
191 mm
124 mm
285 mm
205 mm
OK
ON/OFF
0
To order go to Discount-Equipment.com

English – 19
TECHNICAL DATA
Blade
Recommended blade speed
When sawing at 800-900 rpm, a higher sawing output is obtained if gear 1 is used.
Follow the blade manufacture´s recommendations regarding material and blade speed when choosing blade.When cutting in hard
concrete, a lower speed or a more shallow cut is required compared to cutting in soft concrete.
!
WARNING! Cutting at too high revs can
cause damage to the blade and lead to
personal injury.
Speed, rpm
Gear 1 600-900
Gear 2 800-1200
600 mm (24”) 800 mm (32”) 1000 mm (40”) 1200 mm (48”) 1600 mm (63”)
600 rpm
700 rpm
800 rpm
900 rpm
1000 rpm
1100 rpm
1200 rpm
Concrete
Hard
Medium
Soft
To order go to Discount-Equipment.com
Other manuals for PP 480 HF
1
Table of contents
Languages:
Other Husqvarna Power Supply manuals