manuals.online logo
Brands
  1. Home
  2. •
  3. Brands
  4. •
  5. Hussmann
  6. •
  7. Merchandiser
  8. •
  9. Hussmann IMPACT RL User manual

Hussmann IMPACT RL User manual

NOTES: Insulated partitions are used
in a line-up between different models
or different temperature cases, and are
installed as the line-up is set.
Carefully unpack and inspect the
insulated partition and components
to ensure there is no breakage or
damage, and there are no missing
parts.
Be sure the first merchandiser has
been positioned and leveled according
to the installation instruction.
1Remove items from case as
shown in Figure 1 (both sides of
islands).
A. Remove bumpers, rails,
packing materials, and splash-
guards from both cases.
B. Remove shelves (if
installed).
C. Remove display racks and
pans from ends to be joined.
D. Remove rear shelf supports.
E. Remove back panels from
both cases by lifting up and out
near the bottom. No tools are
necessary.
F. Remove ‘J’ molding from
door frames next to partition.
G. RLNI ONLY: Remove the
interior top panels from end that
will receive partition.
1
HUSSMANN CORPORATION • BRIDGETON, MO 63044-2483 U.S.A.
P/N 0396231
November, 2002
Insulated Partition
Between
Reach-In Merchandisers
Field Installation Instruction
Merchandisers
®
PARTS LIST
Item Quantity Description
RL/RM/RMF
RLN/RMN RLNI
1. 2 4Donut Gasket
(Ships with Case)
2. 1 2Gasket 1 x 1/2x 180 in.
3. 1 2Gasket 1/2x 1/4x 180 in.
4. 1 1Partition Assembly
5. 7 14 Flat Washer 5/16
6. 6 12 Cap Screw 5/16-18 x 21/2 in.
7. 1 2Hex Head Lock Nut 5/16-18
8. 2 4End ‘J’ Molding
9. 10 20 Shoulder Screw
Figure 1. Remove Parts
B
A
CD
E
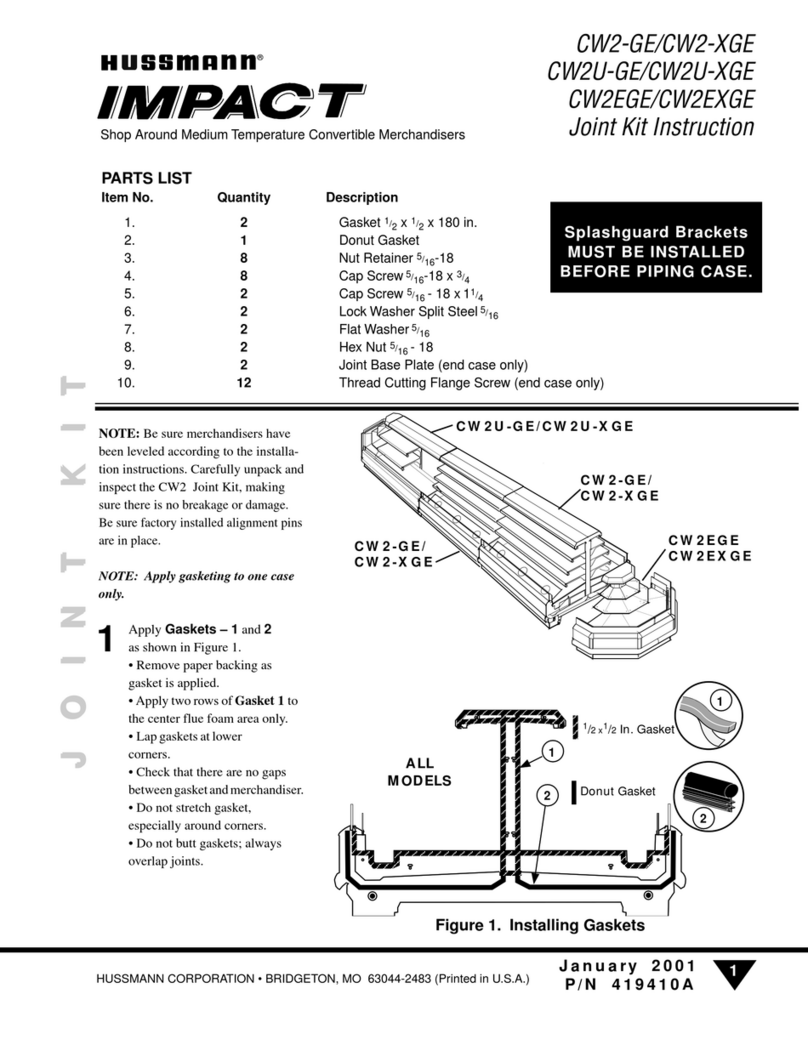
2Verify that nut retainers are
installed in the right-hand end
of the left case in the locations
shown in Figure 2.
Remove all alignment pins from
cases that will join partition.
P/N 0396231
Merchandisers
®
2HUSSMANN CORPORATION • BRIDGETON, MO 63044-2483 U.S.A.
Factory Installed
Nut Retainer
Alignment Pin Alignment Pin
RLNI
Figure 2. Verify Nut Retainer Installation
RL / RM
and
RLN / RMN
Insulated Connecting Partition for Reach-In –
Installation Instruction P/N 0396231
3
HUSSMANN CORPORATION • BRIDGETON, MO 63044-2483 U.S.A.
1 in. x 1/2in.
Donut
1
2
1/2in. x 1/4in.
3
Gaskets must be
applied as shown on
both sides (L & R)
of partition
Make sure area where raceway attaches to end frame
is sealed with the wider 1 in. x 1/2in. gasket.
3
1
2
RL / RM / RMF
and
RLN / RMN
3Apply
Donut Gasket — 1
in end frame recessed locations
of both cases as shown in
Figure 3.
Apply the wider
Foam Tape Gasket — 2
as shown in Figure 3.
• Lap gaskets at lower corners.
• Check that there are no gaps
between gasket and case.
• Do not stretch gasket,
especially around corners.
• Do not butt gaskets; always
overlap joints.
• Remove paper backing after
gasket is applied to keep
gasket free of debris.
Apply the narrower
Foam Tape Gasket — 3
around the outside of the donut
gasket on both cases as shown
in Figure 3.
Gaskets
Must Be
Applied As
Shown
2
Make sure area where raceway attaches to end
frame is covered with wider 1 in. x 1/2in. gasket.
3
1 in. x 1/2in.
Donut
1
2
1/2in. x 1/4in.
3
1
RLNI
Figure 3. Apply Gaskets to Both Cases
4With the left-hand case leveled
in its permanent position, move
the joining case into alignment
approximately 4 in. (102 mm)
from left-hand case.
Slide the
Partition Assembly — 4
between the two cases and raise
it to align its joining holes with
those in the cases.
Insert long narrow rods (or
screwdrivers) through three or
more joining holes of the cases
and the partition to maintain
alignment, then bring the cases
firmly together to compress the
gaskets against the partition.
P/N 0396231
Merchandisers
®
4HUSSMANN CORPORATION • BRIDGETON, MO 63044-2483 U.S.A.
Alignment Pin
4
Figure 4. Insert Partition
5Fasten the cases together
through the end frames with
Washers — 5 under the head
of Cap Screws — 6 as shown
in Figure 5. Thread screws into
nut retainers at the locations
shown.
Once all the cap screws and
washers are in place, tighten in
the order shown in Figure 5.
Do not attempt to draw the cases
together with the cap screws.
Push the second case against the
partition and first case, compress-
ing all gaskets. Overtightening
can distort the end frame and
cause an incomplete seal which
will result in adverse case
performance, including leakage.
At lower front location, use
Hex Head Lock Nut — 7
and Cap Screw — 6 with
Washer — 5 under the head
as shown to fasten the partition
between the cases.
Insulated Connecting Partition for Reach-In –
Installation Instruction P/N 0396231
5
HUSSMANN CORPORATION • BRIDGETON, MO 63044-2483 U.S.A.
B
D
E
A
C
Alignment Pin
5
6
Nut Retainer
Figure 5. Install Cap Screws,Washers and Hex Nut
65
57
6Fasten one
‘J’ Molding — 8
between the partition and the
door frame on each side as
shown in Figure 6 using
Shoulder Screws — 9.
Note that when fastening
through the hinge side of the
door frame, it may be necessary
to release the door retainer so
the door opens more than
90 degrees. Refer to manual that
shipped with the door.
7Replace rear shelf support, back
panels, display racks and pans,
and shelves removed in Step 1.
RLNI ONLY: First, replace the
interior top panels removed in
Step 1.
Once line-up is complete, install
bumpers and rails as shown in
Section 1 of the case installation
manual. Be sure to install the
splashguard brackets before
wiring or piping cases.
P/N 0396231
Merchandisers
®
6HUSSMANN CORPORATION • BRIDGETON, MO 63044-2483 U.S.A.
9
8
6
4
9
Figure 6. Install ‘J’ Molding

Other manuals for IMPACT RL

6

This manual suits for next models

7

Other Hussmann Merchandiser manuals

Hussmann VR1-D User manual

Hussmann

Hussmann VR1-D User manual

Hussmann impact Excel C2X-XLGE Instruction Manual

Hussmann

Hussmann impact Excel C2X-XLGE Instruction Manual

Hussmann RMID Instruction Manual

Hussmann

Hussmann RMID Instruction Manual

Hussmann Impact C2-XLE Instruction Manual

Hussmann

Hussmann Impact C2-XLE Instruction Manual

Hussmann P4NX-EP Instruction Manual

Hussmann

Hussmann P4NX-EP Instruction Manual

Hussmann Impact Excel D5X-ULEP Instruction Manual

Hussmann

Hussmann Impact Excel D5X-ULEP Instruction Manual

Hussmann impact Excel C2X-LGE Instruction Manual

Hussmann

Hussmann impact Excel C2X-LGE Instruction Manual

Hussmann C3X-LGE Instruction Manual

Hussmann

Hussmann C3X-LGE Instruction Manual

Hussmann LBN Quick guide

Hussmann

Hussmann LBN Quick guide

Hussmann IMPACT D5RRI Instruction Manual

Hussmann

Hussmann IMPACT D5RRI Instruction Manual

Hussmann FNGSC-A User manual

Hussmann

Hussmann FNGSC-A User manual

Hussmann NEBBDT Supplement

Hussmann

Hussmann NEBBDT Supplement

Hussmann DDS User manual

Hussmann

Hussmann DDS User manual

Hussmann IMPACT ED1 Instruction Manual

Hussmann

Hussmann IMPACT ED1 Instruction Manual

Hussmann MPCETNM6S User manual

Hussmann

Hussmann MPCETNM6S User manual

Hussmann BEXD-A User manual

Hussmann

Hussmann BEXD-A User manual

Hussmann IMPACT Elite ES1 Instruction Manual

Hussmann

Hussmann IMPACT Elite ES1 Instruction Manual

Hussmann IMPACT Elite E1S Instruction Manual

Hussmann

Hussmann IMPACT Elite E1S Instruction Manual

Hussmann IMPACT D5 User manual

Hussmann

Hussmann IMPACT D5 User manual

Hussmann CGHT User manual

Hussmann

Hussmann CGHT User manual

Hussmann M1XD-GEP Instruction Manual

Hussmann

Hussmann M1XD-GEP Instruction Manual

Hussmann SMG User manual

Hussmann

Hussmann SMG User manual

Hussmann Impact Excel M3X-GE Instruction Manual

Hussmann

Hussmann Impact Excel M3X-GE Instruction Manual

Hussmann Hussman P User manual

Hussmann

Hussmann Hussman P User manual

Popular Merchandiser manuals by other brands
True G4SM-23-PT Specifications

True

True G4SM-23-PT Specifications

Master Bilt BEL-2-30 Specification sheet

Master Bilt

Master Bilt BEL-2-30 Specification sheet

Kysor/Warren GranBering KW TECHNICAL MANUAL & USER INSTRUCTIONS

Kysor/Warren

Kysor/Warren GranBering KW TECHNICAL MANUAL & USER INSTRUCTIONS

Prince Castle 515-A Series TRANSLITE INSTALLATION INSTRUCTIONS

Prince Castle

Prince Castle 515-A Series TRANSLITE INSTALLATION INSTRUCTIONS

EPTA iarp COOL EMOTION EXTRA SLIM User instructions

EPTA

EPTA iarp COOL EMOTION EXTRA SLIM User instructions

True GDM-9-PT Specifications

True

True GDM-9-PT Specifications

Howard McCray R-CBS40E-4C Specifications

Howard McCray

Howard McCray R-CBS40E-4C Specifications

Bonnet Neve Epta PATIO installation instructions

Bonnet Neve

Bonnet Neve Epta PATIO installation instructions

Howard McCray R-CFS40E-12 Specifications

Howard McCray

Howard McCray R-CFS40E-12 Specifications

Randell 44250DIMA Specifications

Randell

Randell 44250DIMA Specifications

LOZIER Island Section Installation

LOZIER

LOZIER Island Section Installation

Victor CU manual

Victor

Victor CU manual

True TAC-30 Specifications

True

True TAC-30 Specifications

Newco Vista Vend Installation & operation guide

Newco

Newco Vista Vend Installation & operation guide

Bakers Pride PDC Specifications

Bakers Pride

Bakers Pride PDC Specifications

Howard McCray R-M32E-3-LS Specifications

Howard McCray

Howard McCray R-M32E-3-LS Specifications

Arneg BERGEN 2 BT/TN GI R290 Direction for Installation and Use

Arneg

Arneg BERGEN 2 BT/TN GI R290 Direction for Installation and Use

Arneg Panama 3P Direction for Installation and Use

Arneg

Arneg Panama 3P Direction for Installation and Use

manuals.online logo
manuals.online logoBrands
  • About & Mission
  • Contact us
  • Privacy Policy
  • Terms and Conditions

Copyright 2025 Manuals.Online. All Rights Reserved.