- 9 - - 10 - - 11 - - 12 -
- 13 - - 14 - - 15 -
Chapter 6. Live View
Some icons are provided on screen in Live View mode to indicate
different camera status. These icons include:
Live View Icons. In the live view mode, there are icons at the right
top of the screen for each channel, showing the status of the record
and alarm in the channel, so that you can find problems as soon as
possible.
Chapter 7. Record
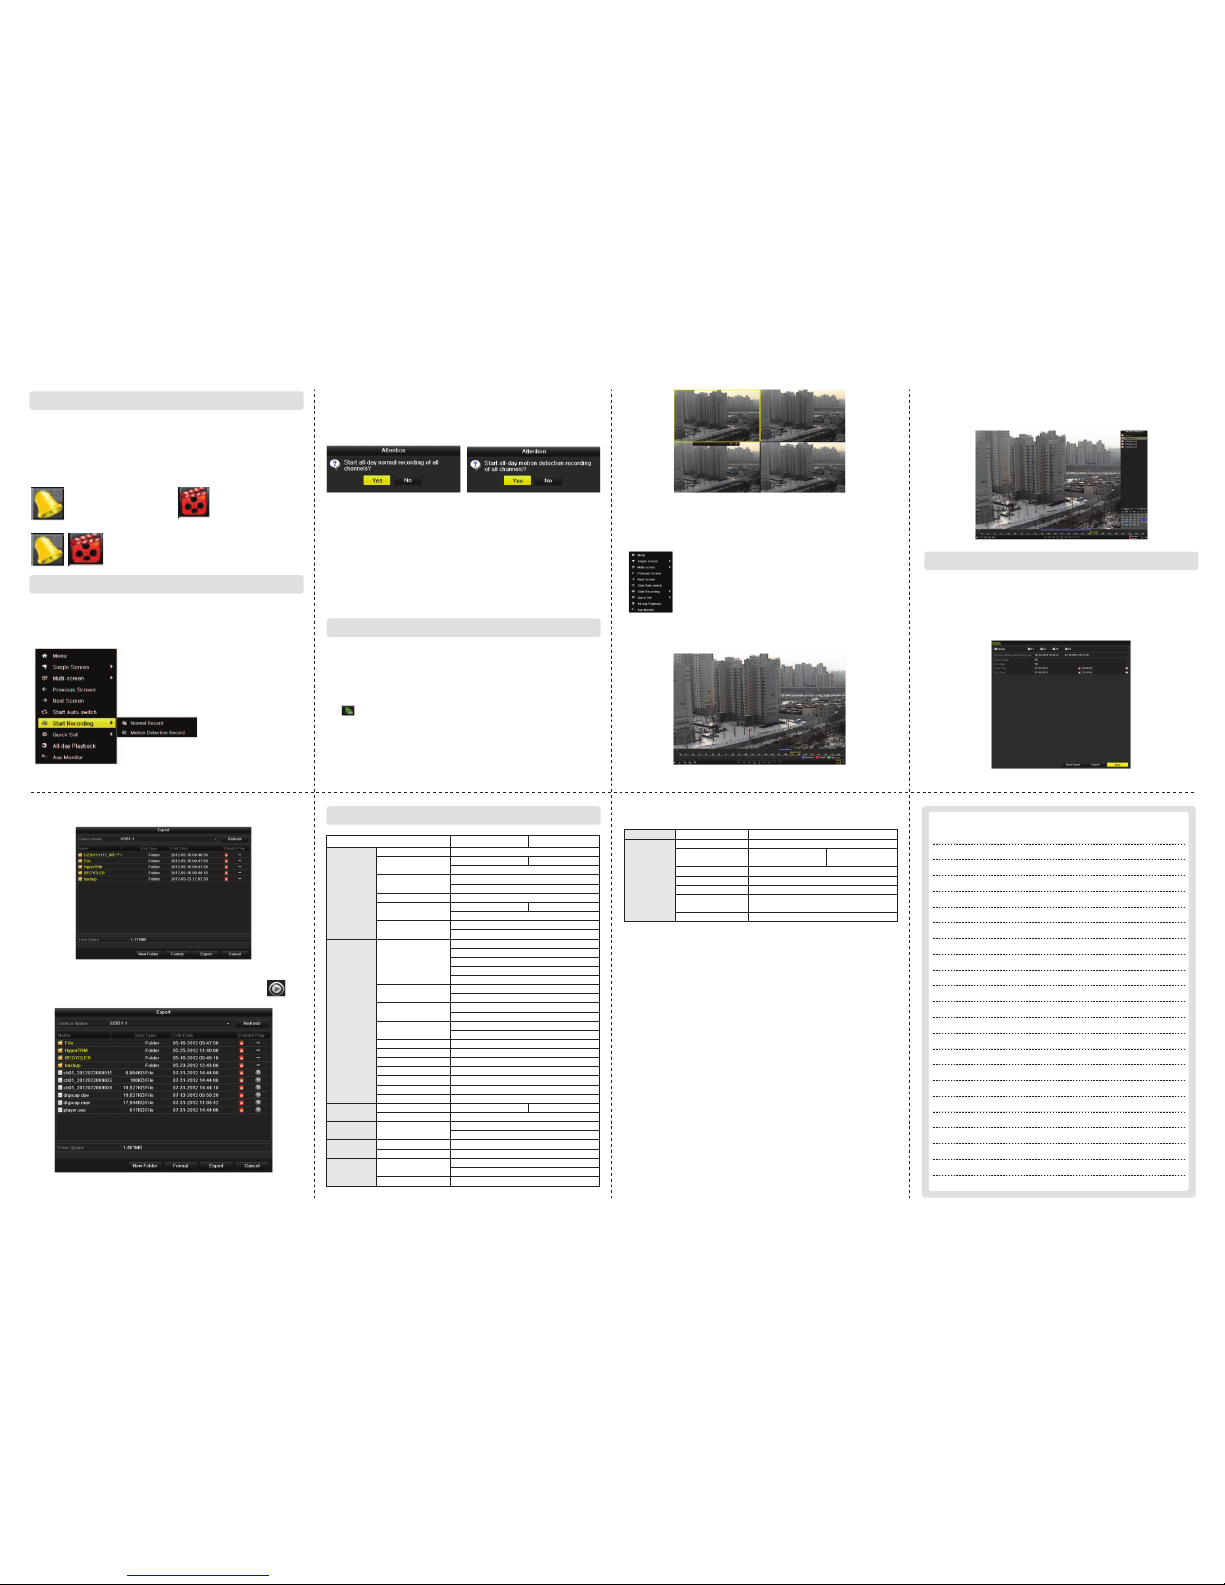
You can use the right-click menu in live view mode to configure
recording for all channels.
1) In the live view mode, use the mouse to right-click on the
window to access the following menu:
2) Click the Start Recording submenu and select the recording
mode to Normal Record or Motion Detection Record.
3) In the pop-up message box, click Yes to finish the quick
recording
settings.
Note: The full-screen motion detection triggered recording is config-
ured by default in this mode.
Chapter 8. Playback
Play back the record files of a specific channel in the live
view menu.
1) Instant playback by channel
Choose a channel under live view using the mouse and click
the button in the shortcut operation menu.
2) All-day Playback by channel
1. Enter the All-day Playback menu.
Mouse: right-click a channel in live view mode and select
All-day Playback from the menu.
2. Playback management.
The toolbar in the bottom part of Playback interface can be
used to control playing process.
The channel and time selection menu will display by moving the
mouse to the right of the playback interface. Tick the channel or
channels if you want to switch playback to another channel or
execute simultaneous playback of multiple channels.
Recorded files can be backed up to various devices, such as USB
flash drives, USB HDDs or a DVD writer. To export recorded files:
1) Click Menu>Export to enter Video Export interface.
Choose the channel (s) you want to back up and click the Quick
Export button.
2) Enter Export interface, choose backup device and click
Export button to start exporting.
3) Check backup result.
Choose the record file in Export interface and click the
button to check it.
- Alarm
(video loss, tampering,
motion detection or
sensor alarm.)
- Record (manual
record, schedule
record, motion
detection record
or alarm triggered
record)
- Alarm & Record
Chapter 9.Backup
Note: Only record files recorded during the past five minutes on this
channel will be played back.
Press PLAY button on the front panel or IR remote control
to play back record files of the channel under single-screen
live view.
Under multi-screen live view, record files of the top left
channel (not masked) will be played back.
Specification
Model
Video
/Audio input
Video
/Audio output
Hard disk
External
interface
General
SK-RH04 SK-RH08
Video compression
Video input
Video input interface
Audio compression
Audio input
Two-way audio input
HDMI/VGA output
CVBS output
Encoding resolution
Frame rate
Video bit rate
Audio output
Audio bit rate
Dual-stream
Stream type
Synchronous playback
SATA
Capacity
Network interface
Serial interface
USB interface
Power supply
Consumption
(without hard disk)
Working temperature
Working humidity
Chassis
Dimensions
(W × D × H)
Weight
H.264
4-ch 8-ch
4-ch 8-ch
1080I60, 1080I50, 1080P30, 1080P25, 720P60
720P50, 720P30, 720P25
1 RS-485 interface, half-duplex
2, USB 2.0
12 VDC
≤ Max.15 W ≤ Max.20 W
10% ~ 90%
19-inch rack-mounted 1U chassis
445 × 290 × 45mm
≤ 4 kg
-10 C ~+55 C
0 0
HD-SDI interface (800 mVp-p, 75 Ω)
G.711u
RCA (2.0 Vp-p, 1 KΩ)
1-ch, RCA (2.0 Vp-p, 1 KΩ),
(using the 1st channel of audio input)
1-ch, resolution:
1080P: 1920×1080/60Hz
1280×1024/60Hz;
1280×720/60Hz;
1024×768/60Hz
1-ch, BNC (1.0 Vp-p, 75 Ω),
resolution: PAL: 704 × 576, NTSC: 704 × 480
Main stream: 1920 × 1080 (1080P) / 1280 × 720 /
VGA / 4CIF / CIF
Main stream: 1/16 fps ~ Real time frame rate
Sub-stream: 1/16 fps ~ Real time frame rate
32 Kbps-16 Mbps
1-ch, RCA (Linear, 1KΩ)
64 Kbps
Support
Video, Video & Audio
2-ch,1080P / 4-ch,4CIF 2-ch,1080P / 8-ch,4CIF
Playback resolution 1920×1080 (1080P) / 1280×720 / VGA / 4CIF /CIF
Remote
access
Output bandwidth 128Mbps 256Mbps
Remote connections 128
Network
management Network protocols TCP/IP, PPPoE, DHCP, DNS, DDNS, NTP,
SADP, SMTP, SNMP, NFS, iSCSI, UPnP™
2 SATA interfaces
Up to 4TB capacity for each disk
1; 10M / 100M / 1000M self-adaptive
Ethernet interface
General
<MEMO>