Hyundai HSO20305 User manual

1
ORIGINALS INSTRUCTIONS

2
1. SAFETY INSTRUCTIONS
WARNING: When using electric tools, basic safety precautions, including the following, should always be followed to
reduce the risk of fire, electric shock and personal injury. Read all these instructions before operating this product and
save these instructions.
Safety operations
a) Keep work area clean and clear
Cluttered areas and benches invite injuries.
b) Consider work area environment
Do not expose power tools to rain.
Do not use power tools in damp or wet locations.
Keep work area well lit.
Do not use power tools where there is risk to cause fire or explosion.
c) Guard against electric shock
Avoid body contact with earthed or grounded surfaces (e.g. pipes, radiators, ranges, refrigerators).
d) Keep visitors away
Do not allow visitors, especially children, to participate in the work and touch the tool or extension cord.
All visitors should be kept away from work area.
e) Store idle tools
When not in use, tools should be stored in a dry, high or locked up place, out of reach of children.
f) Do not force the tool
It will do the job better and safer at the rate for which it was intended.
g) Use the right tool
Do not force small tools or attachments to do the job of a heavy duty tool.
Do not use tools for purposes not intended; for example, do not use circular saws to cut tree limbs, logs,
etc.
h) Dress properly
Do not wear loose clothing or jewellery, they can be caught in moving parts.
Rubber gloves and non-skid footwear are recommended when working outdoors.
Wear protecting hair covering to contain long hair.
i) Use safety glasses and hearing protection
Use protective goggles.
Also use face or dust mask if the cutting operation is dusty.
j) Connect dust extraction equipment
If devices are provided for the connection of dust extraction and collection facilities ensure these are
connected and properly used.
k) Do not abuse the cord
Never carry the tool by the cord or yank it to disconnect it from the socket. Keep the cord away from
heat, oil and sharp edges.
l) Secure work
Use clamps or a vice to hold the work. It is safer than using your hand and it frees both hands to operate
the tool.
m) Do not overreach
Keep proper footing and balance at all times.
n) Maintain tools with care
Keep cutting tools sharp and clean for better and safer performance.
Follow instructions for lubrication and changing accessories.
Inspect tool cord periodically and if damaged have it repaired by an authorized service facility.
Inspect extension cords periodically and replace, if damaged.
Keep handles dry, clean and free from oil and grease.
o) Disconnect tools
When the tool is not in use, before servicing and when changing accessories such as blades, bits and
cutters, disconnect the tool from its electrical outlet.
p) Remove adjusting keys and wrenches
Form the habit of checking to see that keys and adjusting wrenches are removed from the tool before
turning it on.
q) Avoid unintentional starting

3
Do not carry a plugged-in tool with a finger on the switch. Ensure switch is in OFF position when
plugging in.
r) Use outdoor extension leads
When tool is used outdoors, use only extension cords intended for outdoor use and therefore marked.
s) Stay alert
Watch what you are doing. Use common sense. Do not operate tool when you are tired.
t) Check damaged parts
Before further use of the tool, a guard or other part that is damaged should be carefully checked to
determine that it will operate properly and perform its intended function.
Check for alignment of moving parts, free running of moving parts, breakage of parts, mounting and any
other conditions that may affect its operation.
A guard or other part that is damaged should be properly repaired or replaced by an authorized service
centre unless otherwise indicated in this instruction manual.
Have defective switches replaced by an authorized service facility.
Do not use the tool if the switch does not turn it on and off.
u) Warning
The use of any accessory or attachment, other than those recommended in this instruction manual or
the catalogue, may present a risk of personal injury.
v) Have your tool repaired by a qualified person
This electric tool is in accordance with the relevant safety requirements. Repairs should only be carried
out by qualified persons using original spare parts, otherwise this may result in considerable danger to
the user.
Additional instructions
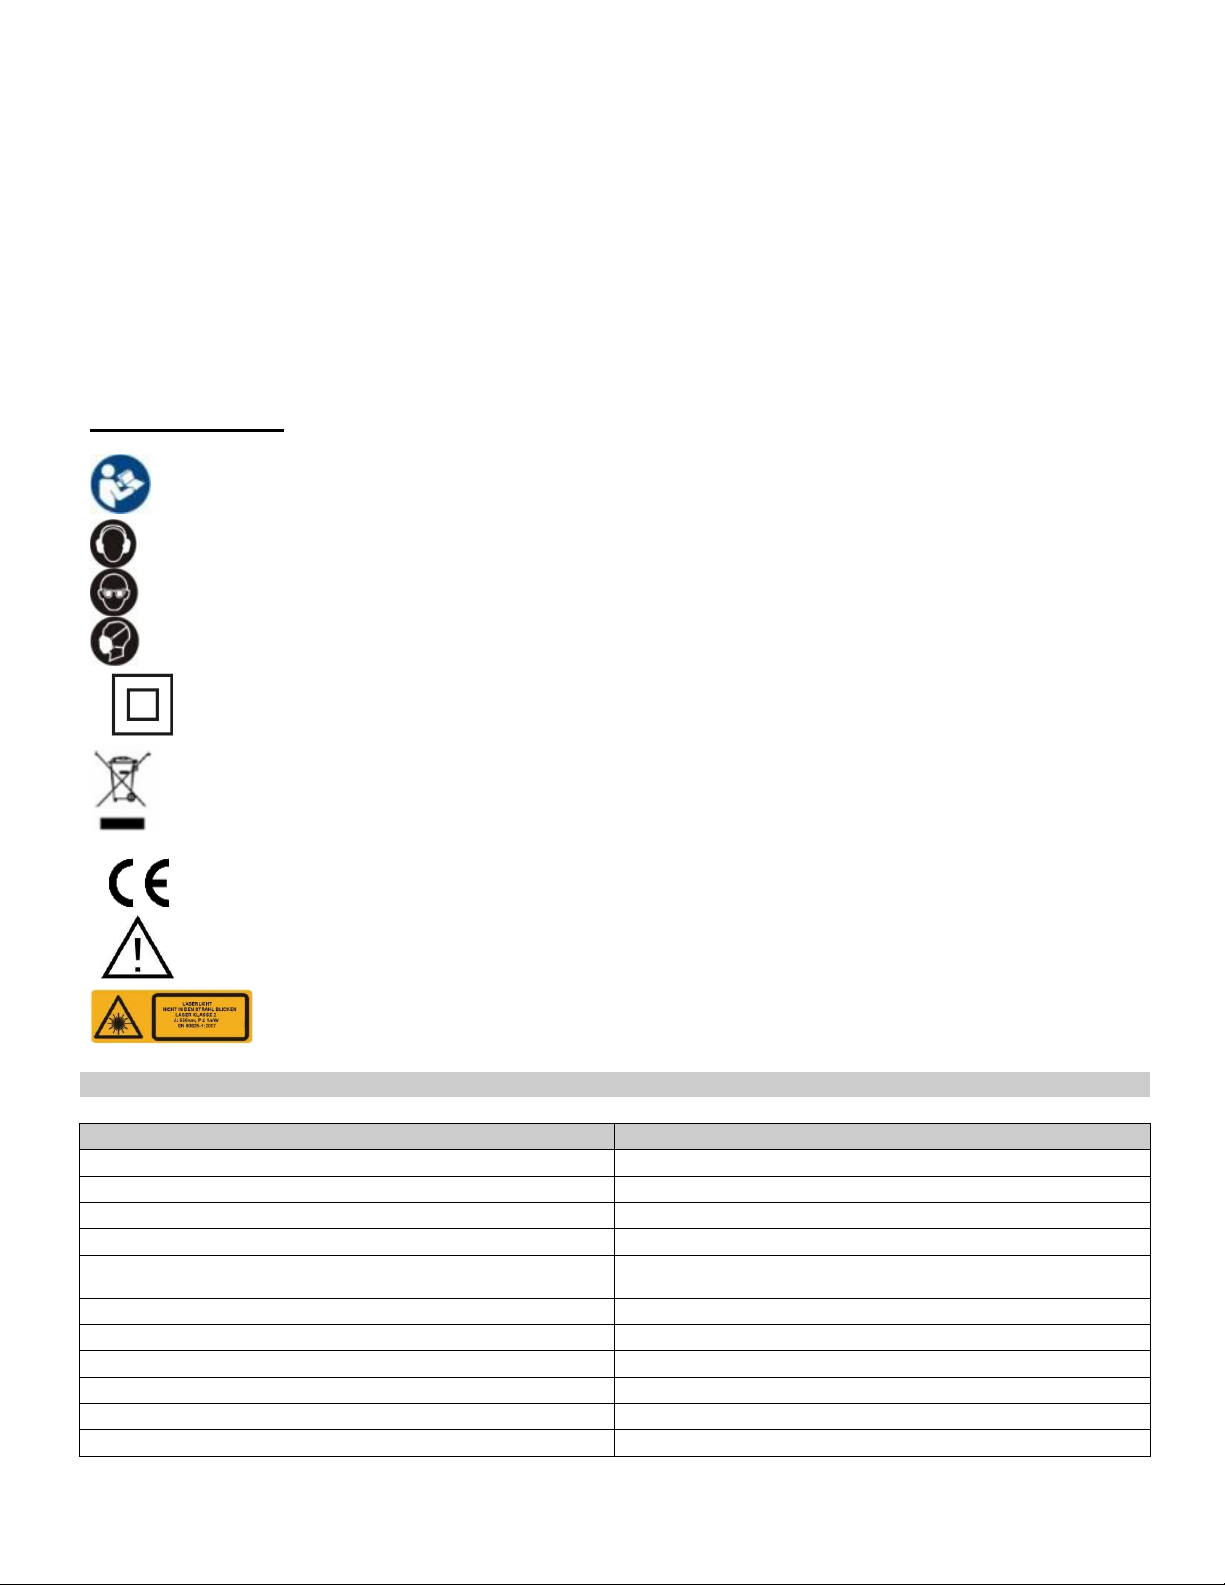
- When using the saw, wear personal protective equipment such as safety goggles or a screen,
helmet, dust mask, gloves, non-slip footwear and protective clothing
- Ensure that there is sufficient, generalized or localized lighting.
- Do not use the saw when the protective parts are not in place.
- Do not use the saw to cut metal or masonry parts.
- Do not allow persons under 18 to operate the tool.
- Ensure that users of this tool have received professional training and know how to set and use
this tool.
- Do not use the saw to cut firewood
- Remove all stumbling blocks from the work area.
- Report or record any defects as soon as possible, including the guards and the saw blade.
- Install the saw as much as possible on a work stand. Res Always stay on the side when the
saw is turning.
- Never use a saw blade that is cracked or deformed.
- When cutting round wood, use a clamping assembly to prevent slippage of the workpiece.
- Do not use your hand to remove sawdust, chips or debris near the saw blade.
- Use only blades recommended by the manufacturer that comply with EN847-1.
- Do not use high speed steel blades (HSS blades).
- If the plate inserted on the swivel table is worn or damaged, have it replaced by an authorized
service center
- Objects such as cloth, strings, should never be left in the working wone. Avoid cutting nails.
Check the workpiece and remove all nails and other foreign objects before starting the machine.
- Hold the workpiece firmly.
- Avoid collecting debris or sawdust on the saw before the saw is completely stopped and the
blade guard is in the open position.
- Do not attempt to release a blocked blade before stopping the machine by pressing the switch
- Do not attempt to slow down or stop the blade when it is still in the workpiece.
- Let her stop by herself.

4
- When you want to pause, turn off the power and wait for the saw to stop completely before
leaving the work area.
- Periodically check that all fasteners, screws, bolts and nuts are properly tightened.
- Do not put materials or equipment above the saw to prevent the possibility of an unfortunate fall.
- Use the saw to cut parts that are insulated from electricity. If you accidentally cut a wire hidden
in the workpiece or cut the power cable of the saw, the metal parts of the saw are covered by
the current, the power must then be switched off immediately and the plug removed from the
saw. outlet.
- Never use the saw near any flammable liquid or gaseous material.
- Note and remember the direction of rotation of the motor and that of the blade.
- Do not block the movable blade guard in the open position and make sure it can move freely
and fully cover the blade teeth.
- Place a saw on a dust collecting bag and ensure it is working properly. As an operator, you
need to know the factors that influence the severity of pollution, such as material type,
performance, and setting of the dust collection or evacuation device. In any case we
recommend the use of a dust mask.
- Wear gloves when handling saw blades and rough materials.
- Put the saw blades in a sheath during transport.
- Select the saw blades according to the type of material to be cut.
- Use sharp saw blades and observe the maximum speed marked on the blade.
- Redouble your attention by machining a groove.
- The miter saw can be transported safely by the main handle, but only when it has been
disconnected from the power outlet and locked in the locked position.
- Do not use the saw when the guards are not properly assembled, in good condition or well
maintained.
- Make sure that the arm is securely secured during bevel cutting.
- Apply the workpiece strongly against the swivel table on which there should be no other pieces
of wood.
- Install sufficiently intense lighting.
- Ensure that you have received training and / or training and know how to adjust and use this
tool.
- Use blades that are properly sharpened and do not exceed the maximum rated speed.
- Do not pick up debris from the cutting area until the blade guard closes and the saw is
completely stopped.
- Attach the miter saw to a workbench if possible.
- When cutting a long piece that extends far beyond the width of the table, supports should be
used to support the ends of the workpiece at the same height as the cutting table. The supports
must be positioned so that the workpiece does not fall to the ground when the cutting has
finished. If the part is very long, several supports must be provided.
Laser safety instructions
- Warning: Do not look directly at the laser beam.
The laser light / laser radiation used on this saw is of class 2 with 1mV at the maximum and the
wavelengths of 650 nm. These lasers do not usually constitute an optical hazard, but stare at
the beam can cause flash blindness. The danger exists if you deliberately look at the laser
beam. To avoid optical hazards, please observe the following guidelines:
oNever point the laser beam at a person or object other than the workpiece.

5
oThe laser can not be pointed at a person's eye for more than 0.25s.
oAlways make sure that the laser beam is directed to a solid piece that does not have a
reflective surface such as a piece of wood or a rough, matte surface. A glossy steel sheet
or similar material is not suitable for use with the laser because a reflective surface can
return the laser to the operator.
oDo not replace the laser light device with a different laser product. Repairs must be
performed by the manufacturer of the laser product or its authorized dealer.
Caution: Use of controls or adjustment or application of procedures other than those specified
in this manual may result in exposure to hazardous radiation.
Residual risks
Warning: When using a power tool, basic safety precautions should be taken to avoid the risk
of fire, electric shock or injury to persons.
Please read the additional safety instructions in this manual carefully and note that even if the
power tool is used in accordance with the operating instructions, it is not entirely certain that all
residual risk factors will be eliminated. The following hazards can occur:
oContact with blade
oRebound of the workpiece or debris of the workpiece
- Fracture of the blade.
- Ejection of debris from the machined part.
- Hearing damage if you do not wear ear plugs.
- Projection of wood chips that are harmful to health when the tool is used in a poorly sealed
room.
It is therefore important to take preventive measures:
oAlways use a sawdust disposal device if possible.
oDo not use deformed or cracked blades.
oRemove the plug from the power tool before any adjustment or maintenance, including
replacement of the blades.
oChoose a suitable blade for the material to be cut.
oDo not use the saw to cut material other than those designated by the manufacturer
The miter saw can be transported safely by the main handle, but only when it has been
disconnected from the power outlet and locked in the locked position.
Do not use the saw when the guards are not properly assembled, in good condition or properly
maintained.
Make sure that the arm is securely secured during bevel cutting.
Apply the workpiece strongly against the swivel table on which there should be no other pieces
of wood.
Install sufficient lighting.
Make sure you have been trained or trained and know how to adjust and use this tool.
Use blades that are properly sharpened and do not exceed the maximum rated speed.
Do not pick up debris from the cutting area until the blade guard closes and the saw comes to
a complete stop.
Attach the miter saw to a workbench if possible.
When cutting a long piece that extends far beyond the width of the table, supports must be
used to support the ends of the workpiece at the same height as the cutting table.

6
The supports must be positioned so that the workpiece does not fall to the ground when the
cutting has finished. If the part is very long, several supports must be provided.
⚫keep the floor area free of loose material e.g. chips and cut-offs;
⚫ensure that any spacers and spindle rings used are suitable for the purpose as stated by
the manufacturer
Symbol explanation
To reduce the risk of injury, the user must read and understand this manual before using
this product.
Wear ear protectors. Exposure to noise can cause hearing loss.
Wear protective goggles.
Wear respiratory protection.
Double insulation.
Waste electrical products should not disposed of with household waste. Please recycle
where facilities exist. Check with your local authority or retailer for recycling advice.
In accordance with essential applicable safety standards of European directives
WARNING!
DO NOT stare into beam! DO NOT aim the laser beam at people!
1 –Technical data :
Model
HSO20305
Mains voltage/ frequency
230 V - 50 Hz
Power
2000W; S2 2min 2400W
Speed
4350/min
Type
Single Phase
Blade size
Ø305 x Ø30 x 40TX2.8 mm
Bras oscillant inclinabl
45° G/D
Base pivotante
45° G/D
Câble d’alimentation
1.8 m
Net weightt
19kg
Protective cless
II
Soud pressure level LpA
93.2 dB(A)

7
Sound power level LwA
106.2 dB(A)
Uncertainty K:
3 dB(A)
Vibration
1.778m/s2, K=1.5m/s2
Max. Cutting depth at :
0° - 90°
90 x 340 mm
45° - 90°
90 x 240 mm
0° - 45° left
48 x 340 mm
0° - 45° right
40 x 240 mm
Table Tilting Range:
Left45°- Right45°
Saw Body Tilting:
45°- 45°
The minimum size of the workpiece
12mm
maximum cross-section size of the workpiece for
cross-cutting
0.03 ㎡

2. Composition of the machine
*Non - contractual pictures and drawings
WARNING!
Unplug the machine before any intervention.
1 - Laser activation switch
2 - Machine activation switch
3 - Handle with switching on trigger
4 - Top blade protection housing
5 - 250 mm or 350 mm blade - 30 mm bore
6 - Lower housing
7 - Carbon sets maintained by means of stoppers.
8 - Cutting stop rail: supports the workpieces; it
allows making repetitive cuts easily, it is also
equipped with holes in order to fix an auxiliary
element if desired.
9 - Swivelling table
10 - Blade slide
11 - Locking screw of the saw table: allows adjusting
and maintaining the saw table at determined and
specific angle.
12 - Scale of graduation for the adjustment of the
base tilt
13 - Pre-drilled frame for fixing on the workbench
14 - 1 Locking screw of the machine
14 - 2 Protective Cover of the belt drive
15 - Slides: a guide to the saw head for radial cuts
16 - Slide support: support
additional retaining the working parts for composite
cutting (available according to the models)
17 - Side extensions
18 - Scale of graduation for the adjustment of the
saw head tilt
19 - Carrying handle
20 - Power Cable: 5 meter for higher mobility
21 - Laser integrated beam
22 - Scale of graduation for the saw head tilt

Wear safety glasses, hearing protection, a dust mask and protective gloves.
3 - Use
This mitre saw should only be used for to cut rafters, baseboards, panelling, wooden floors, boards, or
cutting pieces of aluminium, processed wood or similar materials.
Caution, do not use the machine beyond the maximum capacity provided and do not cut branches, logs and
any other material with presenting risks of ignition, explosion or release of pollutant or dangerous for the
user or the environment
Any other use, different from that provided in these instructions, may cause damage to the device and
represent a serious danger for the user.
This device is intended solely for private use and not industrial.
Store it carefully and keep these instructions at hand, so that you can consult them in case of need.
Only the blades of the same diameter, bore and kind are allowed.
4 - Conditions of use
- The saw should be placed in a covered and dry place. The ambient temperature should be between
+15°C and +30°C. Humidity should be less than 60%.
- The saw should be mounted on a stable and strong work plan by means of the fixing holes provided for
this purpose on the base.
- Suitable blades should be used depending on the material to be cut
Be careful when cutting hard materials.
Move the workpiece forward slowly, do not force the workpiece against the blade.
Warning: For normal operations of sawing wood, use a 24 teeth tungsten carbide blade. For other sawing
operations and other materials, use depending on the case a 30 teeth, 40 teeth or 60 teeth tungsten
carbide blade (ask for advice to the dealer).
Always check that the recommended speed on the saw blade is equal or greater than the one provided on
the nameplate of the machine.
5 - Capacity
Capacity
F305MAX - 3
0° - 90°
90 x 340 mm
45° - 90°
90 x 240 mm
0° - 45° left
48 x 340 mm
0° - 45° right
40 x 240 mm
6 - Unpacking
You have opened the carton and found this user manual attached to the machine. Keep the packaging for
storage and the instructions for future reference.

Remove the saw from the packaging and check its condition. If the product does not seem correct, or if the
items are broken or missing according to the description above, contact your dealer.
CAUTION! A small anti - moisture bag may be found in the packaging. Do not leave it within reach of
children and discard.
7 - Mounting
WARNING!
Unplug the machine before any intervention.
a) Unlock and lock the saw head in the low position:
STEP 1:
During transport, handling or storage, the saw head should be
folded and locked
in this position.
To unlock the saw head, exercise a downward pressure on the
handle.
STEP 2: Pull out the locking pin
located at the rear of the machine, so
the head can return to its proper
operating position.
b) Mounting of the saw on a stable base:
This machine has 4 mounting holes at its base. These can be used
to secure permanently the saw to a workbench with screws or bolts
as appropriate.
It should be fixed on a workbench with the screws.
Drill the marked areas of the holes whose diameter and depth is
suitable to the screws to be used.
Place the machine on the workbench and insert the screws into the
fixing holes, then tighten firmly.
Alternatively, if the machine needs to be moved frequently, it can
be fixed to a plywood base of 19 mm, provide a more stable base.

c) Unlocking the cutting arm:
To turn the saw on, you should unlock the lower blade
guard. Therefore, press the locking device (no.2) and then press
the switch (no.1) to turn on the mitre saw.
To stop the saw, release the trigger switch no.1.
You should never stop the blade rotation by exerting side
pressure on it.
As a safety measure, the lower blade guard is locked
systematically as soon as you
release the trigger switch.
The lower guard retracts over the top blade guard when the top
blade is in contact with the workpiece.
d) Connection of the dust and chips collector bag:
Insert the dust bag over the extraction outlet located at the rear of
the machine.
You can also connect a vacuum hose to the dust extraction bend to
improve suction. The dust bag should be emptied frequently. The
dust bag is equipped with a zipper to empty it more easily. A full
bag greatly reduces its effectiveness. This bag needs to be cleaned
regularly in soapy water; before reuse, be sure to dry thoroughly.
Caution: Dust particles can cause respiratory problems. For your
protection, wearing a dust mask according to the standards in force
is advisable.
e) Mounting and adjustment of the table extensions:
You can use the table extensions to work on long pieces of wood.
These extensions can be placed on the right or left according to your
needs.
Insert the extensions in the notches provided and tighten the locking
screw so that the extensions do not move while using the machine.

f) Installation and change of the blade:
An accessory should be changed when the machine is idle and disconnected.
To install or change the blades, your mitre saw should be in raised
position,
- Remove the front screw from the housing of the blade bolt (4).
- Lift the motor block blade and then the lower blade guard as high
as possible (note: take care, the lower blade guard is equipped with
a spring.)
Using the wrench, hold the flange (2) and then
loosen the bolt of the shaft (3) using the Allen key.
- Remove the flange of the blade and install or replace the blade
on the shaft. Make sure that the blade is
properly installed, the teeth directed downwards at the front of the
saw.
- Place again the flange of the blade firmly against the blade.
- Tighten the bolt of the shaft by turning it to the left. Using the
wrench, hold the flange and tighten the bolt of the shaft using the
Allen key.
- Push with your thumb on the locking device of the lower blade
guard so that the blade guard covers the blade.
- Tighten the housing screw of the blade bolt.
- Check the locking device of the lower blade guard is properly in
place and that it properly blocks the latter.
Pay attention to the direction of blade rotation, a superimposed arrow on the head of the saw shows
the direction of the blade rotation. The teeth of the saw blade should be oriented in the arrow
direction. Choose also a blade with a marking showing the rotation direction to observe.
Use only sharp blades and not damaged. Cracked or twisted blades should be replaced immediately.
Do not use HSS steel blades. Use only blades that are appropriate for the speed provided. Make
sure that the axis diameter and the axis hole are consistent.
g) Use of the laser:
This machine is equipped with a LASER generator.
• Laser switch: To turn the laser on push the "ON" button upwards and to turn it off the "OFF"
button downwards. You can use this button if you do not want to use the laser function.

h) Adjusting the mitre angle:
Your saw allows performing mitre cutting from 0° to 48° both
to the right and to the left.
To adjust the table, loosen the locking handle of the table
(A)
as shown in the diagram, move the table (C) until you get
the desired angle by using the handle (A).
Finally, lock the table using the locking handle to lock the
table in the proper position.
i) Adjusting the tilt of the saw head:
You can tilt the saw head of your machine from 0° to
45° to the right and to the left.
1 - Tilt locking handle
2 - Locking pin
3 - Locking crew for side extension
4 - Adjusting screw of the additional stop
To adjust the tilt, loosen the locking handle of the table (1)
located at the rear of the machine as shown on the diagram.
To tilt to the left, unlock the locking handle (1) then tilt the saw
head from 0° to 45° to obtain the desired tilt by using the
handle.
To tilt to the right, unlock the locking handle (2), then pull the
pin (2) to unlock the tilt angle and then tilt the saw head from
0° to 45° to obtain the desired tilt by using the handle.
Once set, tighten the handle firmly.

j) Use of the stop:
Your mitre saw is equipped with a fixed part stop as well as removable stop, on the right and left side: they
allow immobilizing the workpiece during the cutting operation and thus prevent it from moving.
You should always push the workpiece against the latter, regardless of the type of cut to be performed.
The mitre gauge should be systematically adjusted to perform a cut.
CAUTION: This mitre saw is also equipped with an adjustable
stop. These stops should be adjusted to match the cutting
angle (straight cut, bias cut, etc...).
k) Adjustment of the drive belt tension
Checking, adjustment of the drive belt tension and replacement:
- Remove the black plastic cover by unscrewing each
screw
- Check the belt tension by exerting pressure with the
thumb.
- When the belt should be tightened or replaced.
Unscrew the four fixing screws of the motor by about a
turn.
Tighten or replace the drive belt.
For rear tension move the motor backwards.
Tighten the fixing screws of the motor crosswise.
- Put back in place the black plastic cover and then
tighten it.
8 - Start-up
The base of your saw should be placed and well fixed on a solid, flat surface in a place inaccessible to
children.
Ensure the proper tightening of the safety components and blade before starting,
a) Start-up

The start-up after the adjustments and checks is carried out by pressing the trigger switch located on the
main handle.
Connect the machine to the 230V mains.
You can stop the device by releasing the power switch located on the handle.
You should never stop the blade rotation by exerting lateral pressure on it.
Before you start cutting, the saw should reach its maximum speed.
Lower the saw head slowly and exert pressure depending on the composition of the materials to be cut.
When cutting, the wood should be well pressed against the stop rail.
For longer wood, you need to use side extensions.
After cutting, release the switch and re - attach the head in upper and locked position, making sure of
locking it.
After the cutting, the translucent blade guard closes automatically and covers the saw blade.
Run idle for 30 seconds in a safe position, stop the machine immediately if there is a relevant vibration or
other faults are detected.
If that is the case, check the machine to determine the cause of the fault.
You can stop the machine by releasing the trigger.
b) Use
Before any use, check that the blade is properly mounted and the stop is properly adjusted according to the
desired use.
Make sure that the lower mobile guard works properly and that the blade enters freely into the groove of the
working table by lowering the idle head while the motor is turned off.
If necessary re - adjust the cutting angle.
The translucent mobile guard should be replaced if it is cracked or damaged.
Tighten the workpiece in the vise on the working table.
CAUTION!
• Always observe the maximum widths and heights of the workpiece provided in the paragraph "Technical
features".
• If the workpiece's length is greater than 1 m, special precautions should be taken, such as support by
using shims at regular intervals under each end beyond the working table.
• Connect the power cable to a wall socket, checking that the voltage corresponds to that shown on the
nameplate of the machine.
• After turning the power on, wait a few seconds for the blade to reach its speed.
• Lower the cutting head slowly towards the workpiece and start working.
• Do not force the head: the advancement speed should be compatible with the material to be cut.
• At the end of the work, release the trigger switch and slowly raise the cutting head in upper position.
• The opening of the vise and cleaning of the waste should be done only when the machine is turned off,
the cutting head back in upper position, the movable guard closed and the blade completely stopped.
Instructions for cutting:
1. Unlock the head of the saw: exert pressure downward on the handle, pull the locking pin located at the
rear of the machine so that the head can return to its proper operating position.
2. Unlock the table
3. Rotate the table until the indicator reaches the desired angle on the scale tab
4. Secure the tab lock lever.
5. Before turning the saw on, run a test on the idle machine to make sure that the cutting is not difficult.
6. Firmly grasp the handle of the saw and squeeze the trigger. Wait a few seconds so that the blade can
reach its maximum speed.
7. Press your thumb against the lower blade guard locking device located on the handle.
8. Slowly lower the blade through the workpiece.

9. Release the trigger and wait until the blade stops spinning before removing it from the workpiece.
10. Raise gently the blade motor block to its highest position and release the lower blade guard locking
device.
WARNING!!
Always place the workpiece flat on the table with one edge pressed firmly against the stop.
If the board is bent, place the convex side against the stop and secure it. If the concave side is placed
against the stop, the board may press against the blade at the end of the cutting, blocking it.
WRONG
RIGHT
To prevent bouncing and serious bodily injury, never locate the concave side of a bent or curved piece
against the stop.
When cutting long pieces of wood or mouldings, support the opposite end of the workpiece. Align the
cutting line of the workpiece with the cutting edge of the blade. Hold the work piece firmly with one hand
and press it firmly against the stop.
WARNING!!
To avoid the risk of serious bodily injury, make sure that the mitre lock lever is securely locked before
starting cutting. If the mitre lock lever is not locked, the table may move during the cut.
To avoid serious bodily injury, your hands should always stay out of the "forbidden hands" area, at least 75
mm away from the blade. Never perform freehand cutting (without pressing the workpiece against the stop).
The blade could hook the workpiece if the latter slides or twists.
9 - User's guide
a - Cross-sections:
A cross section consists in cutting transversely through the workpiece. To perform a straight cross-section
cut (90°), the table should be set on position 0°. To perform mitre cuts - cutting, the table should be
positioned at an angle other than 0°.
b - Bias cuts:
Bias cuts are performed with the table positioned on the tab 0° and the blade tilted at an angle between 0°
and 45°.

- Rotate the table so that the indicator shows 0° on the scale
tab.
- Lock the table by blocking the locking lever.
- Loosen the tilt locking knob and tilt the blade motor block to
the left or right up to the desired angle.
- The bias cutting angle can be set between 0° and 45°.
- Align the indicator with the desired angle.
c - Mitre cuts:
A mitre cut consists in cutting a piece placed against the end of the rear guide at an angle between 0° and
48° to the right or left.
d - Double mitre cuts:
A double mitre cut consists in using both a mitre angle and a tilt angle. This type of cut is used to make
frames, cut mouldings, make boxes with inclined sides, and for certain framework cutting.
To perform this type of cut, the table should be placed on the desired mitre angle and the blade motor block
should be tilted up to the selected bias angle.
The settings for double mitre cutting should be adjusted with great care, due to the interaction between the
two angles. The settings for mitre and bias cutting are interdependent. When you change the mitre angle
setting, you change the impact of the tilt adjustment. Similarly, when you change the tilt setting, you change
the impact of the mitre cutting angle setting. You may need to try several settings before getting the desired
cut. When you have completed the setting of the second angle, check again the first angle setting, as the
setting of second angle may have changed that of the first.
Once you have the two proper settings for a for a given cut, always perform a cutting test with scrap
material before making the final cut on the workpiece.
- The bias cutting angle can be set between 0° and 45°.
- Align the indicator with the desired angle.

e - Positioning of mouldings flat on the table:
In order to use this method to cut with precision crown mouldings for inner and external right - angled
corners, lay the moulding with its broadest backside flat on the table, pressed against the stop.
When setting up the bias and mitre angles and the tab for double mitre cuts, remember that the settings are
interdependent: when you change an angle, the other is modified.
The angles for crown mouldings are very precise and difficult to adjust. Given that the angles tend to go out
of adjustment, all settings should first be tested on scrap mouldings. In addition, most walls are not exactly
perpendicular, so adjustments should be made accordingly.
10 - Maintenance/Service
a. General maintenance:
Remove the plug from the power outlet before performing any adjustment or
maintenance.
This machine does not require special mechanical maintenance, such as the lubrication of the bearings.
Remember to keep your machine in clean condition to avoid any risk of failure.
Lubricate regularly all parts requiring it, as the shaft for instance.
Remove regularly sawing dust from the housing and protective casings.
Periodically check the power cable and, if it is damaged, replace it with an identical cable.
Having this operation performed by the After - Sales Service is advisable.
Periodically check the power cable extension cords and replace them if they are damaged.
The use of extension cords leads to a loss of power.
To limit the power loss to a minimum and prevent the tool overheating, use an extension cord with sufficient
calibre to carry the necessary current to the tool.
If the power cord is damaged, it should be replaced by the After - Sales Service to work safely.
If the power cord is damaged, unplug it immediately.
The cleaning of plastic parts should be performed when the machine is turned off, using a soft, damp cloth
and mild soap.
Do not use solvents to clean plastic parts.
Most plastics may be damaged by the solvents commercially available.
Never immerse the machine and do not use detergent, alcohol, gasoline, etc.
The blades should be stored and handled with care.
Replace the blade as soon as it shows signs of wear.
In case of problems or for a thorough cleaning, consult the After - Sales Service.
b. Brush replacement:
CAUTION!
Remember to
check and
replace the
brushes
periodically.
Check periodically the condition of the brushes. They should be
replaced when the carbon length is about 5mm. Brushes should always
be replaced in pairs. Always keep brushes clean and free to move in
the brush holder.
For their replacement or inspection: remove the threaded plugs using a
flat - head screwdriver, replace the brushes, making sure of inserting
properly the new brushes and ensuring that they slide properly in their
housing, replace the plugs, taking care not to pinch the spring - loaded
brushes.

c. Troubleshooting:
If the machine does not start, make sure that all electrical connections are properly made, check that the
safety circuit breaker is switched on, make sure that in your electrical installation there are no blown fuses.
If after these operations, the failure is attributable to the machine, it should be checked by a certified centre.
Note: For any after - sales service, contact your dealer.
CAUTION! Use only original spare parts.
d. Storage:
To store the machine, follow these tips:
1. Carefully clean the entire machine and its accessories (see the maintenance paragraph).
2. Keep it out of the reach of children, in a stable and secure position, in a dry and temperate place and
avoid temperatures being too high or too low.
3. Protect it from direct light. If possible, store it in the dark.
4. Do not lock it nylon bags as moisture could form.
e. Disposal:
The packaging, machine when it is out of use, as well as each component of the machine should be
disposed of in accordance with the terms prescribed by the legislation in force.
f. Warranty and the environment:
The warranty is for a period of 2 years upon presentation of proof of purchase during normal operation and
with a maintenance in accordance with the provisions of this manual. Any wear parts or consumables are
not covered by the warranty.
Warranty limits:
A return due to worn carbons is not covered by the warranty.
Replace the worn carbons with new carbons {contact us or consult your dealer)
We reserve the right not to apply the warranty for improper returns: inappropriate use, degraded machine...
SCOPE OF THE WARRANTY
The warranty is only valid and applicable under normal use of the machine, that is to cut wood. Feider
undertakes repairing or replacing for a period of 2 years from the date of initial sale any parts or machines
of a FEIDER power tool having a duly recognized material or production fault. To benefit from FEIDER
warranty, the part or parts presumed to be defective should be returned to FEIDER France. The warranty
obviously does not cover cases of misuse, overvoltage, degradation and normal wear and tear, not giving
any right to replacement or repair. Any repairs performed by anyone outside of our authorized maintenance
centres or in our repair center, exempts FEIDER France from any other liability under this warranty.
IT IS EXPRESSLY STATED THAT, UNDER THIS WARRANTY, WE SHALL NOT BE ENGAGED BY ANY
OTHER WARRANTY (either EXPRESS - IMPLIED INTRINSIC QUALITY - MERCHANTABILITY -
SUITABILITY FOR A SPECIFIC PURPOSE OR WARRANTY BY THE POINT OF SALE).

Environment:
Please observe the rules of collection, sorting and recycling of packaging and products at end of life
(Packaging directive and WEEE).
11 - Solutions to common problems:
PROBLEMS
POSSIBLE CAUSES
SOLUTIONS
The motor does not start
1. Under voltage
2. Poor connection
Check the connections and the
mains voltage.
The motor does not start and
disconnects.
1. Short circuit in the socket
2. Short circuit in the motor
3. Bad fuse, or cut circuit breaker
1. Check the plugs
2. Inspect the connections on the
machine
3. Check the fuses
The motor heats up
The motor is overloaded
Reduce the load on the motor
The rotation speed drops
1. The motor is in short circuit
2. The tension drops
3. Bad fuse
4. Overheating engine
1. Check the connections on the
motor and the insulation of the
connections
2. Check the voltages and fuses
3. Reduce the load
The machine vibrates, trembles
1. The saw blade is not circular
2. The saw blade is damaged
3. The saw blade is badly fixed
1. Replace or sharpen the saw
blade
2. Replace the blade with a
suitable blade adapted for the
materials to cut
3. Tighten the screw of the shaft
Burn points appear on the
workpiece
1. Malfunction
2. The saw blade is dull or not
suitable
1. Replace or sharpen the blade
2. Replace the blade with a
suitable blade for the materials to
cut
The cutting angle is not accurate
1. The alignment is bad
1. Check the tightness of the
different axes
The blade engine block oscillates
1. The pivot is moving
1. Check the tightness of the pivot
Table of contents
Other Hyundai Saw manuals

Hyundai
Hyundai HYMS1500E User manual

Hyundai
Hyundai HSBT7672 User manual

Hyundai
Hyundai HY2163 User manual

Hyundai
Hyundai HSO20305-A User manual

Hyundai
Hyundai HSO20305-1 User manual

Hyundai
Hyundai HSC20V2A User manual

Hyundai
Hyundai HYPS36LI User manual

Hyundai
Hyundai HCP3000 User manual

Hyundai
Hyundai HYC5620 User manual

Hyundai
Hyundai HSO14210 User manual