8
INTERACTIVE USER GUIDE
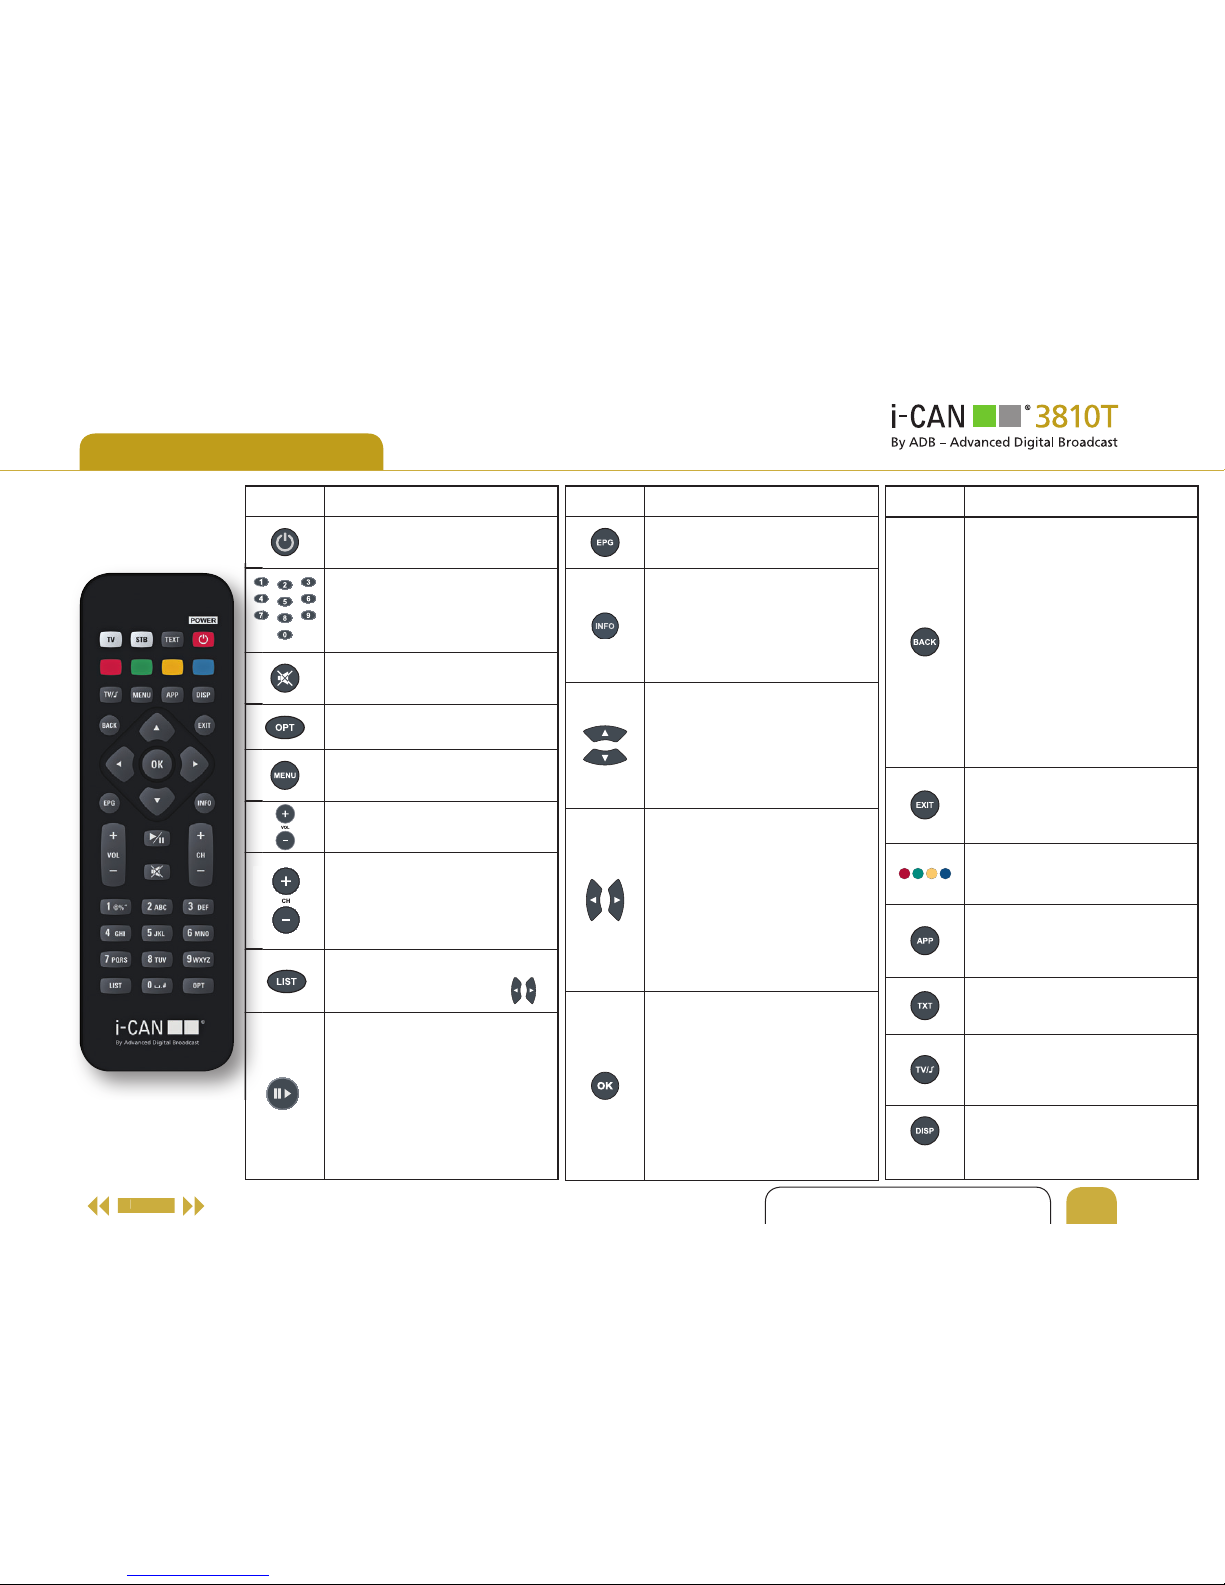
REMOTE CONTROL
Displays Program Guide.
Switches between: Channel
Banner and Channel Banner
with Extended Information.
In the Menu screens, displays
help texts.
In the Channel Banner,
they scroll channel information
up/down while the receiver
remains tuned to the current
channel. In the Menu,
highlight items.
In the Channel Banner, they
switch between the current
program information and the
next program information. In
the Menu, changes settings.
In ‘Pause TV’ LEFT rewinds the
recorded content, while RIGHT
fast-forwards it.
Selects the currently
highlighted item or confirms
choices. In ‘Pause TV’ mode
(where you may be watching a
program some time after it was
transmitted) you may press this
button to catch up with the live
broadcast.
In viewing mode, alternates
between the current and
previous program. In the
Menu, returns to the previous
screen. In ‘Pause TV’ mode
(where you may be watching
a program some time after it
was transmitted), you may press
this button to switch ‘Pause
TV’ off and catch up with live
broadcast.
Returns to normal viewing.
Used in external applications.
Displays window with
interactive applications.
Displays teletext if available.
Switches between TV and
Radio mode.
Changes the video resolution.
Button Action
Switches your receiver between
standby and operating modes.
Number buttons allow you to
select channels or input a PIN
code. The default PIN code
is 1234.
Mutes the sound.
Displays the Program Options
menu.
Displays the Menu screen.
Increases/decreases audio
volume.
In viewing mode, or in the
Channel Banner, tunes to the
next/previous channel. In the
Channel List, they scroll up or
down the list page.
Displays the Channel List.
Select the list by pressing
During normal viewing switches
to ‘Pause TV’ mode where you
can delay a program when you
want and catch up later. Press
again in ‘Pause TV’ mode to
stop the program. Press once
more to resume watching from
the paused position.
Button Action Button Action