i-Life V7s User manual
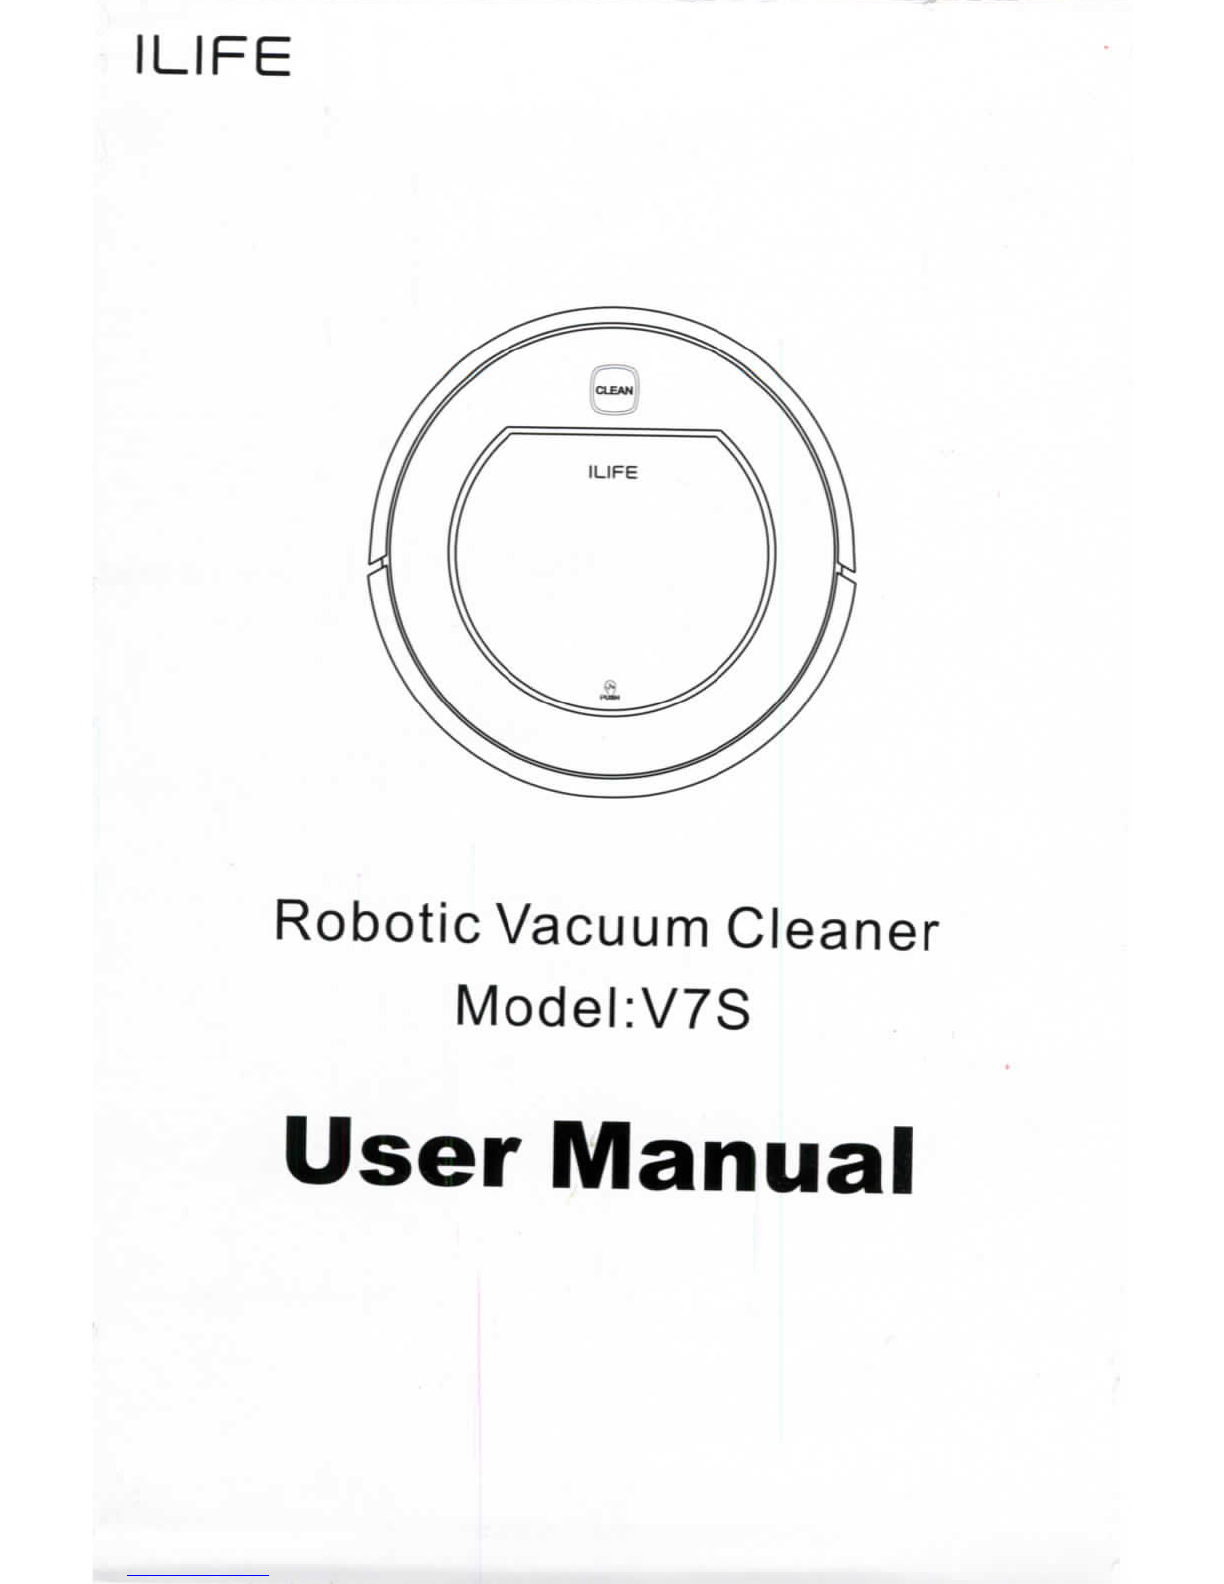
ILIFE
RoboticVacuumCleaner
Model:V7S
UserManual
Table
of
Contents
Safety
Instructions
1
ProductIntroduction
2
Robot
anatomy
2
Charging
base
3
Remote
Control
4
LightIndications
4
ProductOperating
5
Switch
On/Select/Sleep
5
Schedule
Clean
5
CleanModes
6
ChargingOperation
7
Remote
Control
Operation
• 8
Wet
Mopping
9
ProductMaintaining
10
Cleaning
the
brush
andMop
Cloth
10
Cleaning
the
dustbin
and
filters
10
Cleaning
cliff
sensors
and
charging
pins
11
Troubleshooting
12
Errorcodesheet
12
ProductSpecifications
•*
13
Product
Part
List
14

Safety
Instructions
Before
using
this
product,
please
read
the
following
safety
instructions
and
follow
all
normal
safety
precautions.
•
Before
using
this
product,
ensure
the
power
switch
isON.
•Ifthe
product
isnot
used
for
long
time,
please
turn
offthe
switch
on
bottom
ofthe
main
body.
WARNING
1.
Only
the
certified
technician
may
disassemble
the
product.Users
arenot
allowed
to
disassemble
or
repair
the
product.
2.
Only
usethe
adapterprovided
bythe
factory.Usingother
un-matched
adapter
may
cause
electricshock,fire
or
productdamage.
3.Donot
touch
the
powercord,plug
or
adapterwhenyourhands
are
wet.
4.Donot
makeclothes
or
part
ofa
bodydrawninto
the
product'swheels.
5.
Donot
makethisproductclose
to
cigarette,lighter,match
orany
flammables.
6.
If
the
product
is
needed
to
clean,clean
it
aftercharging
is
stopped.
7.Donot
over-bend
the
powercord
or
pressure
the
power
cordwithheavy
or
sharp
objects.
8.
Thisproduct
is
usedonlyindoors,
donotuseit
outdoors.
9.Do
not
sit
on
top
of
this
product
or
attach
an
object
on
the
top
ofit.
10. Do not use
thisproduct
in wet or
moistenvironment(anyenvironmentwith
liquid).
11.
Beforeuse,collect
the
floorenvironment(remove
allthe
fragileobjects
and
cords,
clothings
papers
and
drapes,
etc
that
mayget
caught
inthe
product).
12.Dono
place
this
productwhere
itis
easy
to
drop
off
(tables,chairs,etc).
13.
Turn
offthe
powerswitchwhen
you
don'tneed
touse
thisproduct
fora
long
time.
14.
Beforeuse,checkwhetheradapter
and
outlet
are
properly
connected.
15.
To
avoid
tripping,
inform
allthe
people
inthe
housewhenthisproduct
is
working.
16.
The
product
may
not
be
able
to
pass
throughstepsover10mm.
17.Use
thisproduct
in
temperaturefrom
-10°to
40°(centigradedegree)
anddonot
place
this
product
in
high-temperature
environment.
18.
The
batterymust
be
removedfrom
the
productbefore
itis
scrapped.
19.The
product must
be
disconnectedfrom
the
supplymainswhenremoving
the
battery.
20.The
battery
istobe
disposed
of
safety.
NOTE:
pleaseensurethere
is
people'sinstructwhenchildren,
disabled/mentally
challengedperson
useit.
1

Product
Introduction
Robotanatomy
Bumper
CLEAN
Button
MiddleCover
Push
Button
Cliff
Sensors
Auto
ChargingPins
Battery
Cover
Right
WheelModule
Power
Switch
Nose
Wheel
Side
Brush
TurboBrush
Left
WheelModule
Bottom
Cover
Middle
Cover
Dust
Bin/Water
Tank
Power
Supply
Socket

Product
Introduction
Efficient
filter
Water
input
hole
watertank
Primary
Filter
Dust
Bin
RubberPlug
Handle
Mop
Cloth
Chargingbase
TransparentCover
Housing
Removable
Mop
Bracket
SignalLight
ChargeConnectingPoint
PowerSupplySocket
Product
Introduction
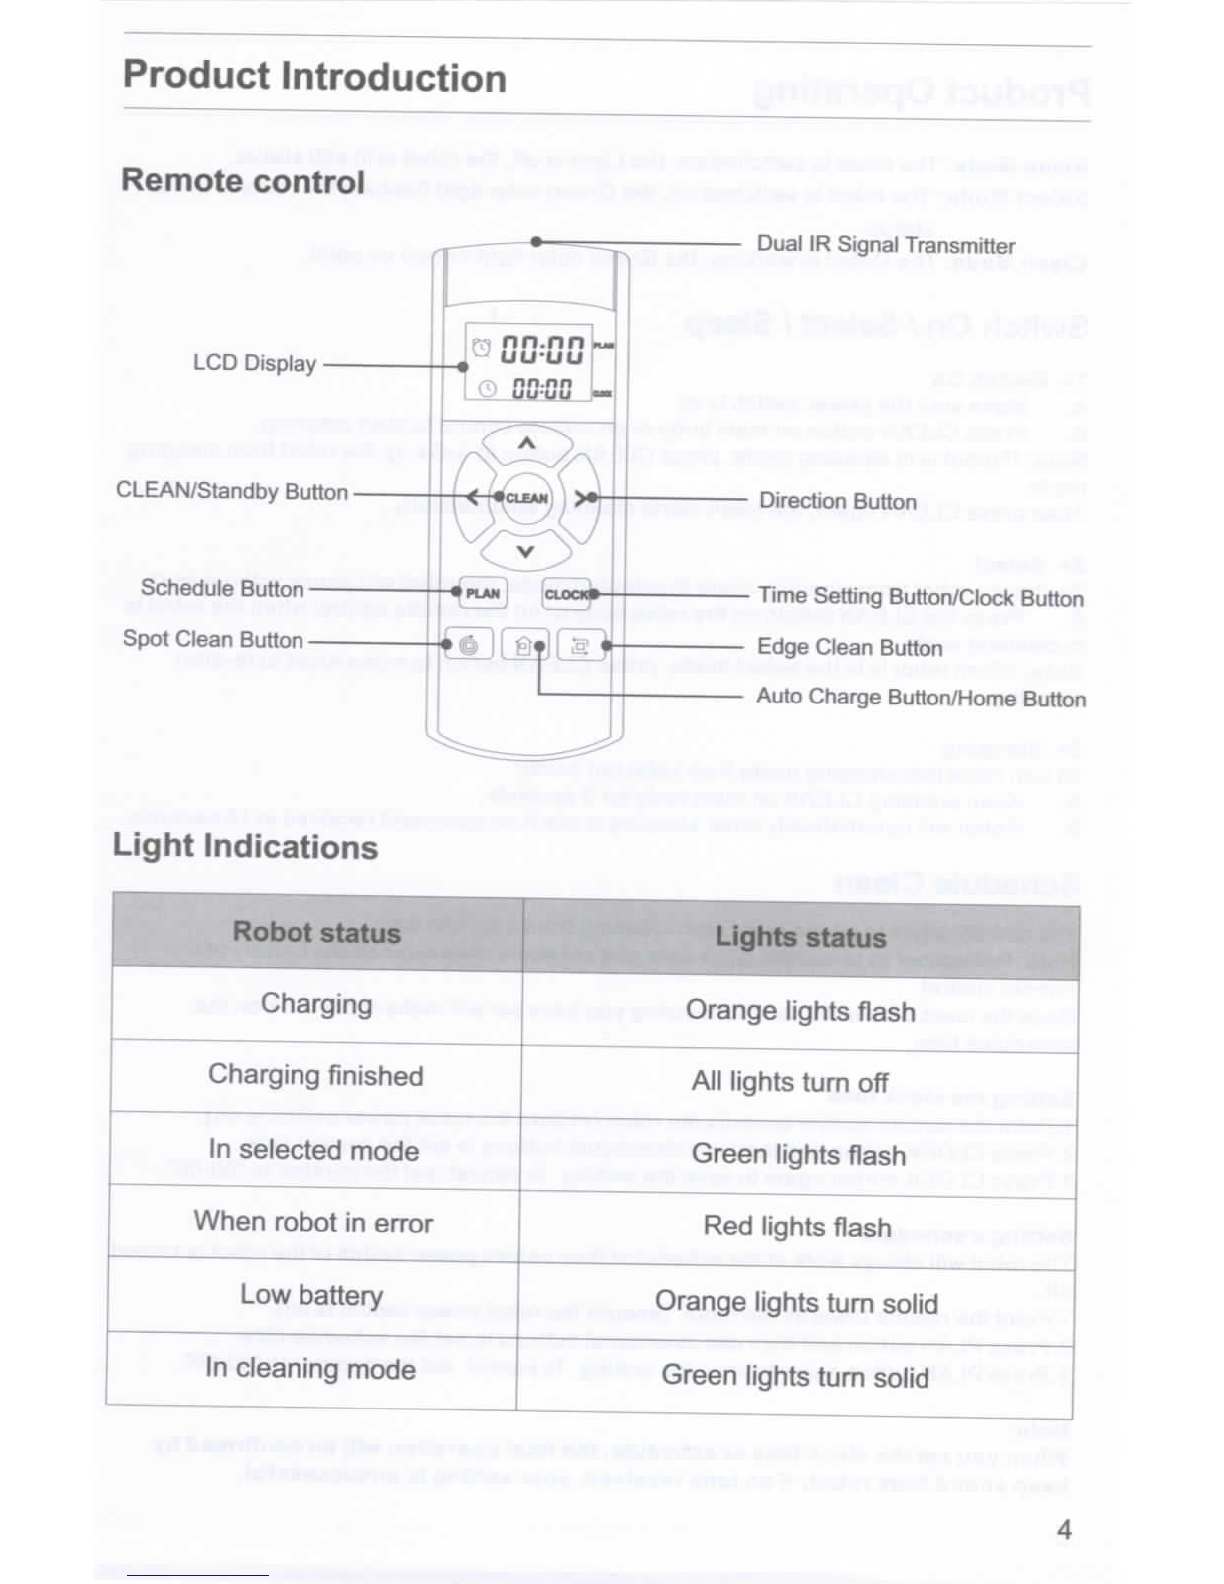
Remote
control
LCD
Display
CLEAN/Standby
Button
Schedule
Button-
Spot
Clean
Button
nn.nn
uu-uu
Dual
IR
Signal
Transmitter
Direction
Button
Time
SettingButton/ClockButton
Edge
Clean
Button
Auto
Charge
Button/Home
Button
Light
Indications
Robotstatus
Charging
Charging
finished
In
selectedmode
When
robot
in
error
Low
battery
In
cleaning
mode
Lights
status
Orange
lights
flash
All
lightsturn
off
Green
lights
flash
Red
lightsflash
Orange
lightsturnsolid
Green
lightsturnsolid

ProductOperating
Steep
Mode:
The
robot
is
switched
on,the
Light
is
off,
the
robot
isin
stillstatus.
SelectMode:
The
robot
is
switched
on,the
Greencolor
light
flashes;
the
robot
isin
still
status.
Clean
Mode:
The
Robot
is
working,
the
Greencolor
light
turned
on
solid.
Switch
On/
Select
/
Sleep
1>.
Switch
On
A.
Makesure
the
powerswitch
ison
B.
PressCLEANbutton
on
mainbody
or on
remotecontrol
to
startcleaning.
Note:
If
robot
isin
sleepingmode,pressCLEANbutton
to
wake
upthe
robotfromsleeping
mode.
ThenpressCLEANagain,
the
robotstartscleaningautomatically.
2>
Select
To
change
robotfromcleaningmode
to
selectedmode,
the
robotwillpausewithout
work
A.
Press
the
CLEANbutton
onthe
robotbody
oronthe
remotecontrolwhen
the
robot
is
in
cleaningmode
Note:
Whenrobot
isinthe
selectmode,press CLEANbutton
to
makerobot
to
re-start
cleaning.
3>.
Sleeping
To
turnrobotintosleepingmodefromselectedmode:
A.
Keep pressing
CLEAN
on
mainbody
for3
seconds.
B.
Robot
will
automaticallyentersleepingmode
ifno
commandreceived
in
15
seconds.
Schedule
Clean
You
can
schedule
toletthe
robotstartcleaningfrom
a
certain
time.
Note:Remember
to
re-set
the
clock
time
and
scheduleoncereplace
the
battery
ofthe
remotecontrol.
Once
the
clocktime
is
set,
any
scheduling
you
have
set
willmakerobot
work
onthe
scheduledtime.
Setting
the
clocktime
1
.Point
the
remotecontrol
towards
the
robot(ensure
the
robotpowerswitch
is
on).
2.Press
CLOCKbutton
and
then
use
directionalbuttons
tosetthe
correcttime.
3.Press
CLOCKbuttonagain
to
save
the
setting.
To
cancel,
setthe
number
to
"00:00".
Setting
a
schedule
The
robot
will
alwayswork
atthe
scheduledtimeunlesspowerswitch
ofthe
robot
is
turned
off.
1
.Point
the
remotetowards
the
robot,
(ensure
the
robotpowerswitch
is
on).
2.Press
PLAN
button
and
then
use
directionalbuttons
tosetthe
schedule
time
3.Press
PLAN
button
again
to
save
the
setting.
To
cancel,
set
the
number
to
"00:00".
Note:
When
you
set
the
clocktime
or
schedule,
the
final
operationwill
be
confirmed
by
beepsoundfromrobot;
ifno
tonereceived,yoursetting
is
unsuccessful.
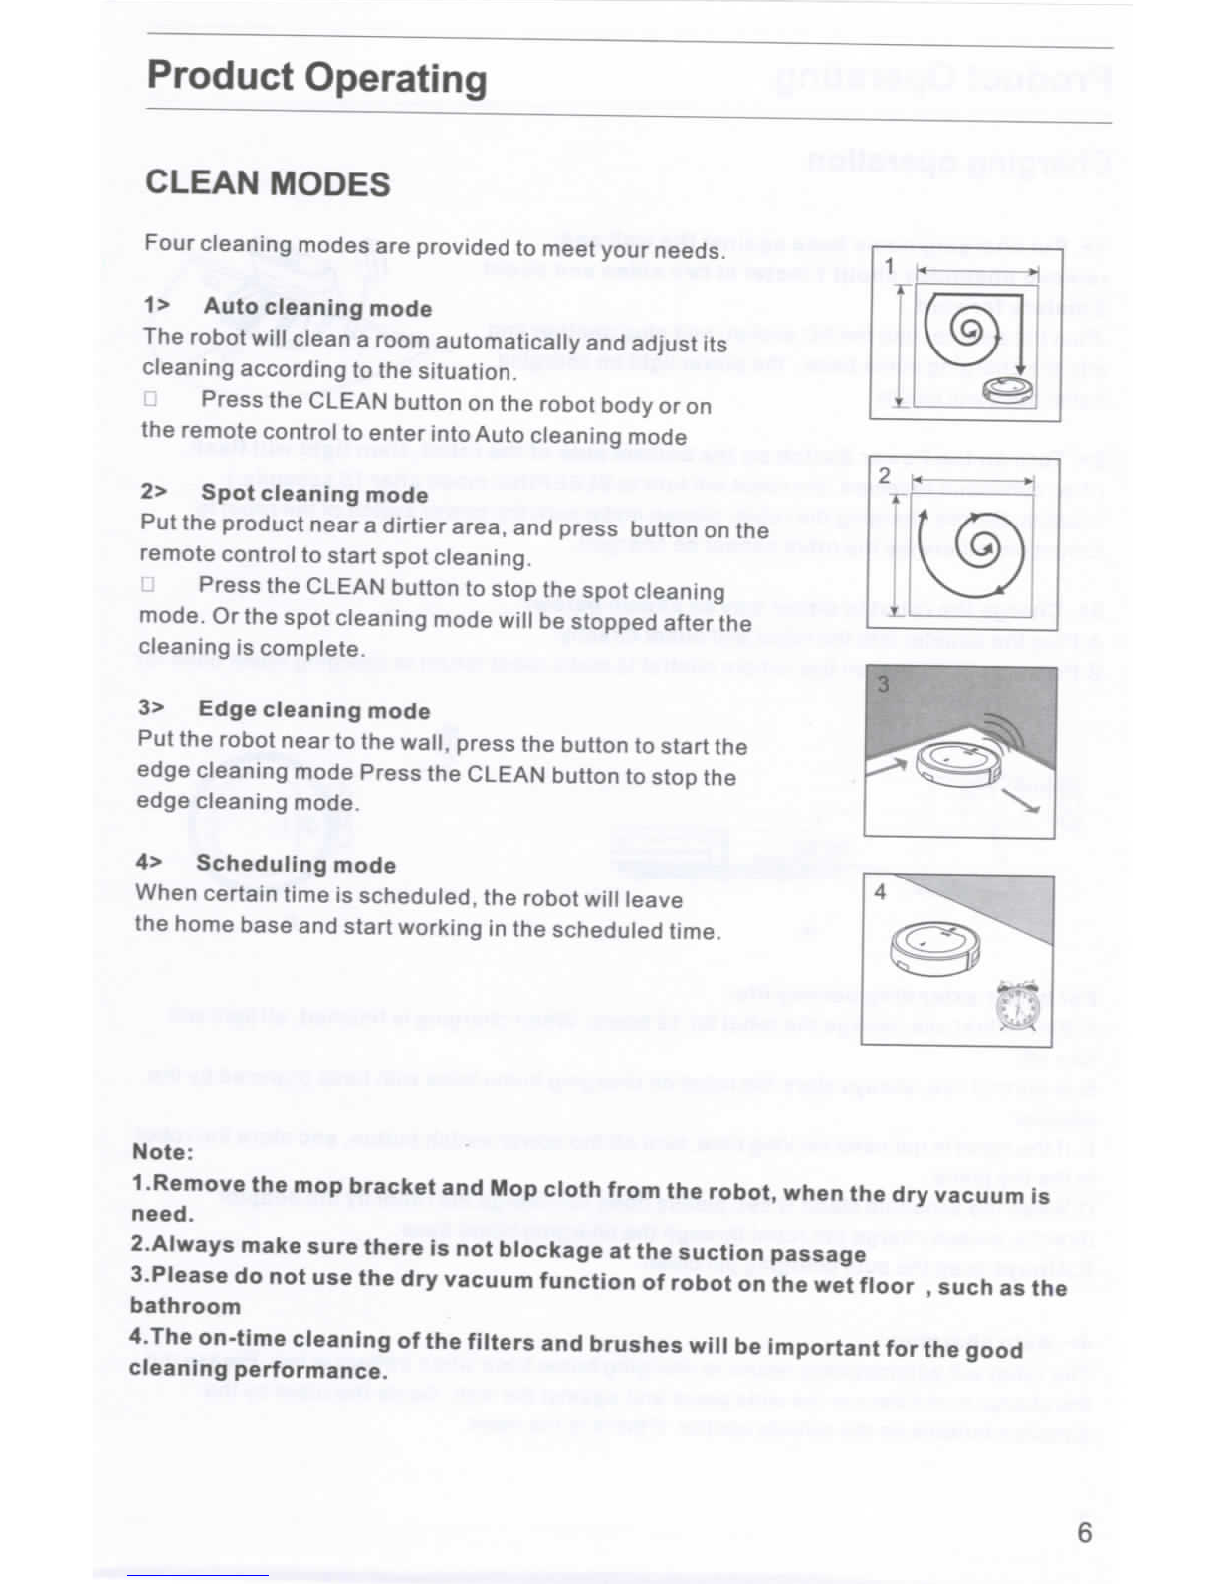
Product
Operating
CLEAN
MODES
Four
cleaning
modes
are
provided
to
meetyourneeds.
1
>
Autocleaningmode
The
robot
will
clean
a
roomautomatically
and
adjust
its
cleaningaccording
tothe
situation.
Press
the
CLEANbutton
onthe
robotbody
oron
the
remotecontrol
to
enterintoAutocleaningmode
2>
Spot
cleaning
mode
Putthe
productnear
a
dirtier
area,
and
pressbutton
onthe
remote
control
to
start
spot
cleaning,
Press
the
CLEANbutton
to
stop
the
spotcleaning
mode.
Orthe
spot
cleaning
mode
will
be
stopped
after
the
cleaning
is
complete.
3>
Edgecleaningmode
Put
the
robotnear
tothe
wall,press
the
button
to
start
the
edgecleaningmodePress
the
CLEANbutton
to
stop
the
edge
cleaning
mode.
4>
Scheduling
mode
When
certain
time
is
scheduled,
the
robot
will
leave
the
homebase
and
startworking
inthe
scheduled
time.
Note:
1.Remove
themop
bracket
andMop
clothfrom
the
robot,when
thedry
vacuum
is
need.
2.Always
makesurethere
isnot
blockage
atthe
suction
passage
3.Please
donotusethedry
vacuumfunction
of
robot
onthewet
floor
,
such
asthe
bathroom
4.The
on-time
cleaning
ofthe
filters
and
brusheswill
be
important
forthe
good
cleaningperformance.
6

Product
Operating
Charging
operation
1>.
Put
charginghome
base
against
the
wall
and
remove
obstaclesabout
1
meter
attwo
sides
and
about
2
metersforward.
Plug
the
adapter
into
the
AC
socket,
and
plug
another
end
into
the
charginghomebase,
the
powerlight
on
charging
homebase
will
beON
2>.
Turn
onthe
PowerSwitch
onthe
bottomside
ofthe
robot,thenlightwillflash.
(Ifno
commandreceived,
the
robot
will
turn
to
SLEEPINGmodeafter
15
seconds.)
Caution:Beforecharging
the
robot,pleasemakesure
the
powerswitch
ofthe
robot
is
turned
on,
otherwise
the
robot
cannot
be
charged.
3>.
Charge
the
robot
in
either
wayas
shownbelow:
A.Plug
the
adapterinto
the
robot
and
outletdirectly;
B.Press
on
JL
button
onthe
remotecontrol
to
makerobotreturn
to
charginghomebase
for
For
better
extending
battery
life:
A.Before
firstuse,charge
the
robot
for12
hours.Whencharging
is
finished,
all
lightwill
turnoff.
B.ln
normaluse,alwaysstore
the
robot
on
charginghomebasewithbasepowered
bythe
adaptor
C.
Ifthe
robot
isnot
used
for
longtime,turn
offthe
powerswitchbutton,
and
store
the
robot
inthedry
place
D.When
the
schedule
clean
is
set,
please
does
not
charge
the
robot
bythe
adaptor
directly,pleasecharge
the
robotthrough
the
charginghomebase.
E.Always
keep
the
autocharging
pin
clean.
4>.
Autocharging
The
robotwillautomaticallyreturn
to
charginghomebasewhenbattery
is
low.
Please
put
the
chargehomebase
inthe
wideplace
and
against
the
wall.
Guide
the
robot
bythe
direction
buttons
onthe
remote
control,
if
there
isthe
need.

Product
Operating
Remote
control
operating
1."Jf$r
Clean
Press
thisbutton
to
startcleaning
in
selectedmode
Press
this
button
to
make
the
robot
stop
when
it's
cleaning.
Pressthisbutton
to
exchange
from
sleepingmode
to
selectedmode.
2.
Directional
Buttons
A.
"A"
button:
Press
this
button
to
increase
number
in
scheduling
or
clock
mode;
Pressthisbutton
to
makerobotmove
forward
in
selectedmode
or
make
robot
stop
whenrobot
is
movingforward.
B.
"Y"
button:
Press
thisbutton
to
decreasenumber
in
scheduling
or
clockmode.
Press
to
makerobotmovebackward
for
little
step
in
selectedmode.
C.
"^
"button:
Pressthisbutton
to
exchangefromminute
to
hour
in
scheduling
or
clockmode;
Press
to
make
the
robotturnaround
inthe
selectedmode
D.
"*"
button:
Press
thisbutton
to
exchangefromhour
to
minute
in
scheduling
or
clockmode;
Press
this
button
to
makerobot
turn
right.
3.
"««)"
Plan
Press
this
button
to
enterschedulingmodewhen
in
selectedmode.
Pressthisbutton
to
confirmscheduling
in
schedulingmode.
4.
"BW
Clock
Press
thisbutton
to
enterclockmodewhen
in
selectedmode.
Press
thisbutton
to
confirmclock
settin
gin
clockmode.
5.
"@?t"
Home
Press
thisbutton
to
returnrobot
to
char
g'n
ghome
base.
6.
";Si2"
Edge
Press
thisbutton
to
makerobotcleanalong
wall.
7.
"KfS"
Spot
Press
thisbutton
to
makerobotstartspotcleaning.
Shows
the
schedulingtime.
Shows
the
clocktime.
Note:
1.
Install
twoAAA
/R03
typebatteriesinto
the
remotecontrol.
2.
Take
outthe
batteries
ifthe
remotecontrol
isnot
used
for
longtime.

Product
Operating
Wet
Mopping
(drawl)
(draw
2)
(draw
3)
(draw
4)
I.Dry
clean
is
made
with
dust
bin,
andwet
clean
is
made
with
water
tank.
2.The
mop
bracketwith
mop
should
beonthe
robotwhen
the
watertank
is
used.(draw
1)
3.
Pouring
the
cleanwaterinto
the
watertank(draw
2)
4.Open
the
robot
lidandputthe
watertankinto
the
body,
the
weephole
ofthe
watertank
should
be
aligned
with
the
weephole
onthe
robot
body,
(draw
3)
5.Close
the
robotlid,press
"CLEAN"
button
to
start
thewet
cleaning.There
isno
vacuum
suctionfunctionduring
thewet
cleaning
(draw
4)
6.When
the
robotvacuumcleaner
is
stoppedwithwatertankinside,
or
when
thewet
cleaning
is
completed,please
takeout
the
watertank
andpouroutthe
water,thenstore
the
watertankproperlyafter
the
watertank
is
empty.
7.It
is
suggest
to
make
the
suction(dryclean)before
wet
mopping
fora
bettercleaning
result
8.The
water
inthe
watertank
is
flow
out
automatically,
soitis
prohibited
tolet
watertank
be
still
inside
or
outside
ofthe
robotwhenthere
is
still
water
inthe
tank.This
will
cause
the
water
logging
on
floor.
9.
Pleasetake
outthe
water
tank
when
you
charge
the
robotvacuumcleaner
9

Product
Maintaining
Clean
the
brush
andmop
cloth
When
they
are
dirty,cleanside
brush,
turbobrush
and
cloth;
Whenthey
are
damaged,replace
the
brushes
and
cloth.
•
Pressturbobrushcoverbuckle
inthe
bottom
ofthe
robot,remove
it
to
clean.
•
Holdbracketoutwardfromrobot.Wheninstallation,
fixthe
bracket
onthe
robot,with
the
fourfeet
on
bracket
tothe
fourroundholes
atthe
bottom
ofthe
robot
,
pressdown
and
can
complete
the
installation.
Cleaning
the
dust
binand
filters
Note:
Ifyou
need
to
pick
upthe
robot,
pleaseturndisplaypanel
side
upwards
to
avoid
dusts
leaking
out.
A.
PressPUSHmark
to
open
the
middlecover
lid
B.
Take
outthe
dustbin.
C.You
couldopendust
bin
cover
and
remove
the
filters;
ordonot
open
the
dustbin,
dump
the
trashfromdust
bin
sides,
D.
Dump
the
trash
and
clean
the
filterswithcleaning
tool.
Note:
Check
ifthe
suctionpassage
onthe
robot
is
clean,
or
clean
it.
E.
Wash
the
dust
binand
filterswithcleanwater.
F.
Install
the
filters
into
dust
binand
Install
the
dust
bin
into
robot.
Note:
•
Ensure
the
filters
aredry
before
install
it
into
dust
bin.
•Donotdrythe
filters
inthe
sun.
Donot
squeeze
the
filters
•Drythe
filterswithcloth
orinthe
air.
•
Bothefficientfilter
and
primaryfilters
are
replaceable.
Itis
suggested
to
clean
the
filters
every
15-30
days,
or
depending
onthe
actualsituation.
3
10

ProductMaintaining
Cleaning
cliff
sensors
and
charging
pins
Slightly
wipe
the
sensorwindow
and
autocharging
pins
withcleaningtool
ora
soft
dry
cloth.
Note:
Charge
connecting
points
on
charginghomebase
need
to
clean
if
dirty.
ChargeConnectingPoints
ChargeConnectingPoints
Cliff
Sensors
Auto
charging
pins
Cliff
Sensors
Cliff
Sensors
Auto
charging
pins
Cliff
Sensors
11

Trouble
Shooting
Error
codesheet
When
the
robotmeetswithsomeroutinetroubles,
it
willremind
youby
beep.
•
Shorttone
NO.
01
02
03
04
05
Tone
•
••
•
••
•
•••
•
••••
Cause
Wheels
or
sidebrushes
no
work
Cliff
sensor
or
bumper
sensor
failure
Mainbodygetsstuck
Turbobrush
no
work
Lack
of
Dust
Bin
Solution
Check
wheels
or
side
brushes
Clean
cliff
sensor
and
checkbumpersensor
Movemainbody
and
start
again
Check
turbobrush
Check
ifthe
dust
binisput
inside
the
robot,Check
if
the
Filter
isput
inside
the
dust
bin.
Note:
Ifall
abovesolutionsdon'twork,
please
takebelowactions.
1.
Re-set
the
robot
by
re-turning
onthe
power
switch
onthe
bottomside;
2.
If
re-set
action
doesn't
work,
please
send
the
robot
to
seller
for
repairing.
12

ProductSpecifications
Classification
Mechanical
Specifications
Electrical
Specifications
Cleaning
Specifications
Item
Diameter
Height
Weight
Powervoltage
Batteryspecifications
Dust
bin
capacity
Charging
type
Cleaningmode
Charging
time
Cleaning
time
Main
BodyButtonType
Detail
340mm
80mm
2.95kg
14.8V
Li-ion2600mAh
0.4L
Auto
Charging/
Manual
Charging
Auto,Spot,Edge,
Daily
Schedule,
Wet
SOOmin
at
maximum
120-150min
Touch
button
Note:
Productstoragetemperature:
-10°to40°(centigrade).
13

Product
PartList
Main
body
and
accessories
NOj
1
2
3
4
5
6
7
8
9
10
Description
Main
Body
ChargingHomeBase
Remote
Control(battery
not
included)
Adapter
Cleaning
Tool
UserManual
ExtraSide
Brush
Cloth
Filters
Water
Tank
Q'ty
1
1
1
1
1
1
1
1
2
1
8
9
10
14

Table of contents
Other i-Life Vacuum Cleaner manuals


