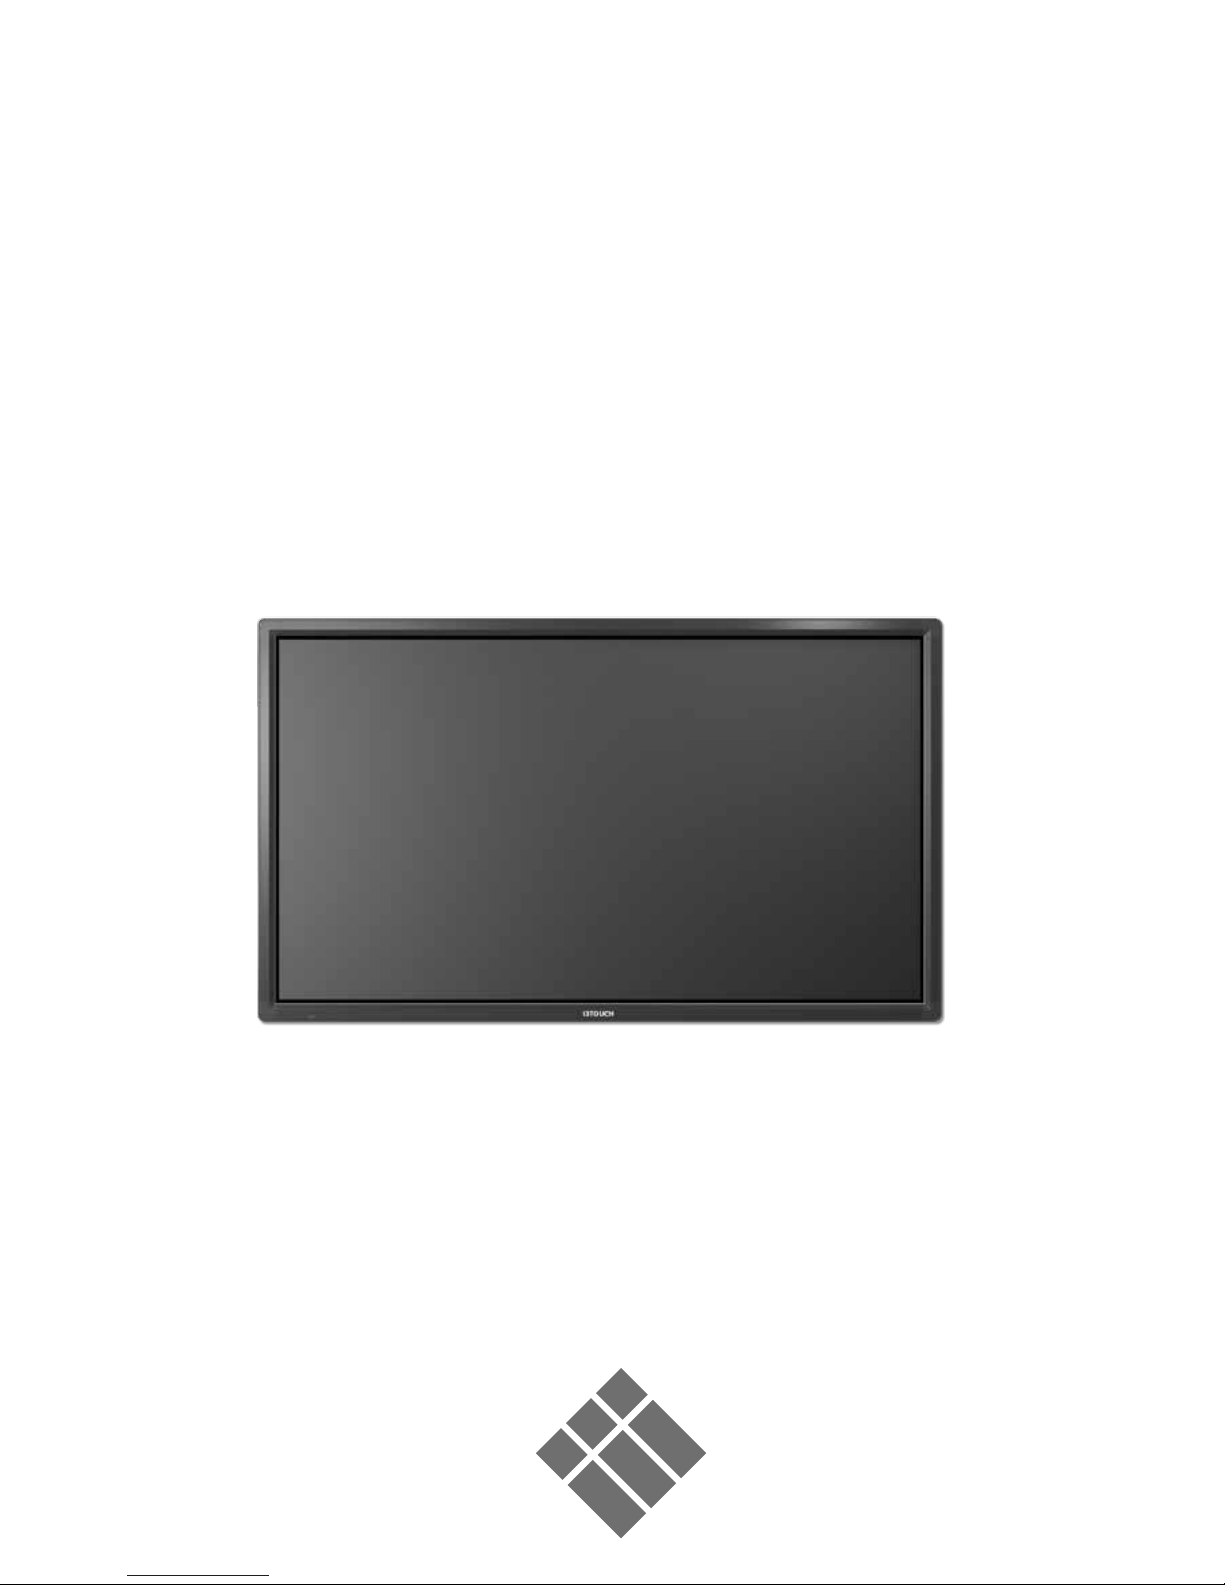
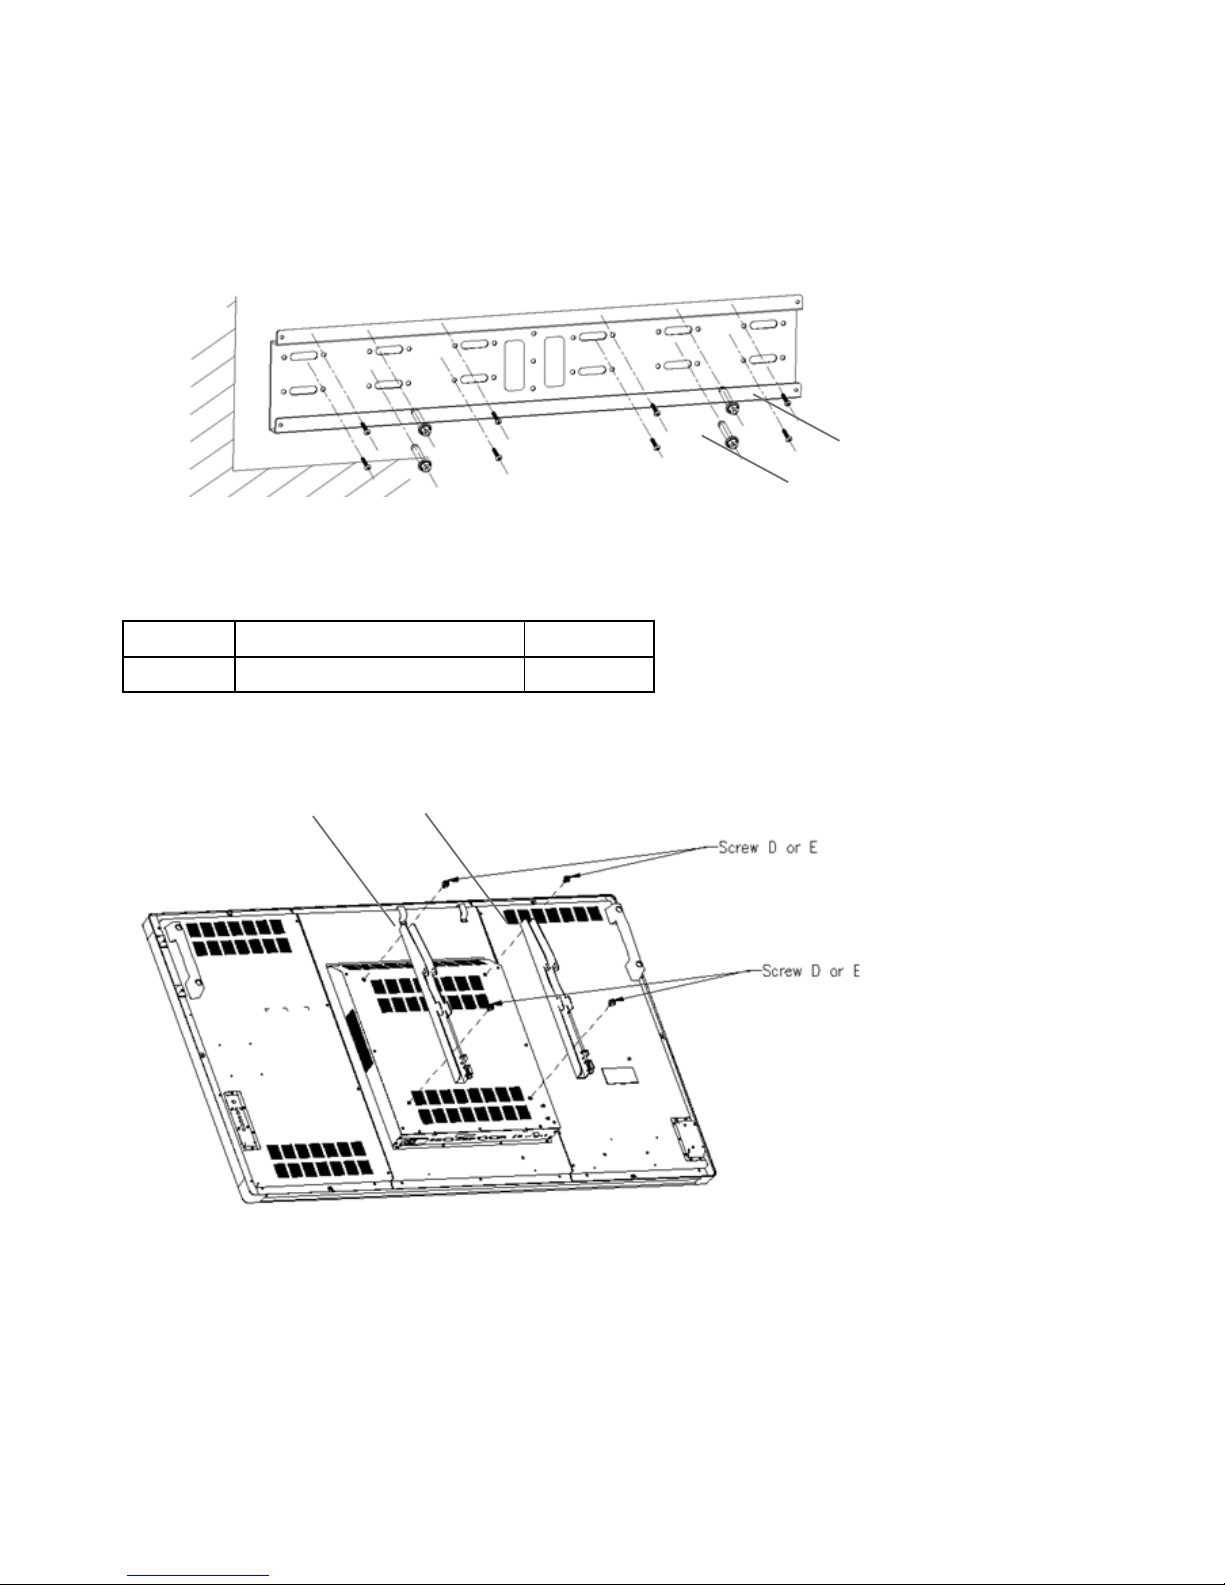
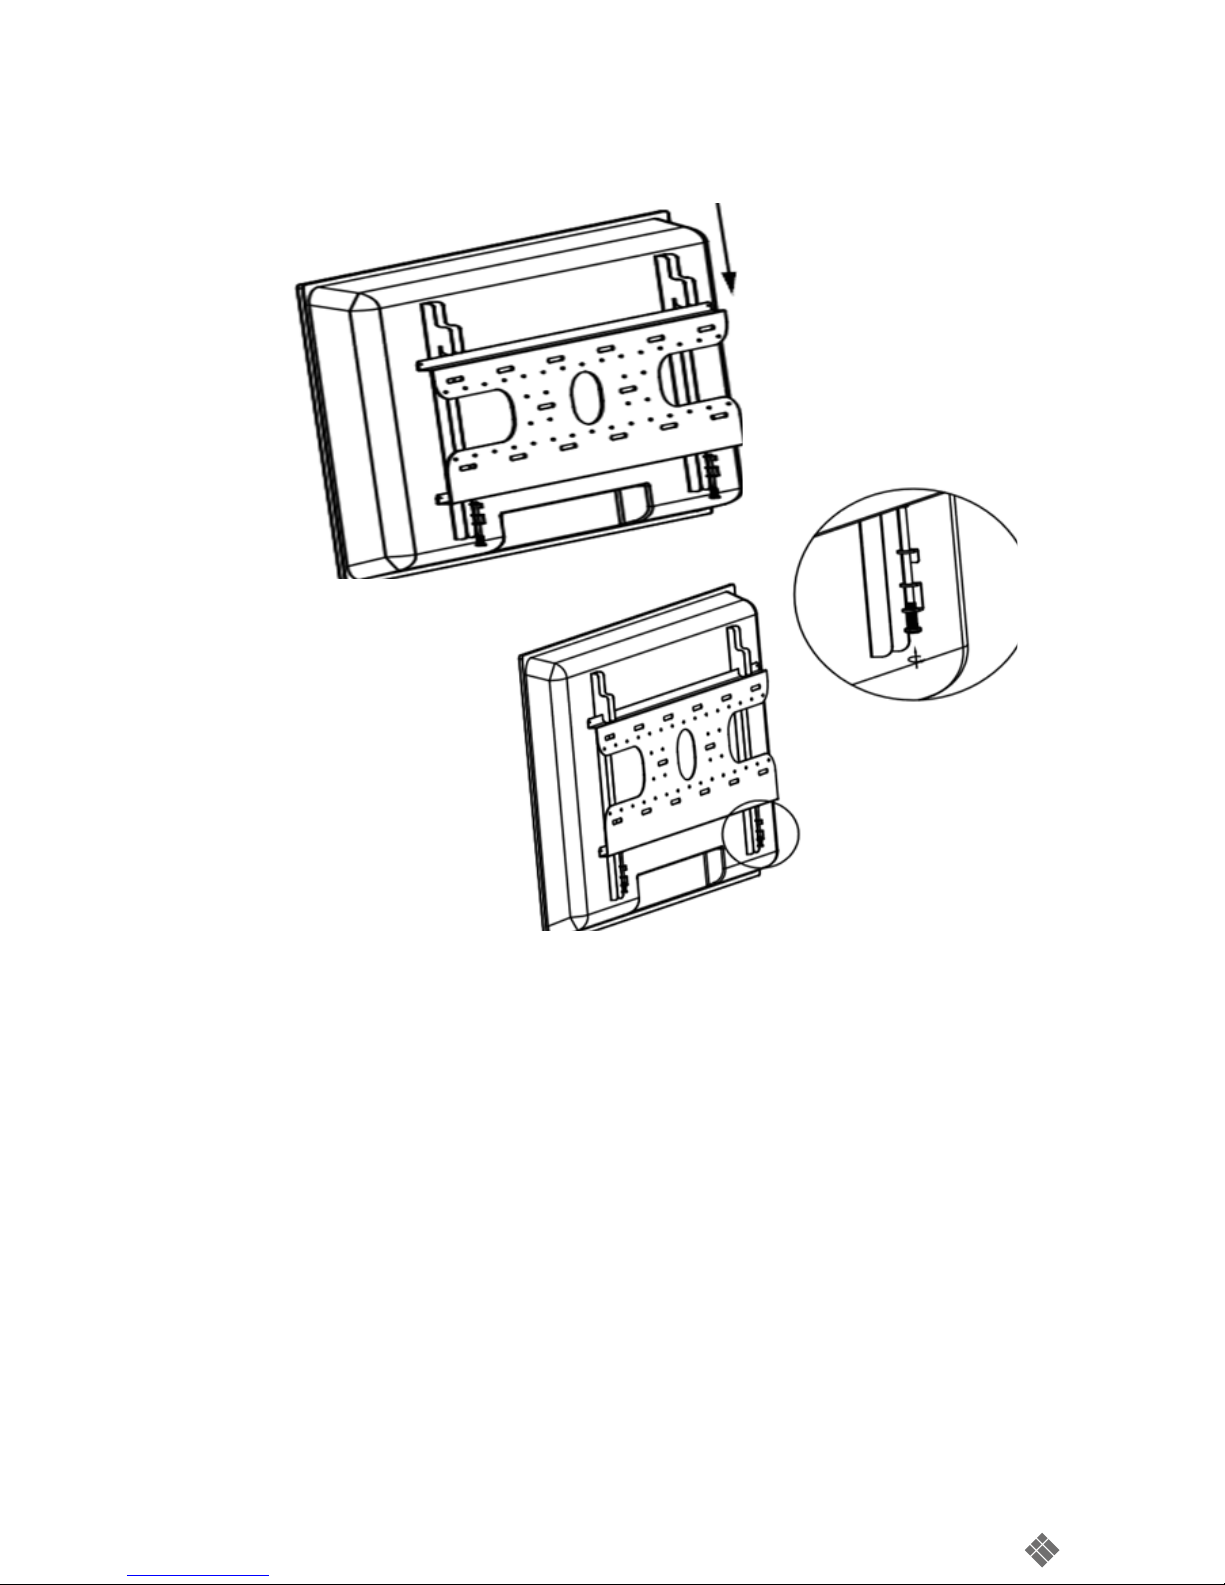
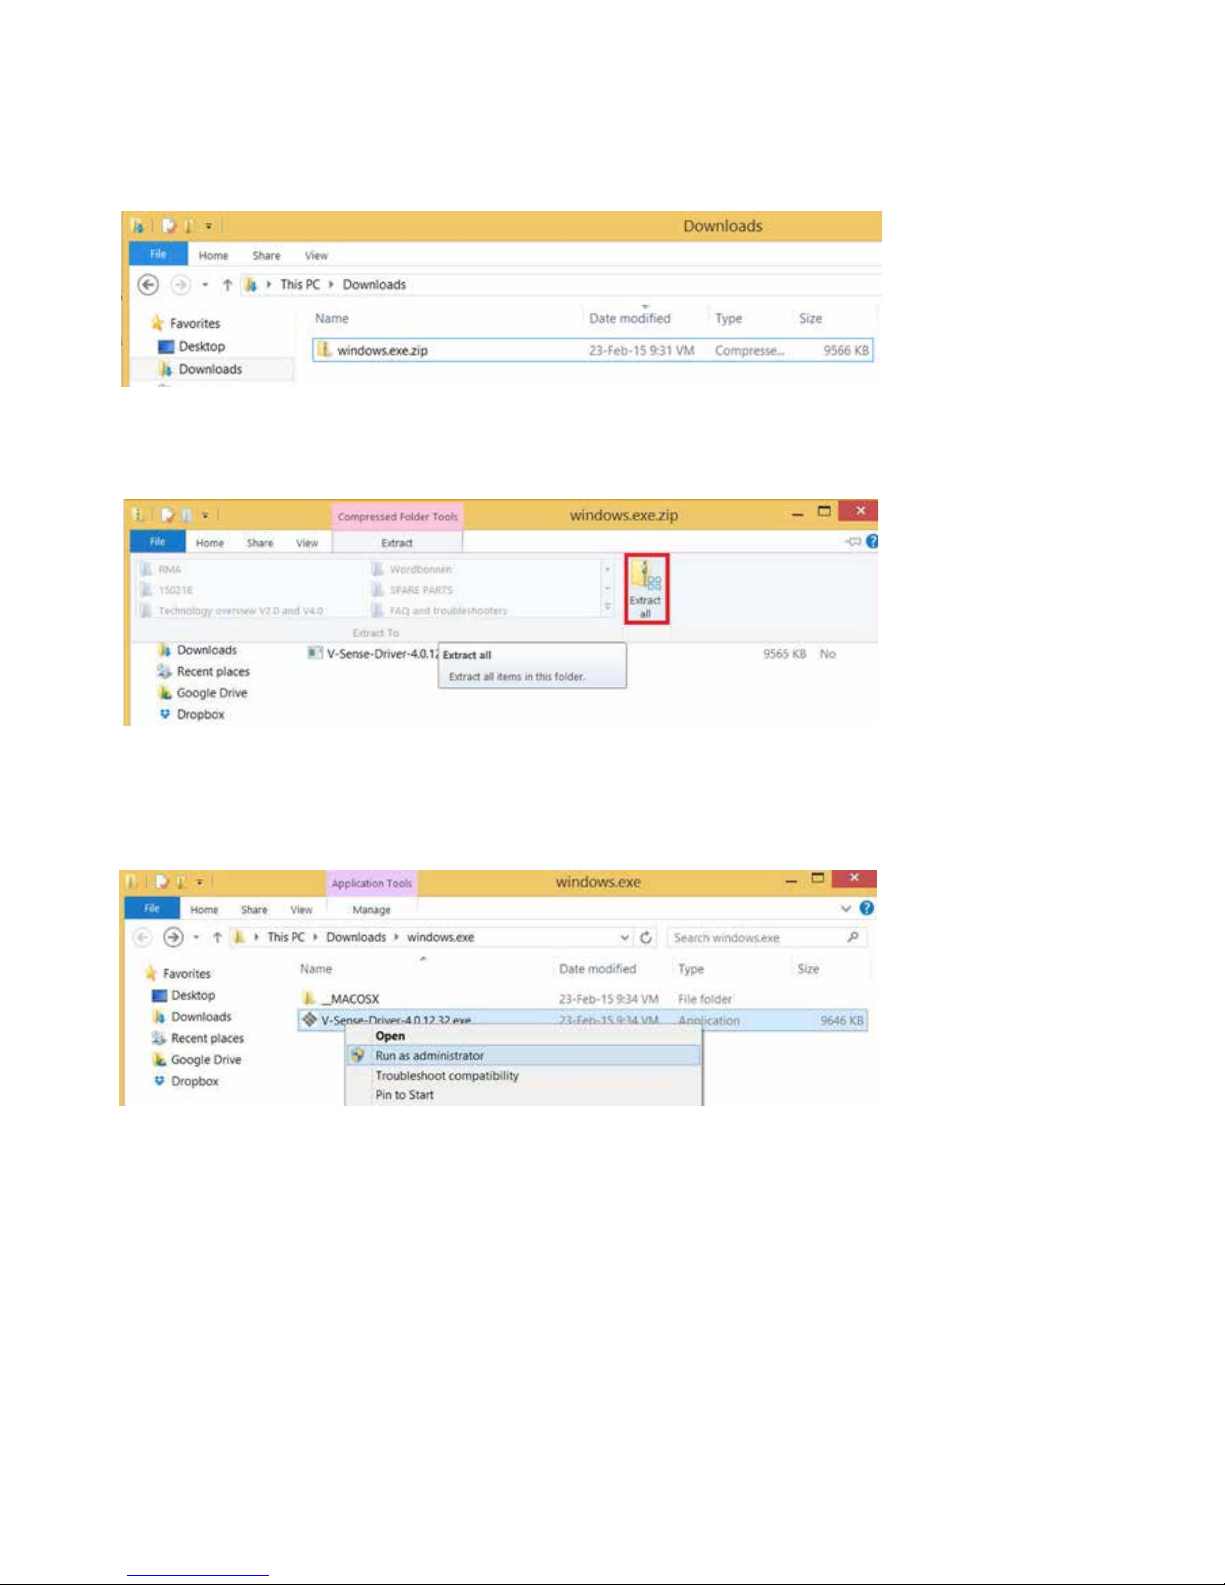
i3TOUCH Excellence User manual

i3TOUCH Excellence
Installation guide
Version 3.5.1

I 42”~ 70” Wall mount Installation Guide
Step 1 : Choose the siding appropriate for mounting.
• The thickness of siding is 5 cm at least or above.
• Please conrm the material and strength of the wall is appropriate to mounting.
• Use the expansion bolts (A) or wood screw (B) to x the hanging bracket (C) on the wall.
Step 2 : Mounting the hanging plate (C) on the display.
• Please power o the display between mounting.
• Use screw to x the hanging plate (C) on the display.
Screw D M6*L20mm+spring washer, 4PCS For 42”~55”
Screw E M8*L20mm+spring washer, 4PCS For 65”~70”
Step 3 : Suspend the display on the hanging bracket.
• Two adult prop up the display.
• Put down the display slow on the hanging bracket.
• Please confirm the hook with hanging plate to be joined on the hanging bracket.
i3TOUCH EXCELLENCE Installation guide Version 3.5.1
2
A
B
CC

3

II 75”~84” Wall mount Installation Guide
Step 1 : Choose the siding appropriate for mounting.
• The thickness of siding is 5 cm at least or above.
• Please conrm the material and strength of the wall is appropriate to mounting.
• Use the expansion bolts (B) to x the hanging bracket (A) on the wall.
Step 2 : Mounting the hanging plate (C) on the display.
• Please power o the display between mounting.
• Use screw to x the hanging plate (C) on the display.
i3TOUCH EXCELLENCE Installation guide Version 3.5.1
4
A
B
S C R E W M8 x20mm + Spr i ng wa s h e r , 4 PCS

Step 3 : Suspend the display on the hanging bracket.
• Two adult prop up the display.
• Put down the display slow on the hanging bracket.
• Please conrm the hook with hanging plate to be joined on the hanging bracket.
5

V 65”~ 84” Stand Installation Guide
Step 1 Open the package and to take out the stand.
• Check the parts and that amount, please see the bellow picture.
i3TOUCH EXCELLENCE Installation guide Version 3.5.1
6
1 . Stand .1PCS 2 . Screw M8 L20mm+Washer . 4 PCS

Step 2 Mounting the display (A) on the stand.
• Use screw (B) to x the display on the stand (C).
VI 42”~84” Stand Assembly Guide
Step 1 Open the package and to take out the stand.
• Check the parts and that amount, please see the bellow picture.
7
A
c
B M8 L20mm+Washer 4pcs
1 Stand R case 1PCS. 2 Stand L case 1PCS. 3 Stand B case 1PCS. 4 Screw M4 L8mm 4PCS.

Step 2 Use screw (A) to x the stand (B) case between (B) and (C) .
i3TOUCH EXCELLENCE Installation guide Version 3.5.1
8
A
B
c
Stand B case

Appendix on i3TOUCH manual - touch configuration
1 Driver download
Go to the i3-learning website www.i3-learning.com and download the
latest drivers (products -> drivers -> i3TOUCH drivers)
2 Connecting the touch sensor
Connect the port indicated “USB touch” with the supplied USB cable to the computer. If there
are 2 USB-ports and one is indicated “USB for touch OPTION”, do not use this port as it is
disabled.
9

3 Installing the drivers
install the drivers you downloaded on the website (you will find the driver in the download folder
that has been set in your browser preferences).
The drivers are compressed in a .ZIP-file. When using windows 7 or higher: double click the file
and choose “extract all”. Extract the content of the folder on your PC.
Now click on the file “V-Sense Driver – x.x.xx.xx.exe” (version number depends on the
download date). If you cannot open the file, right click on the file and choose “run as
administrator”. Make sure you have installation rights.
i3TOUCH EXCELLENCE Installation guide Version 3.5.1
10

Run the installer and click 4 times “next” and finally “install”. If you can finish the installation, the
drivers will ask for a reboot. Reboot your computer to finish the installation.
If the installation was successful, skip step 4
4 What to check when drivers can’t be installed
Make sure the computer is USB-connected to the display when installing the drivers. If the
display is not connected properly, you cannot finish the installation. The installer will ask you to
insert the device and try again.
11

If the display is connected properly but you cannot finish the installation, make sure the USBport
and cable are working & supplying sufficient power (see step 5). To check if the USB-port &
cable are working, first try another USB-port. Then try another computer and/or try another
short high quality USB-cable. Do not connect the i3TOUCH with your computer using multiple
USB-cables (see step 6). Unless you concluded after testing that it is defect, we advise only to
use the USB-cable delivered with the i3TOUCH. Prolonging the distance from i3TOUCH to PC
using multiple USB-cables can result in a loss of power and signal strength (data signal).
5 Power supply
The i3TOUCH needs around 5 volts to be recognized & work properly. The touch sensor is
powered via the USB-cable and the USB-port of your computer. In very seldom situations (!) a
i3TOUCH Premium XX03 (XX stands for display size) can have touch that shows strange
behavior such as random “ghost touch points” on locations where no finger or pen is located.
The I3TOUCH XX04 Premium and the i3TOUCH Excellence series require a lower voltage and
will therefore hardly be subject to power loss.
Strange behavior or a non-recognized touch sensor - when ports & connections were checked -
are mostly the result of a USB-port not supplying sufficient power, cables that are prolonged or
a single cable that is too long or not high quality. If you tried another cable and/or computer and
the problem is only encountered with one computer, use a powered USB-hub (a USB-hub with
its separate power supply providing a power boost to all USB-ports)
When you need to prolong the cable length to the i3TOUCH, use active USB extender cables.
See step 6.
i3TOUCH EXCELLENCE Installation guide Version 3.5.1
12

6 USB-cabling of the i3TOUCH
Normally a computer and a i3TOUCH will communicate without any troubles if only the
delivered USB-cable is used. In some seldom cases however other cabling is necessary
because of insufficient power (see step 5) or because the PC is located away from the display.
Check if your installation setting matches with the below image. The active USB extender
cables (RED) are only used when cables need to be prolonged. The USB hub (GREEN) is only
used when the i3TOUCH is not getting sufficient power. See step 5.
7 Connecting the display (VGA/HDMI/DVI/DP)
Connect your computer with your display. If necessary, duplicate the image. The keycombination
to be used to extend your image depends on your computer brand. E.g. Dellcomputers:
FN+F5
13

Choose “duplicate” to see the computer image on both PC display and i3TOUCH, or “projector
only” to see the computer image only on the i3TOUCH.
Make sure the image shown on both your computer screen as on the i3TOUCH is full screen.
Prevent black borders left/right or top/bottom. This means there is a difference in resolution.
i3TOUCH EXCELLENCE Installation guide Version 3.5.1
14

If the image on the computer display or the i3TOUCH is showing black borders, go to “control
panel -> display -> screen resolution”. Choose the FHD (1920*1080) or 4K resolution
(depending on I3TOUCH). Then choose duplicate.
Now choose “advanced settings”. Choose the tab of your graphical card control panel. In this
field you should see the options display, refresh rate, rotation and scaling.
15

Click “display” and select the screen that needs to be scaled. Either your computer display (for
laptops called “built-in display”) or the monitor. Click “scaling” and choose “scale full screen”.
Then click “apply”. If necessary, have both scaled to full screen.
If you don’t manage to have both screens scaled full screen, the graphical card of your
computer or the drivers of this graphical card might need to be upgraded. As an alternative,
choose “projector only” in your display settings and only use the 2nd display (i3TOUCH). If you
prefer to use both computer display and i3TOUCH, move on to step 9 before heading to step 8.
8 Calibrating the I3TOUCH
Calibrate your i3TOUCH. The best method to calibrate is using the V-sense drivers. Go to start
-> all programs -> i3learning -> V-sense -> V-Sense Driver Configuration. If you have a
windows 8.1 computer, search for the V-sense driver in the search field of the start screen.
i3TOUCH EXCELLENCE Installation guide Version 3.5.1
16

Choose calibration and press on the 9 red circles with your finger (or the i3TOUCH pen to
increase accuracy) from the top left side to the bottom right side.
This concludes the calibration. Check if your i3TOUCH is calibrated well. If so, the display is
ready to be used. Before using the display, please check step 11. If you cannot calibrate the
display because of no touch, move to step 12.
If you calibrated the display but the calibration is not accurate, you can perform an extra
calibration using the Windows calibration tool on top of the V-sense calibration. Go to “control
panel” -> “tablet PC settings” (windows 7 / windows 8)
Now choose “calibrate and press with your finger on the black crosses
17

9 What to do if calibration is still inaccurate even after calibrating in V-sense & windows
If you calibrated using the V-sense drivers & windows calibration, if there are no black borders
on the PC screen or the i3TOUCH image but still the calibration is not accurate, go to “screen
resolution” (see step 7) and choose “extend” instead of duplicate and apply.
Now go to “control panel” -> “tablet PC settings” (windows 7 / windows 8)
Follow the on-screen instructions. Tap on the i3TOUCH when the below instructions are shown
on the display or press “enter” when you read the instructions on your computer screen only.
With this step you identify the i3TOUCH as the touch screen to be used in windows. Finish with
“escape”.
Touch the i3TOUCH and check if it recognizes touch, regardless to it’s accuracy. Then check
the accuracy of the touch. If not accurate, calibrate using the V-sense driver calibration. If still
not accurate after calibration, go to screen resolution and choose “duplicate” again to duplicate
your computer screen on the i3TOUCH.
i3TOUCH EXCELLENCE Installation guide Version 3.5.1
18

Calibrate again with the V-sense drivers and test the result. If the i3TOUCH is still not calibrated
fully accurately, the problem might be related to your computer graphical card or its drivers that
needs to be upgraded.
10 What to do if windows calibration does not start
Sometimes the Windows calibration cannot run because the i3TOUCH is already calibrated with
the V-sense driver. Remove the V-sense drivers using the uninstaller (unins000.exe) in the
folder “program files\i3 learning”.
Now go to “control panel” -> “tablet PC settings” (windows 7 / windows 8)
19

Choose “Setup”
Follow the on-screen instructions. Tap on the i3TOUCH when the below instructions are shown
on the display or press “enter” when you read the instructions on your computer screen only.
With this step you identify the i3TOUCH as the touch screen to be used in windows. Finish with
“escape”.
Now choose “calibrate and press with your nger on the black crosses
After having pressed on all the black crosses, the calibration is nished and the calibration
should be fully accurate. If this is still not the case, contact your i3DEALER. Keep in mind the
windows calibration tool only enables 7 touch points (windows 7 and higher).
i3TOUCH EXCELLENCE Installation guide Version 3.5.1
20
Other manuals for Excellence
3
Table of contents
Other i3TOUCH Interactive Whiteboard manuals