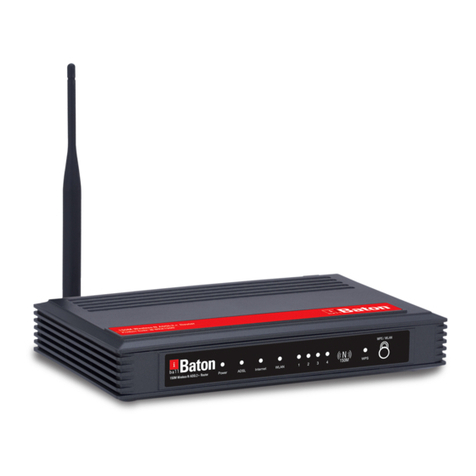
iBall Baton iB-WRA300N User manual

300M Wireless-N ADSL2+ Router
Model No. iB-WRA300N
User Guide
Ver. 1.0.0

FCC STATEMENT
This equipment has been tested and found to comply with the limits for a Class B digital device,
pursuant to part 15 of the FCC Rules. These limits are designed to provide reasonable protection
against harmful interference in a residential installation. This equipment generates, uses and can
radiate radio frequency energy and, if not installed and used in accordance with the instructions,
may cause harmful interference to radio communications. However, there is no guarantee that
interference will not occur in a particular installation. If this equipment does cause harmful
interference to radio or television reception, which can be determined by turning the equipment off
and on, the user is encouraged to try to correct the interference by one or more of the following
measures:
•Reorient or relocate the receiving antenna.
•Increase the separation between the equipment and receiver.
•Connect the equipment into an outlet on a circuit different from that to which the receiver
is connected.
•Consult the dealer or an experienced radio/ TV technician for help.
This device complies with part 15 of the FCC Rules. Operation is subject to the following two
conditions:
1)This device may not cause harmful interference.
2)This device must accept any interference received, including interference that may cause
undesired operation.
Any changes or modifications not expressly approved by the party responsible for compliance
could void the user’s authority to operate the equipment.
CE Mark Warning
This is a class B product. In a domestic environment, this product may cause radio interference, in
which case the user may be required to take adequate measures.

CONTENTS
Package Contents .................................................................................................... 1
Chapter 1. Introduction ......................................................................................... 2
1.1 Product Overview ..................................................................................2
1.2 Main Features .......................................................................................3
1.3 Conventions ..........................................................................................3
Chapter 2. Hardware Installation .......................................................................... 4
2.1 The Front Panel.....................................................................................4
2.2 The Back Panel .....................................................................................5
2.3 Installation Environment ........................................................................5
2.4 Connecting the Router...........................................................................6
Chapter 3. Quick Installation Guide ..................................................................... 8
3.1 Configure PC.........................................................................................8
3.2 Login....................................................................................................11
Chapter 4. Software Configuration..................................................................... 15
4.1 Status ..................................................................................................15
4.1.1 Device Info............................................................................................... 15
4.1.2 System Log.............................................................................................. 17
4.1.3 Statistics .................................................................................................. 17
4.2 Quick Start........................................................................................... 20
4.3 Network Setup..................................................................................... 20
4.3.1 Internet..................................................................................................... 20
4.3.2 LAN.......................................................................................................... 26
4.3.3 Wireless ................................................................................................... 30
4.4 Advanced Setup ..................................................................................40
4.4.1 Firewall .................................................................................................... 40
4.4.2 Routing .................................................................................................... 41
4.4.3 NAT.......................................................................................................... 42
4.4.4 QoS.......................................................................................................... 45
4.4.5 VLAN ....................................................................................................... 48
4.4.6 ADSL ....................................................................................................... 50
4.5 Access Management ...........................................................................50
4.5.1 ACL.......................................................................................................... 51
4.5.2 Filter......................................................................................................... 51
4.5.3 SNMP ...................................................................................................... 60
4.5.4 UPnP ....................................................................................................... 60
4.5.5 DDNS....................................................................................................... 61
4.5.6 CWMP ..................................................................................................... 62
4.6 Maintenance........................................................................................63
4.6.1 Administration .......................................................................................... 64
4.6.2 Time Zone................................................................................................ 64
4.6.3 Firmware.................................................................................................. 66
4.6.4 SysRestart ............................................................................................... 68
4.6.5 Diagnostics .............................................................................................. 69
Appendix A: Specifications ................................................................................... 70
Appendix B: Contact Information……………………………………………………...70

iB-WRA300N 300M Wireless-N ADSL2+ Router User Guide
1
Package Contents
The following contents should be found in your package:
¾300M Wireless-N ADSL2+ Router
¾Power Adapter
¾Quick Installation Guide
¾RJ45 cable
¾RJ11 cables
¾ADSL splitter
¾One Resource CD, which includes this User Guide
)Note:
Make sure that the package contains the above items. If any of the listed items are damaged or
missing, please contact your distributor.

iB-WRA300N 300M Wireless-N ADSL2+ Router User Guide
2
Chapter 1.Introduction
Thank you for choosing the iBall Baton iB-WRA300N 300M Wireless-N ADSL2+ Router
1.1 Product Overview
The device is designed to provide a simple and cost-effective ADSL Internet connection for a
Wired Ethernet or Wireless IEEE 802.11n/ IEEE 802.11g/ IEEE 802.11b wireless network.
iB-WRA300N connects to an Ethernet LAN or computers via standard Ethernet ports. The ADSL
connection is made using ordinary telephone line with standard connectors. Multiple workstations
can be networked and connected to the Internet using a single Wide Area Network (WAN)
interface and single global IP address.
The advanced security enhancements, IP/MAC, Application and URL Filtering can help to
secure your network.
Quick Start of the Web-based Utility is supplied and friendly help messages are provided for the
configuration. Network and Router management is done through the Web-based Utility which can
be accessed through local Ethernet using any web browser.
ADSL
iB-WRA300N complies with latest ADSL standards Annex-M with downstream up to 24Mbps.
Conforming to the ITU and ANSI specifications.
Wireless
In the most attentive wireless security, the Router provides multiple protection measures. It can be
set to turn off the wireless network name (SSID) broadcast so that only stations that have the
SSID can be connected. The Router provides wireless LAN 64/128-bit WEP encryption security,
WPA-PSK/WPA2-PSK authentication, as well as TKIP/AES encryption security.

iB-WRA300N 300M Wireless-N ADSL2+ Router User Guide
3
1.2 Main Features
¾Complies with IEE802.3 & IEEE802.3u standards
¾Complies IEEE 802.11n wireless technology to provide a wireless data rate of up to 150Mbps
¾3-in-1: One RJ11(Internet) LINE port, four 10/100M Auto-Negotiation (RJ45) Ethernet ports
supporting Auto MDI/MDIX and Wireless-N Access Point
¾Supports Latest standards with Downstream data rates up to 24Mbps, Upstream data rates
up to 3.5Mbps (With Annex M enabled).
¾Provides WPA/WPA2, WPA-PSK/WPA2-PSK authentication, TKIP/AES encryption security
¾IPv6 Ready
¾WPS (Wi-Fi Protected Setup) – Automatically establishing WPA2 encryption security
¾Wi-Fi Button - Allows users to turn off the wireless function as not in use
¾Supports Multiple PVC (Permanent Virtual Circuit).
¾Triple Active Firewall – SPI, NAT & Packet filter
¾IP, Domain, Mac & Application filtering
¾Wireless MAC filtering & DHCP Server
¾Built-in firewall, supporting IP/MAC filter, Application filter and URL filter.
¾Virtual Server, DMZ host and IP Address Mapping.
¾Dynamic DNS, UPnP and Static Routing.
¾With SNMP & DHCP server.
¾Support Remote Management and Access Control
¾With 5-dBi Omni-Directional Antenna type.
1.3 Conventions
The Router or device mentioned in this User Guide stands for iBal Baton iB-WRA300N model
without any explanations.
Parameters provided in the pictures are just references for setting up the product, which may differ
from the actual situation.

iB-WRA300N 300M Wireless-N ADSL2+ Router User Guide
4
Chapter 2.Hardware Installation
2.1 The Front Panel
Figure 2-1
The LEDs locate on the front panel. They indicate the device’s working status.
LED Explanation:
Name Status Indication
On ( Red Colour) Device Init
On ( Green Colour) Device Init OK
PWR
Off Power is off.
Flash ADSL negotiation is in progress.
On LINE port is linked up.
DSL
Off LINE port is linked down.
On (Red Colour) Port Init
Flash (Green Colour) Data is being transferred over the Internet.
Internet
Off There is no data transmission over the internet
On There is a successful connection on the
corresponding Ethernet port but no activity.
Flash Data is being transferred over the Ethernet port.
LAN
(Ethernet)
Off There is no connection on the corresponding
Ethernet port or the connection is abnormal.
On The wireless function is enabled but no data
is being transmitted.
Flash There is wireless data being transmitted.
WLAN
Off The wireless function is disabled.
Off There is no WPS activity
Flash Device is ready to make WPS connection.
WPS
On WPS connection established

iB-WRA300N 300M Wireless-N ADSL2+ Router User Guide
5
2.2 The Back Panel
Figure 2-2
¾DSL: Through the port, you can connect the router with the telephone. Or you can connect
them by an external separate splitter. For details, please refer to 2.4.
¾Wi-Fi: Press this button for short time, used to Enable/Disable wireless
¾RESET: There are two ways to reset the Router's factory defaults.
Method one: With the Router powered on, use a pin to press and hold the Reset button for at
least 5 seconds. And the Router will reboot to its factory default settings.
Method two: Restore the default setting from “Maintenance-SysRestart” of the Router's
Web-based Utility.
¾Ethernet: Through the port, you can connect the Router to your PC or the other Ethernet
network devices.
¾ON/OFF: Switch ON/ OFF the router.
2.3 Installation Environment
¾The Product should not be located where it will be exposed to moisture or excessive heat.
¾Place the Router in a location where it can be connected to the various devices as well as to a
power source.
¾Make sure the cables and power cord are safely placed out of the way so they do not create a
tripping hazard.
¾The Router can be placed on a shelf or desktop.
¾Keep away from the strong electromagnetic radiation and the device of electromagnetic
sensitive.

iB-WRA300N 300M Wireless-N ADSL2+ Router User Guide
6
2.4 Connecting the Router
Before installing the device, please make sure your broadband service provided by your ISP is
available. If there is any problem, please contact your ISP. Before cable connection, cut off the
power supply and keep your hands dry. You can follow the steps below to install it.
Step 1: Connect the ADSL Line.
Method one: Plug one end of the twisted-pair ADSL cable into the ADSL LINE port on
the rear panel of iB-WRA300N, and insert the other end into the wall socket.
Method two:You can use a separate splitter. External splitter can divide the data and
voice, and then you can access the Internet and make calls at the same time. The
external splitter has three ports:
• LINE: Connect to the wall jack
• PHONE: Connect to the phone sets
• MODEM: Connect to the ADSL LINE port of iB-WRA300N
Plug one end of the twisted-pair ADSL cable into the ADSL LINE port on the rear panel of
iB-WRA300N. Connect the other end to the MODEM port of the external splitter.
Step 2: Connect the Ethernet cable. Attach one end of a network cable to your computer’s
Ethernet port or a regular hub/switch port, and the other end to the Ethernet port on the
iB-WRA300N.
Step 3: Power on the computers and LAN devices.
Step 4: Attach the power adapter. Connect the power adapter to the power connector on the rear
of the device and plug in the adapter to a electrical outlet or power extension. The
electrical outlet shall be installed near the device and shall be easily accessible.

iB-WRA300N 300M Wireless-N ADSL2+ Router User Guide
7
Figure 2-3

iB-WRA300N 300M Wireless-N ADSL2+ Router User Guide
8
Chapter 3.Quick Installation Guide
3.1 Configure PC
After you directly connect your PC to the iB-WRA300N or connect your adapter to a Hub/Switch
which has connected to the Router, you need to configure your PC’s IP address. Follow the steps
below to configure it.
Step 1: Click the Start menu on your desktop, right click My Network Places, and then select
Properties (shown in Figure 3-1).
Figure 3-1
Step 2: Right click Local Area Connection (LAN), and then select Properties.

iB-WRA300N 300M Wireless-N ADSL2+ Router User Guide
9
Figure 3-2
Step 3: Select General tab, highlight Internet Protocol (TCP/IP), and then click the Properties
button.
Figure 3-3

iB-WRA300N 300M Wireless-N ADSL2+ Router User Guide
10
Step 4: Configure the IP address as Figure 3-4 shows. After that, click OK.
Figure 3-4
)Note:
You can configure the PC to get an IP address automatically, select “Obtain an IP address
automatically” and “Obtain DNS server address automatically” in the screen above.
Now, you can run the Ping command in the command prompt to verify the network connection.
Please click the Start menu on your desktop, select run tab, type cmd or command in the field
and press Enter. Type ping 192.168.1.1 on the next screen, and then press Enter.
If the result displayed is similar to the screen below, the connection between your PC and the
Router has been established.

iB-WRA300N 300M Wireless-N ADSL2+ Router User Guide
11
Figure 3-5
If the result displayed is similar to the screen shown below, it means that your PC has not
connected to the Router.
Figure 3-6
You can check it follow the steps below:
1) Is the connection between your PC and the Router correct?
The LEDs of Ethernet port which you link to the device and the LEDs on your PC's adapter
should be lit.
2) Is the TCP/IP configuration for your PC correct?
If the Router's IP address is 192.168.1.1, your PC's IP address must be within the range of
192.168.1.2 ~ 192.168.1.254.
3.2 Login
Once your host PC is properly configured, please proceed as follows to use the Web-based Utility:
Start your web browser and type the private IP address of the Router in the URL field: 192.168.1.1.
After that, you will see the screen shown below, enter the default User Name admin and the
default Password admin,and then click OK to access to the Quick Start screen. You can follow
the steps below to complete the Quick Start.

iB-WRA300N 300M Wireless-N ADSL2+ Router User Guide
12
Figure 3-7
Step 1: Select the Quick Start tab, then click RUN WIZARD, and you will see the next screen.
Click the NEXT button.
Figure 3-8
Step 2: Configure the time for the Router, and then click the NEXT button.
Figure 3-9
Step 3: Select the connection type to connect to the ISP (We select PPPoE/PPPoA as BSNL
ISP), and then click the NEXT button.

iB-WRA300N 300M Wireless-N ADSL2+ Router User Guide
13
Figure 3-10
Step 4: Configure the following options provided by your ISP: Username, Password,VPI, VCI
and Connection Type. Then click NEXT.
Figure 3-11
Step 5: Configure the rules for the WLAN, and click NEXT.
Figure 3-12

iB-WRA300N 300M Wireless-N ADSL2+ Router User Guide
14
)Note:
If the Access Point is activated, the wireless function will be available even without the external
antenna because of an additional printed antenna. To adopt the wireless security protection
measures, please refer to Section 4.3.3.
Step 6: Click NEXT to finish the Quick Start.
Figure 3-13

iB-WRA300N 300M Wireless-N ADSL2+ Router User Guide
15
Chapter 4.Software Configuration
This User Guide recommends using the “Quick Installation Guide” for first-time installation. For
advanced users, if you want to know more about this device and make use of its functions
adequately, maybe you will get help from this chapter to configure the advanced settings through
the Web-based Utility.
After your successful login, you can configure and manage the device. There are main menus on
the top of the Web-based Utility; submenus will be available after you click one of the main menus.
On the center of the Web-based Utility, there are the detailed configurations or status information.
To apply any settings you have altered on the page, please click the SAVE button.
4.1 Status
Choose “Status”, you can see the next submenus: Device Info, System Log and Statistics.
Click any of them, and you will be able to configure the corresponding function.
Figure 4-1
Click any of them, and you will be able to view the corresponding information.
4.1.1 Device Info
Choose “Status→Device Info” menu, and you will be able to view the device information,
including LAN, WAN and ADSL. The information will vary depending on the settings of the Router
configured on the Network Setup screen.

iB-WRA300N 300M Wireless-N ADSL2+ Router User Guide
16
Figure 4-2
)Note:
Click the other submenus System Log or Statistics in Figure 4-2, and you will be able to view the
system log and traffic statistics about the Router.
Table of contents
Other iBall Baton Network Router manuals

iBall Baton
iBall Baton iB-W3GMPB21 User manual

iBall Baton
iBall Baton iB-WVG300N User manual

iBall Baton
iBall Baton iB-W4G311N User manual

iBall Baton
iBall Baton iB-WRT300N User manual

iBall Baton
iBall Baton DWA-N150 Series User manual

iBall Baton
iBall Baton iB-WR7011A User manual

iBall Baton
iBall Baton iB-WRA150N User manual

iBall Baton
iBall Baton DWA-N150U Series User manual

iBall Baton
iBall Baton iB-W3GT150N User manual

iBall Baton
iBall Baton 150m User manual