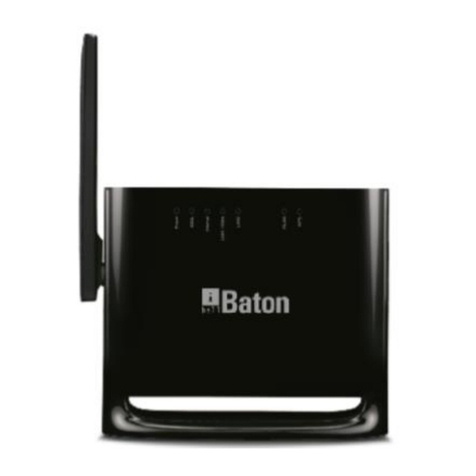
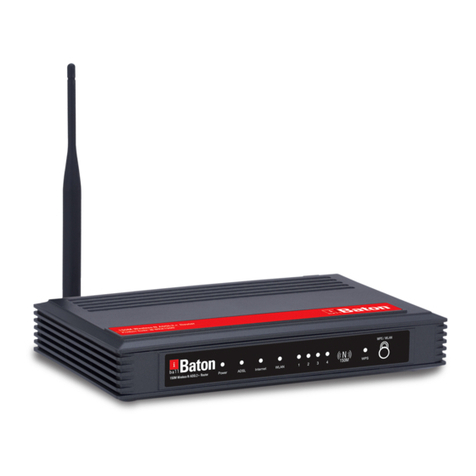
iBall Baton iB-W3GMPB21 User manual

21Mbps GSM MiFi + Power Bank Multi-Function Router
Model No.: iB-W3GMPB21
User Manual
Ver.: 1.0.0

2
FCC STATEMENT
This equipment has been tested and found to comply with the limits for a Class B
digital device, pursuant to part 15 of the FCC Rules. These limits are designed to
provide reasonable protection against harmful interference in a residential installation.
This equipment generates uses and can radiate radio frequency energy and, if not
installed and used in accordance with the instructions, may cause harmful
interference to radio communications. However, there is no guarantee that
interference will not occur in a particular installation. If this equipment does cause
harmful interference to radio or television reception, which can be determined by
turning the equipment off and on, the user is encouraged to try to correct the
interference by one or more of the following measures:
Reorient or relocate the receiving antenna.
Increase the separation between the equipment and receiver.
Connect the equipment into an outlet on a circuit different from that to which
the receiver is connected.
Consult the dealer or an experienced radio/ TV technician for help.
This device complies with part 15 of the FCC Rules. Operation is subject to the
following two conditions:
1) This device may not cause harmful interference.
2) This device must accept any interference received, including interference that
may cause undesired operation.
Any changes or modifications not expressly approved by the party responsible for
compliance could void the user’s authority to operate the equipment.
FCC RF Radiation Exposure Statement
This equipment complies with FCC RF radiation exposure limits set forth for an
uncontrolled environment. This device and its antenna must not be co-located or
operating in conjunction with any other antenna or transmitter.
“To comply with FCC RF exposure compliance requirements, this grant is applicable
to only Mobile Configurations. The antennas used for this transmitter must be installed
to provide a separation distance of at least 20 cm from all persons and must not be
co-located or operating in conjunction with any other antenna or transmitter.”
3
CE Mark Warning
This is a class B product. In a domestic environment, this product may cause radio
interference, in which case the user may be required to take adequate measures.
Safety Precautions
Read the safety precautions carefully to ensure the correct and safe use of your wireless
device.
Do not switch on your device when the device use is prohibited or when
the device use may cause interference or danger.
Follow the rules or regulations in hospitals and health care facilities.
Switch off your device near medical apparatus.
Switch off your device in an aircraft. The device may cause interference
to control signals of the aircraft.
Switch off your device near high-precision electronic devices. The
device may affect the performance of these devices.
Do not attempt to disassemble your device or its accessories. Only
qualified personnel are allowed to service or repair the device.
Do not place your device or its accessories in containers with strong
electromagnetic field.
Do not place magnetic storage media near your device. Radiation from
the device may erase the information stored on them.
Do not put your device in a high-temperature place or use it in a place
with flammable gas such as a gas station.
Keep your device and its accessories away from children. Do not allow
children to use your device without guidance.
Use approved batteries and chargers only to avoid explosion.
Observe the laws or regulations on device use. Respect others’ privacy
and legal rights when using your device.

4
Contents
Safety Precautions........................................................................... 3
Package Contents............................................................................ 5
1.Overview: ...................................................................................... 5
1.1. Product Features………………………………………………….6
1.2. Hardware Overview.................................................................. 7
2. Device Mode................................................................................ 8
2.1. Install the Card.......................................................................... 9
3. Power ON/OFF Router .............................................................. 10
4. Turn Router to WiFi mode ......................................................... 10
5. Router Web Management page................................................ 11
6. Access Storage via Android Mobile phone ............................... 16
7. Multi Device Access................................................................... 18
8. FAQ………………….………………………………………………18
Contact Information........................................................................ 19

5
Package Contents:
The following contents should be found in the product packaging:
21Mbps GSM MiFi + Power Bank Multi-Function Router
USB Cable
Universal Power Adapter
User Manual
Brief introduction:
iB-W3GMPB21 is a Router to access Internet Anytime & Anywhere through 2G/3G
Internet or Broadband Internet Connection.
Router as used for a long time in a enclosed space, the temperature of the device will
increase. Then it will turn off automatically. When this phenomenon appears, please put it
in ventilation space to dissipate the heat and when the temperature of the device
decrease, you can use it as normal.
• Please change default (SSID) and change password for wireless security purpose.
1. Overview & Benefits
Compact size Pocket / Travel GSM router with Multi-function features
- 2G/3G Internet (GSM SIM Slot)
- Power Bank for charging digital gadgets as mobile phones & USB Devices
- Broadband Internet (Cable / DSL)
Wi-Fi Hotspot : Up to 10 Wi-Fi devices Access Internet Anytime…Anywhere
Wi-Fi Storage: Access SD Card data through Android Phones/ tablet.
Battery : 4400mAh Polymer Battery
Working time: Approx. 10Hours | Standby time: 20 Hours

6
1.1 Product Features:
Complies with IEEE802.11 b/g/n standards
GSM SIM Slot - 2G/3G Network support
Broadband Internet : Router / Bridge / AP Client modes
Micro SD with max. support up to 32GB
Firewall security features as IP, MAC & URL Filtering
With Virtual Server, DMZ, DDNS & Remote Management
Support WPA-PSK/WPA-PSK2 wireless encryption security
Built-in DHCP Server
Internal Antenna
2G/3G Frequency band: HSPA / UMTS 2100MHz, GSM / GPRS / EDGE :
eeeeeee850MHz, 900MHz, 1800MHz & 1900MHz

7
1.2 Hardware Overview
1.Micro SD Card Indicator
2.WAN Indicator
3.3G Indicator
4. Power Bank Indicator
5. Battery Indicator
6.3G Wireless Router
7.Select Button or Data Indicator
8.LAN / WAN Port
9. Micro SD Card Slot
10.SIM Card Slot
11. Power Switch
12.Reset
13.Power Bank
14.Charging Port : Micro USB
15.Charging Indicator Light

8
2. Device mode
Item
Status
Micro SD Card
Indicator Light
Blue LED : Switch to SD card mode
WAN Indicator Light
Blue LED : Switch to WAN mode
3G Indicator Light
Blue LED : Switch to 3G mode
Power Bank Indicator
Light
Blue LED : Switch to Power Bank Router
Battery Indicator
Light
Blue LED: The battery is between 80% ~ 100%
Blue & Red LED: The battery is between 40% ~ 80%
Red LED: The battery is between 10% ~ 40%
Red LED Rapid Flashing: The battery is between 0% ~ 10%
Charge Indicator Light
Blue LED : Battery Charging
The LED Goes out : Charge Complete
Data Indicator Light
Blue LED slowly flashing : Boot or not connected to network
Blue LED : Connected to a Network
Note:
SD card, WAN, 3G, Power Bank function is activated by pressing down the
Select Button

9
2.1 Install the SIM card & Micro SD card
As per Image, insert the SIM card & Micro SD card in to corresponding card slot.
Note: Please donot plug or unplug the SIM card & SD card when device working to avoid
the data lost or damage.
System Requirements
CPU: Pentium 500MHz or above.
Hard Disk: 50MB available space.
Operating System: Windows 8/7/VISTA/XP (SP2 and above), Mac OS X 10.4.9 and
Later, Up to X10.6.0.
Display Resolving Power: 800 × 600 pixels or above (1024 × 768 is recommended).
Interface: Standard USB 2.0 interface.
Web Browser: Internet Explorer 6/7/8, Safari3/4/5.
One or more computing devices that support Wi-Fi (802.11b/g/n).

10
3. Power ON/OFF the Router
Turn on: Turn the power switch to 'ON'
Turn off: Turn the power switch to 'OFF'
Note:The default mode is Power Bank mode. When insert the Network Cable, it will be
automatically switched to the WAN mode.
3.1 Power Bank Mode
Turn on the Router, switch to the Power Bank mode, you can charged gadgets via USB
cable.
Note: As routers button mode is working on SD Card, WAN or 3G function, you can
charge other devices, just charging is working slow.
4. Turn Router to Wi-Fi Mode
Step I:Turn on the Router
·Power ON the Router.
·Switch the Router to 3G mode, wait for the data indicator light till blue,you can access to
the internet after that.
Step II:Establish a Wi-Fi connection
(Connect Computer for example)
1. Choose Start => Control panel =>
Network Connections => Wireless Network
connection.
Note:Before establishing a Wi-Fi
connection, it must ensure that the computer has been equipped with a wireless card. If
the Computer indicates the existence of wireless networks, then the wireless card can be
used. Otherwise, you need check whether the wireless card can work.
2. Click to check the available wireless networks, there will show the list of network
connections.
3. When the connection between user terminal and Router and click 'Connect'.
.
Note: Default SSID is iBall-Baton, you can connect the SSID for further settings
.

11
Wait for a moment, when the wireless network connection icon appears on the bottom
right of the computer screen, the connection is successful.
Step III: Access to the internet
When the connection between user terminal and router is established, internet will be
available immediately.
Turn wired network to Wireless
·Turn ON the Router.
·Insert the Network Cable (Automatically switch to the WAN).when the data indicator light
is blue,you can access to the internet.
5. Router Web management page
1. Confirm the connection to the Router with WiFi is good.
2. Open the browser, enter 'http://192.168.1.1' in the address field or just enter
'192.168.1.1'
3. Input username and password, then click 'OK'.
·Note:Administrator can view and edit the configuration.
Default username and password are 'admin'
Click 'Storage' to enter the multimedia sharing page
(This button is only valid after the switch to SD card mode).
Click 'Start' to enter the Router Menu.

12
SD Card sharing on PC / Laptop
1. Turn On the Router.
2. Switch the Router to the mode of SD card. After Wi-Fi connection, just login admin
page .Click 'storage' to access multimedia sharing.
Note:Realize multiple clients can browse the same movie, music and so on in the
multimedia sharing at the same time. If need to modify the contents of the Shared media,
please refer to the storage management.
Modify the SSID and password
1.Click on Basic => Wizard
2.Enter the SSID and password that you need
3.Click 'apply'

13
Static IP
1.Click on Basic => Wizard
2.Select Static IP connection type
3.Enter IP Address, Subnet Mask, Gateway.
4.Click 'apply'
Note: Static IP, DHCP & PPPoE should ensure that the mode has switched to WAN, and
the system mode must be the gateway mode.
DHCP
1.Click on Basic => Wizard
2.Select DHCP connection type
3.Click 'apply'
PPPoE
1.Click on Basic => Wizard
2.Select PPPoE connection type
3.Enter user name and password
4.Click 'apply'

14
Note: Incase your internet is not working, kindly in the condition of WAN you can't get to
the Internet, please select the correct connection type.
Wireless Mac filter
1.Click on Wireless => Wireless Macfilter
2.Choose the required authentication mode
3.Fill in the MAC address (According to the wireless MAC list)
4.Click 'apply'
Note: Deny listed: Unable to connect the Router in the list.
Allow listed: Only in the list can connect the Router.
Wireless Network to Wi-Fi
1.Click on Advanced => Route => SYS Mode
2.Select theAP client mode .Click 'apply'
3.Search the AP and enter the password. Click 'apply'
Note: The Router can act as a Wireless Repeater to turn Wireless network to
WiFi .Please ensure that the mode has switched to the WAN and without the Network
Cable before setting.

15
Storage Management
1.Switch to the mode of SD card
2.choose Advanced => Storage => Samba Setting
3.Check whether samba function is Enable, if not please choose “Enable”, Click 'apply'
4.Select the 'run' in the start menu, type \\192.168.1.1
Modify the login password
1.Click on Maintenance => SYS Config => Admin Setting
2.Enter user name and password
3.Click 'apply'

16
6. Wi-Fi Storage (Access SD card data via Android devices)
1.Select button & Switch the mode to SD card.
2.Open the ES file explorer
Note: Incase same ES File explorer not available in your device, kindly download the
same from Play store & install the .apk
3.Click “LAN”menu, then “New” and then “Sever” and input position. The IP address of
the router is “192.168.1.1”. Enter user name and password (both of them are “admin”
by default).
4.After settings are finished, “192.168.1.1” can be found in the share list. Click it and
open “Home” can accesses SD.
Note: If your android device cannot access the SD card, Check the samba function is
turn on / SD Card is inserting properly.

17
Charge the Router
·The charge indicator light is always blue: Charging
·The charge indicator light go out: Charge Complete
Note: If the Router is not been used for a long time, kindly charge battery to saturation
mode before use.
Restore the factory Settings
If you forget the modified password and SSID, please take the following methods to
restore Wi-Fi default values
·Hard Reset: Long press the RESET button for 3 seconds. Just wait for a moment, the
Router will restart.
·Soft Reset: You can reset the router also from menu as accessing 192.168.1.1
Maintenance > Factory Default Menu

18
7. Multi-device access
Wi-Fi device or computer can access to the Internet through Router.
Multiple Operations:
8. FAQ
1、Forget the login password?
Press "RESET" button for 3 seconds, then you can restore the factory default settings.
2、IP address conflict after Router connection?
Please check as same IP address is not provided to any other device in the LAN.
3、After changing the security type (such as from WPA-PSK to WPA2-PSK), computer
with WINDOWS 7 system cannot connect to Router?
Please select the correct type of security in the wireless network properties.
4、3G mode selected but can’t access Internet?
After switching to 3G mode, check whether LED Indicator is blue light flashing;
Check as SIM card is properly inserted
·If yes, please check 3G mode setting in Router Menu, if dialing fails with refreshing many
times, check SIM services is properly function or balance
5、WAN mode, but can’t access Internet?
After switching to WAN mode, check whether WAN LED Indicator is blue light flashing:
·If yes, please check whether the Network Cable access to Router is PROPERLY
INSERTED, Configure proper settings as provided by your ISP or contact ISP.

19
COPYRIGHT & TRADEMARKS
Specifications are subject to change without notice. iBall Baton is a registered
trademark of Best IT World (India) Pvt. Ltd. Other brands and product names are
trademarks or registered trademarks of their respective holders.
No part of the specifications may be reproduced in any form or by any means or used
to make any derivative such as translation, transformation, or adaptation without
permission from Best IT World (India) Pvt. Ltd.All rights reserved.
Note: For any technical help on iBall Baton products please contact support@iballbaton.com
www.iBallBaton.com | www.iBall.co.in
Table of contents
Other iBall Baton Network Router manuals

iBall Baton
iBall Baton iB-WRT300N User manual

iBall Baton
iBall Baton iB-W3GT150N User manual

iBall Baton
iBall Baton DWA-N150U Series User manual

iBall Baton
iBall Baton iB-W4G311N User manual

iBall Baton
iBall Baton iB-WRA300N User manual

iBall Baton
iBall Baton iB-WR7011A User manual

iBall Baton
iBall Baton 150m User manual

iBall Baton
iBall Baton iB-WRA150N User manual

iBall Baton
iBall Baton iB-WVG300N User manual

iBall Baton
iBall Baton DWA-N150 Series User manual