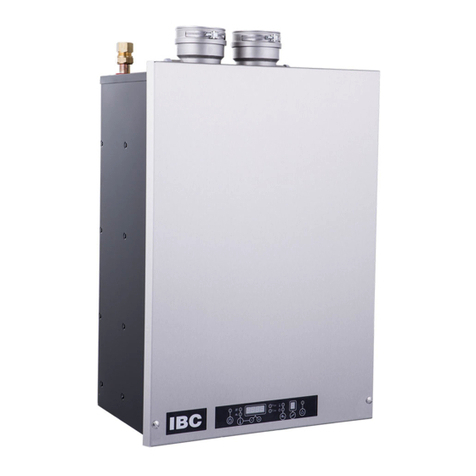
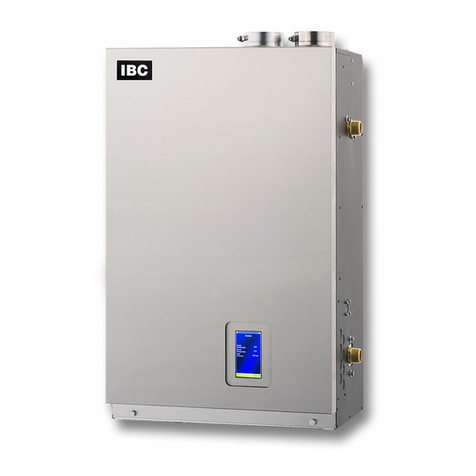
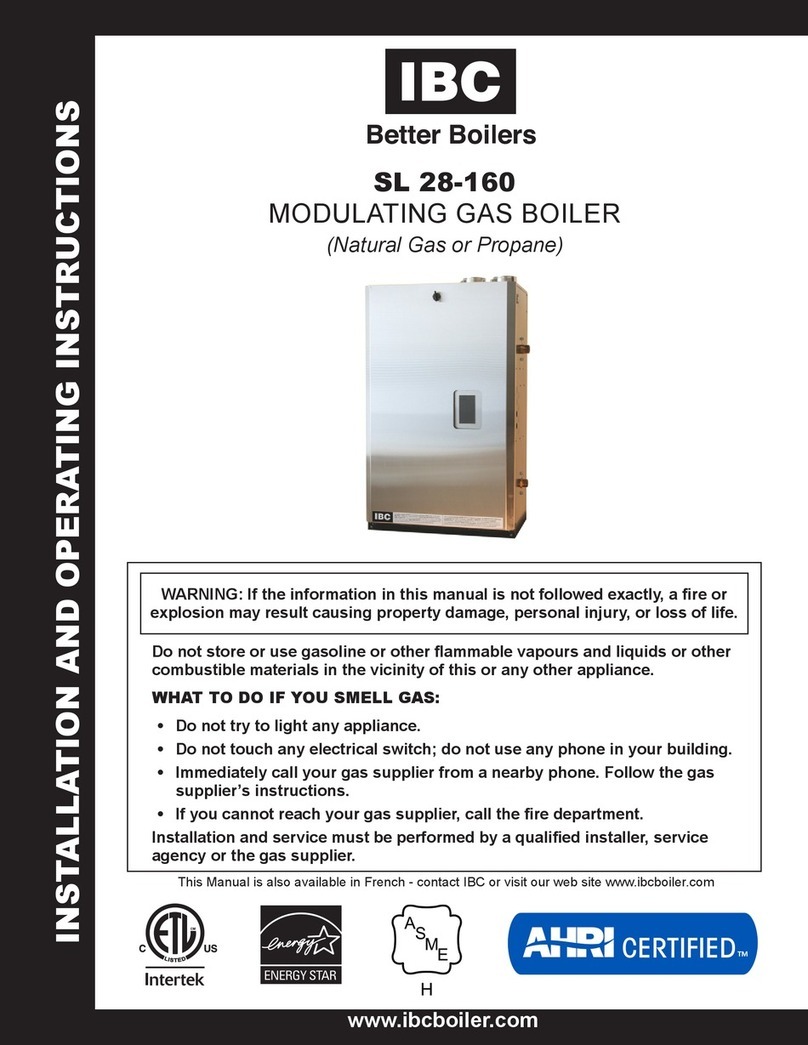
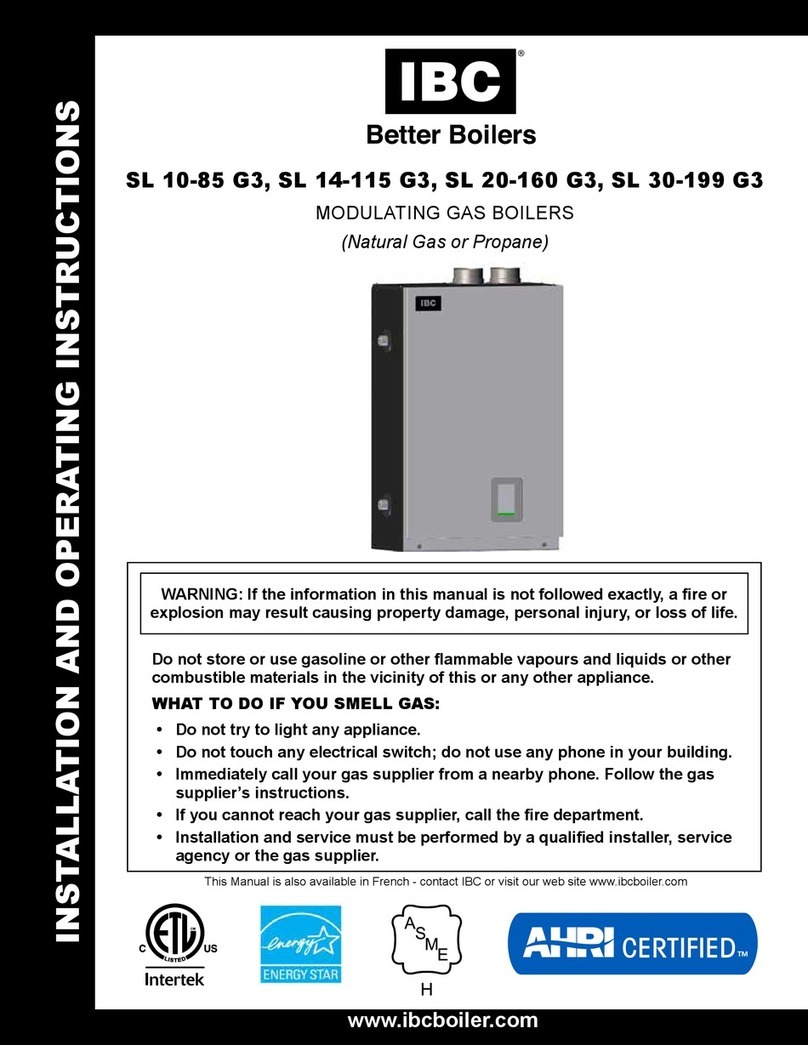
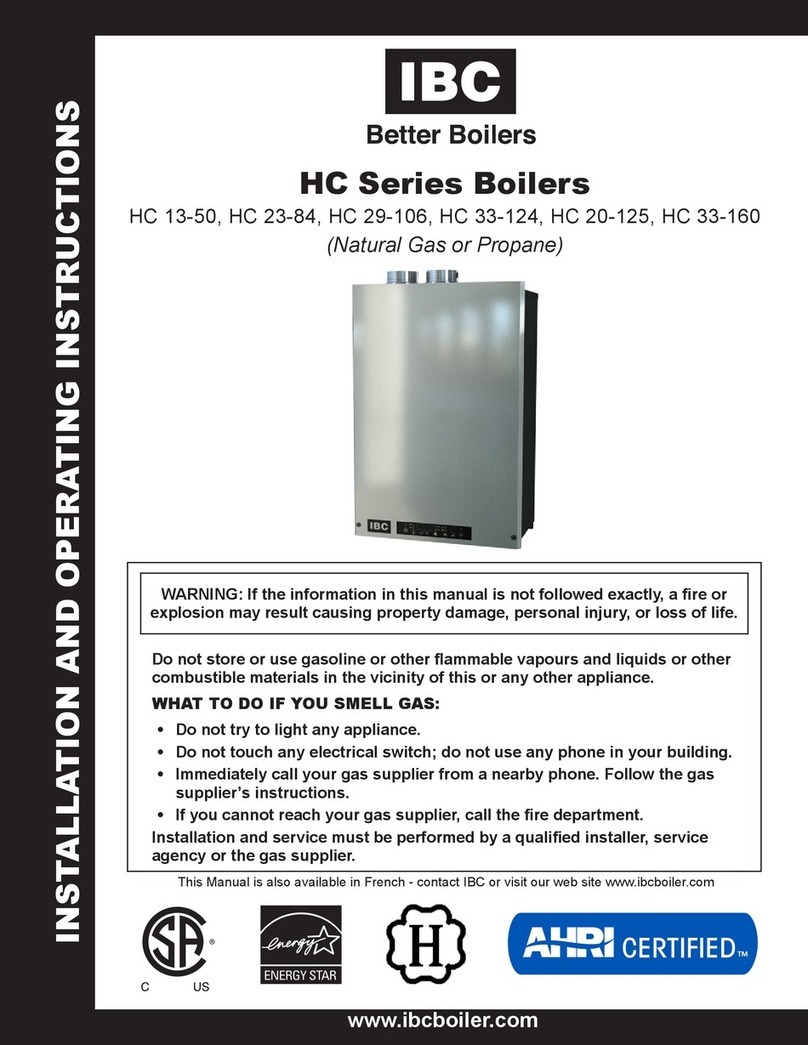
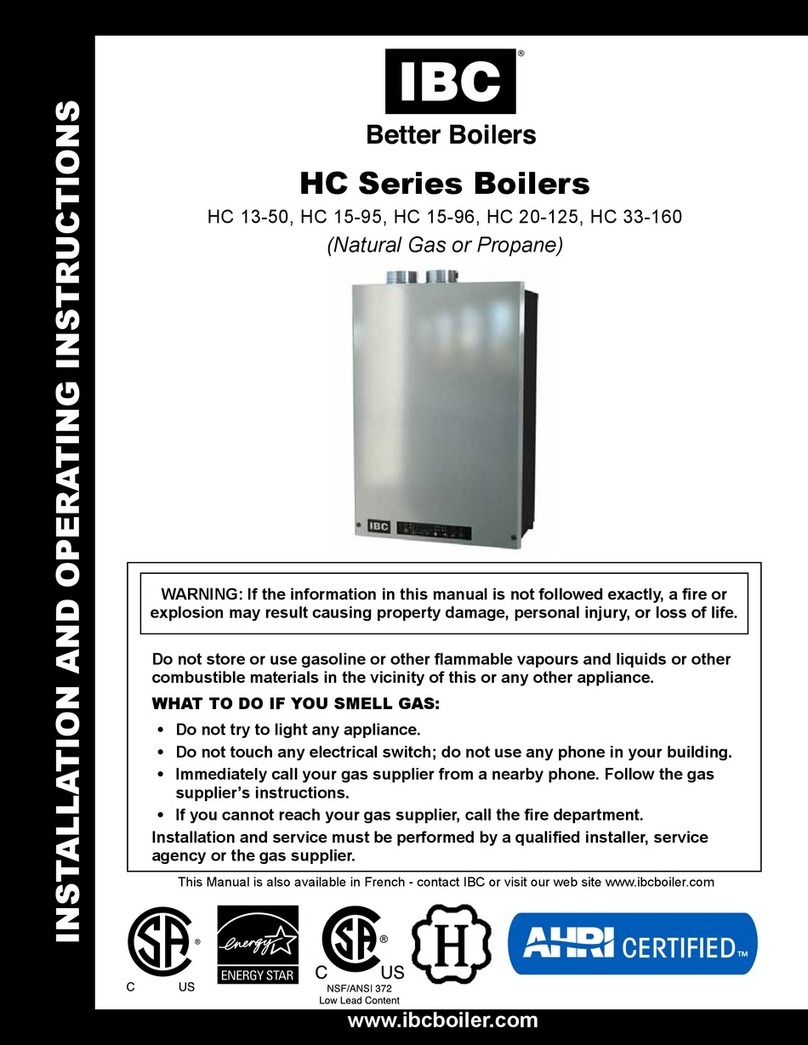
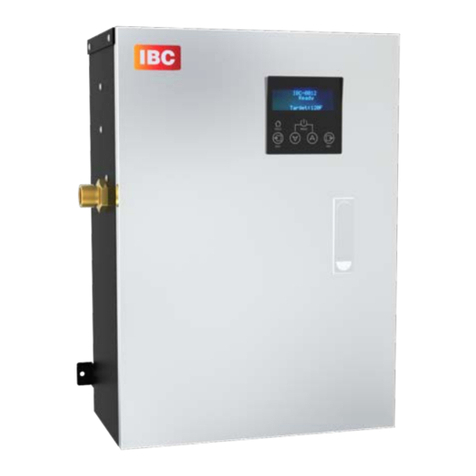
IBC SFC-199 User manual

INSTALLATION AND OPERATING INSTRUCTIONS
www.ibcboiler.com
SFC 199
COMBI BOILERS
(Natural Gas or Propane)
WARNING: If the information in this manual is not followed exactly, a re or
explosion may result causing property damage, personal injury, or loss of life.
Do not store or use gasoline or other ammable vapours and liquids or other
combustible materials in the vicinity of this or any other appliance.
WHAT TO DO IF YOU SMELL GAS:
•Do not try to light any appliance.
• Do not touch any electrical switch; do not use any phone in your building.
• Immediately call your gas supplier from a nearby phone. Follow the gas
supplier’s instructions.
• If you cannot reach your gas supplier, call the re department.
Installation and service must be performed by a qualied installer, service
agency or the gas supplier.
Le manuel est également disponible en français. Visitez le portail << Technical Information Portal >> à notre
site web www.ibcboiler.com.

INSTALLATION AND OPERATION INSTRUCTIONS
2
SFC BOILER / WATER HEATERS - SFC 199
SAFETY CONSIDERATIONS
Installation, start-up and servicing of IBC units must be done with due
care and attention, and should only be performed by competent, qualied,
licensed and trained heating technicians. Failure to read and comply with
all instructions and applicable National and local codes may result in
hazardous conditions that could result in property damage and injury to
occupants which in extreme cases might result in death.
HAZARDS & PRECAUTIONS
Supplied with the unit - The SFC unit is shipped with an accessory parts kit
consisting of the following items:
• 1 x Wall Mounting Bracket, 4 x 1.75 “ bolts - IBC part P-837
• 1 x Condensate Trap Assembly
• 1 x Pressure Relief valve, ¾ NPT, 30psi
• 1 x Outdoor Temperature Sensor, IBC part P-732
• 1 x SFC Installation & Operating Instructions
• 1 x SFC/SFB Controller Manual
• 1 x Propane Conversion Kit: P-844
WARNING
If the information in this
manual is not followed
exactly, a re or explosion
may result causing property
damage, personal injury, or
loss of life.
WARNING
Points out a potentially
hazardous situation which
must be avoided to prevent
serious injury or death.
CAUTION
Points out a potentially
hazardous situation which
must be avoided to prevent
possible moderate injury and/
or property damage
NOTE
Points out installation,
maintenance and operation
details that will result in
enhanced efciency, longevity
and proper operation of your
unit.
DANGER
Points out an immediately
hazardous situation which
must be avoided in order to
prevent serious injury or
death.
BEST PRACTICES
Points out recommendations
for better installation.

3
INSTALLATION AND OPERATING INSTRUCTIONS
SFC BOILER / WATER HEATERS - SFC 199
SPECIFICATION SFC 199
CSA Input (Natural Gas or Propane) – MBH 28.3 - 125
CSA Input (Natural Gas or Propane) – KW 8.29 - 36.6
CSA Output – MBH 27.1 - 111
CSA Output - KW 7.94 - 32.5
DHW - CSA Input (Natural Gas or Propane) - MBH 28.3 - 199
DHW - CSA Input (Natural Gas or Propane) - KW 8.29 - 58.3
A.F.U.E 95%
Min Gas Pressure (Nat. Gas or Propane) – inch w.c. 4
Max Gas Pressure (Nat. Gas or Propane) – inch w.c. 14
Power (120Vac/60Hz) - Watts @ full re with internal pump 120
Weight (empty) – lbs/Kg 84 / 38
Pressure Vessel water content – USG/Liters 0.19 / 0.72
Max boiler ow rate - USgpm 12
Min boiler ow rate - USgpm 2
Max Operating Pressure – Space Heating Coil - psig †43.5
Max Operating Pressure – Domestic Hot Water Coil - psig 150
Minimum water pressure - psig 8
Approved installation altitude - ASL 10,000 ft
Ambient Temperature – Low (°F/°C) 32/0
Ambient Temperature – High (°F/°C) 122/50
Max relative humidity (non-condensing) 90%
Min water Temperature - Space Heating (°F/°C) 50/10
Max water Temperature – Space Heating (°F/°C) 194/90
Min water Temperature – Domestic Hot Water (°F/°C) 104/40
Max water Temperature – Domestic Hot Water (°F/°C) 149/65
Min ow rate to activate DHW heating - USgpm 0.5
Max ow rate DHW heating - USgpm 7
Max equivalent vent length 3" (each side) 120'
Max equivalent vent length 2" (each side) 35’
* Natural Gas units require a Propane conversion kit included with unit (see page #3-2, Table 11).Propane (LP) units require a Natural Gas conversion kit (see page
#3-2, Table 11) to be ordered separately if converting a Propane unit to Natural Gas.
† units are shipped with 30 psig pressure relief valve
SPECIFICATIONS

INSTALLATION AND OPERATION INSTRUCTIONS
4
SFC BOILER / WATER HEATERS - SFC 199
BURN
HOT
DANGER
° Water temperature over 125°F (52°C) can cause severe burns instantly
or death from scalds.
° Children, disabled, and elderly are at highest risk of being scalded.
° See instruction manual before setting temperature at water heater.
° Feel water before bathing or showering.
° Temperature limiting valves are available, see manual.
WARNING
CAUTION
WATER HEATER INSTALLATION GUIDELINES
ADJUSTABLE TEMPERATURE SETTING
°Hotter water increases the risk of scald injury. Before changing the temperature setting, see
instruction manual.
°This unit must be installed in accordance with local codes, if any; if not follow the National
Fuel Gas Code, ANSI Z223.1/NFPA 54, or the Natural Gas and Propane Installation Code,
CAN/CSA B149.1, as applicable.
°Failure to correctly install and operate this appliance can result in severe personal injury
or death.
°The unit shall have a pressure relief valve installed within 6” [152mm] of the DHW HOT
outlet connection.
Refer to the unit’s User Manual before operating the relief valve.
°The unit requires a pressure relief valve identified with the ASME V or HV symbol and
set to relieve at or below 150psi of domestic water pressure and a minimum relieving capacity
of 199,000 Btu/hr with 3/4” NPT threads. For safe operation of the unit, the relief valve
must not be removed from its designated point of installation or plugged.
°Read and follow warnings and instructions.
°
Touch the panel above the dot twice, then touch the Faucet . . Adjust the water temperature
with the Plus + and Minus – then touch the Return button to save the changes.

5
INSTALLATION AND OPERATING INSTRUCTIONS
SFC BOILER / WATER HEATERS - SFC 199
CONTENTS
1.0 INSTALLATION ..........................................1-1
1.1 GENERAL........................................................1-1
1.2 CODE REQUIREMENTS ............................................1-3
1.3 LOCATION .......................................................1-3
1.3.1 Mobile Home Installations ........................................1-4
1.4 EXHAUST VENTING AND AIR INTAKE .................................1-5
1.4.1 Applications ...................................................1-6
1.4.2 Exhaust Vent Material ...........................................1-6
1.4.3 Vent Travel ....................................................1-7
1.4.4 Venting Passage Through Ceiling and Floor ..........................1-9
1.4.5 Rooftop Vent Termination .........................................1-9
1.4.6 Sidewall Vent Termination .......................................1-11
1.4.7 “Direct Vent” Combustion Air Intake Piping .........................1-15
1.4.8 “Indoor Air” 1.4.8 “Indoor Air” Combustion Air Intake ..................1-16
1.4.9 Closet Installations .............................................1-16
1.5 CONDENSATE REMOVAL..........................................1-17
1.5.1 Condensate Trap ..............................................1-17
1.5.2 Installing the Condensate Trap....................................1-17
1.5.3 Cleaning the Condensate Trap . . . . . . . . . . . . . . . . . . . . . . . . . . . . . . . . . . . 1-18
1.5.4 Further Installation Details . . . . . . . . . . . . . . . . . . . . . . . . . . . . . . . . . . . . . . . 1-18
1.6 Water Piping - SPACE HEATING .....................................1-20
1.6.1 General Piping Considerations....................................1-20
1.6.2 Basic Heating Piping Arrangements................................1-24
1.7 Domestic Hot Water System.........................................1-29
1.7.1 Domestic Hot Water System .....................................1-30
1.7.2 Domestic Hot Water Piping ......................................1-30
1.8 Gas Piping ......................................................1-33
1.9 Electrical Connections .............................................1-34
1.9.1 120VAC Line Voltage Hook-up....................................1-34
1.9.2 Power Quality and Electrical Protection .............................1-36
1.9.3 Zone Valve and Zone Pump Connections ...........................1-36
1.9.4 Thermostat / Sensor Wiring ......................................1-36
2.0
UNIT SYSTEM OPERATION .....................................2-1
2.1 GENERAL........................................................2-1
2.2 CONTROL .......................................................2-2
2.3 INSTALLER INTERFACE ............................................2-2
2.3.1 Turning Appliance ON/OFF .......................................2-2
2.4 Tankless Domestic Hot Water Modes ...................................2-5
2.4.1 Tankless Domestic Hot Water - Standard and ECO Comfort Modes ........2-5
2.5 Adding Domestic Hot Water Storage ...................................2-6
2.5.1 Tankless Domestic Hot Water with a Storage Tank .....................2-6
2.5.2 Domestic Hot Water with an Indirect Tank Heater ......................2-6
2.6 SPACE HEATING ..................................................2-6

INSTALLATION AND OPERATION INSTRUCTIONS
6
SFC BOILER / WATER HEATERS - SFC 199
2.6.1 Overview .....................................................2-6
2.7 SEQUENCE OF OPERATION ........................................2-7
3.0 STARTUP & COMMISSIONING ..............................3-1
3.1 LIGHTING & SHUTTING DOWN THE UNIT .............................3-1
3.2 PRIOR TO START-UP ..............................................3-2
3.2.1 Pre-Ignition Checks ............................................3-2
3.2.2 Test Ignition Safety Shutoff ......................................3-2
3.3 COMMISSIONING .................................................3-2
3.4 FUEL CONVERSION ...............................................3-4
3.4.1 Gaining access to combustion chamber, burner removal instructions .......3-5
4.0 MAINTENANCE..........................................4-1
4.1 UNIT MAINTENANCE ..............................................4-1
4.1.1 General Care .................................................4-1
4.1.2 Inspection ...................................................4-1
4.1.3 Venting .......................................................4-1
4.1.4 Condensate Trap ...............................................4-1
4.1.5 Burner . . . . . . . . . . . . . . . . . . . . . . . . . . . . . . . . . . . . . . . . . . . . . . . . . . . . . . . 4-1
4.1.6 Heat Exchanger . . . . . . . . . . . . . . . . . . . . . . . . . . . . . . . . . . . . . . . . . . . . . . . . 4-2
4.1.7 Pump ........................................................4-2
4.1.8 Gas Piping ....................................................4-2
4.1.9 Control Module.................................................4-2
4.1.10 Water Heating System ..........................................4-2
4.1.11 Freeze Protection ..............................................4-2
4.1.12 Unit Treatment ................................................4-3
4.1.13 Relief Valve - Maintenance and Testing .............................4-3
4.1.14 Domestic Hot Water System .....................................4-3
4.1.15 Fan and gas valve removal instructions ............................4-4
4.1.16 Fan and gas valve re-assembly instructions .........................4-4
5.0 TROUBLESHOOTING .....................................5-1
5.1 Preliminary Checks.................................................5-1
5.2 Electronic Components..............................................5-2
5.2.1 Temperature Sensors ............................................5-2
5.2.2 Fan/Blower ...................................................5-3
5.2.3 Thermostat Connections .........................................5-3
5.2.4 Water Pressure Sensor-Type Low Water Cut Off (LWCO)...............5-3
5.2.5 Flue Gas Temperature Sensor .....................................5-4
5.2.6 Domestic Hot Water Flow Sensor ..................................5-4
5.2.7 Domestic Hot Water Sensor.......................................5-4
5.2.8 Outdoor Sensor ................................................5-4
5.2.9 DHW Tank Sensor ..............................................5-5
5.3 WARNINGS AND FAULTS . . . . . . . . . . . . . . . . . . . . . . . . . . . . . . . . . . . . . . . . . . . 5-6

7
INSTALLATION AND OPERATING INSTRUCTIONS
SFC BOILER / WATER HEATERS - SFC 199
5.3.1 Warning Codes.................................................5-6
5.4 OTHER FAULTS ...................................................5-8
5.4.1 No heat (central heating) fault codes ................................5-8
5.4.2 Central heating does not reach the correct temperature .................5-8
5.4.3 Central heating system remains too warm............................5-9
5.4.4 No domestic hot water (DHW) . . . . . . . . . . . . . . . . . . . . . . . . . . . . . . . . . . . . . 5-9
5.4.5 Domestic hot tap water does not reach the correct temperature ...........5-9
5.4.6 Burner ignites loudly............................................5-10
5.4.7 Burner resonates ..............................................5-10
6.0 DIAGRAMS .............................................6-1
6.1 PARTS DIAGRAMS ................................................6-2
6.2 WIRING DIAGRAMS ...............................................6-5
INSTALLATION & COMMISSIONING REPORT..............................6-6
SERVICE RECORD ...................................................6-7
NOTES ...................................................6-8
REVISION HISTORY .................................................6-11

INSTALLATION AND OPERATION INSTRUCTIONS
8
SFC BOILER / WATER HEATERS - SFC 199
PRE-INSTALLATION CHECK
Carefully consider clearances and access, vent travel and termination, gas
supply, condensate removal and combustion air supply.
Consider the following:
•Install the unit in areas where the combustion air source is not subject to
chemical fouling or agricultural vapours. Exposure to corrosive chemical
fumes such as chlorinated and/or uorinated hydrocarbons can reduce the life
of a unit. Cleaners, bleaches, air fresheners, refrigerants, aerosol propellants,
dry-cleaning uids, de-greasers and paint-removers all contain vapours
that can form corrosive acid compounds when burned in a gas ame. Avoid
airborne chlorides such as those released with the use of laundry detergents.
•Locate the unit where water leakage will not result in damage to the area (for
example, do not install above carpeting). If you cannot nd a suitable location,
install a drain pan under the appliance.
•At a new construction site, or during renovations, protect the unit from drywall
dust or other construction related contaminants (not a construction heater).
•Ensure combustion air is drawn from a CLEAN source (outdoors).
•Isolate the unit from interior dust sources.
•When the unit is in operation, assess the impact of the steam plume normally
experienced at the exhaust terminal of a condensing unit. Generally, intake
and exhaust pipes should terminate at a rooftop or sterile wall location. Unit
condensate is corrosive. Protective measures must be taken to prevent
corrosion damage to metal roofs or other metal building components in
contact with the condensate. Keep exhaust plumes well away from all building
air intakes including those of neighbouring properties.
•Place the exhaust outlet so it to reaches 12” minimum above the down-turned
intake. Avoid exhaust re-ingestion.
•For sidewall venting options: Both the inlet and exhaust terminations should
be located on the same side of the building. You can elevate both pipes
in “periscope style” after passing them through the wall to gain required
clearance above grade and snow level.
•Examine the condensate outlet to ensure proper disposal of condensate will
occur during operation. If discharging condensates into building drain piping
materials that are subject to corrosion, you must use a neutralization package.
•Ensure that the pressure relief valve is installed with no valves or other
means of isolation between its inlet and the unit. Pipe the relief valve with
unobstructed piping (minimum 3/4” diameter) to a safe discharge location.
•In locations where power supply quality varies or is unstable, consider
installing surge protection and power conditioners (up to and including battery
back-up uninterrupted power supply devices).
•Ensure the domestic hot water demands are considered before purchasing
the SFC series unit. You may need to add a storage tank or an indirect tank.
CAUTION
Care must be taken to
properly size the unit for
its intended use. Prolonged
full re run time, over-
sizing or under-sizing,
and incorrect ow rates
through the unit can lead
to increased maintenance
costs, equipment stress and
premature failure.
WARNING
Do not use this unit if any
part has been under water.
Immediately call a qualied
service technician to inspect
the unit and to replace any
part of the control system and
any gas control that has been
under water.
DANGER
Should overheating occur or
the gas supply fail to shut off,
do not turn off or disconnect
the electrical supply to the
pump. Instead shut off the
gas supply at a location
external to the appliance.
1-1
INSTALLATION
SFC BOILER / WATER HEATERS - SFC 199
1.0 INSTALLATION
1.1 GENERAL
SFC series gas-red modulating units are low pressure, fully condensing units
with variable input ranges (see specication chart - page 3) designed to be used
for domestic (residential) purposes. Domestic use is considered to be an average
annual gas usage of 4000 m3 for natural gas or ± 1500 m3 for propane. The
units are approved as “Category IV” vented appliances using Direct Vent (sealed
combustion).
Figures 1a and 1b show outer case dimensions and piping. Use this diagram to
nd a suitable location for the unit. See also Section 1.3 Location.
Figure 1a: Dimensions / Connections for SFC Series
NOTE
When using the SFC units
for non-domestic purposes
the warranty conditions
and maintenance periods
described in this document
are no longer valid. Please
contact IBC for advice.

INSTALLATION AND OPERATION INSTRUCTIONS
1-2
SFC BOILER / WATER HEATERS - SFC 199
Figure 1b: Dimensions /
Connections for SFC Series
DESCRIPTION SFC SERIES UNITS
AExhaust Outlet 3" Schedule 40
BCombustion Air 3" Schedule 40
C
Cold Domestic Water
Connection
¾" Male NPT
DHot Domestic Water
Connection ¾” Male NPT
EHeating Water Inlet (Return) ¾" Male NPT
FHeating Water Outlet
(Supply) ¾" Male NPT
GGas Inlet ¾" Male NPT
HCondensate Outlet ¾" Hose
IControl Wiring Passage 7/16” Rubber Plug
Table 1: Connections
Bracket

1-3
INSTALLATION
SFC BOILER / WATER HEATERS - SFC 199
1.2 CODE REQUIREMENTS
The SFC units are certied under CSA 4.9 / ANSI Z21.13 and Water Heater CSA
4.3 / ANSI Z21.10.3.
The installation must conform to the requirements of the authority having
jurisdiction or, in the absence of such requirements, to the National Fuel Gas
Code, ANSI Z223.1/NFPA 54, and/or Natural Gas and Propane Installation Code,
CAN/CSA B149.1. The installation must also conform to the Canadian Electrical
Code Part 1 CSA C22.2 No.1 and/or the National Electrical Code ANSI/NFPA 70.
Where required by jurisdiction, the installation must conform to the Standard for
Controls and Safety Devices for Automatically Fired Boilers, ANSI/ASME CSD-1.
If there is any conict, then the more stringent will apply.
1.3 LOCATION
The SFC series unit is designed and approved for indoor installation. Its venting
options provide exibility of location; for example, placement in an alcove,
basement, utility room or closet. The unit is approved for installation in a closet
(see Table 2 for clearances to combustibles).
Conditions for safe installations
Ensure that the surrounding conditions are 0°C to 50°C and less than 90%
relative humidity.
Install the unit in areas where the combustion air source is not subject to
chemical fouling or agricultural vapours.
Exposure to corrosive chemical fumes such as chlorinated and/or
uorinated hydrocarbons can reduce the life of a unit. Cleaners, bleaches,
air fresheners, refrigerants, aerosol propellants, dry-cleaning uids, de-greasers
and paint-removers contain vapors that can form corrosive acid compounds
when burned in a gas ame. Also avoid airborne chlorides such as those
released with the use of laundry detergents.
Avoid installing the unit where water leakage may damage the area (for example,
above carpeting). If a location such as this cannot be found, a suitable drain pan
should be installed under the appliance.
Unit fastening
Approximate weight for the unit
is
85 lbs / 39 kg. For support fasteners, use
the two of the four supplied ¼” x 2½” long lag screws. Installers will supply 1/4"
bolts if metal mounting systems are used. Attach fasteners to solid material that
are capable of supporting the combined weight of the unit
and piping assembly
components.
Unit clearance
Other factors affecting potential mounting sites:
•Ensure minimum clearance requirements for combustible materials (see
Table 2) are satised.
•For ease of access, we recommend a minimum 24" clearance at the front and
24" above. Check local codes for additional access and service clearance
requirements.
•
At a new construction site, or during renovations, protect the unit from
drywall dust or other construction related contaminants. Combustion air
must be drawn from a CLEAN source (e.g. outdoors) and the unit must be
isolated from interior dust sources.
WARNINGS
- Keep the unit area free
and clear of combustible
materials, gasoline, and
other ammable vapours and
liquids.
- C
ombustion air must not be
drawn from areas containing
corrosive air from swimming
pools or spas, including air
directly next to outdoor pools
and spas.
- T
he unit must not be
exposed to water leaks from
piping or components located
overhead. This includes
condensation dropping from
un-insulated cold water lines
overhead.
-
Ensure the gas ignition
system components are
protected from water (dripping,
spraying, rain, etc.) during
appliance operation and when
servicing (pump replacement,
condensate trap servicing,
control replacement, etc.)

INSTALLATION AND OPERATION INSTRUCTIONS
1-4
SFC BOILER / WATER HEATERS - SFC 199
SURFACE
DISTANCE FROM
COMBUSTIBLE
SURFACES
RECOMMENDED DISTANCE
FOR INSTALLATION AND
SERVICE
Front 2" 24"
Rear 0" 0"
Left Side 1.5" 6" (labels may be difcult to read with
reduced clearance)
Right Side 4" 6" (labels may be difcult to read with
reduced clearance)
Top 2" 24"
Bottom 8" 24"
Table 2: Clearance from the unit cabinet
You must provide a minimum distance below the unit of 8" to allow
clearance for the supplied condensation trap assembly. More clearance will
typically be required to accommodate associated water and gas piping.
Figure 2: Wall mounting of unit
1.3.1 Mobile Home Installations
Units installed in a mobile or manufactured home must conform to the local
building codes.
WARNINGS
Exposed water piping and
associated components
(relief valves, circulators, etc.)
should not be in contact with
combustible materials. Check
local codes for required
clearances and/or provide
adequate insulation.
DO NOT MOUNT THIS
UNIT TO HOLLOW WALL
STRUCTURES - The
combined weight of the
unit, its water contents
and associated piping
components can exceed 150
pounds(68kg). Fasteners
must be rated for this strain,
and must be rmly anchored
into solid material that will
support this weight.
Take precautions to avoid
injury during the installation
of this unit.
DANGER
Do not common vent the SFC
modulating series units with
any other existing or new
appliance.

1-5
INSTALLATION
SFC BOILER / WATER HEATERS - SFC 199
1.4 EXHAUST VENTING AND AIR INTAKE
When you plan the installation, ensure that you consider appropriate venting
materials, travel and termination decisions. In particular, you should manage the
impact of the steam plume typically at the exhaust terminal of a condensing unit.
Generally, intake and exhaust pipes terminate at a rooftop or sterile wall location.
Keep exhaust plumes well away from all building air intakes including those of
neighbouring properties.
Install venting in accordance with the requirements of the jurisdiction having
authority: in Canada, Part 8, Venting Systems of the B149.1-10 Code and any
other local building codes are to be followed. In the USA the National Fuel Gas
Code, ANSI 223.1, latest edition, prevails. Where there is a discrepancy between
the installation instructions below, and the code requirements, you must apply the
more stringent of the two.
Provisions for combustion and ventilation air in accordance with the section “Air
for Combustion and Ventilation,” of the National Fuel Gas Code, ANSI Z223.1/
NFPA 54, or Clause 8.2, 8.3 or 8.4 of Natural Gas and Propane Installation Code,
CAN/CSA B149.1, or applicable provisions of the local building codes.
IMPORTANT
When an existing unit is removed from a common venting system, the common
venting system is likely to be too large for proper venting of the appliances
remaining connected to it.
When re-sizing any portion of the common venting system, the common venting
system should be re-sized to approach the minimum size as determined using
the appropriate tables in the National Fuel Gas Code, ANSI Z223.1 - latest
edition. In Canada, use the B149.1 Installation Code - latest edition.
WARNING
Venting, condensate
drainage, and combustion
air systems for all IBC units
must comply with applicable
codes and the instructions of
their respective Installation
manuals.
Inspect nished vent and air
piping thoroughly to ensure
all are airtight and comply
with the instructions provided
and with all requirements of
applicable codes.
Failure to comply will result
in severe personal injury or
death.
Figure 3: Basic exhaust vent assembly
NOTES
The minimum thickness of the
wall for venting penetration
is 1” and the maximum
thickness for venting is 14”.
Do not connect a water heater
to a chimney ue serving a
separate appliance designed
to burn solid fuel.
The air intake tting can be
moved to the left or to the
right of the exhaust tting.

INSTALLATION AND OPERATION INSTRUCTIONS
1-6
SFC BOILER / WATER HEATERS - SFC 199
Removal of an existing unit
For each appliance remaining connected to the common venting system, you
must follow the steps below. Before you begin, ensure that any other appliances
connected to the common venting system are not in operation.
•Seal any unused opening in the common venting system.
•Inspect the venting system for proper size and horizontal pitch, and
determine that there is no blockage or restriction, leakage, corrosion and
other deciencies that could cause an unsafe condition.
•Where practical, close all building doors and windows. This includes closing
the doors of the appliances remaining connected to the common venting
system. Turn on clothes dryers and any appliance not connected to the
common venting system. Turn on any exhaust fans, such as range hoods
and bathroom exhausts, so they will operate at maximum speed. Do not
operate a summer exhaust fan. Close replace dampers.
•Place in operation the appliance being inspected. Follow the lighting
instructions. Adjust the thermostat, so that the appliance operates
continuously.
•After determining that each appliance remaining connected to the common
venting system properly vents when tested as outlined above, return doors,
windows, exhaust fans, replace dampers and any other gas-burning
appliance to their previous conditions of use.
•Correct any improper operation of the common venting system to ensure that
the installation conforms to the National Fuel Gas Code, ANSI Z223.1 - latest
edition. In Canada, all installations must conform to the current CAN/CGA -
B149.1 Installation Code and/or local codes.
1.4.1 Applications
All SFC series models must be installed as a Direct Vent venting system. The
combustion air must be piped in from the outdoors and connected directly to
the unit’s combustion air connection. See section 1.4.7 for air intake piping
requirements.
1.4.2 Exhaust Vent Material
Exhaust Vent Material – CANADA
Use only PVC, CPVC, or Polypropylene (PPs) vent components. Venting
components must be approved for use with a Category IV appliance, listed under
ULC 636 and must comply with CSA B149.1 (latest edition).
•ULC-636 - PVC
•ULC-636 - CPVC
•ULC-636 - PPs
Exhaust Vent Material – USA
Use only PVC, CPVC, or Polypropylene (PPs) vent components. Venting
components must be approved for use with a Category IV appliance, (UL1738 or
ULC636).
•PVC Schedule 40 –Solid Core
•CPVC Schedule 40 or 80 – Solid Core
•Approved Polypropylene venting materials
NOTE
The ue gas temperature
sensor reports the current
ue gas exhaust temperature
to the unit’s controller. If
necessary, the controller
will reduce the input of the
appliance to meet the ue
gas exhaust temperature
requirements of PVC material.
The controller locks out the
unit if this temperature is
exceeded, and displays F002.

1-7
INSTALLATION
SFC BOILER / WATER HEATERS - SFC 199
Exhaust Venting Material – Other
Do not use ABS or any cellular core pipe for exhaust venting.
Use of cellular core PVC (ASTM F891), cellular core CPVC, or Radel®
(polyphenolsulfone) in venting systems are prohibited.
The unit offers 3" venting connections. Use ttings to adapt to the appropriate
diameter (see Vent Travel below). Insert CPVC or PVC exhaust venting directly
into the 3" female tting on the unit’s top panel. To secure the pipe into the tting,
tighten the clamp. If PPs materials are being used, ensure the proper adapter is
used to transition from the Schedule 40 diameter to the PPs-size diameter.
For PPs material, use the 3" transition/adaptor tting (Sch 40 to PPs) offered by
the respective PPs manufacturers Centrotherm/InnoueTM (their part # ISAA0303),
M&G Dura Vent/PolyPro #3PPS-AD, or #3PPS-3PVCM-3PPF. For PPs material
exposed to outdoor weather, follow the venting suppliers’ recommendations on UV
protection.
Venting must be supported in accordance with applicable code.
Manufacturers of stainless steel Type BH venting systems must submit
their approved transition tting to IBC for evaluation and written approval.
1.4.3 Vent Travel
PVC, CPVC or PPs (Rigid Single Wall) piping is the standard venting option that
enables units to be vented up to 120 equivalent feet from the vent termination
using 3". The actual vent travel allowance is reduced for ttings in accordance
with Table 3.
Example: For the models listed above, using 6 x 90º CPVC elbows, the
maximum lineal measure of pipe allowed using 3" pipe is 72 feet (120' – (6 x 8' =
48’) = 72').
For 3" Flexible PPs, up to 35 actual lineal feet are allowed in a nominally vertical
orientation (>45°). The equivalent length of 3" Flexible PPs is calculated using
a multiple of 1.4:1, e.g. 35' x 1.4 = 49' equivalent. The balance of the venting
allowance is still available for use with rigid PPs piping material.
2" Flexible PPs is not allowed.
EXHAUST PIPE SIZE/FITTINGS MAXIMUM EQUIVALENT LENGTH
Schedule 40 PVC, CPVC or PPs – Allowances are for each side separately.
2" 35'
3" 120'
2" or 3" 90' Long Sweep Vent Elbow Allow 5 equivalent feet
2" or 3" 90' Short Sweep Vent Elbow Allow 8 equivalent feet
2" or 3" 45' Vent Elbow Allow 3 equivalent feet
PPS
PPs 87-90' Elbow Allow 8 equivalent feet
Flex PPS – Factor = 1.4
3" PPs Flex Length multiplied by 1.4 actual feet (Max.
35)
Table 3: Maximum Exhaust Venting Length
WARNINGS
- Do not mix venting materials
from different Polypropylene
manufacturers.
These venting materials are
designed to be installed as
part of a complete system.
Failure to comply may result
in severe personal injury or
death.
- Fully insert the approved
venting material into the
unit’s exhaust outlet and
tighten clamp to ensure the
venting connection is locked
in place.
Inlet and outlet vent
connections. Note the ue
exhaust test port on the outlet
vent.

INSTALLATION AND OPERATION INSTRUCTIONS
1-8
SFC BOILER / WATER HEATERS - SFC 199
Follow all installation instructions supplied by the pipe and tting
manufacturer. Prior to assembly, ensure all venting components are clean
of burrs/debris. Ensure that ingestion into the fan of PVC debris (left in the
combustion air piping) is avoided.
General Venting/Piping Requirements
Slope exhaust venting towards the unit with a pitch of at least 1/4" per foot.
Follow PPs manufacturer requirements, so condensate runs back towards the
trap. Support should be provided for intake and vent piping, particularly for
horizontal runs (follow the local code).
Insert exhaust piping directly into the 3" female plastic tting on the top center of
the unit, and run it horizontally or vertically to the outdoors. We recommend using
a bird screen of 1/4" stainless steel or plastic mesh (e.g., IPEX System 636 drain
grate for CPVC systems to guard against foreign objects.
Figure 4
Secure joints using appropriate solvent cement to bond the respective pipe
material (Canada: PVC/CPVC cement approved under ULC-S636, in accordance
with its manufacturer instructions; USA: PVC (ASTM D2564), or PVC (D2235).
Use transition glue anywhere that PVC and CPVC are joined. Follow the cement
manufacturer’s instructions closely when joining various components. For PPs,
connections must be secured using approved retainer clips supplied by the
respective PPs manufacturer.
Ensure that all vent connections are liquid and pressure tight. Prior to ring the
unit, and before any of the venting run is concealed by the building construction,
you must test the exhaust joints with a soap/water solution. You must ll the
condensate trap before testing.
BEST PRACTICES
To reduce the possibility of
expansion noise, allow a ¼"
gap around the exhaust and
air intake piping.

1-9
INSTALLATION
SFC BOILER / WATER HEATERS - SFC 199
1.4.4 Venting Passage Through Ceiling and Floor
• Conrm material meets local codes including re stopping requirements.
Some local jurisdictions require that a minimum initial length of pipe be
exposed or accessible for inspection.
•
Pipe clearances - no IBC requirements, but best practice allows a minimum ¼"
gap around the pipe to prevent binding and expansion noise. Follow local codes.
•All piping must be liquid and pressure tight.
1.4.5 Rooftop Vent Termination
Direct Vent - Two Pipe
Rooftop vents must terminate as follows:
•
The exhaust pipe can terminate in an open vertical orientation without concern
about rain inltration; rain will drain away through the condensate trap.
•
The intake air pipe is not typically drained, so it must be terminated with a down-
turned elbow (see Figure 5b). The intake pipe does not need to penetrate the
roof at the same elevation as the exhaust (as shown); lower down the roof is
OK.
•The air intake pipe may terminate on the side wall of the building as long as
the air intake terminal is turned down and the side wall of the building is not
exposed to large wind loads i.e.,: prevailing wind (see Figure 5a).
• Optional bird screen may be placed in a termination tting. Leave unglued,
and hold in place with a short nipple to allow easy access for cleaning.
•For roof top venting of multiple unit sets, group all intake terminals together
for a common penetration through a custom cap. Alternatively, place in
the closest proximity achievable using commonly available pipe ashing.
Similarly, group the exhaust pipes and place the 2 separate groups of pipes
at least 3' apart (the closest intake and exhaust pipes must be 36" - or more -
apart). Use the same 12" (minimum) vertical separation for 2 pipe option. For
alternative group terminations, contact the IBC Factory for written guidance.
•DO NOT exhaust vent into a common venting system.
WARNING
Condensate can cause
corrosion of metal roong
components and other
roong materials. Check
with the builder or roong
contractor to ensure that
materials are resistant to
acidic condensate. pH levels
can be as low as 3.0
CAUTION
Vent termination clearances
in this section are
code minimum, or IBC
recommended minimum
requirements, and may
be inadequate for your
installation. You must
examine building envelope
details, and take measures to
avoid admission of moisture
into building structures.
Serious structural damage
may occur if adequate
precautions and clearances
are not allowed for.
These precautions are to be
observed for neighbouring
structures as well as for
the structure the unit(s) are
installed in.
Figure 5b: Rooftop vent terminal congurations
Figure 5a: Rooftop vent terminal
congurations

INSTALLATION AND OPERATION INSTRUCTIONS
1-10
SFC BOILER / WATER HEATERS - SFC 199
Figure 6: Vertical Concentric Termination - Two Kits
Figure 7: Vertical Concentric Termination - Single Kit
DIRECT VENT CONCENTRIC ROOF TOP TERMINATION
Roof Top Concentric Termination kits are approved for use with this unit.
For vertical roof top concentric terminations, you must follow the installation
instructions supplied with the venting material manufacturer. Care must be taken
to install the termination kit a minimum horizontal distance of 10' (305cm) away
from any portion of the building and a minimum of 18" (46cm) above the roof line
plus the anticipated snow line (see Figures 6 and 7).

1-11
INSTALLATION
SFC BOILER / WATER HEATERS - SFC 199
1.4.6 Sidewall Vent Termination
Direct Vent - Two Pipe
Sidewall direct vent applications must be vented as follows:
• Both the inlet and exhaust terminations must be located on the same plane
(side) of the building.
•The exhaust outlet is to be placed so as to reach 12" minimum above the
down-turned intake - to avoid intake re-ingestion of exhaust gases.
•The elevation of both pipes can be raised in “periscope style” after passing
through the wall, then congured as in Figure 8, to gain required clearance.
•Use a 45° elbow on the exhaust termination to launch the plume up and off
the sidewall, for protection of wall.
•Bird screen of 1/4" stainless steel or plastic mesh eg. (IPEX System 636 drain
grate for CPVC systems) is useful to guard against foreign objects.
Figure 8: Sidewall vent termination - piping conguration
Figure 9: Top view - minimum distance of exhaust vent to inside and outside corners.
DIRECT VENT SIDE WALL TERMINATION KITS
The Side Wall Termination kits approved for use with the SFC series units are
subject to restrictions. NOTE: Some jurisdictions may not allow this type of side
wall termination due to close proximity to the neighboring properties. See Figures
10, 11a and 11b on page 1-12.
WARNINGS
- You must maintain at least
the minimum separation of
exhaust vent termination
from unit’s intake air as
illustrated in gures 5, 8 and
12. Failure to do so can result
in a dangerous situation
where exhaust gases are re-
ingested with combustion air.
Damage to the unit can result
from a failure to maintain
these separations. Improper
installation will void the
warranty.
- You must not cover non-
metallic vent pipe and ttings
with thermal insulation.
- In areas of high snowfall,
users must be advised to
check side wall vent and
air intake terminations on
a regular basis to ensure
blockage does not occur.

INSTALLATION AND OPERATION INSTRUCTIONS
1-12
SFC BOILER / WATER HEATERS - SFC 199
You must follow the installation instructions, clearances and wall thickness
requirements recommended of the approved vent termination manufacturer.
Approved Side Wall Termination Kits are listed below: (Alternative vent
termination kits must be submitted to IBC for approval prior to installation.)
• Ipex - #196984 – 2" PVC low prole termination kit
• Ipex - #196985 – 3" PVC low prole termination kit
Figure 10: Non-Concentric kits - Ipex #196984 2” PVC and #196985 3” PVC
Figure 11a: Horizontal Concentric Termination - Two Kits
Figure 11b: Horizontal Concentric Termination - Single Kit
WARNING
The vent for this appliance
must not terminate:
1. Over public walkways.
2. Near soft vents or crawl
space vents or other areas
where condensate or vapor
could create a nuisance or
hazard or cause property
damage.
3. Wherever condensate
vapor could cause damage
or could be detrimental to the
operation of regulators, relief
valves, or to other equipment.
Other manuals for SFC-199
1
Table of contents
Other IBC Boiler manuals
Popular Boiler manuals by other brands

Wolf
Wolf ComfortLine CHK Installation and maintenance instructions

Express
Express AS18 User instructions

Knight
Knight 51 Service manual

Vaillant
Vaillant GA100CS SERIES Installation and service manual

Vaillant
Vaillant ecoTEC exclusive 835 Installation and maintenance instructions

KSM-Stoker
KSM-Stoker KSM-Multistoker 240 XL instructions