IBM ThinkPad 770 User manual

IBM ThinkPad 770
CD-ROM Drive Upgrade
Installation Guide
OPTIONS
by

First Edition (January 1998)
The following paragraph does not apply to the United Kingdom or any country where such provisions are inconsistent with local law: INTERNATIONAL
BUSINESS MACHINES CORPORATION PROVIDES THIS PUBLICATION “AS IS” WITHOUT WARRANTY OF ANY KIND, EITHER EXPRESS OR
IMPLIED, INCLUDING, BUT NOT LIMITED TO, THE IMPLIED WARRANTIES OF MERCHANTABILITY OR FITNESS FOR A PARTICULAR
PURPOSE. Some states do not allow disclaimer of express or implied warranties in certain transactions, therefore, this statement may not apply to you.
This publication could include technical inaccuracies or typographical errors. Changes are periodically made to the information herein; these changes will be
incorporated in new editions of the publication. IBM may make improvements and/or changes in the product(s) and/or the program(s) described in this publication
at any time.
This publication was developed for products and services offered in the United States of America. IBM may not offer the products, services, or features discussed
in this document in other countries, and the information is subject to change without notice. Consult your local IBM representative for information on the
products, services, and features available in your area.
Requests for technical information about IBM products should be made to your IBM reseller or IBM marketing representative.
Copyright International Business Machines Corporation 1998. All rights reserved.
Note to U.S. Government Users — Documentation related to restricted rights — Use, duplication or disclosure is subject to restrictions set forth in GSA ADP
Schedule Contract with IBM Corp.

Contents
Safety: Read First . . . . . . . . . . . . . . . . . . . . . . . iv
Part 1. About This Book ..................................................... 1-1
Part 2. Installation Instructions . . . . . . . . . . . . . . . . . . . . . . . . . . . . . . . . . . . . . . . . . . . . . . . . . 2-1
Part 3. Appendixes . . . . . . . . . . . . . . . . . . . . . . . . . . . . . . . . . . . . . . . . . . . . . . . . . . . . . . . . . 3-1
Appendix A. Safety Information . . . . . . . . . . . . . . 3-1
Appendix B. Help and Service Information ........ 3-11
Appendix C. Product Warranty and Notices ....... 3-13
Copyright IBM Corp. 1998 iii
Safety: Read First
iv

Part 1. About This Book
This booklet describes how to install the ThinkPad 770 CD-ROM
Drive Upgrade in the ThinkPad 770 computer.
This booklet contains two parts:
Part 1: Installation Instructions
This part contains three chapters:
– Checking the Items
This chapter lists the parts included in the option package.
– Device Driver Installation Guide
This chapter describes how to install the device driver for the
following operating systems: OS/2 Warp, Windows 95,
Windows NT, and DOS.
– CD-ROM Drive Installation Guide
This chapter describes how to install the CD-ROM drive into
the UltraBay II of your computer.
Part 2: Appendixes
There are three appendixes:
–Appendix A: Safety Information
This appendix provides safety information.
–Appendix B: Help and Service Information
–Appendix C: Product Warranty and Notices
This appendix provides warranty information, a list of
trademarks, and general notices.
Copyright IBM Corp. 1998 1-1

1-2

Part 2. Installation Instructions
Checking the Items
Before you begin the installation, ensure that you have the following
items:
Ø CD-ROM drive ØDevice Driver Diskette for DOS
Ø This booklet
Copyright IBM Corp. 1998 2-1

Device Driver Installation Guide
The following table provides additional information to help you
determine which device driver to use for the CD-ROM drive,
depending on the operating system you will be using:
Before using the drive with your application programs, you must first
install the device driver. The following table lists the device driver
files used by DOS and Windows:
Install the CD-ROM device driver required by your operating system.
Note: To use the CD-ROM drive to install the operating system,
refer to the operating system documentation.
Device driver for DOS and
Windows IBMTPCD.SYS
File system for DOS and
Windows MSCDEX.EXE (MS-DOS
CD-ROM Extensions)
Operating System What You Need to Do
OS/2 Warp
Windows 95
Windows NT
These operating systems have built-in device
drivers that work with this CD-ROM drive.
See the “OS/2 Warp”, “Windows 95”, or
“Windows NT” section.
PC DOS V7.0
MS-DOS V6.22
Windows for
Workgroups
V3.11
You need to install a CD-ROM device driver.
See the “DOS” section.
2-2

OS/2 Warp
To install the CD-ROM device driver for OS/2 Warp, follow these
instructions:
1. Turn on the computer. Start OS/2 Warp.
2. Double-click on OS/2 System.
3. Double-click on System Setup.
4. Double-click on Selective Install.
5. Select CD-ROM Device Support; then click on OK.
6. Select Non-listed IDE CD-ROM and click on OK; then click on
OK again at the System Configuration menu.
7. At the OS/2 Setup and Configuration menu, select Install.
8. Follow the instructions on the screen to complete the installation.
Software Parameters in the CONFIG.SYS File
When the CD-ROM device driver is installed in your computer, OS/2
automatically modifies the CONFIG.SYS file. The following
describes the parameters for the CD-ROM device driver in the
CONFIG.SYS file:
DEVICE=OS2CDROM.DMD [options]
This is the CD-ROM device class driver, where options can be:
[/V] Displays messages during the installation.
[/Q] Does not display messages during the installation.
BASEDEV=IBMIDECD.FLT [option]
This is the IDE adapter device driver for ATA Packet Interface
devices, where option can be:
[/V] Displays messages during the installation.
IFS=[drive]:[path]CDFS.IFS [options]
This is the ISO9660/HSG file system for OS/2. All CD data
discs are recorded with this file format. where options can be:
[/C:n]Indicates how many 64-KB segments to use for the
sector cache. The default is n=2, two 64-KB
segments.
[/M:n]Indicates the maximum number of file sectors to be
read at a time. The default is n=8, eight sectors.
[/V] Displays messages on the computer screen during the
installation.
[/Q] Does not display messages on the computer screen
during the installation.
You have now completed the modifications required for the CD-ROM
device driver.
Part 2. Installation Instructions 2-3

Windows 95
Windows 95 comes with a generic ATAPI CD-ROM device driver that
works with your computer's CD-ROM. You do not need to install a
new device driver for your CD-ROM. You can enable the generic
device driver by following the instructions below.
Note
If you upgraded to Windows 95 from DOS or Windows 3.x, you
must disable the original DOS/Windows CD-ROM device driver
in order to allow the generic Windows 95 device driver to work
effectively.
To enable the Windows 95 generic ATAPI CD-ROM device driver,
follow these instructions:
1. Go to the MS-DOS command prompt.
2. Open the CONFIG.SYS file.
3. Find the following line:
DEVICE=C:\xxxxxx\IBMTPCD.SYS /D:TPCDðð1.....
where xxxxxx is the subdirectory where you have installed the
CD-ROM device driver. If you cannot find the line, quit the file
and go to step 5.
4. Comment out the line, changing it as follows:
REM DEVICE=C:\xxxxxx\IBMTPCD.SYS /D:TPCDðð1.......
If the line is already commented out, quit the file and go to the
next step.
5. Open the AUTOEXEC.BAT file.
6. Find the following line:
C:\xxxxxx\MSCDEX.EXE /D:TPCDðð1.....
where xxxxxx is the subdirectory where you have installed the
CD-ROM device driver. If you cannot find the line, quit the file
and go to step 8.
7. Comment out the line, changing it as follows:
REM C:\xxxxxx\MSCDEX.EXE /D:TPCDðð1......
If the line is already commented out, quit the file and go to the
next step.
8. Exit the MS-DOS command prompt; then restart your system.
You have now completed the modifications required for the CD-ROM
device driver.
2-4

Windows NT
Windows NT comes with a generic ATAPI CD-ROM device driver
that works with your computer's CD-ROM. The generic Windows NT
CD-ROM device driver is automatically installed during Windows NT
setup.
When you install this CD-ROM device after Windows NT is already
installed, add an ATAPI CD-ROM device driver according to the
following instructions:
If you are installing under Microsoft Windows NT 4.0:
1. Boot the system and log on with an administrator account.
2. Double-click on My Computer, Control Panel, and then
SCSI Adapter. The SCSI Adapter menu appears.
3. Click on the Drivers tab and then Add.... The selection list
menu appears.
4. Select Standard mass storage controllers as the
manufacturer, select IDE CD-ROM (ATAPI
1.2)/Dual-channel PCI IDE Controller as the SCSI adapter,
and click on OK.
5. Windows NT prompts you to restart your system. Click on
Yes.
If you are installing under Microsoft Windows NT 3.51:
1. Boot the system and log on with an administrator account.
2. From the Program Manager, double-click on Windows NT
Setup in Main.
3. Select Options, and then Add/Remove SCSI Adapters in
the pull-down menu. The SCSI Adapter Setup panel
appears.
4. Click on Add... to add a new driver. A message appears
explaining how to recover from a wrong installation.
5. Select OK. The Select SCSI Adapter Option menu
appears.
6. Select IDE CD-ROM (ATAPI 1.2)/Dual-channel PCI IDE.
7. Click on Install and follow the instructions.
8. When prompted; restart your system.
Part 2. Installation Instructions 2-5

DOS
To install the CD-ROM device driver for DOS and DOS/V or later:
1. Turn on the computer.
2. Locate the CD-ROM device driver diskette that was shipped with
your computer. Insert it into the diskette drive.
3. Type A:UINSTALL
Then press Enter.
4. Follow the instructions on the screen to complete the installation.
5. After the installation is complete, remove the diskette from the
diskette drive and restart your system.
You have now completed the installation of the CD-ROM device
driver for DOS.
Software Parameters in the CONFIG.SYS File
When the CD-ROM device driver is installed in your computer,
UINSTALL automatically modifies the CONFIG.SYS file. The
following are the parameters for the CD-ROM device driver:
DEVICE=[drive:][path]IBMTPCD.SYS [/C]
IBMTPCD.SYS is the CD-ROM device driver. Make sure this
line is inserted after the EMM386 statement.
[/C] Sets the cache size in the XMS memory. When this
parameter is set, the cache size in the XMS memory is
512 sectors. When it is not set, the default is 0.
Note: Do not specify the [/R] parameter for this option.
[drive:][path]MSCDEX.EXE /D:TPCDðð1
[/M:n][/E][/V][/L:x]
The Microsoft CD-ROM Extensions program (MSCDEX.EXE),
for MS-DOS Version 3.11 or later, works with the
IBMTPCD.SYS device driver to allow your computer to access
the CD-ROM drive, where options can be:
/D Specifies the name of the CD-ROM drive, TPCD001.
[/M:n]Specifies the number of sector buffers to store the most
recent disc data temporarily. The default is n=4.
[/E] Specifies that the computer will use expanded memory,
if available.
2-6

[/V] Displays on the computer screen a summary of RAM
allocation and expanded memory usage at power-on.
[/L:x]Specifies the drive letter (represented here by x) for the
CD-ROM drive. Do not assign a drive letter already
used by another drive; otherwise, the computer cannot
access the CD-ROM drive.
Software Parameters in the AUTOEXEC.BAT File
The following describes about the SMARTDRV parameter in the
AUTOEXEC.BAT file:
SMARTDRV
If you are using DOS SMARTDRV caches and are planning to
use a photo CD or multiple session discs, add the /U parameter
to the SMARTDRV line in the AUTOEXEC.BAT file. This is
because photo CDs or multiple session discs are not compatible
with the SMARTDRV caches.
If you are planning to play CD-i movies, do not cache the
CD-ROM drive with SMARTDRV Version 5.0 or 5.1, which is
supplied with PC DOS Version 7.0.
Part 2. Installation Instructions 2-7
CD-ROM Drive Installation Guide
This chapter describes how to install the CD-ROM drive into the
UltraBay II.
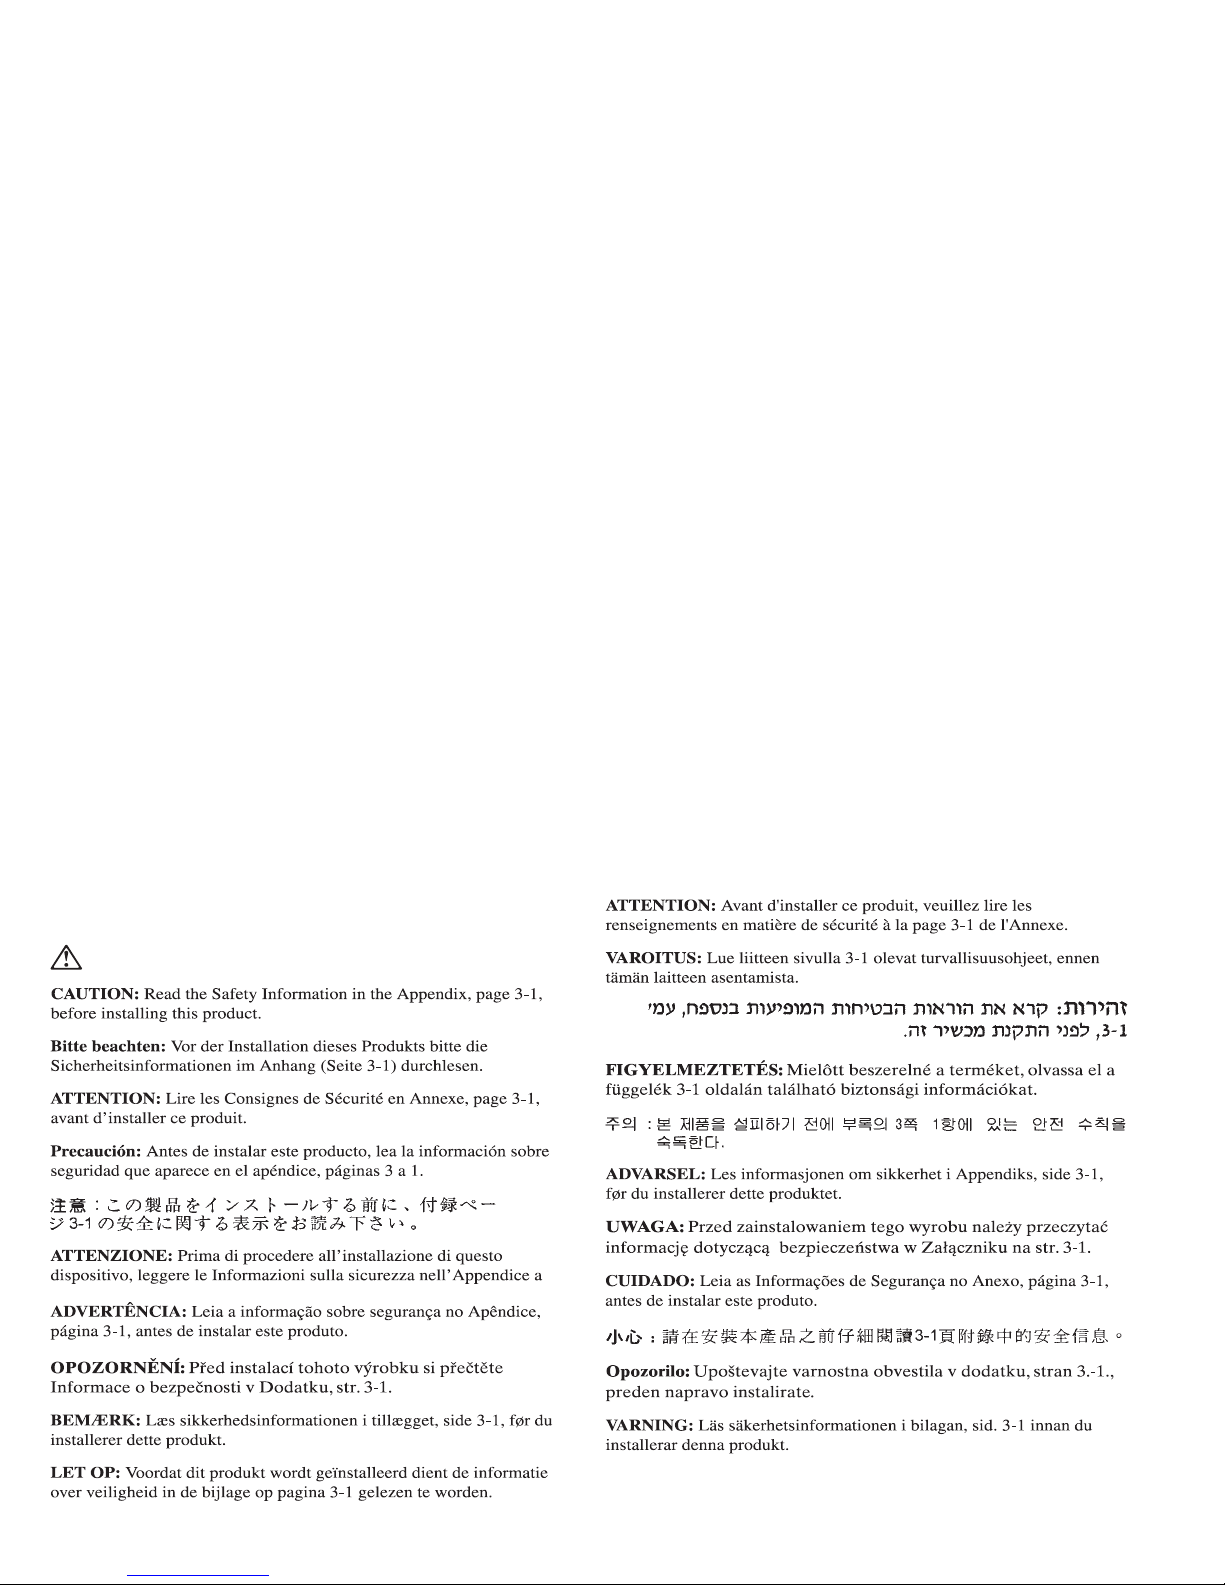
1. Turn off the computer. Disconnect the AC adapter and all cables
from the computer.
2. Slide the latch to the right .1/ until the device release lever .2/
pops out.
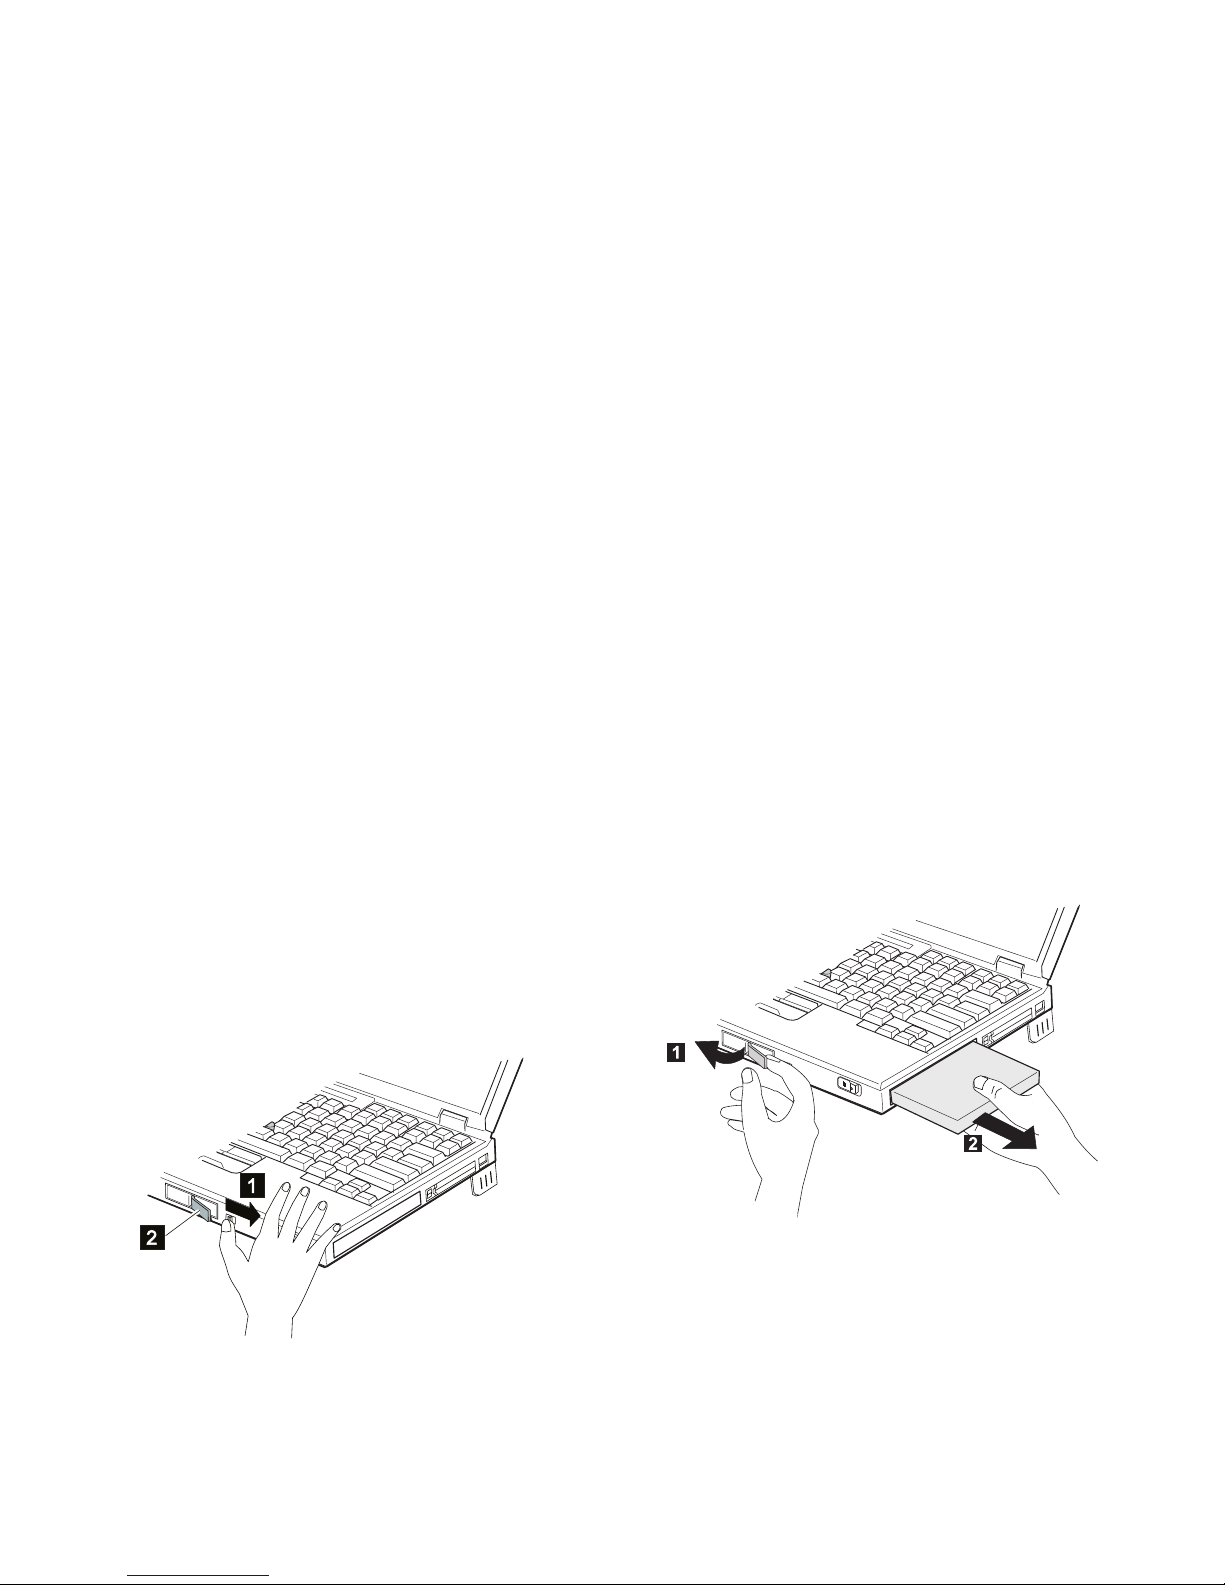
3. Pull the device release lever toward you .1/ until the device in
the UltraBay II is disengaged from the connector. Pull the device
.2/ out of the UltraBay II.
2-8

4. Insert the CD-ROM drive into the UltraBay II .1/ until it
engages the connector. Then push the device release lever .2/
until it is latched.
5. Connect all cables and the AC adapter to the computer.
6. Turn on the computer.
You have now finished installing the ThinkPad 770 CD-ROM Drive
Upgrade.
Part 2. Installation Instructions 2-9

Part 3. Appendixes
Appendix A.
Safety Information
Copyright IBM Corp. 1998 3-1

3-2

Part 3. Appendixes 3-3

3-4

Part 3. Appendixes 3-5
Other manuals for ThinkPad 770
6
Other IBM Laptop Accessories manuals


