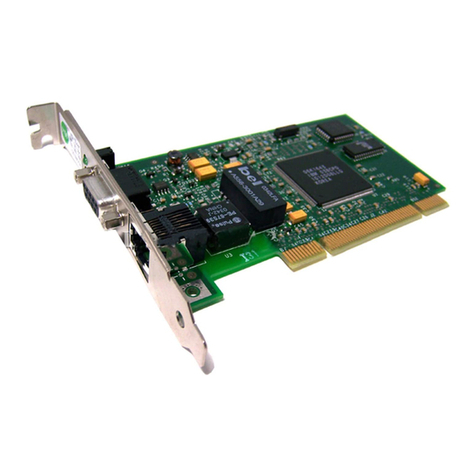
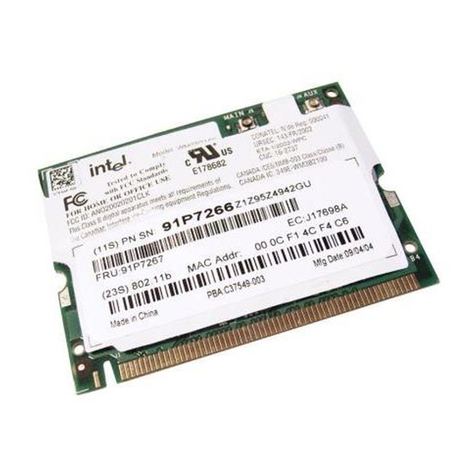
IBM 10/100 Ethernet Mini-PCI Adapter User manual

IBM
OPTIONS
by IBM
IBM 10/100 Ethernet
Mini-PCI Adapter
with 56K Modem by
3Com
User’s Guide


IBM
IBM 10/100 Ethernet
Mini-PCI Adapter
with 56K Modem by
3Com
User’s Guide

Note: Before using this information and the product it supports, be sure to
read the information in Appendix B, "Notices" on page B-1.
First Edition (February 2000)
© COPYRIGHT INTERNATIONAL BUSINESS MACHINES CORPORATION, 2000.
All rights reserved.
Note to U.S. Government Users — Documentation related to restricted rights — Use,
duplication or disclosure is subject to restrictions set forth in GSA ADP Schedule
Contract with IBM Corp.

iii
Contents
Product description . . . . . . . . . . . . . . . . . . . . . . . . . . . . . . . . . . . . . . . . . . . . . . . . . . .1-1
Overview. . . . . . . . . . . . . . . . . . . . . . . . . . . . . . . . . . . . . . . . . . . . . . . . . . . . . . . . . . . . 1-1
Product features. . . . . . . . . . . . . . . . . . . . . . . . . . . . . . . . . . . . . . . . . . . . . . . . . . . . . . 1-1
Connecting and using the 3Com 10/100 Mini-PCI Ethernet adapter . . . . . . . . .2-1
Network connections . . . . . . . . . . . . . . . . . . . . . . . . . . . . . . . . . . . . . . . . . . . . . . . . 2-1
Network software . . . . . . . . . . . . . . . . . . . . . . . . . . . . . . . . . . . . . . . . . . . . . . . . . . . . 2-2
Network wake-up features. . . . . . . . . . . . . . . . . . . . . . . . . . . . . . . . . . . . . . . . . . . . . 2-3
Advanced network settings . . . . . . . . . . . . . . . . . . . . . . . . . . . . . . . . . . . . . . . . . . . . 2-4
Setting up the network adapter. . . . . . . . . . . . . . . . . . . . . . . . . . . . . . . . . . . . . . . . . 2-5
Frequently asked questions . . . . . . . . . . . . . . . . . . . . . . . . . . . . . . . . . . . . . . . . . . . 2-17
Connecting and using the 3Com V.90 Mini-PCI modem . . . . . . . . . . . . . . . . . . .3-1
Connecting the modem cable. . . . . . . . . . . . . . . . . . . . . . . . . . . . . . . . . . . . . . . . . . . 3-1
Configuring communications software . . . . . . . . . . . . . . . . . . . . . . . . . . . . . . . . . . 3-1
Transmitting data and faxes. . . . . . . . . . . . . . . . . . . . . . . . . . . . . . . . . . . . . . . . . . . . 3-2
Modem features . . . . . . . . . . . . . . . . . . . . . . . . . . . . . . . . . . . . . . . . . . . . . . . . . . . . . . 3-6
Modem device drivers . . . . . . . . . . . . . . . . . . . . . . . . . . . . . . . . . . . . . . . . . . . . . . . . 3-8
Modem AT commands . . . . . . . . . . . . . . . . . . . . . . . . . . . . . . . . . . . . . . . . . . . . . . . 3-11
Modem S-Registers . . . . . . . . . . . . . . . . . . . . . . . . . . . . . . . . . . . . . . . . . . . . . . . . . . 3-11
Modem messages. . . . . . . . . . . . . . . . . . . . . . . . . . . . . . . . . . . . . . . . . . . . . . . . . . . . 3-12
Frequently asked questions . . . . . . . . . . . . . . . . . . . . . . . . . . . . . . . . . . . . . . . . . . . 3-14
Appendix A. Help and service information . . . . . . . . . . . . . . . . . . . . . . . . . . . . . A-1
Online technical support . . . . . . . . . . . . . . . . . . . . . . . . . . . . . . . . . . . . . . . . . . . . . . A-1
Telephone technical support . . . . . . . . . . . . . . . . . . . . . . . . . . . . . . . . . . . . . . . . . . . A-1
Appendix B. Notices. . . . . . . . . . . . . . . . . . . . . . . . . . . . . . . . . . . . . . . . . . . . . . . . . . B-1
Trademarks. . . . . . . . . . . . . . . . . . . . . . . . . . . . . . . . . . . . . . . . . . . . . . . . . . . . . . . . . . B-1
Electronic emissions notices. . . . . . . . . . . . . . . . . . . . . . . . . . . . . . . . . . . . . . . . . . . . B-1

iv Book Title

© Copyright IBM Corp. 2000 1-1
1. Product description
This section provides an overview of the manual and information on the product features.
Overview
The IBM®10/100 Ethernet Mini-PCI Adapter with 56K Modem by 3Com is built into
your notebook computer and offers the same local area network (LAN) and modem
properties that are available in a combination LAN + Modem PC Card. It is configured
from the factory, ready to use, and covered by your IBM ThinkPad®computer warranty.
When a connection is made, the IBM 10/100 Ethernet Mini-PCI Adapter with 56K
Modem by 3Com automatically determines if it is a network or modem connection.
Mini-PCI technology puts both network and modem functions right inside your computer.
With Mini-PCI, you no longer need to use PC Cards for network and modem functions.
The IBM 10/100 Ethernet Mini-PCI Adapter with 56K Modem by 3Com is already
configured to work with Microsoft®Windows®2000, Windows 98, Windows 95, and
Microsoft Windows NT®4.0 Server. If you need information about removing or
reinstalling the combination card, refer to the online User’s Guide on your ThinkPad
computer.
Product features
The IBM 10/100 Ethernet Mini-PCI Adapter with 56K Modem by 3Com comprises two
separate functions built into a single circuit board: a full-function 10/100 Ethernet function
and a 56K data/fax modem. LAN and modem software applications treat the single
adapter as though it were two adapters:
• The Ethernet portion of the adapter is recognized as a 3Com 10/100 Mini-PCI
Ethernet adapter.
• The modem portion of the adapter is recognized as a 3Com 56K V.90 Mini-PCI
modem.
These names are used in the rest of this manual to identify the appropriate function.
3Com 10/100 Mini-PCI Ethernet adapter
This portion of the adapter supports network connections in either a 10BASE-T or
100BASE-TX network. It contains all the capabilities of a 3Com LAN PC Card, including
DynamicAccess software, Remote Wake-Up, Wake on LAN®or Plug-In-and-Go, and
Managed Boot Agent, and is already configured so that you only need to make a network
connection to access your network. An RJ-45 connector is provided for industry-standard
network cables. See "Network cabling requirements" on page 2-1 for more information.
3Com 56K V.90 Mini-PCI modem
This portion of the adapter enables you to make modem connections. It contains all the
capabilities of a 3Com Modem PC Card, including V.90 connection speeds. You can use it
to access the Internet, bulletin board systems or services (BBS), or to send and receive
faxes. An RJ-11 connector is provided for industry-standard telephone cables.
1-2 IBM 10/100 Ethernet Mini-PCI Adapter with 56K Modem by 3Com User’s Guide
The IBM 10/100 Ethernet Mini PCI Adapter with 56K
Modem by 3Com is already installed in your ThinkPad
computer. In some instances, however, you might have to
install the combination card. Before installing a
combination card, you must first tear off one of the MAC
address labels found on the combination card wrap and
attach it to the rear panel of your computer. For more
information on installing the card, refer to the
documentation that comes with your ThinkPad computer.

© Copyright IBM Corp. 2000 2-1
2. Connecting and using the 3Com 10/100 Mini-
PCI Ethernet adapter
This section contains information on network connections, network software, network
wake-up features, advanced network settings, device driver installation, and frequently
asked questions.
Network connections
The IBM 10/100 Ethernet Mini-PCI Adapter with 56K Modem by 3Com (referred to as
the 3Com 10/100 Mini-PCI Ethernet adapter in this section) provides superior LAN
technology that is built into your notebook computer.
Network cabling requirements
You must use a twisted-pair cable that complies with the Electronic Industries
Association/ Telecommunications Industries Association (EIA/TIA) T568B Commercial
Building Wiring Standard and the Technical Services Bulletin TSB38 standards for
quality, distance, and connectors.
Twisted-pair cable consists of copper wires surrounded by an insulator. Two wires are
twisted together (the twisting prevents interference problems) to form a pair, and the pair
forms a circuit that can transmit data. A cable is a bundle of one or more twisted pairs
surrounded by an insulator.
Unshielded twisted pair (UTP) is the most commonly used type of twisted-pair cable.
Shielded twisted pair (STP) is a twisted-pair cable that provides protection against
crosstalk. Twisted-pair cable is now commonly used in Ethernet, Fast Ethernet, and other
network topologies.
The following table includes descriptions and the length requirements for the twisted-pair
cables that work with network protocols.
Network protocol Twisted-pair cable
category Description Maximumnetwork
cable length
10BASE-T 3 Voice and data
transmission up to 25
MHz. This type of UTP is
the most common type of
installed cable in older
corporate wiring schemes.
Supports 10BASE-T
operation only. The cable
typically has four pairs of
wires.
100 m (328 ft)

2-2 IBM 10/100 Ethernet Mini-PCI Adapter with 56K Modem by 3Com User’s Guide
Connecting to the network
To connect the connector to a 10 Mbps Ethernet or 100 Mbps Fast Ethernet network, do
the following:
1. Plug the RJ-45 connector on the network cable into the RJ-45 connector.
2. Connect the other end of the network cable to an active Ethernet or Fast Ethernet
network connector.
Network software
This section contains information on network software applications.
DynamicAccess software
DynamicAccess is software application that can be used with the 3Com 10/100 Mini-PCI
Ethernet Adapter. DynamicAccess software adds intelligence to the network adapter by
integrating the following features:
•Distributed RMON (dRMON) — Enables full RMON reporting on all the network
segments, including switched networks, without having to place dedicated RMON
probes throughout the network.
•Traffic prioritization — Ensures that business-critical and delay-sensitive traffic
(such as multimedia applications) has priority over normal data.
•Efficient multicast control — Prevents flooding of switched networks by multicast
applications such as video training, stock quotes, or online news.
The DynamicAccess software is included on the IBM 10/100 Ethernet Mini-PCI Adapter
with 56K Modem by 3Com CD, and can be installed in Windows 98, Windows 95,
Windows NT 4.0, or Windows 2000.
For detailed information on the DynamicAccess software, refer to the 3Com Web site at:
http://www.3com.com/dynamicaccess
10BASE-T 4 Voice and data
transmission up to 33
MHz. This type of UTP is
not very common.
Supports 10BASE-T
operation only.
100 m (328 ft)
10BASE-T and
100BASE-TX 5 Voice and data
transmission up to 125
MHz. This is the most
popular cable used today
for new installations.
Supports 10BASE-T or
100BASE-TX operation.
The cable normally has
four pairs of copper wire
and three twists per foot.
100 m (328 ft)
Network protocol Twisted-pair cable
category Description Maximumnetwork
cable length

2. Connecting and using the 3Com 10/100 Mini-PCI Ethernet adapter 2-3
DynamicAccess Managed PC Boot Agent
The DynamicAccess Managed PC Boot Agent comes with the 3Com 10/100 Mini-PCI
Ethernet Adapter. With the PC boot agent, system administrators can accomplish a
comprehensive range of management tasks or repairs from a central management station.
These tasks include installing and configuring new computers, performing software
upgrades, reconfiguring multiple computer systems, backing up and restoring hard disk
drives, and scanning for viruses. After the PC boot agent performs these tasks, boot
control is returned to the local hard disk drive on the computer.
The DynamicAccess managed PC boot agent increases network manageability and
reduces cost because routine tasks can be performed from a central location without
requiring major network changes or upgrades.
For documentation or detailed information on DynamicAccess managed PC boot agent,
visit the 3Com Web site at:
http://www.3com.com/managedpc
Managed Boot Agent (MBA)
Managed Boot Agent (MBA) comes with the 3Com 10/100 Mini PCI Ethernet adapter.
With MBA, system administrators can accomplish, from a central management station, a
comprehensive range of management tasks or repairs, such as installing and configuring
new computers, performing software upgrades, reconfiguring multiple systems, backing
up and restoring hard disk drives, and scanning for computer viruses. After these tasks are
completed, boot control is returned to the computer local hard disk drive.
MBA increases network manageability and reduces costs, because routine tasks can be
performed from a central location without requiring major network changes or upgrades.
For detailed information on MBA, visit the 3Com Web site at:
http://www.3com.com/
DMI 2.0
DMI (Desktop Management Interface) 2.0 enables managed computers and net computers
to report details about themselves and their attached devices across the network to a DMI
2.0 management application. A network administrator can use this information to assist in
remotely managing and configuring computer clients and servers. The DMI 2.0 software
is included on the IBM 10/100 Ethernet Mini-PCI Adapter with 56K Modem by 3Com CD.
For detailed information on DMI, refer to the 3Com Web site at:
http://www.3com.com/
Network wake-up features
This section contains information on the Remote Wake-up and Wake on LAN features.
Remote Wake-up (from standby state)
The Remote Wake-up feature enables you to remotely turn on a networked computer that
has gone into standby mode by sending a wake-up packet through the LAN from another
computer.

2-4 IBM 10/100 Ethernet Mini-PCI Adapter with 56K Modem by 3Com User’s Guide
Notes:
1. The Remote Wake-up feature is supported by Windows 2000 and Windows 98
Second Edition ACPI. If you have another version of Windows 98, check with your
network administrator to see if that version supports the Remote Wake-up feature.
2. Consult your network administrator before turning on the Remote Wake-up feature.
To enable the Remote Wake-up feature, you will also need to perform the following
procedure:
a. In the Device Manager window, select 3Com 10/100 Mini PCI Ethernet
Adapter.
b. Click Properties.
c. Click the Power Management tab.
d. Place a check in the Allow this device to bring the computer out of standby
check box.
You can use Remote Wake-up to awaken the computer in one of the following ways:
1. You can wake your computer through a remote management application. This
application sends what is often called a magic or special packet.
2. You can use TCP/IP to “ping” the computer system through an IP address that
identifies the computer.
3. You can use the Network Neighborhood settings to locate the computer and wake it
up. Windows recognizes the Advanced Configuration and Power Interface (ACPI)
standard, which defines the different power states for the computer. The 3Com
10/100 Mini-PCI Ethernet adapter is also compliant with the ACPI standard and
provides remote wake-up capabilities through the Windows operating system.
To support Remote Wake-up, your notebook computer must have the following features:
• BIOS that supports Remote Wake-Up
• Operating system that supports Remote Wake-up
• ACPI capability
For more information on Remote Wake-up, Wake on LAN, or ACPI, refer to your
Windows documentation or your network administration documentation.
Wake on LAN (from power-off state)
Attention: The Wake on LAN or Plug-In-and-Go feature can be enabled only by a
network administrator, because it is used to remotely administer to the notebook computer.
Wake on LAN (WOL), also called Plug-In-and-Go (PIG), enables a remote management
application to send amagic packet to remotely start your notebook computer. When WOL
is enabled and ac power applied, a computer can be turned off and then remotely turned on
when it receives a magic packet. The WOL feature is usually used by network
administrators to provide system services to the network during non-peak hours.
Advanced network settings
This section provides information on adjusting the following advanced network settings in
the 3Com 10/100 Mini-PCI Ethernet Adapter window:

2. Connecting and using the 3Com 10/100 Mini-PCI Ethernet adapter 2-5
•Network Link Selection. You can use this setting to select the speed (10BASE-T or
100BASE-TX) and duplex settings (half-duplex or full-duplex) for your link. Auto
Negotiation, the default, enables your notebook computer to sense and set the current
connection speed.
•Wake on Link. The default for this setting is On. If this setting is enabled, your site
can initiate a remote wake-up upon connecting to the network.
•Wake on Magic. The default for this setting is On. If this setting is enabled, your site
can initiate a remote wake-up when it receives a magic packet.
•Wake on Pattern. The default for this setting is On. If this setting is enabled, your
site can initiate a remote wake-up when it receives a packet pattern.
•LAN Function. In Windows NT 4.0, you can disable the LAN to conserve battery
power. The LAN function setting options include:
— LAN Enabled (default)
— LAN Disabled (power savings)
Adjusting advanced network settings in Windows 98 or Windows 95
To use the Advanced Settings feature to adjust settings in Windows 98 or Windows 95:
1. Click Start.
2. Select Settings; then click Control Panel.
3. Double-click the Network icon.
4. Double-click 3Com 10/100 Mini PCI Ethernet Adapter. The 3Com 10/100 Mini-
PCI Ethernet Adapter window opens.
5. Click the Advanced tab so that you can adjust the Network Link or Wake on LAN
settings.
Adjusting advanced network settings in Windows NT 4.0
To use the Advanced Settings feature to adjust settings in Windows NT 4.0:
1. Click Start.
2. Select Settings; then click Control Panel.
3. Double-click the Network icon.
4. Click the Adapters tab.
5. Double-click 3Com 10/100 Mini PCI Ethernet Adapter to open the Setup window
that contains the Advanced Settings tab for Windows NT 4.0.
Adjusting advanced network settings in Windows 2000
To use the Advanced Settings feature to adjust settings in Windows 2000:
1. Click Start.
2. Select Settings; then select Network and Dial-up Connections.
3. Right-click the Local Area Connection icon and click Properties.
4. Click Configure. The 3Com 10/100 Mini PCI Ethernet Adapter window opens.
5. Click the Advanced tab so that you can adjust the Network Link or Wake on LAN
settings.

2-6 IBM 10/100 Ethernet Mini-PCI Adapter with 56K Modem by 3Com User’s Guide
Setting up the network adapter
This section contains information on using the device drivers for Windows 98, Windows
95, Windows NT 4.0, and Windows 2000 to set up the network adapter.
Windows 98 device drivers
This section contains information on installing, uninstalling, and updating the device
drivers for Windows 98.
The device driver for Windows 98 is already installed on your notebook computer. This
section provides the installation procedure, if you need to reinstall the device driver.
Before you install the device driver:
• Make sure that the 3Com network adapter is connected to the network.
• If the Windows 98 installation files are not on your hard disk drive, be sure that you
have the Windows 98 installation CD or diskette.
Installing the device driver for Windows 98
To install the 3Com 10/100 Mini-PCI Ethernet adapter device driver for Windows 98:
1. Insert the IBM 10/100 Ethernet Mini-PCI Adapter with 56K Modem by 3Com CD
that comes with your notebook computer into the CD-ROM drive.
2. Find and open the LANSETUP folder that is on the CD.
3. Double-click the SETUP.EXE file.
4. Follow the on-screen instructions. When you are prompted to do so, restart the
computer.
5. After the computer restarts and the Insert Disk message displays, click OK.
6. In the Copying Files window, type C:\WINDOWS\OPTIONS\CABS, and then click OK.
7. In the Systems Setting Change window, click Yes to restart the computer. If you are
reinstalling the device driver, the reinstallation is complete. If you are installing the
device driver for the first time, go to the next step.
8. If this is the first time that networking is being installed on your computer, you will
be prompted to enter the following information in the Identification tab window:
•Computer Name—Identifies the computer on the network for other users. This
entry must be a unique name of 15 characters or fewer, containing no spaces.
•Workgroup—Identifies the group (for example, your department name) to
which your computer belongs. If you belong to a peer-to-peer network, this
entry must be the same for all the computers in your network.
•Computer Description (optional)—Displays additional details about this
computer to other users. For example, you could specify that the computer has a
printer attached.
9. If the Windows 98 installation files are on your hard disk drive, click OK. In the
Copyfiles from entry box, type the directory (usually C:\WINDOWS\OPTIONS\CABS),
and then click OK. The installation is complete when you are prompted to click
Finish.

2. Connecting and using the 3Com 10/100 Mini-PCI Ethernet adapter 2-7
10. If you do not have the Windows 98 installation files on your hard disk drive, remove
the CD you inserted in Step 1 and insert the Windows 98 installation CD or diskette
into the CD-ROM drive or the diskette drive; then click OK.
11. Click Finish. When you are prompted to do so, restart your computer to complete
the installation.
12. If there is a CD in the CD-ROM drive or a diskette in the diskette drive, remove it.
13. Click Yes to restart the computer.
14. After Windows restarts, double-click the Network icon in the Windows Control
Panel and make sure that the configuration settings meet the requirements of your
network environment. Contact your system administrator for assistance.
Uninstalling the device driver for Windows 98
Sometimes previous or incomplete installations leave problems that can affect the
operation of the network adapter. Possible problems might be indicated if:
• The 3Com 10/100 Mini-PCI Ethernet adapter is not working.
• Windows 98 does not detect the 3Com 10/100 Mini-PCI Ethernet adapter.
If the device driver installation is unsuccessful for any reason, try removing the software
and repeating the device driver installation procedures. If you followed the installation
steps in “Installing the device driver for Windows 98” on page 2-6, the existing device
drivers were uninstalled prior to the installation. However, you can also use the following
steps to uninstall a device driver:
1. Click Start →Settings →Control Panel.
2. Double-click the Network icon.
3. Select 3Com 10/100 Mini PCI Ethernet Adapter, and then click Remove.
4. Click OK, and then restart the computer and reinstall the device driver using
instructions given in “Installing the device driver for Windows 98” on page 2-6.
Updating the device driver in Windows 98
You might need to update your network device driver if another version of the network
device driver becomes available. To update your network device driver in Windows 98:
1. Click Start →Settings →Control Panel.
2. Double-click the System icon.
3. Click the Device Manager tab. A list of devices displays, arranged by type.
4. Double-click Network Adapters.
5. Double-click 3Com 10/100 Mini PCI Ethernet Adapter. The 3Com 10/100 Mini
PCI Ethernet Adapter Properties window opens.
6. Click the Driver tab.
7. Click Update Driver and provide the path to the updated device driver.
Confirming proper installation in Windows 98
To confirm that your network is connected in Windows 98:
1. Click Start →Settings →Control Panel.
2. Double-click the System icon.
3. Click the Device Manager tab. A list of devices displays, arranged by type.

2-8 IBM 10/100 Ethernet Mini-PCI Adapter with 56K Modem by 3Com User’s Guide
4. Double-click Network Adapters. The 3Com 10/100 Mini PCI Ethernet Adapter
displays, confirming successful installation.
5. Double-click 3Com 10/100 Mini PCI Ethernet Adapter to display a description of
the network connection and its current status. The device status will display the This
device is working properly. message.
If a red X or a yellow exclamation point (!) displays next to the name of the network
adapter, the installation was notsuccessful. You might also find the network adapter with a
yellow exclamation point (!) next to it in the Other Devices list. If your installation was not
successful, go to the next section, “Troubleshooting the Windows 98 device driver
installation” for problem-solving information.
Troubleshooting the Windows 98 device driver installation
Symptom Possible solutions
Basic troubleshooting:
Applicable for all problem
situations
Inspect all the cables and the connections.
Verify that you have the latest BIOS for
your computer. If not, visit the Web site for
your computer and followthe BIOS upgrade
instructions.
Use Control Panel/System/Device
Manager to inspect the status of your 3Com
network adapter.
In Control Panel/Network application,
make sure that you have installed the correct
clients and protocols.
At installation, the Update
Device Driver window does
not open.
The 3Com network adapter might have
already been installed.
The 3Com network adaptermight have been
installed as “Other Devices” because of a
previous faulty installation.
The network adapter does
not work. The connector
LED is off or does not match
the real network speed.
Click Control Panel →System →Device
Managerto inspect the status of your 3Com
network adapter.
If you see a red "X", enable the 3Com
network adapter by placing a check in the
appropriate check box in the Properties
window.
If you see a yellow exclamation mark (!),
click the icon to see what the conflict is.
Verify that there are adequate system
resources. Try to free system resources (for
example, disable the infrared port); then
remove and reinstall the device driver using
instructions given in “Installing the device
driver for Windows 98” on page 2-6.
Windows 98 stops
responding after startup. By default, Windows 98 installs TCP/IP
with DHCP enabled. If your network does
not have a DCHP server, the service will
eventually time out and return an error.
Contact your MIS manager to determine
how TCP/IP is configured for your site.

2. Connecting and using the 3Com 10/100 Mini-PCI Ethernet adapter 2-9
Windows 95 device drivers
The Windows 95 device driver is already installed on your notebook computer. The device
driver installation procedure is provided in this section if you need to reinstall the device
driver.
Before you begin:
• Make sure that the 3Com network adapter is connected to the network.
• If the Windows 95 installation files are not on your hard disk drive, be sure that you
have the Windows 95 installation CD or diskette.
Installing the device driver for Windows 95
To install the 3Com 10/100 Mini-PCI Ethernet adapter device driver for Windows 95:
1. Insert the IBM 10/100 Ethernet Mini-PCI Adapter with 56K Modem by 3Com CD
that comes with your notebook computer into the CD-ROM drive.
2. Find and open the LANSETUP folder that is on the CD.
3. Double-click the SETUP.EXE file.
4. In the 3Com 10/100 Mini-PCI Ethernet Adapter Has a ROM window, place a check
in the Device can be removed safely check box, and then click Test.
5. Click Finish to restart the computer.
6. After the system restarts and the Insert Disk message displays, click OK.
7. In the New Hardware Found window, type C:\WINDOWS\OPTIONS\CABS, and then
click OK. If you are reinstalling the device driver, the reinstallation is complete. If
you are installing the device driver for the first time, go to the next step.
8. If this is the first time that networking is being installed on your computer, you will
be prompted to enter the following information in the Identification window:
Installation was successful,
but you are still unable to
browse Network
Neighborhood.
Make sure that the peer networking protocol
NetBEUI is installed and used on your
network. Click Start →Find →Find
Computer and type the name of a computer
on the network.
File Sharing must be set in Windows 9x
before the network recognizes it. In the
Network Properties/File and Print
Sharing window, place a check in the I
want to be ableto give others access to my
files check box.
Unable to log on to Netware
servers. This symptom can occur when NetWare
servers are running the IPX/SPX protocol.
Windows 9x defaults to automatically sense
the frame type. You might need to force
your frame type to match the frame type
used on the server. Examples of valid frame
types include Ethernet 802.2 and Ethernet
802.3
Symptom Possible solutions

2-10 IBM 10/100 Ethernet Mini-PCI Adapter with 56K Modem by 3Com User’s Guide
•Computer Name–Identifies the computer on the network for other users. This
entry must be a unique name of 15 characters or fewer, containing no spaces.
•Workgroup–Identifies the group (forexample, yourdepartmentname) to which
your computer belongs. If you belong to a peer-to-peer network, this entry must
be the same for all the computers in your network.
•Computer Description (optional)–Displays additional details about this
computer to other users on the network. For example, you can specify that the
computer has a printer attached.
9. If the Windows 95 installation files are on your hard disk drive, click OK. In the
Copyfiles from entry box, type the directory (usually C:\WINDOWS\OPTIONS\CABS),
and then click OK.
10. If you do not have the Windows 95 installation files on your hard disk drive, remove
the CD you inserted in Step 1 and insert the Windows 95 installation CD or diskette
into the CD-ROM drive or the diskette drive; then click OK.
11. When you are prompted to do so, click Yes to restart the computer and complete the
installation.
12. If there is a CD in the CD-ROM drive or a diskette in the diskette drive, remove it.
13. After Windows restarts, double-click the Network icon in the Windows Control
Panel and verify that the configuration settings meet the requirements of your
network environment. Contact your system administrator for assistance.
Uninstalling the device driver for Windows 95
Sometimes previous or incomplete installations might leave problems that can affect the
operation of the network adapter. Possible problems might be indicated if:
• The 3Com 10/100 Mini-PCI Ethernet Adapter is not working.
• Windows 95 does not detect the 3Com 10/100 Mini-PCI Ethernet Adapter.
If the device driver installation is unsuccessful for any reason, try removing the software
and repeating the device driver installation procedures. If you followed the installation
steps in the “Installing the device driver for Windows 95” section, the existing device
driver was uninstalled prior to the installation. However, you can also use the following
steps to uninstall a device driver:
1. Click Start →Settings →Control Panel.
2. Double-click the Network icon.
3. Select the 3Com 10/100 Mini PCI Ethernet Adapter, and then click Remove.
4. Click OK; then restart the computer and reinstall the device driver using instructions
given in “Installing the device driver for Windows 95” on page 2-9.
Updating the device driver for Windows 95
You might need to update your device driver for Windows 95 if another version of the
network device driver is made available. To update the device driver for Windows 95:
1. Click Start →Settings →Control Panel.
2. Double-click the Network icon.
3. Click the Device Manager tab. A list of devices displays, arranged by type.
4. Double-click Network Adapters.

2. Connecting and using the 3Com 10/100 Mini-PCI Ethernet adapter 2-11
5. Double-click 3Com 10/100 Mini PCI Ethernet Adapter. The 3Com 10/100 Mini-
PCI Ethernet Adapter Properties window opens.
6. Click the Driver tab.
7. Click Update Driver and provide the path to the updated device driver.
Confirming the proper installation in Windows 95
To confirm that your network is connected in Windows 95:
1. Click Start →Settings →Control Panel.
2. Double-click the System icon.
3. Click the Device Manager tab. A list of devices displays, arranged by type.
4. Double-click Network Adapters. If 3Com 10/100 Mini PCI Ethernet Adapter is
in the displayed list, the installation was successful.
5. Double-click 3Com 10/100 Mini PCI Ethernet Adapter to display a description of
the network connection and its current status. The device status displays the This
device is working properly. message.
6. If a red X or a yellow exclamation point (!) displays next to the name of the network
adapter, the installation was not successful. You might also find the network adapter
with a yellow (!) next to it in the Other Devices list. If your installation was not
successful, go to the next section “Troubleshooting your Windows 95 device driver
installation” for problem-solving information.
Troubleshooting the Windows 95 device driver installation
Symptom Possible solutions
Basic troubleshooting:
Applicable for all problem
situations
Inspect all the cables and the connections.
Verify that your computer has the latest
BIOS. If your computer does not have the
latest BIOS, visit the Web site for your
computer and follow the BIOS upgrade
instructions.
Click Control Panel →System →Device
Manager to inspect the status of your 3Com
network adapter.
In Control Panel/Network application, be
sure that you have the correct clients and
protocols installed.
At installation, the Update
Device Driver window does
not open.
The 3Com networkadapter might have been
already installed.
The 3Com networkadapter might have been
installed as Other Devices because of a
previous faulty installation.

2-12 IBM 10/100 Ethernet Mini-PCI Adapter with 56K Modem by 3Com User’s Guide
Windows NT 4.0 device drivers
The Windows NT devicedriver is already installed.This section provides the device driver
installation procedure if you need to reinstall the device driver.
Before setting up the adapter, you will need obtain the following information:
• Your network file server name, network account user name, and password.
• Protocol used in the Microsoft Windows network (NWLink IPX/SPX Compatible
transport, TCP/IP protocol, NetBEUI protocol)
• NT Server domain or workgroup to which you belong
• Your IP address (unless you are using DHCP)
The Windows NT installation procedure that you use depends on whether networking has
already been installed on your computer. Verify with your MIS department the network
device driver installation instructions that you will need to use. If networking has not been
installed on your computer, goto “Installingthe device driver for WindowsNT 4.0 with no
The network adapter does
not work. The LED on the
connector is off or
mismatches the real network
speed.
Click Control Panel →System →Device
Managerto inspect the status of your 3Com
network adapter.
If there is a red x next to it, enable the 3Com
network adapter by placing a check in the
appropriate check box in the Properties
window.
If you see a yellow exclamation mark, click
the icon to view conflict information. Verify
that there are adequate system resources.
Try freeing system resources (for example,
disable the infrared port); then remove and
reinstall the device driver using instructions
given in “Installing the device driver for
Windows 95” on page 2-9.
Installation was successful
but still unable to browse
Network Neighborhood
Make sure that the peer networking protocol
NETBEUI is installed and on your network.
Click Start →Find →Find Computer and
type the nameof a computeron the network.
File Sharing must be set in Windows 9x
before the network recognizes it. In the
Network Properties/File and Print
Sharing window, place a check in the I
want to be able to give others access to my
files check box.
Unable to log on to Netware
servers. This symptom can occur when Netware
servers are running the IPX/SPX protocol.
Windows 9x defaults to automatically sense
the frame type. You might need to force
your frame type to match the frame type
used on the server. Examples of valid frame
types include Ethernet 802.2 and Ethernet
802.3.
Symptom Possible solutions
Table of contents
Other IBM PCI Card manuals

IBM
IBM PCI SCSI-2 Fast/Wide Single-Ended Adapter User manual

IBM
IBM ARTIC186 II User manual

IBM
IBM Power GXT800P User manual

IBM
IBM EtherJet ISA Adapter User manual

IBM
IBM 16/4 Token-Ring User manual

IBM
IBM 11a User manual

IBM
IBM Vectra VEi7 User manual

IBM
IBM ARTIC X.25 User manual

IBM
IBM Power System 5802 User manual

IBM
IBM Gigabit Ethernet-SX PCI-X Adapter and Dual... Guide

IBM
IBM N2125 User manual

IBM
IBM N2215 User manual

IBM
IBM Broadcom NetXtreme User manual

IBM
IBM 3270 User manual

IBM
IBM 3600 User manual

IBM
IBM PCI Dual Channel Ultra2 SCSI Adapter User manual

IBM
IBM High IOPS SSD PCIe Adapters User manual

IBM
IBM Power Systems Series User manual

IBM
IBM LAN 2100 3B User manual

IBM
IBM 10/100 EtherJet User manual