manuals.online logo
Brands
  1. Home
  2. •
  3. Brands
  4. •
  5. Icegame
  6. •
  7. Game
  8. •
  9. Icegame ARCADE PRO User manual

Icegame ARCADE PRO User manual

1
&
User Manual
Assembly Guide
2
Table of Contents
Safety….Before you begin 3
Parts Included 4
Before you begin assembly 5
Cabinet Assembly 6
Game Modes 17
Game Options. 18
Access to Electronics 19
Score Sensor 20
Main board Connections 21
Warranty Policy 22
Revision D 5/13/2021
3
WHEN INSTALLING THIS GAME, A GROUNDED A.C. RECEPTACLE MUST BE USED. FAILURE TO DO SO COULD RESULT IN
INJURY TO YOURSELF OR OTHERS. FAILURE TO USE A GROUNDED RECEPTACLE COULD ALSO CAUSE IMPROPER GAME
OPERATION, OR DAMAGE TO THE ELECTRONICS. THIS GAME IS DESIGNED TO DISSIPATE STATIC ELECTRICITY THROUGH
THE GROUNDING PLANE OF THE GAME. IF THE A.C. GROUND DOES NOT WORK, THE GAME COULD DISCHARGE STATIC
ELECTRICITY THROUGH THE GAME CIRCUITRY, WHICH COULD CAUSE DAMAGE.
DO NOT DEFEAT OR REMOVE THE GROUNDING PRONG ON THE POWER CORD FOR THE SAME REASON AS GIVEN
ABOVE. USING AN IMPROPERLY GROUNDED GAME COULD VOID YOUR WARRANTY.
IF YOU HAVE ANY QUESTIONS ABOUT YOUR OUTLET HAVE QUALIFIED ELECTRICIAN CHECK YOUR A.C. RECEPTACLE TO
BE SURE THE GROUND IS FUNCTIONING PROPERLY.
THE POWER SUPPLY IS NOT VOLTAGE ADJUSTABLE. TO OPERATE THE GAME AT VOLTAGES OTHER THAN THOSE IT WAS
DESIGNED FOR. PLEASE CONTACT OUR SERVICE DEPARTMENT FOR VOLTAGE CONVERSION INFORMATION.
DO NOT remove any of the components on the main board while the game is powered on. This may cause
permanent damage to the parts and the main board. Doing so will void the warranty of your game.
ALWAYS REMOVE POWER TO THE GAME, BEFORE ATTEMPTING ANY SERVICE, UNLESS NEEDED FOR SPECIFIC
TESTING.
FAILURE TO OBSERVE THIS PRECAUTION COULD RESULT IN SERIOUS INJURY TO YOURSELF OR OTHERS.
NOTE: THIS GAME IS INTENDED FOR INDOOR USE ONLY.
THIS GAME IS NOT SUITABLE FOR OUTDOOR USE OR WET ENVIROMENTS OR IN AREAS WHERE A WATER JET COULD BE
USED.
This game is not intended for use by persons (including children) with reduced physical, sensory or mental capabilies,
or lack of experience and knowledge, unless they have been given supervision or instrucon concerning use of this game
by a person responsible for their safety. Children should always be supervised when playing this game.
The game’s foot print is Depth 95.3125” x width 39.1875” (43 with graphic oor).
WE RECOMMEND AT LEAST TWO ADULTS TO ASSEMBLY THIS GAME.
Watch the video on how to assembly at “hps://www.youtube.com/watch?v=miQoUFGRBhQ ”
AC Power Information
The games main fuse is accessed at the side of the backboard, at the back.
Above the power cord is a small panel that contains the main fuse.
The value of the fuse for 120 volt users is 2.5 AMPS at 250Volt type slow blow.
4
Before you begin to assemble your game locate the parts below.
If any parts are missing please contact ICE
Service at (716) 759-0360 Monday through
Friday 8:30 am to 6 pm Eastern Standard.
5
90.77”
92.77”
94.77”
96.77”
99.77”
100.77”
NO!
Before you begin, determine what
height you will assembly your game to.
Both leg assemblies have seven holes.
The measurements provided are for a
completely assembled game.
If the upper roof assembly is not
installed, you can subtract 4” from these
measurements.
The top hole cannot be used for height
determination. Two holes are required
when mounting the legs to the base.
LEAVE LOOSE
ALLOW GAP
Once you determine your desired height of the game, use the
correct hole. Insert one AA6110 nut into one side and AA6107
shaft plus AA6110 nut to the other side. Do not tighten. There
must be a gap on both sides. Repeat for all legs.
1
2
3
4
5
6
7
Max height install shown
LEGS
(8) AA6610 Inserts
(4) AA6107 bolts
6
Back Leg
Front Leg
LEGS
(8) AA6610 Inserts
(4) AA6107 bolts
Insert LEG hardware to secure legs.
Tighten using supplied tools.
7
Floor
(10) AA6953 Bolt
(10) AA6288 Washer
(10) AA6004 Nut
Lay plywood panel down with wire
harness channel to the left.
Insert bolts and washers at the top and
nuts at the bottom.
Green ground wire attaches to the back
left bolt UNDERNEATH cabinet.
NOT ON TOP!!
8
Attach the front and back supports.
Front and back supports
(8) AA6125 Bolt
9
Cage Sides
(8) AA6281 Bolt
(8) AA6212 Washer
(8) AA6110 Insert
AA6281 bolts and AA6212 washers to the outside.
AA6110 inserts go on the inside.
10
Basket
(4) PC60604 nylon nut
(4) AA6070 washer
Secure front using only 4 PC60604 bolts and 4
AA6070 washers
Slide net onto backboard assembly as shown.
11
Back Board
(8) AA6220 bolt
(8) AA6430 washer
Insert back board into back slot.
Secure using AA6220 bolts and AA6430 washers
through the cage into the back board.
12
Rebound Guard Side
(4) AA6220 bolt
(4) AA6430 washer
Secure sides using 2 AA6220 bolts at the sides and AA6430 washers.
Secure front using only 2 AA6220 bolts (no washers)
13
Place Cage Top at top.
From the bottom, insert 2 AA6281 Bolts and 2 AA6430 Washers on each side.
Standard Control Panel Install:
Insert the control panel into the slot and slightly push down to lock it in place.
Secure using 1 AA6718 bolt and 1 AA6212 washer on each side.
Podium
(2) AA6718
(2) AA6212 Washer
13
14
Podium
(2) AA6718
(2) AA6212 Washer
Optional Extended Control panel Install:
Insert the control panel into the slot and slightly push down to lock it in place.
Secure using 1 AA6718 bolt and 1 AA6212 washer on each side.
15
Plug main harness into back of game.
Plug Score Sensor harness into back of game.
Plug main harness into control panel.
Plug AC cord at back side of game.
16
Insert the AC cord into a grounded AC outlet.
The cord can be found behind the back cabinet.
WARNING - ONLY PLUG INTO A GROUNDED OUTLET.
DO NOT USE ADAPTORS THAT ELIMINATE THE THIRD PRONG!
Flip the AC switch to the on position. It will have a “I” label.
Your game is ready to be played.
Press the “START” button to turn the game on.
The game will come to life.
There are four games and up to four players can play any of them. At anytime you can press
either the “GAME” button or “PLAYER” button. Pressing the “GAME” button will cycle
through the different games available. Pressing the player button will select how many
players will play.
Once you have selected the game you wish to play and the amount of players that will play
press the “START” button to begin play.
** During game play, game volume can be adjusted by pressing the arrow keys. **
17
PRO – The classic basketball arcade game. Players race against the clock to score as many points
as possible. Score 75 to get to the 2nd round. Score 100 to get to the 3rd (nal) round. See who can
get the all-time high score with this arcade classic.
Money Ball – Score points by making baskets – Race against the clock to score as many points
as possible. Money signs are worth bonus points. $ = 5 PTS, $$ = 10 PTS
Pig – The classic game takes on the arcade. Players take turn attempting shots. If a player misses,
they get a P, they miss a second time I and the third time they miss they will get a G and be re-
moved from the game. Last player standing wins. Creativity is key – off the side bank shot? Blind-
folded?
Last Shot – Get as close to zero as possible. Timer counts down from three seconds. Each player
gets four shots per game.
You can change some of the game options if you wish.
Pressing the left and right arrows buttons together will cause the game to display the options
available for that game.
The arrow keys will change the value for that option displayed.
Pressing the “GAME” button will advance to the next option.
Pressing the “START” button will exit and save any changed you made.
Press the “GAME” button to select a different game and repeat this process.
The Game’s LED’s are controlled by the Accent color settings under PRO. These are the only
options that effect all games. The remainder of the options are specific to that game only.
18
Pro: Settings
Round 2 Bonus
Default setting: 75 (Choices 30-120 increment by 5)
Round 3 Bonus now shows the Target (offset+Bonus set above)
Default 100
Choices 5-50+ bonus above so low of 35 and high of 170
Color 1
Default Red
Off-White
Color 2
Default Green
Off-White
Color 3
Default Blue
Off-White
Reset High Score
Rev
PIG: Settings
Rev
Money Ball: Settings
Game Time
Default 45
Choices 45 or 60
Reset High Score
Rev
Last Shot: Settings
Reset High Score
Rev
19
Power
Module
Main
PCB
Power
Supply
Display
Display
Display
20
PART # E00210NSAX

Other Icegame Game manuals

Icegame Hoop Fever Instruction Manual

Icegame

Icegame Hoop Fever Instruction Manual

Icegame Hoop Fever Instruction Manual

Icegame

Icegame Hoop Fever Instruction Manual

Icegame 3 Across User manual

Icegame

Icegame 3 Across User manual

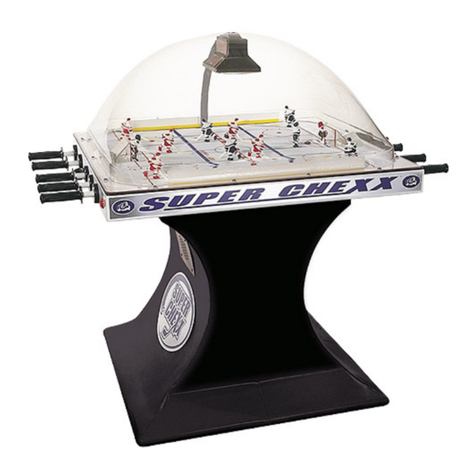
Icegame SUPER CHEXX Instruction Manual

Icegame

Icegame SUPER CHEXX Instruction Manual

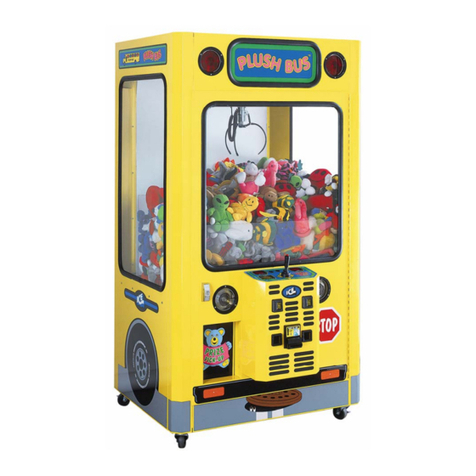
Icegame Plush Bus Instruction Manual

Icegame

Icegame Plush Bus Instruction Manual

Popular Game manuals by other brands

MD SPORTS DRB100_047B Assembly instructions

MD SPORTS

MD SPORTS DRB100_047B Assembly instructions

Spinmaster Black Belts User instructions

Spinmaster

Spinmaster Black Belts User instructions

MD SPORTS BL090Y21003 Assembly instructions

MD SPORTS

MD SPORTS BL090Y21003 Assembly instructions

MD SPORTS BLL090 147M WL Assembly instructions

MD SPORTS

MD SPORTS BLL090 147M WL Assembly instructions

MD SPORTS BLL084 017B Assembly instructions

MD SPORTS

MD SPORTS BLL084 017B Assembly instructions

GreatGadgets Las Vegas instruction manual

GreatGadgets

GreatGadgets Las Vegas instruction manual

MD SPORTS CB048Y20020 Assembly instructions

MD SPORTS

MD SPORTS CB048Y20020 Assembly instructions

MD SPORTS 18406 Assembly instructions

MD SPORTS

MD SPORTS 18406 Assembly instructions

MD SPORTS BL096Y19009 Assembly instructions

MD SPORTS

MD SPORTS BL096Y19009 Assembly instructions

MD SPORTS FS058Y19002 Assembly instructions

MD SPORTS

MD SPORTS FS058Y19002 Assembly instructions

MD SPORTS CB048Y21002 Assembly instructions

MD SPORTS

MD SPORTS CB048Y21002 Assembly instructions

Spinmaster Tricky Toby Turtle instruction sheet

Spinmaster

Spinmaster Tricky Toby Turtle instruction sheet

Carromco Foosball 522.03 manual

Carromco

Carromco Foosball 522.03 manual

Sport Squad FX-48 Assembly instructions

Sport Squad

Sport Squad FX-48 Assembly instructions

Learning Resources Snap It Up math LER 3044 manual

Learning Resources

Learning Resources Snap It Up math LER 3044 manual

Tiger Star Wars Naboo 88-504 Instruction

Tiger

Tiger Star Wars Naboo 88-504 Instruction

Fisher-Price SmartCycle Racer T3856 user manual

Fisher-Price

Fisher-Price SmartCycle Racer T3856 user manual

Hasbro Giggle Game instructions

Hasbro

Hasbro Giggle Game instructions

manuals.online logo
manuals.online logoBrands
  • About & Mission
  • Contact us
  • Privacy Policy
  • Terms and Conditions

Copyright 2025 Manuals.Online. All Rights Reserved.