1716
www.iconico.es User manual WC3
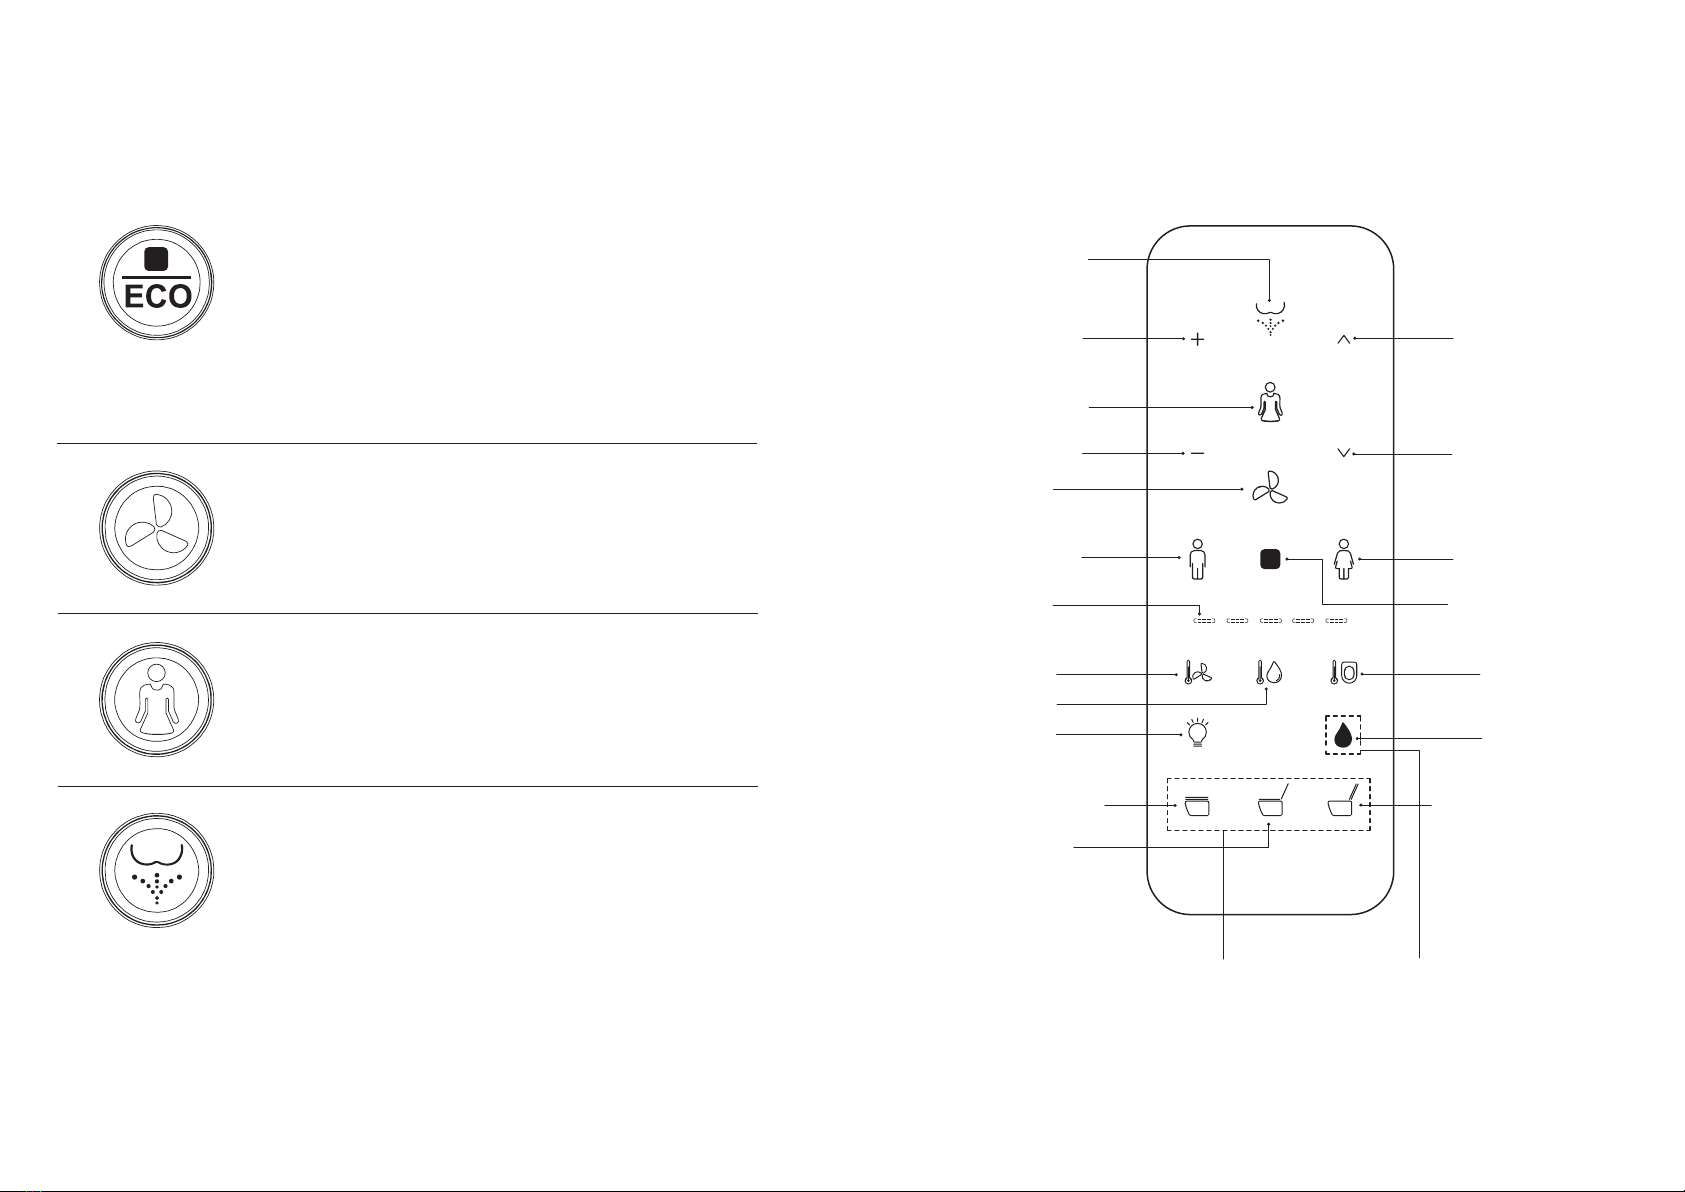
• Press the [Seat temperature] button and continue pressing the [Seat temperature]
button to adjust the seat temperature, the setting will be neutral when the indicator
light is o.
Seat temperature adjustment:
Night light
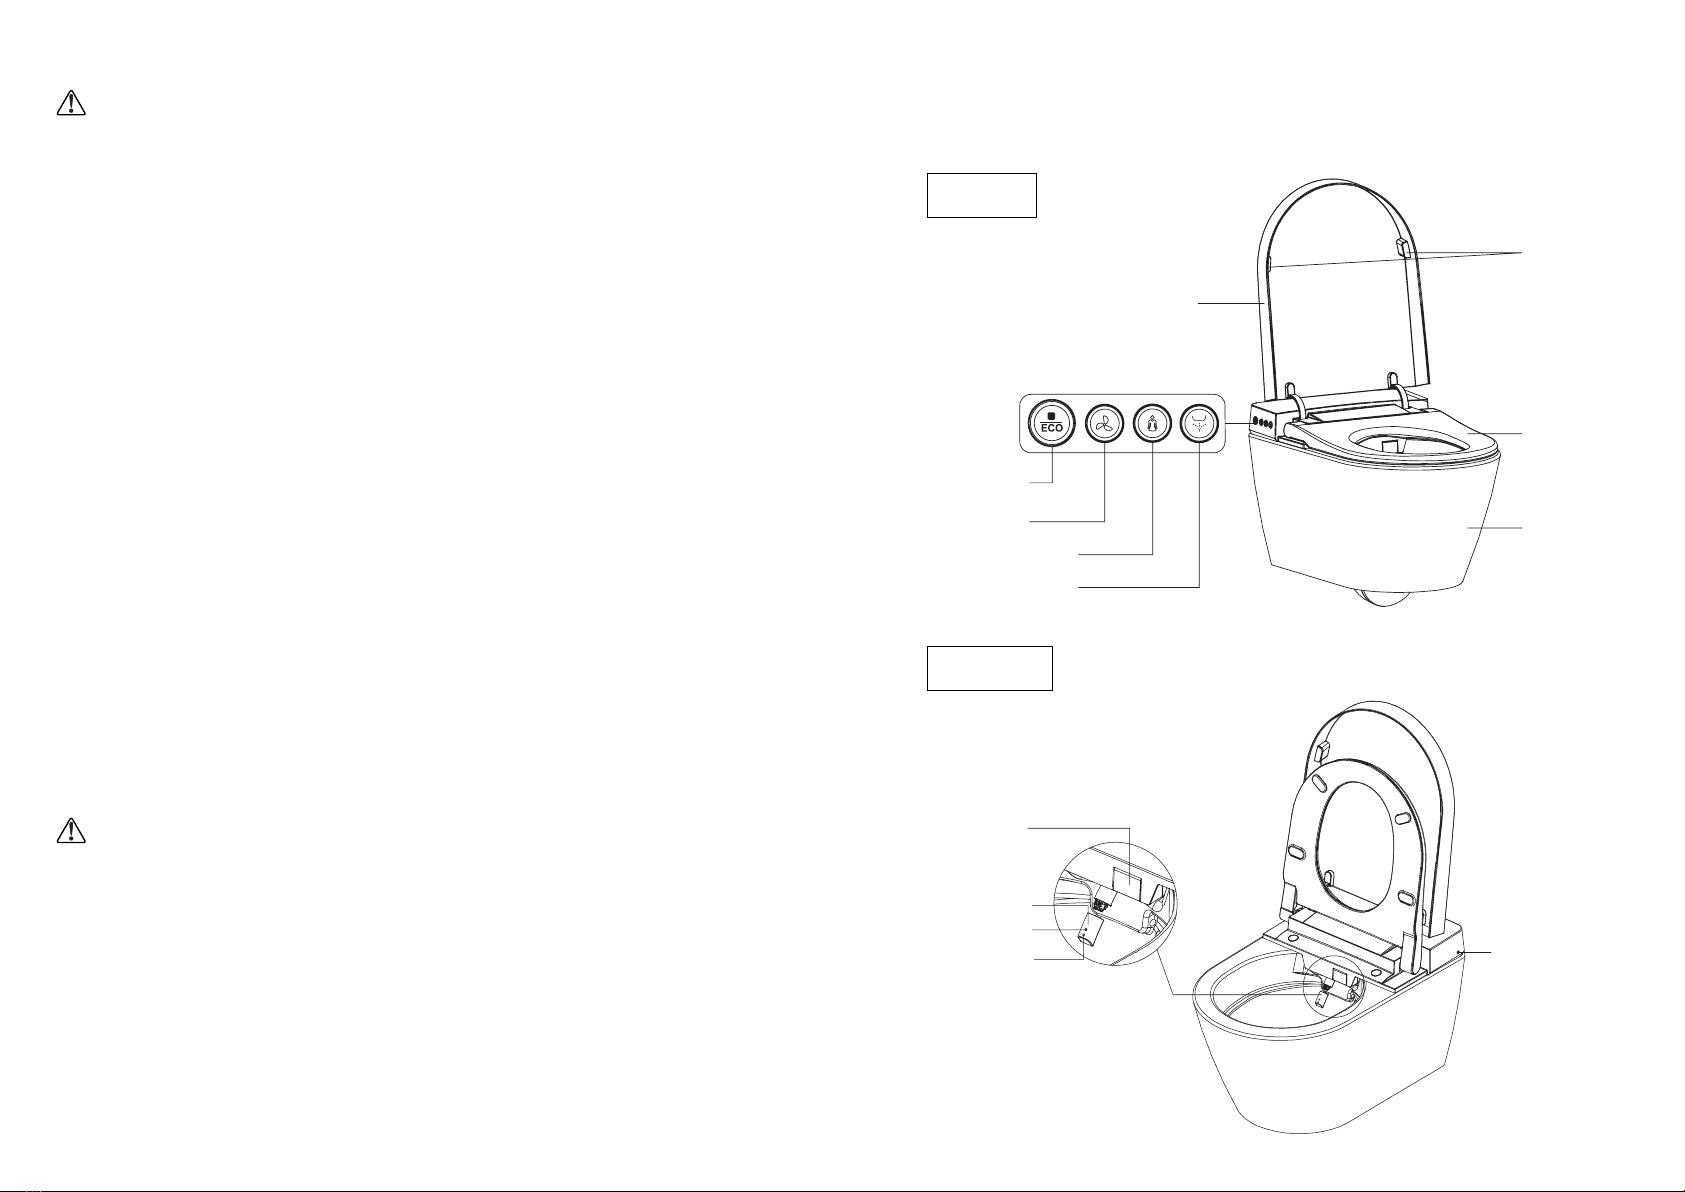
Full Flush
Auto lid open/close
• Short press [Night light] button to turn on/turn o the night light, long press [Night
light] button to enter into intelligent mode (Night light will be on or o by detecting
the lightness of surroundings). If the product is on intelligent mode, short press [Night
light] button to exit intelligent mode.
Quiet mode
User code
• Press [Flush] button to activate full lushing.
• Press [Lid close/seat close] button to close seat cover.
• Press [Lid open/seat close] button to open lid and close seat.
• Press [Lid open/seat open] button to open lid and seat.
- Only for the toilet with auto lush function
- Only for the toilet with this function
FLUSH
• Press [Stop] button, and then press [Lid close/seat close] button, it is the mode
of auto open/close. Repeat above action to stop this function.
(This key combination is only for toilet seat with auto open/close function.
The default setting of auto open/close is in the o state, so it needs to be turned
on at the irst-use.
Lid initializing
• Press [Stop] button irst and meanwhile press [Lid open/seat open] to send lid
initializing order to main unit.
Combination button
Auto open/close
Auto open/close
• Press [Stop] button and then the [Flush] button to turn on or o the automatic
lushing function. When the automatic lushing function is turned on, the toilet
will automatically lush after 3.5s once the user leaves the seat, only if the user
has been seating for more than 6s.
Automatic lush button
Auto deodorizing button
• Press [Stop] button irst and meanwhile press [Front] button to turn on or o
the auto deodorizing function. The deodorizing function will be activated when it
detects the user sitting on the seat, the function will stop 3s after the user leaves.
The deodorizing function will be o during drying operation.
(Only for the toilets with auto deodoriing function, this function is the default
when the toilet is power on).
Remark:
• With quite mode o, the buzzer will “beep” when the user presses one button which means
the main unit receives the signal and conduct the operation accordingly. If the buzzer doesn’t
sound, it means the main unit doesn’t receive the signal, please adjust the remote control
direction and press the button again.
• In case of a black out during cleaning operation, the cleaning nozzle cannot go back to
place, please wait until the power is restored. In case of a black out for a long period, please
push the nozzle softly back by hand.
Do not push hard, to avoid damage to the cleaning system.
• While the user is seating, a “click” noise will indicate the start of the cleaning or drying
functions. During the cleaning function, the system has a 1 or 2 seconds reaction time after
the user stands so, we recommend to wait until the end of the cleaning function to avoid
water sprinkling outside the toilet.
• (Radio frequency) After power o or battery replacement, the coding data will
remain as set by the user so, there is no need to repeat the operation.
• Remote control will exit user code setting mode and go back to previous mode if
there is no action for 10s.
• Press [Stop] button and then [Seat temperature] button to turn o buzzer to
avoid noise in the night; Repeat the process to start buzzer function.
The user code needs to be set to avoid disturbances from remote controls when
more than one toilets are used in the house. Turn on the toilet for setting while
turn o others.
• Press User code buttons (Press [Stop] button irst and then press [Rear] button)
to enter into user code setting mode, the indicator lights will be on and keep
lashing.
• (Radio frequency) remote control will create relative code, press user code
buttons again to exit user code setting mode which means the user code setting
is completed.
- Only for the toilet with this function
- Only for the toilet with this function
- Only for the toilet with this function