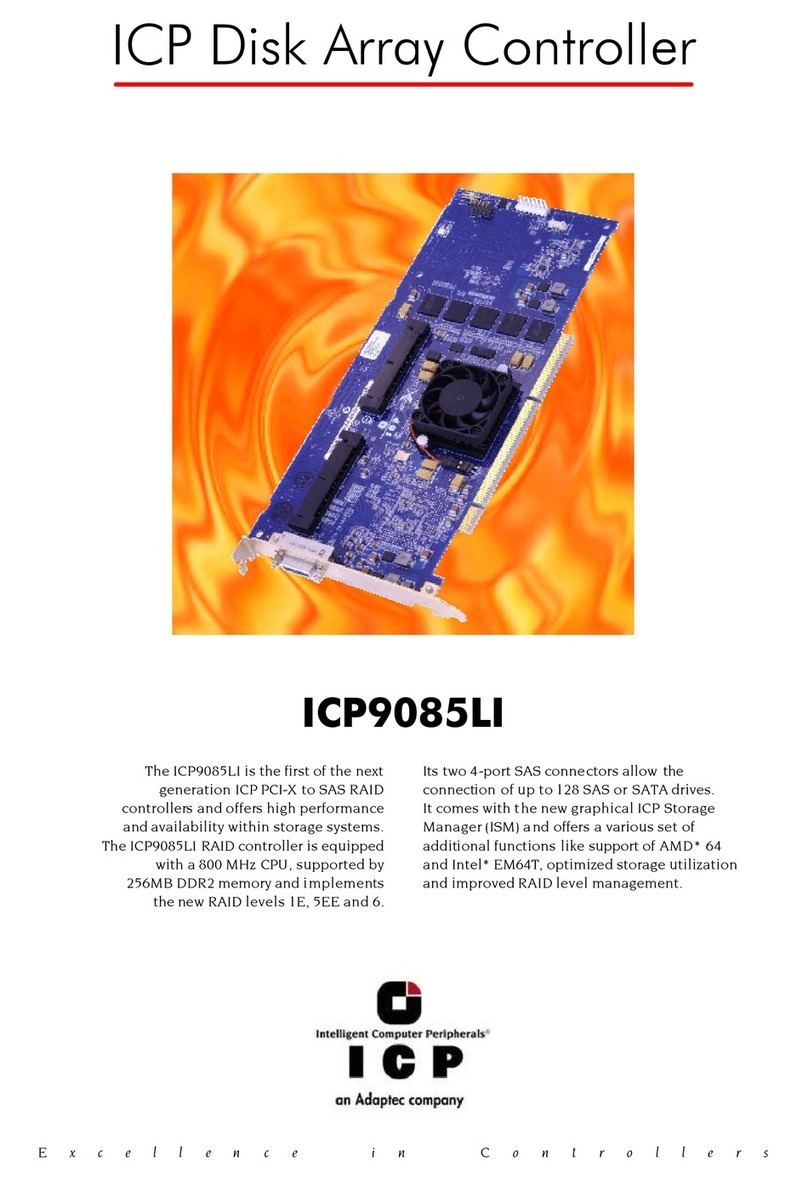
ICP GRD RD Series User manual

1
8VHUV0DQXDO$GGHQGXP
,&3&RQWUROOHUVRIWKH*'75'6HULHV
3&,:LGH8OWUD6&6,
5$,'&RQWUROOHUV
(GLWLRQ
&RS\ULJKW
,&3YRUWH[&RUSRUDWLRQ
:HVW9DQ%XUHQ6WUHHW
3KRHQL[$=86$
,&3YRUWH[&RPSXWHUV\VWHPH*PE+
)DOWHUVWUDVVH
)OHLQ*HUPDQ\
$OO5LJKWVDQG&KDQJHV5HVHUYHG

2

3
&&RRQQWWHHQQWWVV22YYHHUUYYLLHHZZ
&KDSWHU, 8VLQJ,%026Y[
&KDSWHU,, 8VLQJ6&281,;9
&KDSWHU,,, 8VLQJ,QWHUDFWLYH81,;
&KDSWHU,9 8VLQJ8QL[:DUH
&KDSWHU9 *'76(783LQ'HWDLO

4
//LLPPLLWWHHGG::DDUUUUDDQQWW\\
,&3YRUWH[&RUSRUDWLRQ,&3YRUWH[JXDUDQWHHVWKDWWKLVSURGXFWLVIUHHIURPGHIHFWVLQPDWHULDODQG
ZRUNPDQVKLS6XEMHFWWRWKHFRQGLWLRQVDQGOLPLWDWLRQVVHWIRUWKEHORZ,&3YRUWH[ZLOODWLWVRZQ
RSWLRQHLWKHUUHSDLURUUHSODFHDQ\SDUWRIWKLVSURGXFWZKLFKSURYHVWREHGHIHFWLYHE\UHDVRQVRI
LPSURSHUZRUNPDQVKLSRUPDWHULDOV3DUWVXVHGWRUHSDLUSURGXFWVRUUHSODFHPHQWSUR GXFWVZLOOEH
SURYLGHGE\,&3YRUWH[RQDQH[FKDQJHEDVLVDQGZLOOEHHLWKHUQHZRUUHIXUELVKHGWREHIXQFWL R
QDOO\HTXLYDOHQWWRQHZ
7KLVZDUUDQW\GRHVQRWFRYHUDQ\GDPDJHWRWKLVSURGXFWZKLFKUHVXOWVIURPDFFLGHQWDEXVHPLV X
VHQDWXUDORUSHUVRQDOGLVDVWHU$FWVRI*RGRUDQ\XQDXWKRUL]HGGLVDVVHPEO\UHSDLURUPRGLILFDW L
RQ7KHGXUDWLRQRIWKLVZDUUDQW\LVRQH\HDUIURPWKHGDWHRIRULJLQDOUHWDLOSXUFKDVH
::DDUUUUDDQQWW\\&&OODDLLPP55HHTTXXLLUUHHPPHHQQWWVV
7RREWDLQZDUUDQW\VHUYLFHUHWXUQWKHGHIHFWLYHSURGXFWIUHLJKWSUHSDLGDQGLQVXUHGWR\RXUORFDO
DXWKRUL]HG,&3YRUWH[GHDOHURUGLVWULEXWRURUWR,&3YRUWH[&RUSRUDWLRQ:HVW9DQ%XUHQ
6WUHHW3KRHQL[$=3OHDVHQRWHWKHIROORZLQJ<RXPXVWLQFOXGHWKHSURGXFWVHULDOQXPEHU
DQGD
GHWDLOHGGHVFULSWLRQRIWKHSUREOHP\RXDUHH[SHULHQFLQJ<RXPXVWDOVRLQFOXGHSURRIRIWKHGDWHRI
RULJLQDOUHWDLOSXUFKDVHDVHYLGHQFHWKDWWKHSURGXFWLVZLWKLQWKHZDUUDQW\SHULRG
,I\RXQHHGWRUHWXUQWKHSURGXFWWR,&3YRUWH[\RXPXVWILUVWREWDLQD5HWXUQ0DWHULDO$XWKRUL]DWLRQ
50$QXPEHUE\FDOOLQJ,&3YRUWH[&RUSRUDWLRQDW7KLV50$QXPEHUPXVWEHGL V
SOD\HGRQWKHRXWVLGHRI\RXUSDFNDJH3URGXFWVPXVWEHSURSHUO\SDFNDJHGWRSUHYHQWGDPDJHLQ
WUDQVLW,&3YRUWH[DFFHSWVQRUHVSRQVLELOLW\IRUSURGXFWVZKLFKDUHGDPDJHGRQDUULYDOGXHWRSRRU
IUHLJKWVHUYLFH
''LLVVFFOODDLLPPHHUUVV
7KHIRUHJRLQJLVWKHFRPSOHWHZDUUDQW\IRU,&3YRUWH[SURGXFWVDQGVXSHUVHGHVDOORWKHUZDUUDQWLHV
DQGUHSUHVHQWDWLRQVZKHWKHUZULWWHQRURUDO([FHSWDVH[SUHVVO\VHWIRUWKDERYHQRRWKHUZDUUDQWLHV
DUHPDGHZLWKUHVSHFWWR,&3YRUWH[SURGXFWV,&3YRUWH[H[SUHVVO\GLVFODLPVDOOZDUUDQWLHVQRWVWDWHG
KHUHLQLQFOXGLQJWRWKHH[WHQWSHUPLWWHGE\DSSOLFDEOHODZDQ\LPSOLHGZDUUDQW\RIPHUFKDQWDELOLW\
RUILWQHVVIRUDSDUWLFXODUSXUSRVH,QQRHYHQWZLOO,&3YRUWH[EHOLDEOHWRWKHSXUFKDVHURUWRDQ\
XVHURIWKH,&3YRUWH[SURGXFWIRUDQ\GDWDORVVGDWDFRUUXSWLRQGDPDJHVH[SHQVHVORVWUHYHQXHV
ORVW
VDYLQJVORVWSURILWVRUDQ\RWKHULQFLGHQWDORUFRQVHTXHQWLDOGDPDJHVDULVLQJIURPWKHSXUFKDVH
XVHRULQDELOLW\WRXVHWKH,&3YRUWH[SURGXFWHYHQLI,&3YRUWH[KDVEHHQDGYLVHGRIWKHSRVVLELOLW\RI
VXFKGDPDJHV
,&3YRUWH[LVQRWOLDEOHIRUDQGGRHVQRWFRYHUXQGHUZDUUDQW\DQ\FRVWVDVVRFLDWHGZLWKVHUYLFLQJ
DQGRULQVWDOODWLRQRI,&3YRUWH[SURGXFWV
7KLVPDQXDOKDVEHHQYDOLGDWHGDQGUHYLHZHGIRUDFFXUDF\7KHVHWVRILQVWUXFWLRQVDQGGHVFULSWLRQV
ZHUHDFFXUDWHIRU,&3'LVN$UUD\&RQWUROOHUVDWWKHWLPHRIWKLVPDQXDO·VSU RGXFWLRQ+RZHYHU
VXFFHHGLQJ&RQWUROOHUVVRIWZDUHDQGPDQXDOVDUHVXEMHFWWRFKDQJHZLWKRXWQRWLILFDWLRQ7KHUHIRUH
,&3YRUWH[DVVXPHVQROLDELOLW\IRUGDPDJHVLQFXUUHGGLUHFWO\RULQGLUHFWO\IURPHUURUVRPLVVLRQVRU
GLVFUHSDQFLHVEHWZHHQWKH&RQWUROOHUVRIWZDUHDQGWKHPDQXDO

5
3LFNXSWKHSKRQH
LI\RXQHHGWHFKQLFDOVXSSRUW
DQGGLDOWKHQXPEHUV
)RU(XURSH
)RUWKH86$
RUVHQGXVD)$;
)RU(XURSH
)RUWKH86$
RUVHQGXVDQ(0DLO
)RU(XURSHVXSSRUW#YRUWH[GH
)RUWKH86$VXSSRUW#LFSYRUWH[FRP
RUFDOORXU%%61
K
RUFKHFNRXU:HEVLWH
KWWSZZZLFSYRUWH[FRP

6
Important Note
Using modern RAID Systems significantly increases data security and availability. Under no
circumstances does it relieve you from a careful and daily backup on tape or a similar backup
media. This is the only method to protect your valuable data against total loss (e.g.,
through fire or theft), accidental deletion, or any other destroying impacts.
Many Thanks to all my Friends
Monika & Wolfgang (the grandmasters)
AnnDee, Lois, Ken and Andreas (the Phoenix Crew)
Achim, Dieter, Günter, Norbert, Otto, Ralph, Sam, Steffen, Wolfgang (WOS), (real wizards)
Alfred (AB, "We need ultra2. I say we have it")
Andreas (AK, or "Kopf nur mit ö")
Michael (Mipf, "where is my CPU ?")
Jürgen (Jogo, "Hi, is Jurgen there ?")
Ruth (RA, "she had to proof-read that thing, ...)
Johannes (JS, "I want my ice with a red cap .., or Dr. Oops-Click-Click...")
Jürgen (JB, "diesbezüglich & hinsichtlich or probably")
Klaus (KLM, "..not an Airline..")
Markus (Malu, "Luuuuu....")
Uwe (5 Paninis for Reinhardt)
All the fantastic "rest" of this incredible company.
It is not only a pleasure to work here, it is a passion.

7
))&&&&&&RRPPSSOLOLDDQQFFHH66WWDDWWHHPPHHQQWW
,QIRUPDWLRQIRUWKH8VHU
127(7KLVHTXLSPHQWKDVEHHQWHVWHGDQGIRXQGWRFRPSO\ZLWKWKHOLPLWVIRUD&ODVV%
GLJLWDOGHYLFHSXUVXDQWWR3DUWRIWKH)&&5XOHV7KHVHOLPLWVDUHGHVLJQHGWRSURYLGH
UHDVRQDEOHSURWHFWLRQDJDLQVWKDUPIXOLQWHUIHUHQFHLQUHVLGHQWLDOLQVWDOODWLRQV7KLVHTXLS
PHQWJHQHUDWHVXVHVDQGFDQUDGLDWHUDGLRIUHTXHQF\HQHUJ\DQGLIQRWLQVWDOOHGDQGXVHG
LQDFFRUGDQFHZLWKWKHLQVWUXFWLRQVPD\FDXVHKDUPIXOLQWHUIHUHQFHWRUDGLRFRPPXQLFD
WLRQV+RZHYHUWKHUHLVQRJXDUDQWHHWKDWLQWHUIHUHQFHZLOOQRWRFFXULQDSDUWLFXODULQVWDO
ODWLRQ,IWKLVHTXLSPHQWGRHVFDXVHKDUPIXOLQWHUIHUHQFHWRUDGLRRUWHOHYLVLRQUHFHSWLRQ
ZKLFKFDQEHGHWHUPLQHGE\WXUQLQJWKHHTXLSPHQWRIIDQGRQWKHXVHULVHQFRXUDJHGWR
WU\WRFRUUHFWWKHLQWHUIHUHQFHE\RQHRUPRUHRIWKHIROORZLQJPHDVXUHV
5HRULHQWDWHRUUHORFDWHWKHUHFHLYLQJDQWHQQD
,QFUHDVHWKHVHSDUDWLRQEHWZHHQWKHHTXLSPHQWDQGWKHUHFHLYHU
3OXJWKHHTXLSPHQWLQWRDQRXWOHWRQDFLUFXLWGLIIHUHQWIURPWKDWWRZKLFKWKHUHFHLYHULV
SRZHUHG
,IQHFHVVDU\FRQVXOWWKHGHDOHURUDQH[SHULHQFHGUDGLR79WHFKQLFLDQIRUDGGLWLRQDO
VXJJHVWLRQV
7KHXVHRIDQRQVKLHOGHGLQWHUIDFHFDEOHZLWKWKHUHIHUHQFHGGHYLFHLVSURKLELWHG
&KDQJHVRUPRGLILFDWLRQVQRWH[SUHVVO\DSSURYHGE\,&3YRUWH[&RPSXWHUV\VWHPH*PE+
FRXOGYRLGWKHDXWKRULW\WRRSHUDWHWKHHTXLSPHQW

8
&RQWHQWV
,86,1*,%0269(56,21;$1':$53
,7UDQVSDUHQF\RI+RVW'ULYHV
,3UHSDULQJWKH,QVWDOODWLRQ
,&DUU\LQJRXWWKH,QVWDOODWLRQ
,8VLQJD&'520'ULYHXQGHU26
,,QVWDOODWLRQZLWK266&6,'0'
,,QVWDOODWLRQZLWK26$63,'0'
,&RPPDQG/LQH6ZLWFKHVRI*'7;$''
,,86,1*6&281,;9
,,7UDQVSDUHQF\RI+RVW'ULYHV
,,*HQHUDO7LSVIRU,QVWDOODWLRQ
,,,QVWUXFWLRQVRQPNGHY$'0IRUY[
,,,QVWUXFWLRQVRQPNGHY$'0IRUY[2SHQ6HUYHU
,,)XUWKHU,QIRUPDWLRQ
,,,86,1*,17(5$&7,9(81,;
,,,7UDQVSDUHQF\RI+RVW'ULYHV
,,,,QVWDOODWLRQDVDQDGGLWLRQDO&RQWUROOHU
,,,,QVWDOODWLRQDV%RRW&RQWUROOHU
,,,81,;7DUJHW,'/81RID+RVW'ULYH1XPEHU
,,,)XUWKHU,QIRUPDWLRQ
,986,1*81,;:$5(
,97UDQVSDUHQF\RI+RVW'ULYHV
,9*HQHUDO,QVWDOODWLRQ1RWHV
,9*'7DV%RRW&RQWUROOHU
,9*'7DVDQDGGLWLRQDO&RQWUROOHU
,9&RRUGLQDWHVRI6&6,GHYLFHV
,9)XUWKHU,QIRUPDWLRQ
9*'76(783,1'(7$,/
97KHIRXU/HYHOVRI+LHUDUFK\LQWKH*'7)LUPZDUH
9+RVW'ULYH7\SHVLQ5$,'<1(

9
96&6,'HYLFHV:KLFKFDQEH&RQILJXUHG:LWK*'76(783
9/RDGLQJ*'76(783
96SHFLDO.H\VLQ*'76(783
9([SUHVV6HWXS
96HOHFW&RQWUROOHU
9&RQILJXUH&RQWUROOHU
9&RQWUROOHU6HWWLQJV
9)LUPZDUH8SGDWH
9&RQILJXUH3K\VLFDO'HYLFHV
96&6,3DUDPHWHU,QLWLDOL]H
9)RUPDW'LVN
9&KHFN6XUIDFH
99LHZ'HIHFWV6WDWXV
9'HLQLWLDOL]H'LVN
9/RFN8QORFN'LVN
9&RQILJXUDWLRQRI6$)7(6XEV\VWHPV
9&RQILJXUH/RJLFDO'ULYHV
9,QVWDOOLQJD/RJLFDO'ULYHRIWKH7\SH'LVN
9,QVWDOOLQJD/RJLFDO'ULYHRIWKH7\SH&KDLQ
9&RQILJXUH$UUD\'ULYHV
91RWHVRQWKH&RQILJXUDWLRQRI$UUD\V'ULYHV
9&KDQJH'ULYH1DPH
9([SDQG$UUD\'ULYH
9$GG5$,'&RPSRQHQW
95HSODFH$UUD\&RPSRQHQW
95HPRYH5$,'&RPSRQHQW
95HPRYH$UUD\'ULYH
9$GG+RW)L['ULYH
95HPRYH+RW)L['ULYH
9+RW)L[3RRO$FFHVV
93DULW\9HULI\
93DULW\5HFDOFXODWH
9%XLOG5HEXLOG3URJUHVV
9&RQILJXUH+RVW'ULYHV
9&KDQJH'ULYH1DPH
96ZDS+RVW'ULYHV
95HPRYH+RVW'ULYH
96SOLW+RVW'ULYH

10
90HUJH+RVW'ULYHV
93DUWLWLRQ+RVW'ULYH
92YHUZULWH0DVWHU%RRW&RGH
96DYH,QIRUPDWLRQ
9/HDYLQJ*'76(783
,QGH[

11
&KDSWHU,
88VVLLQQJJ2266

12
,8VLQJ,%0269HUVLRQ[DQG:DUS
After having exposed the installation of the ICP Controller in chapters B and C as well as
that of the host-drives, we would now like to give you some hints and pieces of advice on
how to install IBM's operating system OS/2 Versions 2.x and Warp. Furthermore, we explain
how to install a CD-ROM drive (representatively standing for any other Not Direct Access De-
vice) under OS/2.
,7UDQVSDUHQF\RI+RVW'ULYHV
The structure of the Host Drives, which have been installed with GDTSETUP (in chapter C),
is not known to OS/2. I.e., the operating system does not recognize that a given Host Drive
consists of a number of hard disks forming a disk array. To OS/2, this Host Drive simply ap-
pears as one single hard disk with the capacity of the disk array. This complete transparen-
cy represents the easiest way to operate disk arrays under OS/2; neither OS/2 nor the PCI
computer need to be involved in the administration of these complex disk array configura-
tions.
,3UHSDULQJWKH,QVWDOODWLRQ
Under OS/2, the ICP Controller can be operated in two different ways. It is either run by
GDT's BIOS (INT13H interface), or, alternatively, by the high performance driver
GDTX000.ADD (located on the GDT OS/2 disk). Correspondingly, there are two different
ways of installing OS/2 with the ICP Controller. At this point we would like to stress that
only by using the high performance GDTX000.ADD driver can the ICP Controller unfold its
full capacity under OS/2. We therefore recommend this operating mode. In order to be able
to use the GDTX000.ADD from the very beginning of the installation it has to be copied to
the OS/2 diskette #1. We recommend the following procedure:
6WHSWith MS-DOS (using DISKCOPY for example), create a copy of the OS/2 diskette #1.
6WHSCopy GDTX000.ADD (using the COPY command) into the root directory of this new
floppy disk. To get sufficient free space on OS/2 diskette # 1, it may be necessary to erase
some files which are not needed for the installation procedure (for example not needed
*.ADD files)
6WHSInsert the following line into the OS/2 CONFIG.SYS file of your DISK 1 copy:
BASEDEV=GDTX000.ADD /V
The position of the entry is irrelevant.
,&DUU\LQJRXWWKH,QVWDOODWLRQ
As the OS/2 installation takes quite a long time, we suggest having a closer look at the
OS/2 installation manual. During the installation you will be prompted to answer several
questions, for example whether you want to copy OS/2 on an already existing MS-DOS par-
tition, or whether you want OS/2 to have its own partition, or whether you want to install
the OS/2 Boot-Manager, etc. . After having decided on these options, you can start the in-
stallation beginning with DISK 1 of the copy set you have previously created.
The OS/2 installation itself is carried out according to the OS/2 installation program.
After having completed the installation, you should check that the OS/2 CONFIG.SYS file
created during the OS/2 installation contains the following line:

13
BASEDEV=GDTX000.ADD /V
and that the driver GDTX000.ADD is either in the OS/2 or the root directory:
GDTX000.ADD or
\OS2\GDTX000.ADD
If this line is missing you have to add it to your CONFIG.SYS file. If the GDT driver
GDTX000.ADD is not in the OS/2 or root directory, copy it there.
,8VLQJD&'520'ULYHXQGHU26
If OS/2 has been installed from an OS/2 CD, you may skip this chapter as well as chapters
I.4.1 and I.4.2. A CD-ROM drive (standing for any other Not Direct Access Device) can be acces-
sed under OS/2 either directly through the OS/2 driver OS2SCSI.DMD, or the OS/2 ASPI
Manager OS2ASPI.DMD, or, for example, through corelSCSI for OS/2. We presume that the
CD-ROM drive has been properly connected to the ICP Controller. This includes that the
SCSI-ID and the SCSI bus terminators are set in accordance with the settings of the already
present SCSI devices (i. e., the SCSI-ID set for the CD-ROM drive is not occupied by another
device; resistor terminators are located at the two ends of the SCSI bus only).
,,QVWDOODWLRQZLWK266&6,'0'
6WHS Click the OS/2 System icon on the OS/2 Presentation Manager. Then select "System
Setup" and then "Selective Install".
6WHS Confirm the system configuration with "OK".
6WHS Now click "CD-ROM Device Support" in the window opening and select the CD-ROM
drive. Hereafter click "OK".
6WHS Click Install now and the installation begins. The system will ask you to insert further
OS/2 system disks or select an appropriate path on the hard disk.
6WHS After the installation is completed and OS/2 is started again, the CD-ROM drive can
be accessed.
,,QVWDOODWLRQZLWK26$63,'0'
6WHS Add the following line to the CONFIG.SYS file, using, for example, the OS/2 system
editor: BASEDEV=OS2ASPI.DMD
6WHS Now the driver GDTX000.ADD has to be configured in a manner that allows only the
ASPI Manager to access the CD-ROM drive (identified by its SCSI-ID, which in our example
is SCSI-ID 6): BASEDEV=GDTX0000.ADD /V /A:0 /AM:(0,6)
(an exact description of the command line switches can be found in the next chapter, I.5).
6WHS Now install the corelSCSI software from the corelSCSI OS/2 floppy disk.
6WHS After the restart of OS/2, the CD-ROM drive can be accessed.

14
,&RPPDQG/LQH6ZLWFKHVRI*'7;$''
The GDTX000.ADD driver can be configured with the following command line switches. The
names of the switches are IBM OS/2 compliant. The descriptions given in brackets ([,]) are
optional. The "!" inverts the following function.
%$6('(9 *'7;$''>9@>$G@>>@'0@>>@60@>>@$0@>126&$1@>>@87@>5@
9 Verbose (only possible as first parameter)
Display logo/error messages on screen.
$G All the following options until the next /A:d
are valid for adapter d. All adapters are numbered
starting with 0.
>@'0 Switch for supporting a Direct Access
[SCSI] Device-Manager (i.e.: OS2DASD.DMD)
'0 Support Host-Drives (Standard)
'0G Support Host-Drive d as a hard disk
(default if no CD-ROM is present)
'0GH Support SCSI device (Bus d, SCSI-ID e)
as a hard disk (default for SCSI type 0: DASD)
>@60 Switch for supporting a SCSI-Manager
(i.e.: OS2SCSI.DMD)
60 Support SCSI devices (default)
60G Support Host-Drive d as SCSI device
(default if d is a cached CD-ROM)
60GH Support SCSI device (Bus d, SCSI-ID e)
as SCSI device (default for all SCSI types
except 0: DASD)
>@$0 Switch for supporting an ASPI-Manager
(i.e.: OS2ASPI.DMD)
$0 Support SCSI devices (OS2ASPI.DMD)
$0G Support Host-Drive d as ASPI-Device
$0GH Support SCSI device (Bus d, SCSI-ID e)
as ASPI-Device
126&$1 Scans the SCSI channels only for these devices,
which are configured through the "/DM“, „/SM“, „/AM“
or „/R“ switches.
>@87 Ignores special time-out values of a certain
application, but always uses the GDTX000.ADD
settings. Some backup programs use time-out values
that are too short.
5GH Reserve a SCSI device (channel d, SCSI-ID e) as a raw
device, which is directly operated through OS/2 (the
data are not cached by the GDT cache). This SCSI-
device must not be initialized with GDTSETUP
(it may need to be de-initialized).
If reciprocally exclusive options have been selected, the one set last is effective.

15
&KDSWHU,,
88VVLLQQJJ66&&228811,,;;

16
,,8VLQJ6&281,;9
After having explained in chapters B and C the installation of the ICP Controller as well as
that of the Host Drives, we would now like to give you a few hints regarding the installation
of the operating systems
SCO UNIX V/386 3.2v4.x, 3.2v5.x (Open Server)
For successful installation, it is essential to read the SCO system manuals thoroughly.
,,7UDQVSDUHQF\RI+RVW'ULYHV
The structure of the Host Drives, which have been installed with GDTSETUP (in chapter C),
is not known to UNIX. I.e., the operating system does not recognize that a given Host Drive
consists of a number of hard disks forming a disk array. To UNIX this Host Drive simply ap-
pears as one single hard disk with the capacity of the disk array. This complete transparen-
cy represents the easiest way to operate disk arrays under UNIX; neither UNIX nor the PCI
computer need to be involved in the administration of these complex disk array configura-
tions.
,,*HQHUDO7LSVIRU,QVWDOODWLRQ
In the following description, we shall explain the installation of SCO UNIX V/386 3.2v4.x
and 3.2v5.x step by step in connection with the ICP Controller. Apart from the SCO UNIX
floppy disks and the SCO UNIX documentation, you also need the GDT floppy disks
GDT SCO UNIX BTLD-Disks for 3.2v4.x, 3.2v5.x
for the installation. In the following discussion, when we speak of a boot drive we refer to the
drive which is first integrated upon system power up. For the ICP Controller this drive is the
first Host Drive in the list of GDT Host Drives, i. e., the Host Drive number 0 (see
GDTSETUP menu Configure Host-Drives). During the installation you will have to decide whe-
ther you want the ICP Controller to make the boot drive available, or whether you want to
operate the ICP Controller as an additional controller in the computer system.
If the ICP Controller is the only hard disk controller in the computer system, it will automa-
tically make the boot drive available. If there are more hard disk controllers, the controller
which makes the first drive available (the drive containing the MS-DOS partition C:) will be
the boot controller.
In principle, SCO UNIX is always installed on the hard disk with Target ID 0 and LUN 0 on
host adapter 0, that is on Host Drive 0 of this controller. If SCO UNIX is installed from tape
(streamer) the streamer must have SCSI ID 2 and be connected to SCSI channel A of host
adapter 0. For an installation from CD-ROM, the CD-ROM device must have SCSI-ID 5 and
has to be connected with channel A of the ICP Controller.

17
When using 3.2v4.x or 3.2v5.x, you have the option to link the driver to the kernel before
starting the kernel (btld (ADM)). This will allow you to use the ICP Controller as the only
controller in the system. Use the GDT BTLD Disk. During the installation, whenever the N1
floppy disk is inserted and the message
Boot
:
is displayed, do not press <ENTER> immediately, but type in link <ENTER>. The system
will then prompt you for the name of the BTLD driver. Now type in gdth. It may be necessary
to type in the complete boot string. In this case, you have to add the following command:
link=gdth btld=fd(xx)
where xx is the "Minor Device Number" of the corresponding device file. xx = 60 for
fd0135ds18, 3,5" floppy as A,: or xx = 61 for fd1135ds18, 3,5" floppy as B: (see SCO UNIX
system Administrator's Reference, Hardware Dependence, floppy devices). When reque-
sted, enter the IRQ which has been assigned to the PCI INT of the ICP Controller (see chap-
ter B, Hardware Installation). In addition, the GDT BIOS must not be disabled and the boot
drive must be connected with the ICP Controller having the lowest PCI slot number.
When the UNIX installation has been completed, the driver is installed, too, and you may
install further devices with mkdev hd (ADM).
If the ICP Controller is an additional controller, the installation of the driver is carried out
with installpkg.
,,,QVWUXFWLRQVRQPNGHY$'0IRUY[
Whenever the program mkdev hd (ADM) is started, you will be asked for the coordinates of
the device you wish to install. The driver does not automatically display all devices connec-
ted, so after the installation you will find a tool named GDTSCAN in the directory '/etc'.
The scanning can take up to several seconds, especially when there is more than one con-
troller in the system. The devices are displayed together with their host adapter number,
target-ID and LUN. These values are to be used in mkdev (ADM). Let's have a brief look at
how the HA-no., target-ID and LUN are determined. Please note that the UNIX driver al-
ways maps the first detected Host Drive with target-ID 0, LUN 0. Exactly this drive would be
used as a boot drive when the ICP Controller is to make the boot drive available.
+RVWDGDSWHU1XPEHU+$
The host adapter number assigned to the ICP Controller is derived from the PCI slot num-
ber of the ICP Controller. Therefore, if there is only one ICP Controller installed in the PCI
bus computer system, the host adapter number=0. If there are two ICP Controllersinstalled,
the ICP Controller with the lower PCI Slot number is assigned host adapter number 0 and
the ICP Controller with the higher PCI slot number is assigned host adapter 1. (Note: After
a cold boot, the GDT BIOS displays a couple of messages, each beginning with the con-
troller’s PCI slot number, e.g. "[PCI 0/3] 4 MB RAM detected". The number after the ‘/’ is the
slot number of the controller. This helps you to determine which is the order of the ICP
Controllers and and which host adapter number is assigned to them by UNIX. See also
chapter B, Hardware Installation).

18
81,;7DUJHW,'DQG/81
Target-IDs 0 and 1 with LUN 0 to 7 are reserved for "Direct Access Devices" (devices beha-
ving like a hard disk or a removable hard and therefore configurable with GDTSETUP). The-
re is a correlation between the Host Drive number GDTSETUP assigns (menu Configure Host
Drives), and the assigned target-ID and LUN:
Host-Drive Number = 8 * Target-ID + LUN
The Host Drive number is the number the drive is given in the list of available Host Drives
in the GDTSETUP program. The following exemplary screen shows a list of Host Drives. In
this example, there are two Host Drives installed.
Therefore, the first Host Drive has target-ID 0 / LUN 0 and the second target-ID 0 / LUN 1.
The formula for determining target ID and LUN from the existing Host Drive numbers yields
the following possible combinations for "Direct Access Devices":
+RVW'ULYH
QXPEHU
7DUJHW,' /81 +RVW'ULYH
QXPEHU
7DUJHW,' /81
000810
101911
2021012
3031113
4041214
5051315
6061416
7071517
This conversion is necessary because the single SCSI devices are not declared to the host
operating system in the order of their SCSI-IDs anymore, but according to the Host Drive
numbers they have in GDTSETUP. Host Drives are a prerequisite for the ICP Controller to
be able to link several SCSI devices to form a higher structure (i.e., RAID 5).
The sequence of the single Host Drives can be changed very easily by having GDTSETUP
sort them in its Configure Host Drives menu. In this way, it is also possible to change the boot

19
drive (it had previously been selected as boot drive because it has the lowest drive number,
that is, 0, and is therefore the first drive to be communicated to the system ).
Target ID and LUN of "Not Direct Access Devices" (devices such as streamers, tapes, CD-
ROMS, etc., not configurable with GDTSETUP) are determined on the basis of the SCSI-ID
and the SCSI channel used by the ICP Controller. These devices can only be configured with
SCSI-IDs 2 to 6. SCSI-ID 0 and 1 are reserved for hard disks, SCSI-ID 7 for the ICP Controller.
If "Not Direct Access Devices" are configured on SCSI-ID 0 or 1, they are not recognized du-
ring the scanning process and can therefore not be used. The Target IDs of Not Direct Access
Devices are identical to their SCSI-ID, the LUN depends on the SCSI channel used (LUN 0 for
SCSI channel A and LUN 4 for SCSI channel B). Note: After a cold boot the GDT BIOS dis-
plays all connected devices with their physical coordinates, i. e. their SCSI-ID and SCSI-
LUN, (see "Chapter B, ICP Controller Function Check").
6&6,,'RI1RW'LUHFW$FFHVV
'HYLFHV
8VHG*'7
6&6,FKDQQHO
81,;
7DUJHW,'
81,;
/81
2A20
3A30
4A40
5A50
6A60
2B24
3B34
4B44
5B54
6B64
Having to determine the Target ID and LUN in such a complicated manner might seem rat-
her awkward. However, it is necessary to do so because the ICP Controllers have more than
one SCSI channel, whereas UNIX can only manage host adapters with one SCSI channel.
Therefore, the GDT UNIX driver has to make the appropriate transformations.
&RQILJXUDWLRQ([DPSOH
In the PCI computer are two ICP Controllers (HA 0 = 1st GDT, HA 1 = 2nd GDT), each with
two SCSI channels.
1 hard disk as Host Drive no. 0 on HA0
1 hard disk as Host Drive no. 0 on HA1
1 hard disk as Host Drive no. 1 on HA1
1 Streamer SCSI-ID 2, LUN 0 on SCSI channel A of HA0
1 CD-ROM SCSI-ID 3, LUN 0 on SCSI channel A of HA0
1 DAT SCSI-ID 2, LUN 0 on SCSI channel B of HA1
5HVXOW
HA Target-ID LUN Device
0001
st hard disk, Host Drive no. 0 (boot- and
installation drive)
0 2 0 Streamer
030CD-ROM
1 0 0 hard disk, Host Drive no. 0
1 0 1 hard disk, Host Drive no. 1
124DAT

20
,,,QVWUXFWLRQVRQPNGHY$'0IRUY[2SHQ6HU
YHU
Whenever the program mkdev hd (ADM) is started, you will be asked for the coordinates of
the device you wish to install. The driver does not automatically display all devices connec-
ted, so after the installation you will find a tool named GDTSCAN in the directory '/etc'.
The scanning can take up to several seconds, especially when there is more than one con-
troller in the system. The devices are displayed together with their host adapter number,
target-ID and LUN. These values are to be used in mkdev (ADM). Let's have a brief look at
how the HA-no., target-ID and LUN are determined. Please note that the UNIX driver al-
ways maps the first detected Host Drive with target-ID 0, LUN 0. Exactly this drive would be
used as a boot drive when the ICP Controller is to make the boot drive available. As an al-
ternative for the following "new" mapping method of SCO UNIX V/386 3.2v5.x, you may also
use the mapping as described in section II.3 (for 3.2v2.0 & 3.2v4.x). To enable this ("old")
mapping, change in the
/etc/conf/pack.d/gdth/space.c
gdth_mapping=1 into
gdth_mapping=0
+RVWDGDSWHU1XPEHU+$
The host adapter number assigned to the ICP Controller is derived from the PCI slot num-
ber of the ICP Controller. Therefore, if there is only one ICP Controller installed in the PCI
bus computer system, the host adapter number=0. If there are two ICP Controllersinstalled,
the ICP Controller with the lower PCI Slot number is assigned host adapter number 0 and
the ICP Controller with the higher PCI slot number is assigned host adapter 1. (Note: After
a cold boot, the GDT BIOS displays a couple of messages, each beginning with the con-
troller’s PCI slot number, e.g. "[PCI 0/3] 4 MB RAM detected". The number after the ‘/’ is the
slot number of the controller. This helps you to determine which is the order of the ICP
Controllers and and which host adapter number is assigned to them by UNIX. See also
chapter B, Hardware Installation).
81,;7DUJHW,'DQG/81
Target-IDs and LUNs for “Not Direct Access Devices“ (devices like streamers, tapes and
CD-ROMs and therefore not configurable via GDTSETUP), are directly assigned to the SCSI-
ID and the channel of the ICP Controller. Host Drives are assigned in increasing order to
the free coordinates (bus number and target ID;LUN is always 0).
&RQILJXUDWLRQ([DPSOH
In the PCI computer are two ICP Controllers (HA 0 = 1st GDT, HA 1 = 2nd GDT), each with
two SCSI channels.
1 hard disk as Host Drive no. 0 on HA0
1 hard disk as Host Drive no. 0 on HA1
1 hard disk as Host Drive no. 1 on HA1
1 Streamer SCSI-ID 2, LUN 0 on SCSI channel A of HA0
1 CD-ROM SCSI-ID 3, LUN 0 on SCSI channel B of HA0
1 DAT SCSI-ID 2, LUN 0 on SCSI channel A of HA1
Table of contents
Other ICP Computer Hardware manuals
Popular Computer Hardware manuals by other brands

XFX
XFX AMD RADEON RX Series quick guide

Telit Wireless Solutions
Telit Wireless Solutions xE910 Hardware reference manual

Fibocom
Fibocom L860-GL-16 Hardware guide

Cypress Semiconductor
Cypress Semiconductor CY7C1480V25 Specification sheet

National Instruments
National Instruments NI-9252 CALIBRATION PROCEDURE

Omron
Omron G2RS brochure

Infineon
Infineon DEMO FX3 U3V CAM01 EZ-USB FX3 Guide

Cypress Semiconductor
Cypress Semiconductor CY7C1316BV18 Specification sheet

Moxa Technologies
Moxa Technologies DA-661 Quick installation guide

NEC
NEC uPD780318 Subseries user manual

JOBO
JOBO AUTOLAB ATL-500 instruction manual

Sony
Sony HKSR-5103 installation guide