IDEA VISION C3 VacuMount User manual
contact@idea-vision.de
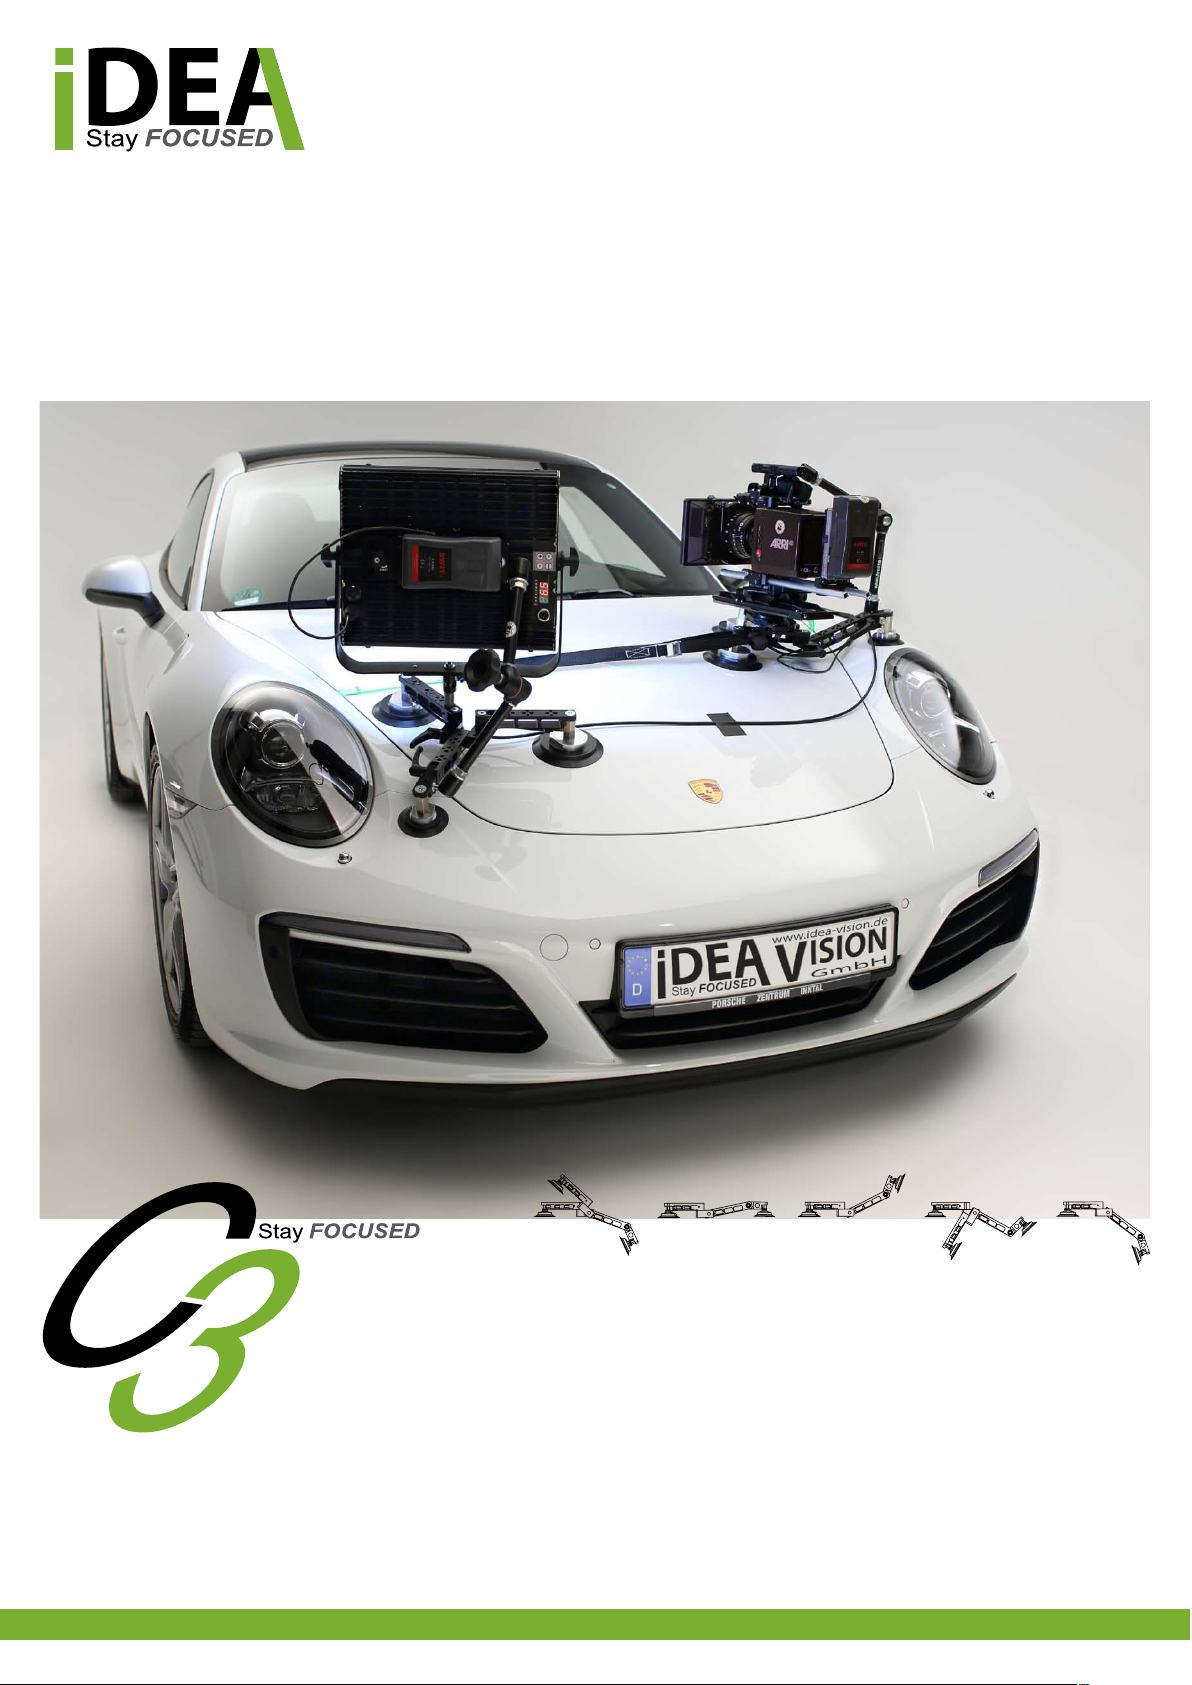
The Right Choice!
GmbH
VISION
www.idea-vision.de
VacuMount
INSTRUCTION MANUAL

1
Office
IDEA VISION GmbH
Anzengruberstr. 16
83059 Kolbermoor
Germany
Directors
Gabriel Pecuch
Mark Fellinger
District Court of
Traunstein HRB 24094
USt-IdNr.: DE 298741089
Contact
Fon +49 (0)8031 90 85 795
Fax +49 (0)8031 90 85 796
email contact@idea-vision.de
www.idea-vision.de
www.idea-vision.de
Subject Page
Safety hints 3
The VacuMount System 4
Initial operation 5
Micro-controlled
Vacuum Pump System 6
Assembling 7- 12
Notes 13
Examples 14 - 15
Table of contents
www.idea-vision.de

3
Safety hints
1. Do not start operating the VacuMount System until you have read and understood the
operating instruction. All safety hints and informations have to be observed.
2. The IDEA VISION VacuMount may only be operated by competent staff.
3. Cleanness and adhesion: To guarantee a proper adhesion of the suction cup it is most
important to make sure that the surfaces of both, the suction cup and the mounting sur-
face are clean. Please mount the device exclusively on smooth, even and suitable surfaces.
4. Attention: Although the holding force of the suction cups are high enough to carry the
camera, always use tension belts (safety straps)as a back up. Before using the VacuMount,
steadiness and holding force must always be tested before shooting or driving using the
maximum forces to be expected. Attention: With the construction the car is wider/higher
as normal. The horizontal and vertical areas must be kept free. Use only on secured roads/
areas. Do not use on public roads.
5. Do not switch on vacuum pump in dusty area. Clean car surface from dirt/dust. The suc-
tion cups work like a vacuum cleaner. During air suctioning, particle (e.g. sand)may dama-
ge inside parts like the pump.
6. Repair works should only be executed by the manufacturer or by well-trained staff.
7. When connecting the VacuMount to the power supply, the general VDE guidelines have
to be observed. The VacuMount needs to be protected against moisture.
8. Make sure that unauthorized personnel can not use the VacuMount
contact@idea-vision.de
4www.idea-vision.de
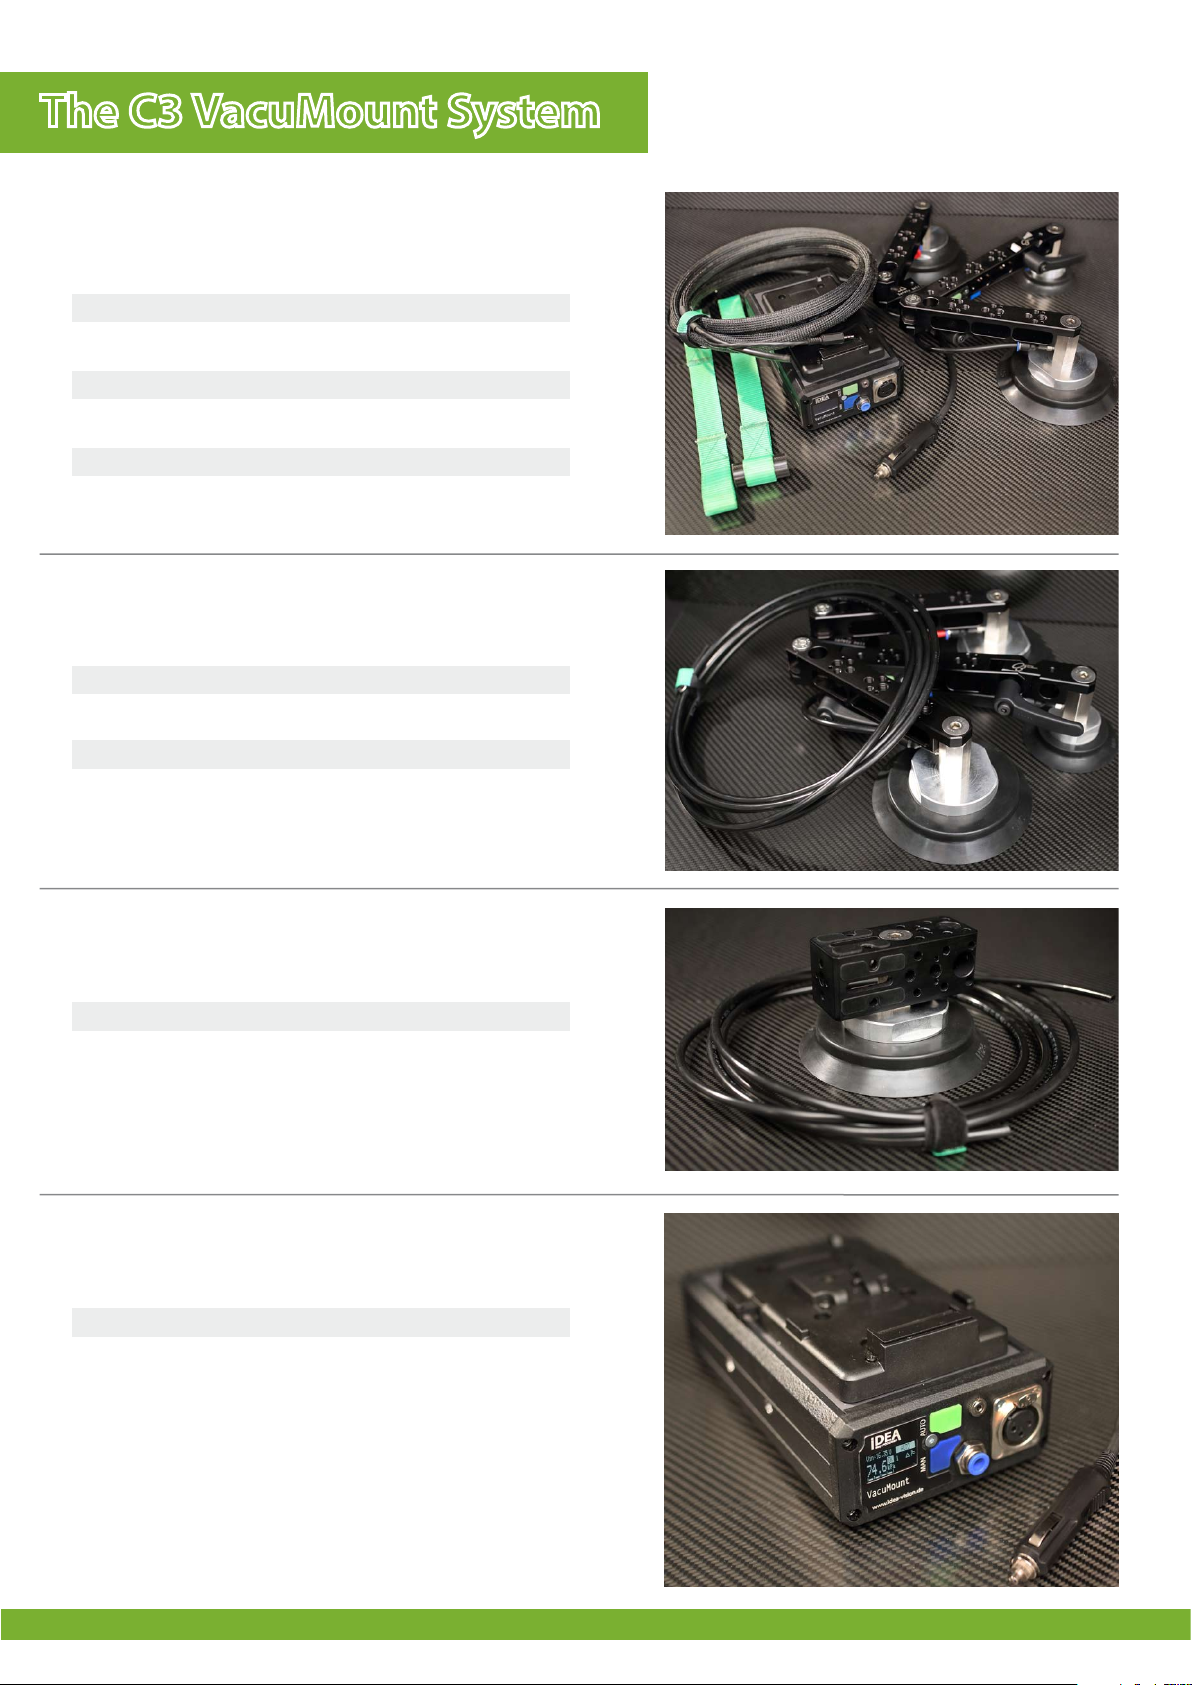
C3VacuMount Kit existing of:
1x C3structure
2x Suction cup 125 mm
1x Suction cup 80mm
1x Micro-controlled Vacuum Pump System
1x cable car power supply appr. 2m
1x cable air supply appr. 5m
C3VacuMount extension:
1x C3structure
2x Suction cup 125 mm
1x Suction cup 80mm
1x cable air supply appr. 5m
C1VacuMount extension:
1x C1structure
1x Suction cup 125 mm
1x cable air supply appr. 3m
The C3VacuMount System
MCU VacuMount Pump
1x VacuMount Pump
1x cable car power supply appr. 2m

5
contact@idea-vision.de
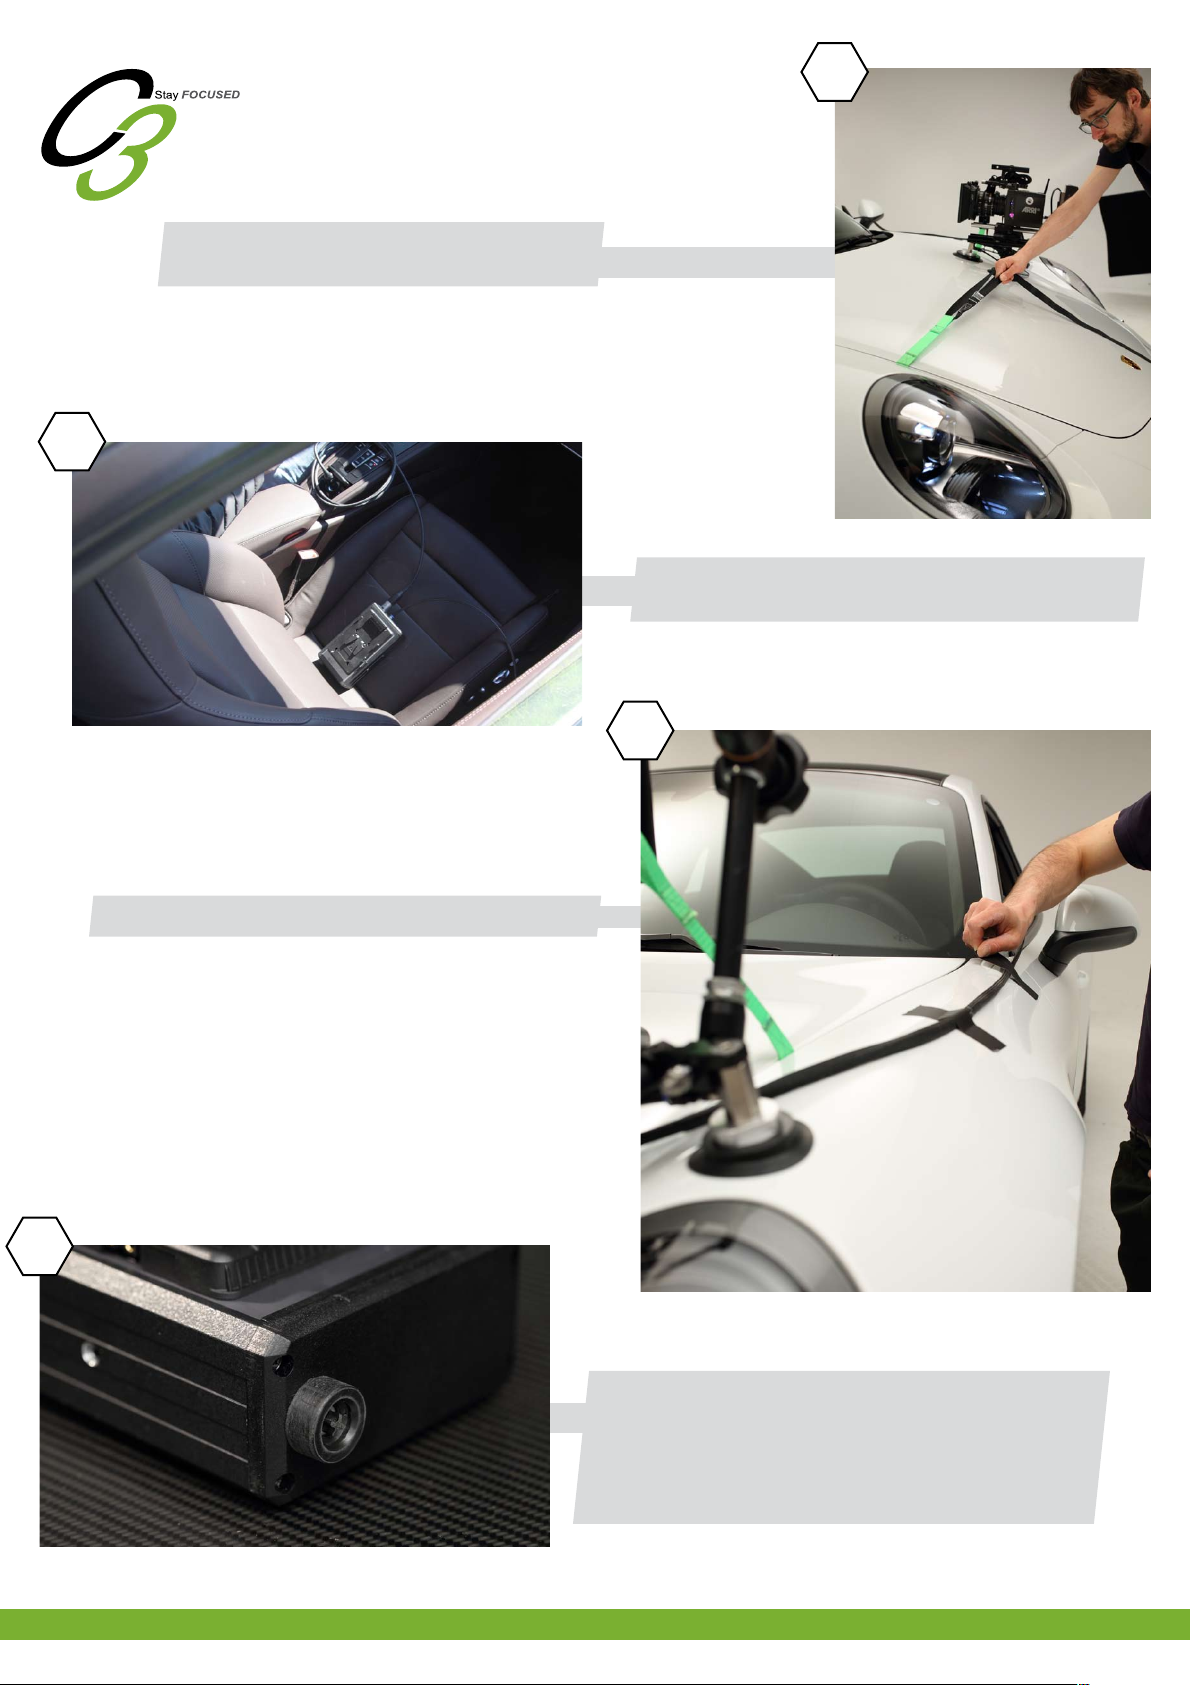
Initial Operation
pic
vacuum hose into
vacuum pump
1. Connect vacuum hose with the Micro-controlled Vacuum
pump and C3, C1structure.
Push the hose into the connections.
You can feel a distinct resistance during this process.
If there is a leak, the VacuMount system will not hold or the
vacuum pump will always pump.
2. Connect the Micro-controlled Vacuum pump system
with the power supply (11V –30V).
3. Check that the suction cups and the mounting
surface are clean.
To guarantee a proper adhesion of the suction cup it
is most important to make sure that the surfaces of
both, the suction cup and the mounting surface are
clean, dry and dust free.
4. Check the stability of the mounting surface.
Hoods, doors of modern cars are often weak.
Place the suction cups near edges, beadings,
seams, etc.
Keep in mind to find suitable mounting spots for
safety/tension belts.
1
2
3
4

6www.idea-vision.de
MANUAL
Vin 12.59 V
48.8
kpa
OK
AUTO
Hi
Lo
Vin
AUTO
OK
Lo
AUTOMAN
VacuMount
123
4
5
6
7
8
9
1 Power Supply Status
Power supply low
Power supply in working range
Power supply to high
2 Voltage indicating system
3 Operating Mode MANUAL
Operating Mode AUTO
4 Warning ! Slow stop! Check the system!
5 VacuumStatus
Vacuum pressure to low
Vacuum pressure in operating mode
6 Operating Range Vacuum
upper operating range
lower operating range
7 Negative Vaccum Pressure in kpa
8 Automatic Button
8.1 Mode Adjustment
Hold green Button for 3 seconds
12 Change into Mode Menu
13 Select with blue Button
Return with green Button
9 Manual Pump Button
10 Air supply
11 XLR Plug
10
11
PUSH
kPa
-70
-60-50
-40
-35 -45 -55 -65 -75
1
2
3
4
Modes
1 Low Vacuum pressure - light weight - low power
consumption - less pump cycles
2 Standard Vacuum pressure - standard power
consumption - standard pump cycles
3 Long Range Vacuum pressure - light weight - low power
consumption - less pump cycles
4 High Vaccum pressure - heavy weight - high centrifugal
force - raised power consumption
12 13
Vin 12.59 V
48.8
kpa
M
AUTO
2
Micro-controlled Vacuum Pump System

7
contact@idea-vision.de
Assembling
1. Make sure all components are available
and in working order.
2. Clean car surface and suction cups.
Note: Clean, dry, dust free
4. Place C3VacuMount where you want
to shoot.
1
2
3
4
3. Safety: Although the C3VacuMount s holding
force is adequate for regular driving shots,
tension belts must be used for additional safety.
In any case, especially if mounted on cars or
overhead, the object attached to the
C3VacuMount (e.g. camera)has to be secured
additionally with a safety cable or a tensioning
strap.
Use pads to avoid dents and scratches on
carpaint. Tighten tension belts carefully to avoid
damages on the car.
Note: Tension belts give additional safty and
avoid vibrations, especially on thin metal
sheets.

8www.idea-vision.de
7. Adjust the C3to your requirements. Close
articulated links after all suction cups got vacuum.
8. Mount camera direct to C3structure using
M8, 1/4“ ,3/8 or use a wedge/tilt plate.
5. Open articulated links to level suction
cups to surface.
5
6
7
8
6. Press firmly suction cups down and push green
Button AUTO at the Micro-controlled Vacuum
pump or push green Button at the C3structure.
The vacuum pump starts working for appr. 3sec
Note: Assure that the Vacuum Pump System is
in Mode Automatic
9
contact@idea-vision.de
11. Fix vacuum hose with e.g. adhesive tape.
10. End of using:
Switch from Automatic into Manual Mode (push
green Button).
Push release Button at the Vacuum Pump System.
Note: You loose vacuum immediately.
10. Place vacuum pump system e.g. inside the car
and secure it properly.
9. Secure C3and camera with tension belt.
Note: Test fixture before driving.
9
10
11
12
VacuMount

10 www.idea-vision.de
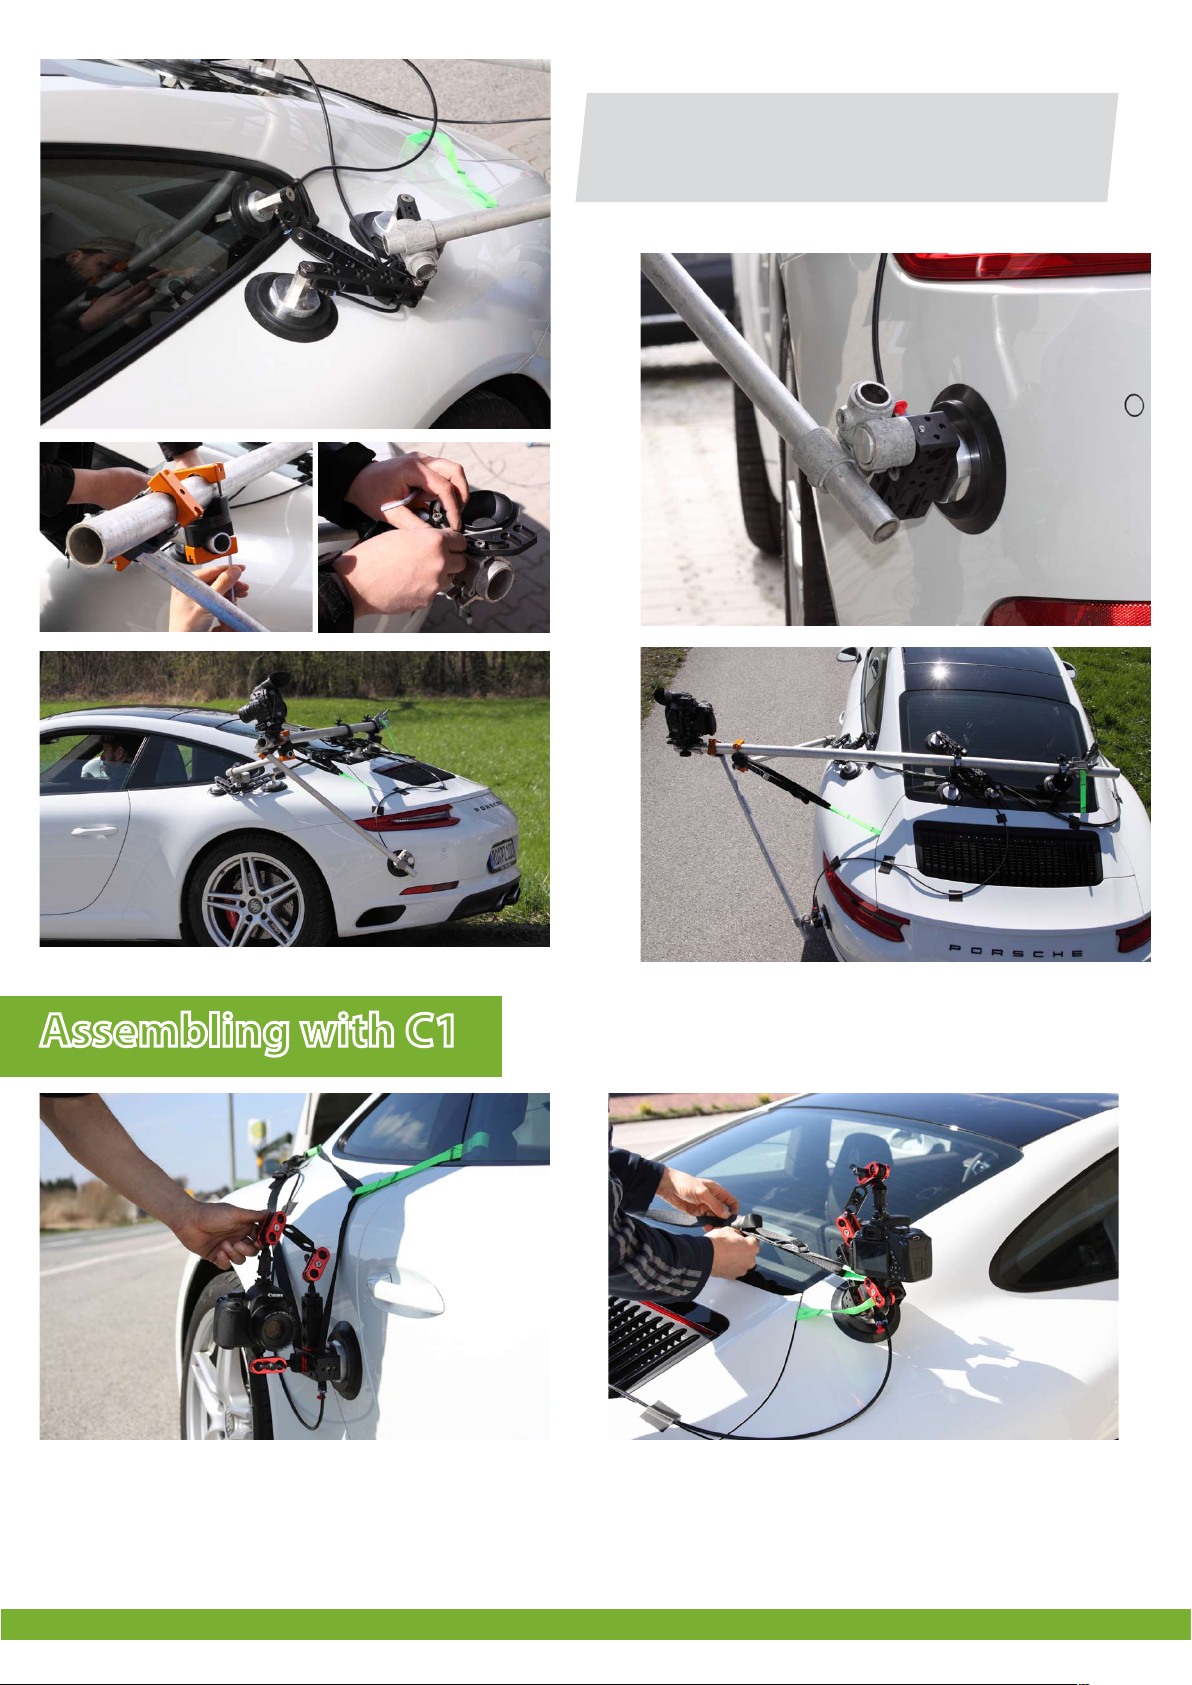
If you rigg the VacuMount e.g. on the
side of a car you have to keep in mind
same points as described
above. However, keep in mind that
the VacuMount will not hold on the
door without the vacuum.
Therefore, switch on the vacuum
pump system before you place it.
Vertical assembling
VacuMount

11
contact@idea-vision.de
Use the Extension Kit if you want to place the
camera from more distance. You have to keep
in mind same points as described above when
mounting the VacuMounts with Extension Kit.
Individually place the VacuMounts to your require-
ments and connect them with the vacuum pumps
system. You can supply vacuum hoses serial.
Use Bowl Adapter to levell the camera. The camera
can be attached directly to Bowl Adapter or to a
camera wedge plate using 3/8 screws.
Assembling with C3, C1extension
1www.idea-vision.de
12 www.idea-vision.de
Note: In any case steadiness and holding force must always be tested before shooting or dri-
ving using the maximum forces to be expected. With the construction the car is wider/higher as
normal. The horizontal and vertical areas must be kept free. Use only on secured roads/areas. Do
not use on public roads.
Always use at least three mounting spots to get
adequate stability. The more mounting spots, C3s,
C1s you use the better stability you get.
Assembling with C1

Office
IDEA VISION GmbH
Anzengruberstr. 16
83059 Kolbermoor
Germany
Directors
Gabriel Pecuch
Mark Fellinger
District Court of
Traunstein HRB 24094
USt-IdNr.: DE 298741089
Contact
Fon +49 (0)8031 90 85 795
Fax +49 (0)8031 90 85 796
email contact@idea-vision.de
www.idea-vision.de
2
contact@idea-vision.de 13
contact@idea-vision.de
Notes
1. You lose vacuum immediately if you disconnect the vacuum hose!
2. Vacuum hose connection.
a. Disconnect vacuum hose.
i. Press down blue ring of connection.
ii. Pull hose at same time.
b. Connect vacuum hose.
i. Push hose into the connection. You can feel a distinct resistance during
this process.
c. If there is a leak, the VacuMount will not hold or the vacuum pump will always
pump.
3. Suction cups can be changed easily.
4. The Suction cups are designed in such a way that they still get vacuum on certain con-
vex and concave surfaces. However, use a suction cup with a different size or form, if the
surface is to much curved.
5. Normally, the suction cup is attached tightly and goes off easily. Nevertheless, the
suction cup should be regularly removed after 12-24 hours at the latest. Please clean and
maintain the device regularly using a special rubber-care product. This measure extends
the life of the suction cup and prevents it from sticking to the surface.
6. Clean surface after use to remove possible prints.
7. Cut vacuum hose right after the bend if the hose is cracked. You can repeat this
procedure until the vacuum hose becomes to short.
8. IDEA VISION recommends tubes with a size of 33mm (weight!).

14 www.idea-vision.de
VacuMount
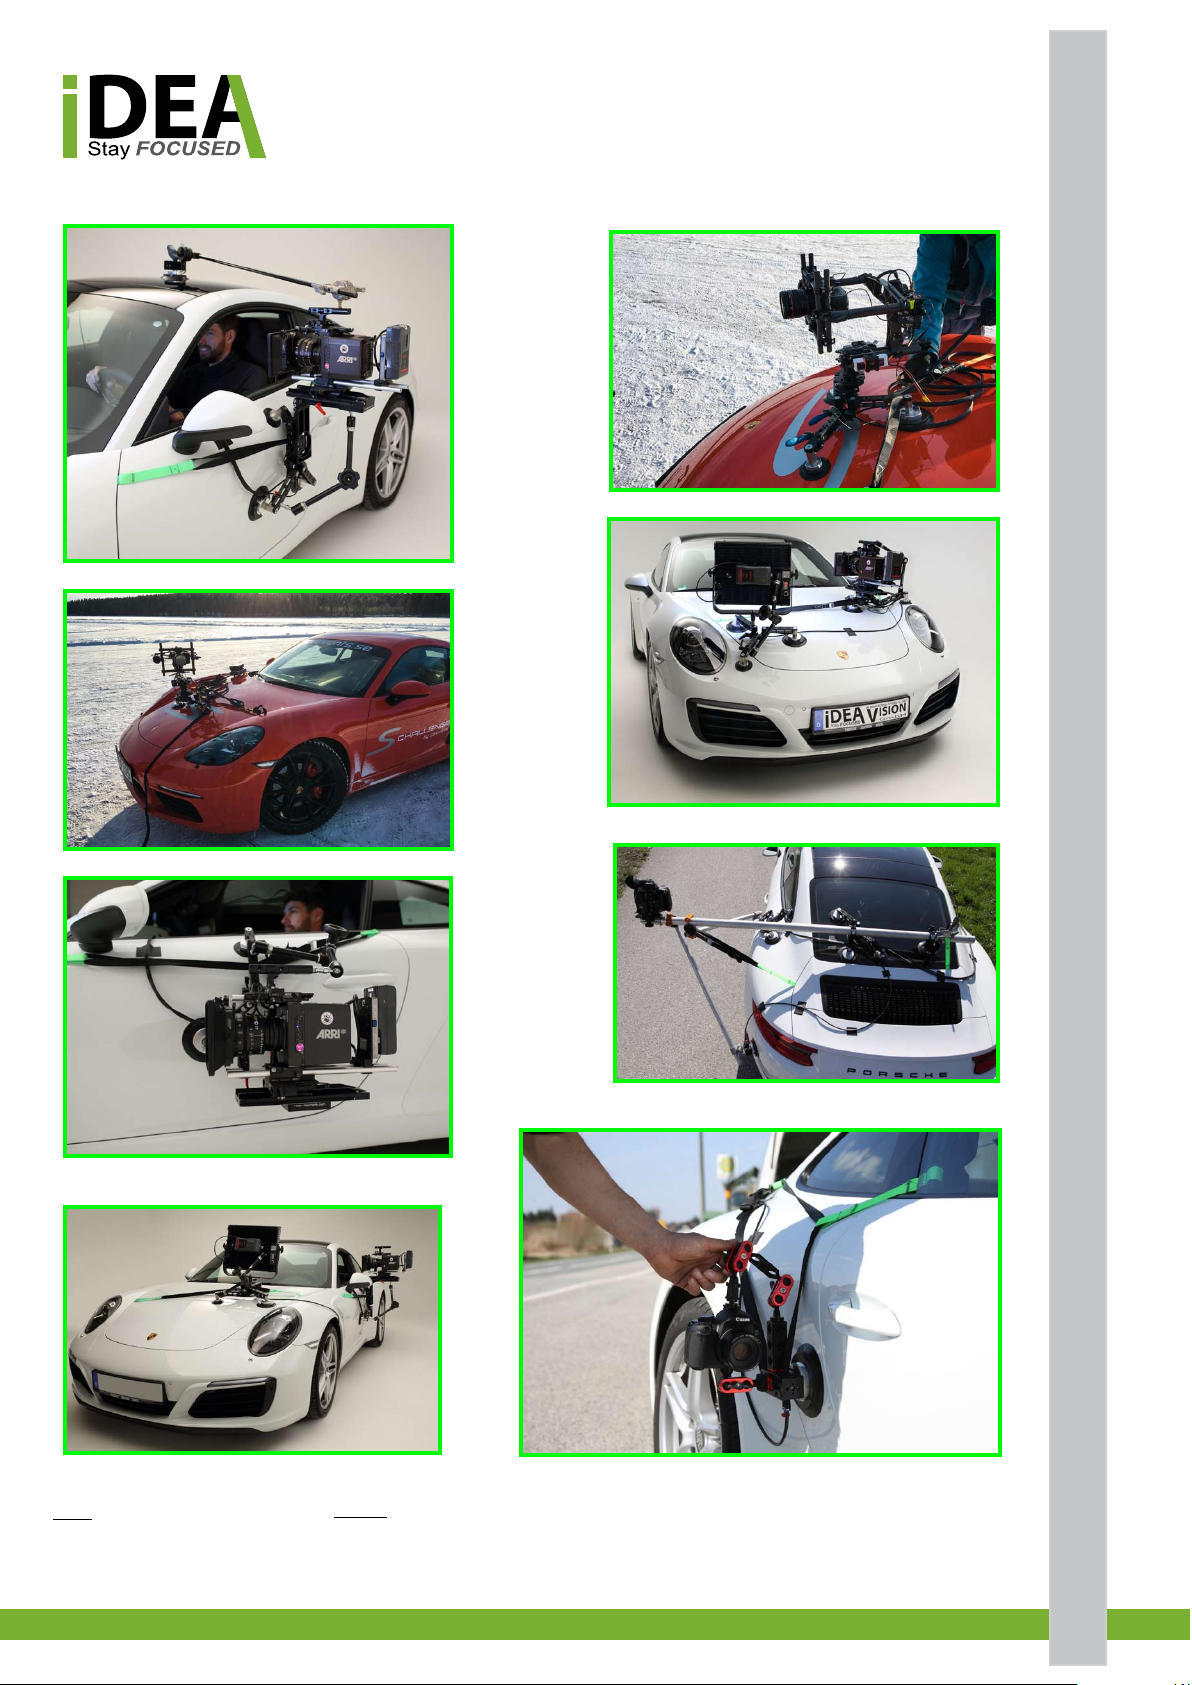
15
contact@idea-vision.de
The Right Choice!
Office
IDEA VISION GmbH
Anzengruberstr. 16
83059 Kolbermoor
Germany
Contact
Fon +49 (0)8031 90 85 795
Fax +49 (0)8031 90 85 796
email contact@idea-vision.de
www.idea-vision.de
GmbH
VISION
www.idea-vision.de
Table of contents
Other IDEA VISION Camera Accessories manuals


