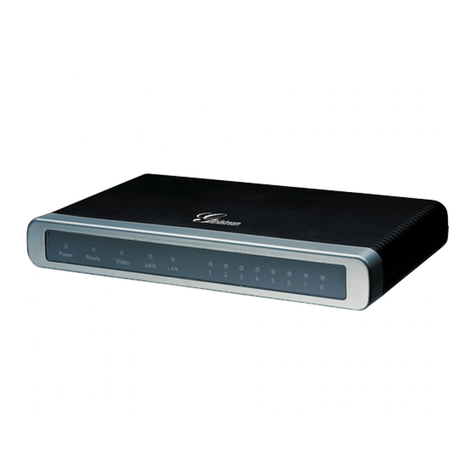
IDEETRON LoRaWAN User manual

Manual LoRaWAN
Mini Gateway
ID150188-02
Date: 28-10-2016
Version: 2.0
Title: Manual LoRaWAN mini gatewa

Pagina 2 of 12 1-11-2016
LoRaWAN mini gatewa
1 Revision history
Version Date Chan es
1.0 17-03-2016 First release
2.0 28-10-2016 Updated for new firmware release
1.1 Contact
Ideetron B.V.
Dropsstraat 81
3941 JL Doorn
Nederland
Tel: +31 (0)343 769094
E-mail: info@ideetron.nl
2 Table of contents
1
REVISION HISTORY 2
1.1
Contact 2
2
TABLE OF CONTENTS 2
3
INTRODUCTION 4
4
SPECIFICATIONS 4
5
INSTALLATION 4
6
LORAWAN INTRODUCTION 5
7
OPERATION 5
8
COMMANDS 6
8.1
ADDR – Transmit address 6
8.2
DRDW – Datarate down 7
8.3
DRUP – Datarate up 8
8.4
CHDW – Channel down 8
8.5
CHUP – Channel up 9

Pagina 3 of 12 1-11-2016
LoRaWAN mini gatewa
8.6
APPK – Application key 9
8.7
NWKK – Network key 9
8.8
SACK – Send ACK 10
8.9
TXTM – Transmit timing 10
8.10
TXCF – Transmit Confirmation 11
8.11
TXDI – Transmit direction 11
8.12
DATA – Send data 12

Pagina 4 of 12 1-11-2016
LoRaWAN mini gatewa
3 Introduction
The LoRaWAN mini gatewa can be used to develop and test LoRaWAN motes. Also it can be used
to test gatewa communication.
This manual will first give a global description of the LoRaWAN communication. In the “Commands”
chapter there will be a more specific explanation of the different settings.
4 Specifications
Radio connection
Modulation LoRa
Channel Up 868.100 MHz
Datarate Up SF12 BW 125 kHz
Channel Down 869.525 MHz
Datarate Down SF9 BW 125 kHz
Device Address 00 00 00 00
Network ke 2B7E151628AED2A6ABF7158809CF4F3C
Application ke 2B7E151628AED2A6ABF7158809CF4F3C
Tx Direction Up
Tx Timing No
Tx Confirmation No
Send ACK No
Table 1: Default radio settin s
See chapter 8 if ou want to change these settings.
Serial communication USB
Datarate 38,4 kbps
Number of data bits 8
Parit None
Number of stop bits 1
Table 2: Serial communication specifications
5 Installation
Connect the mini gatewa to an USB port. The driver will be installed automaticall . Otherwise the
driver can be downloaded from the FTDI website:
htp://www.ftdichip.com.
Download the VCP drivers.
The gatewa can be controlled with a terminal program like Realterm,
http://realterm.sourceforge.net/
All the communication with the gatewa is in ASCII format.

Pagina 5 of 12 1-11-2016
LoRaWAN mini gatewa
6 LoRaWAN introduction
The LoRaWAN communication takes place in two directions, up (from mote to gatewa ) and down
(from gatewa to mote). The mini gatewa can send and receive LoRaWAN messages both wa s,
as shown in Figure 1.
Fi ure 1: LoRaWAN communication
The commands described in chapter 8, will influence different settings for the LoRaWAN
communication.
-The channel and datarate can be set for a direction individuall .
-The Network and application ke will be used for sent or received messages in both
directions.
-The Tx settings influence the sent messages from the mini gatewa up or down.
-The device address is used for sending messages and for sending an ACK on an up
message from a mote.
7 Operation
The gatewa is fitted with two RFM95-868-S2 radio modules. One of the modules will receive
messages coming from motes and the other module will listen to messages from the gatewa .
Ever message the mini gatewa receives will be check and will be broken down in the different
fields. The mini gatewa will send the following information using to serial communication:
Messa e Value Description
RSSI 00 - FF Hexadecimal value for the
RSSI of the received
message.
CRC OK/NOK If the CRC of the received
radio message is ok.
MAC Header See Table 5 LoRaWAN MAC header
Sensor 4 b tes in Hex Device address
Frame counter 2 b tes in Hex Number of frame
Frame control 00 or 20 LoRaWAN Fctrl field
MIC OK/NOK If the MIC calculation of the
LoRaWAN package is ok.

Pagina 6 of 12 1-11-2016
LoRaWAN mini gatewa
Data B tes in Hex Data send from mote or
gatewa
Table 3: Messa e information
The MAC Header specifies the message t pe and the version of the LoRaWAN protocol used.
Bits 7 – 5 4 – 2 1 – 0
Field Message t pe Reserved LoRaWAN protocol
Table 4: MAC Header fields
The LoRaWAN protocol field will alwa s be 00.
The reserved field bits will alwa s be 0.
The message t pe filed can have several values, in Table 5 the different values for the MAC header
are listed.
MAC Header value Hex Messa e type
00 Join request
20 Join Accept
40 Unconfirmed data up
60 Unconfirmed data down
80 Confirmed data up
A0 Confirmed data down
Table 5: Messa e types
The frame control field consists of different bits, the most important is bit 5 containing the ACK.
Most of the times the other bits will be 0, so the frame control field can have the following values:
00 – No ACK
20 – ACK
For a full description of the frame control field see the LoRaWAN specification.
8 Commands
This chapter describes the commands that can be used to communicate with the mini gatewa
using a terminal program. All commands and data is sent as ASCII characters. All data is one or
more b tes of hexadecimal numbers represented b 2 ASCII characters. So all data exist of 2 ASCII
characters that can be 0 – F. All other characters will be set to 0.
All commands have a set and request operation. The set operation starts with a # and a request
operation starts with a ?.
The answer of set operation will start with a * and the answer of a request operation starts with =.
8.1 ADDR – Transmit address
The transmit address is used b the mini gatewa for transmitting messages. Also this address is used
when ‘send ack’ is switched on, see 8.8.
To set the address, use the #ADDR command. Using command will delete an pending command,
and will reset also the transmit frame counter.
To use this command the following needs to be send:

Pagina 7 of 12 1-11-2016
LoRaWAN mini gatewa
#ADDR[Address]
[Address] = The address of the node in 8 ASCII characters.
The repl of the gatewa will be:
*ADDR [Address]
[Address] = The address that is set.
To request the current transmit address that is set use this command:
?ADDR
The repl will be:
=ADDR [Address]
[Address] = The address that is set.
8.2 DRDW – Datarate down
This command is used for the datarate that is used on the down channel of the LoRaWAN
communication, see Figure 1.
To set the datarate use:
#DRDW[Datarate]
The [Datarate] can have the following values
Value Description
00 SF 12 BW 125 kHz
01 SF 11 BW 125 kHz
02 SF10 BW 125 kHz
03 SF9 BW 125 kHz
04 SF8 BW 125 kHz
05 SF7 BW 125 kHz
06 SF7 BW 250 kHz
Table 6: Datarate values
The repl will be:
*DRDW [Datarate Description]
To request the current datarate use:
?DRDW
The repl will be:
=DRDW [Datarate Description]

Pagina 8 of 12 1-11-2016
LoRaWAN mini gatewa
8.3 DRUP – Datarate up
This command is used for the datarate that is used on the up channel of the LoRaWAN
communication, see Figure 1.
To set the datarate use:
#DRUP[Datarate]
The [Datarate] values are listed in Table 6.
The repl will be:
*DRUP [Datarate Description]
To request the current datarate use:
?DRUP
The repl will be:
=DRUP [Datarate Description]
8.4 CHDW – Channel down
This command is used for the channel that is used on the down channel of the LoRaWAN
communication, see Figure 1.
To set the channel use:
#CHDW[Channel]
The [Channel] can have the following values
Value Channel (MHz)
00 868.100
01 868.300
02 868.500
03 867.100
04 867.300
05 867.500
06 867.700
07 867.900
10 869.525
Table 7: Channel values
The repl will be:
*CHDW [Channel Description]
To request the current channel use:
?CHDW
The repl will be:

Pagina 9 of 12 1-11-2016
LoRaWAN mini gatewa
=CHDW [Channel Description]
8.5 CHUP – Channel up
This command is used for the channel that is used on the up channel of the LoRaWAN
communication, see Figure 1.
To set the channel use:
#CHUP[Channel]
The [Channel] can have the values listed in Table 7.
The repl will be:
*CHUP [Channel Description]
To request the current channel use:
?CHUP
The repl will be:
=CHUP [Channel Description]
8.6 APPK – Application key
With this command the application ke for the de- and encr ption of the pa load is set. To set the
application ke use:
#APPK[Ke ]
The [Ke ] consists of 32 ASCII characters representing 16 b tes in hexadecimal notation.
The repl will be:
*APPK[Ke ]
To request the current ke use:
?APPK
The repl will be:
=APPK[Ke ]
8.7 NWKK – Network key
With this command the network ke for the calculation of the MIC. To set the network ke use:
#NWKK[Ke ]
The [Ke ] consists of 32 ASCII characters representing 16 b tes in hexadecimal notation.
The repl will be:

Pagina 10 of 12 1-11-2016
LoRaWAN mini gatewa
*APPK[Ke ]
To request the current ke use:
?APPK
The repl will be:
=APPK[Ke ]
8.8 SACK – Send ACK
The SACK command determines if the ACK bit of the Frame control field is set in messages send
from the mini gatewa .
Also the gatewa will check if an incoming message from a mote has the same address as set with
the ADDR command. If the address is a match the mini gatewa automaticall sends an ACK
message.
To change the behaviour use:
#SACK[Value]
Where [Value] is:
Value Behaviour
00 Don’t sent ACK on address match
Don’t set ACK bit in frame control field
01 Sent ACK on address match
Set ACK bit in frame control field
Table 8: SACK behaviour
The response is:
*ACK Yes/No
To request the current behaviour sent:
?SACK
The response is:
=ACK Yes/No
Note: having a mote requesting an ACK and also a working gatewa will result in a collision
between the ACK message coming from the mini gatewa and the gatewa . Be sure to disable
an gatewa in the vicinit of the test to use this function on the mini gatewa .
8.9 TXTM – Transmit timing
The transmit timing is onl used on messages send in the down direction. That is from mini gatewa
to mote. Transmit timing needs to be switched on if ou want to communicate with t pe A motes.

Pagina 11 of 12 1-11-2016
LoRaWAN mini gatewa
T pe A motes have a receive slot, 2 seconds after the send a message. To make sure a down
message from the mini gatewa is sent in the time window transmit timing needs to be switched on.
To switch the transmit timing use:
#TXTM[Value]
Where [Value] is:
00 = Off
01 = On
The repl will be:
*Tx Timing Yes/No
To request the Tx timing use:
?TXTM
The response will be:
=Tx timing Yes/No
8.10 TXCF – Transmit Confirmation
The transmit confirmation sets the LoRaWAN message t pe that is send. If ou sent a confirmed
message ou request an ACK from either the mote or the gatewa , the message is sent to. For
more information see chapter 7.
To set the confirmation use:
#TXCF[Value]
Where [Value] is:
00 = Unconfirmed
01 = Confirmed
The response is:
*Tx Confirm Yes/No
To request the current message t pe sent:
?TXCF
The response is:
=Tx Confirm Yes/No
8.11 TXDI – Transmit direction
The transmit direction determines if the message ou want to send is in the Up or Down direction.
See Figure 1.

Pagina 12 of 12 1-11-2016
LoRaWAN mini gatewa
To set the direction use:
#TXDI[Value]
Where [Value] is:
00 = Up
01 = Down
The response is:
*Tx Direction Up/Down
To request the current direction use:
?TXDI
The response is:
=Tx Direction Up/Down
8.12 DATA – Send data
This command is used to send data to the node or gatewa with all the settings done with de
different commands. This command can be used to send a maximum 51 b tes of data.
The mini gatewa will directl send a message except if the transmit direction is down and transmit
timing is on.
To use this command send:
#DATA[Data]
[Data] = The data ou want to send to the node. This field has a maximum of 102 characters
representing 51 b tes.
The repl from the gatewa will be:
*DATA[Data]
[Data] = The data that will be send.
Table of contents
