iDTRONIC ID LOCK 6000 User manual
ID LOCK 6000
Manual
Rev. 02 | English | 2
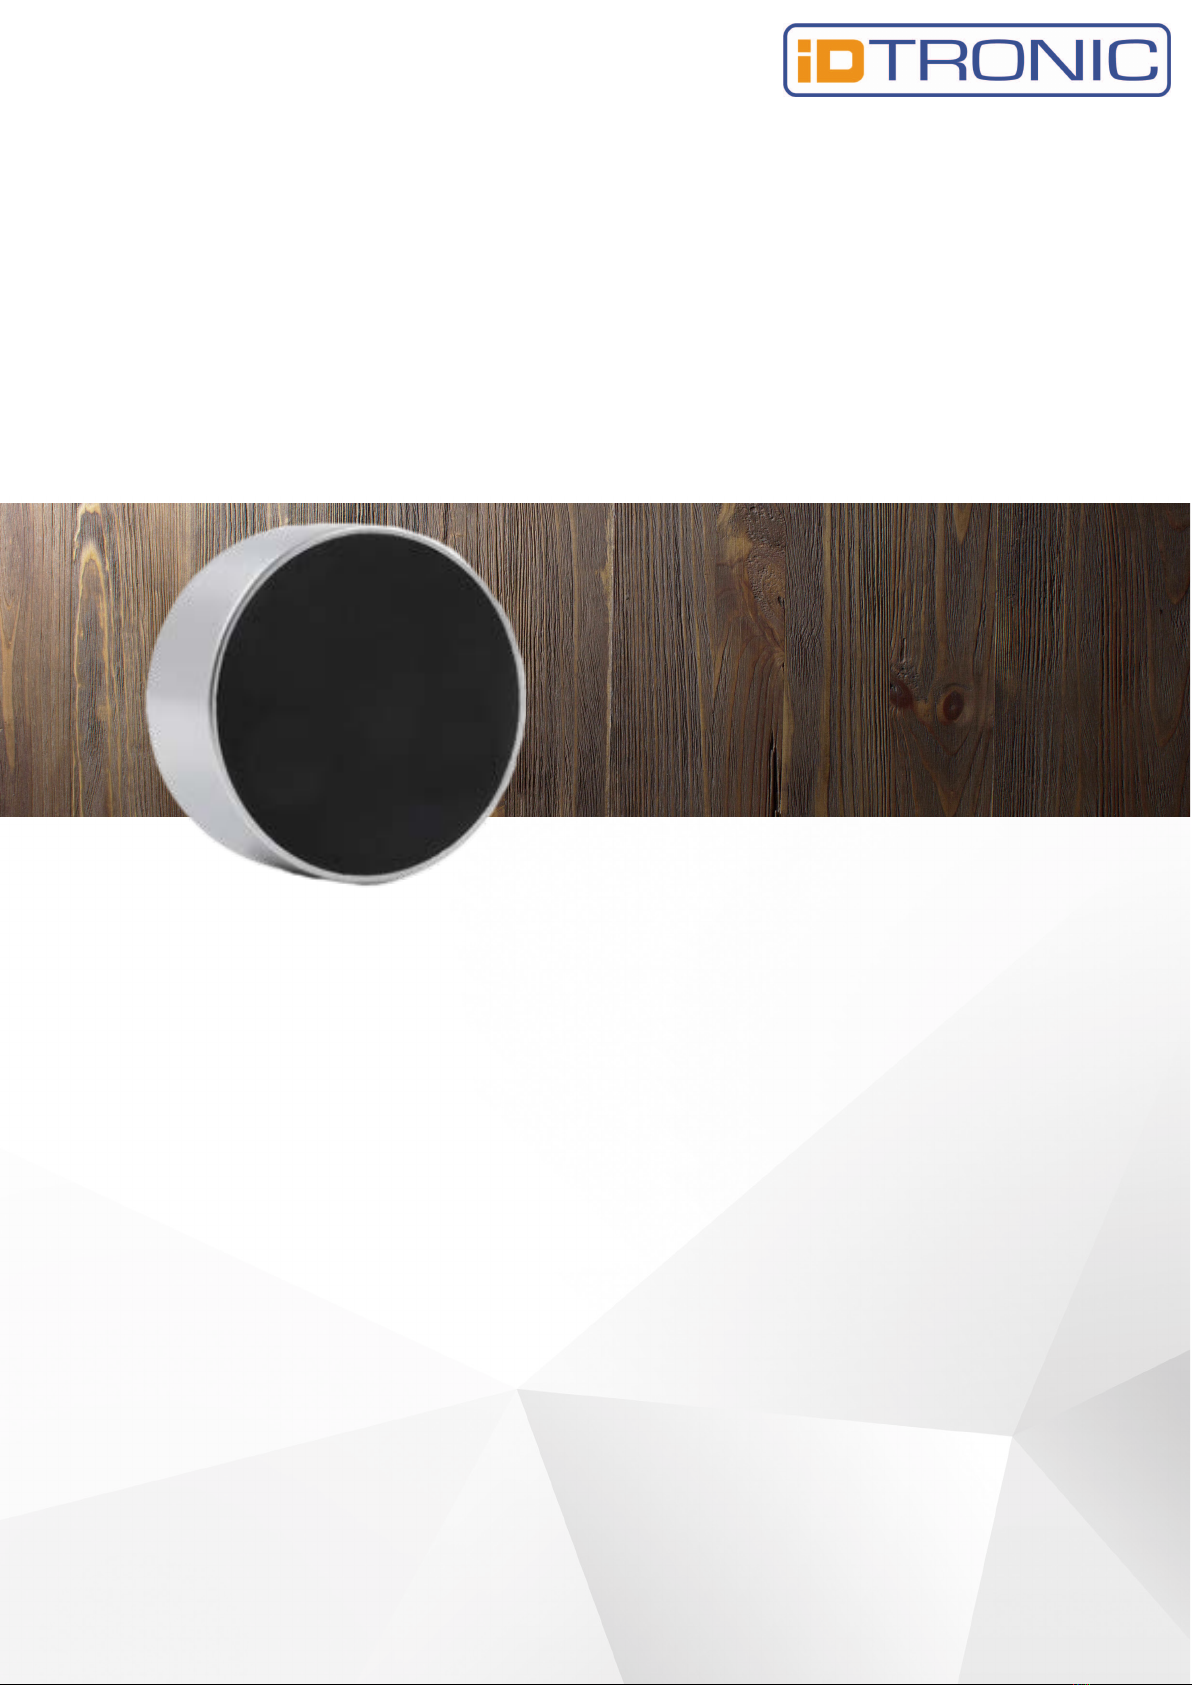
The ID LOCK 6000 is the electronic RFID locking system for
convenient and secure locking of cabinets and lockers. It
can be easily installed in both wooden and steel furniture.
With its user-friendly operation, the lock simplifies everyday
life and stands out with its high-quality design and
ergonomic handling. Thanks to its easy retrofit capability
and interchangeable bolt, the lock can be easily adapted to
any installation situation.
Important: Please pay attention to all warning notices
and read the entire operating manual before starting
the configuration.
Introduction
The latest version of this manual is available at:
www.idtronic-wellfit.de
www.idtronic-secureaccess.de
General
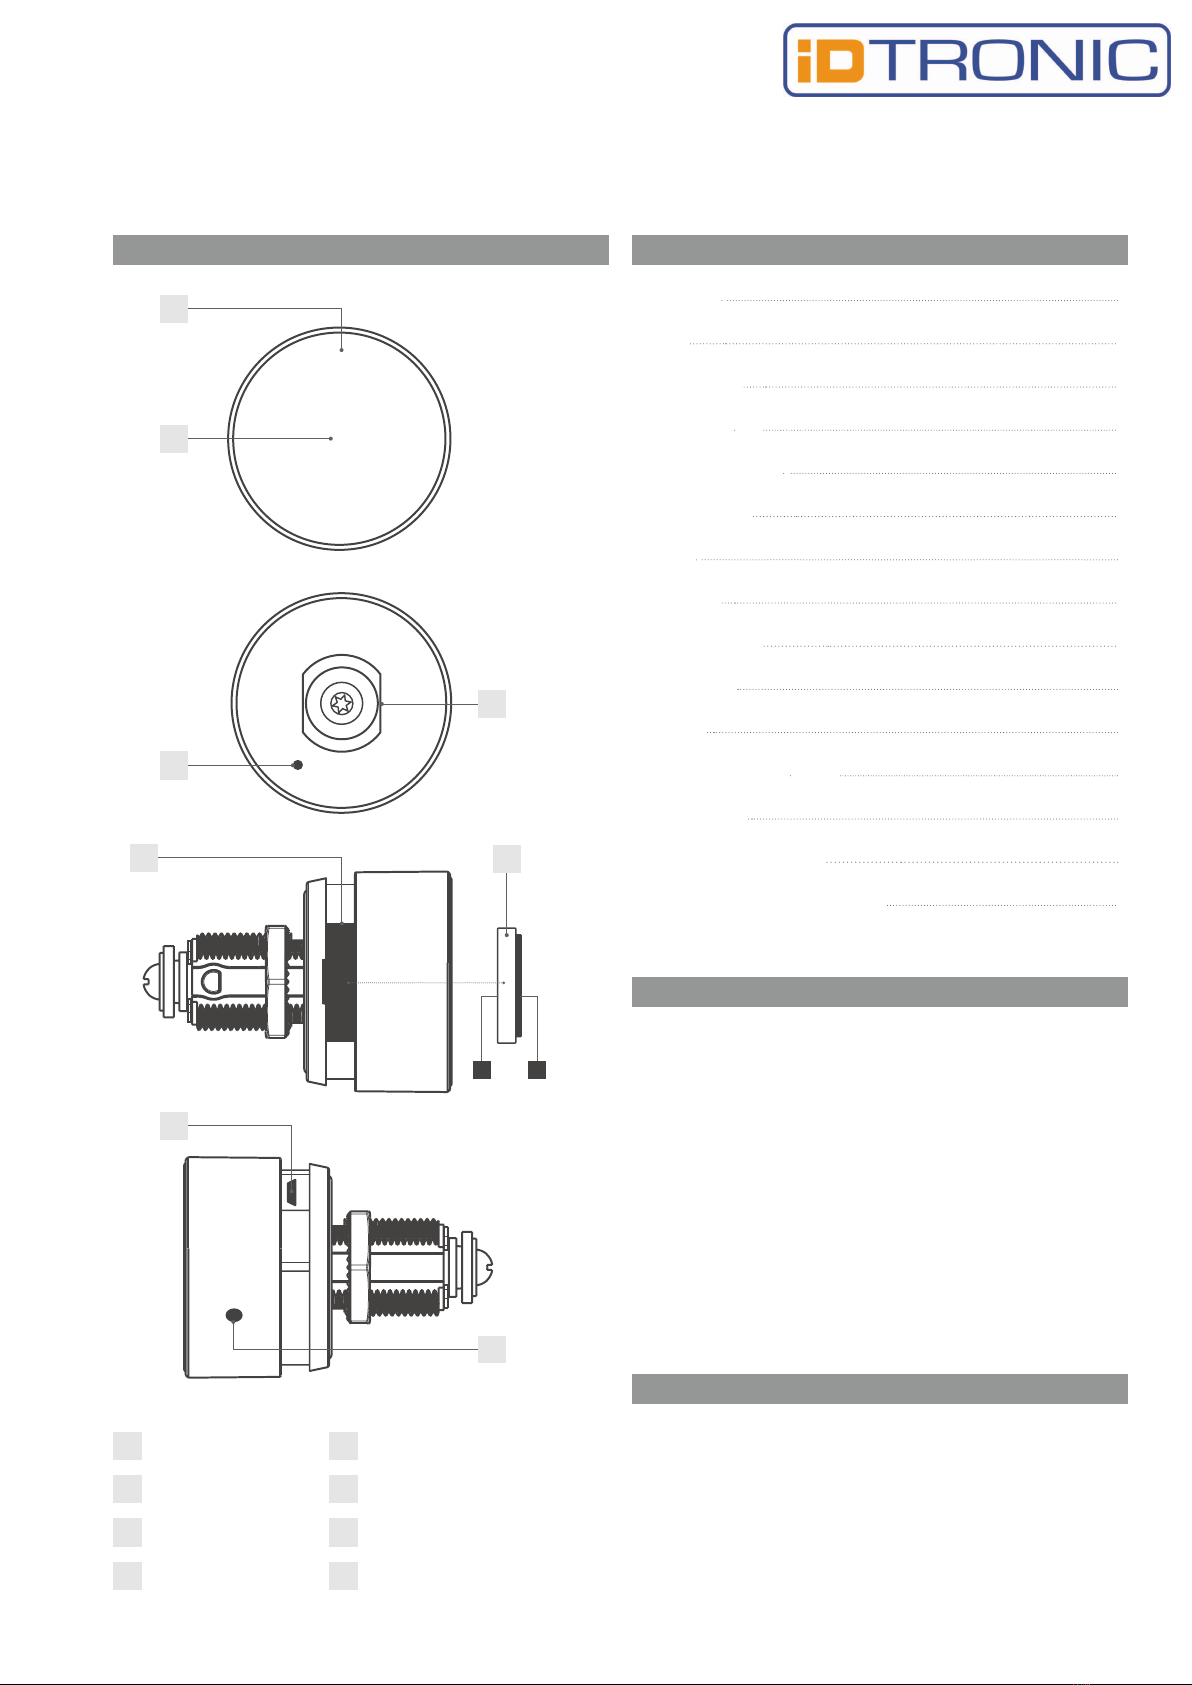
ID LOCK 6000
A LED B RFID-Antenna
C Reset-hole D Stator
E Battery case F Battery
G Micro-USB port
H Opening-hole
2
2
3
3
3
3
3
3
4
4
5
5
5
6
Introduction
General
Technical Data
Scope of Delivery
Optional accessories
Default-settings
Features
Dimensions
Description..........
Configuration
Operation
Emergency Power Supply
Battery change
Reset to factory settings
Disposal- and battery-instructions 6
Content
A
B
C
D
E
H
G
+-
F
ID LOCK 6000 | 07-2023
Rev. 02 | English | 3
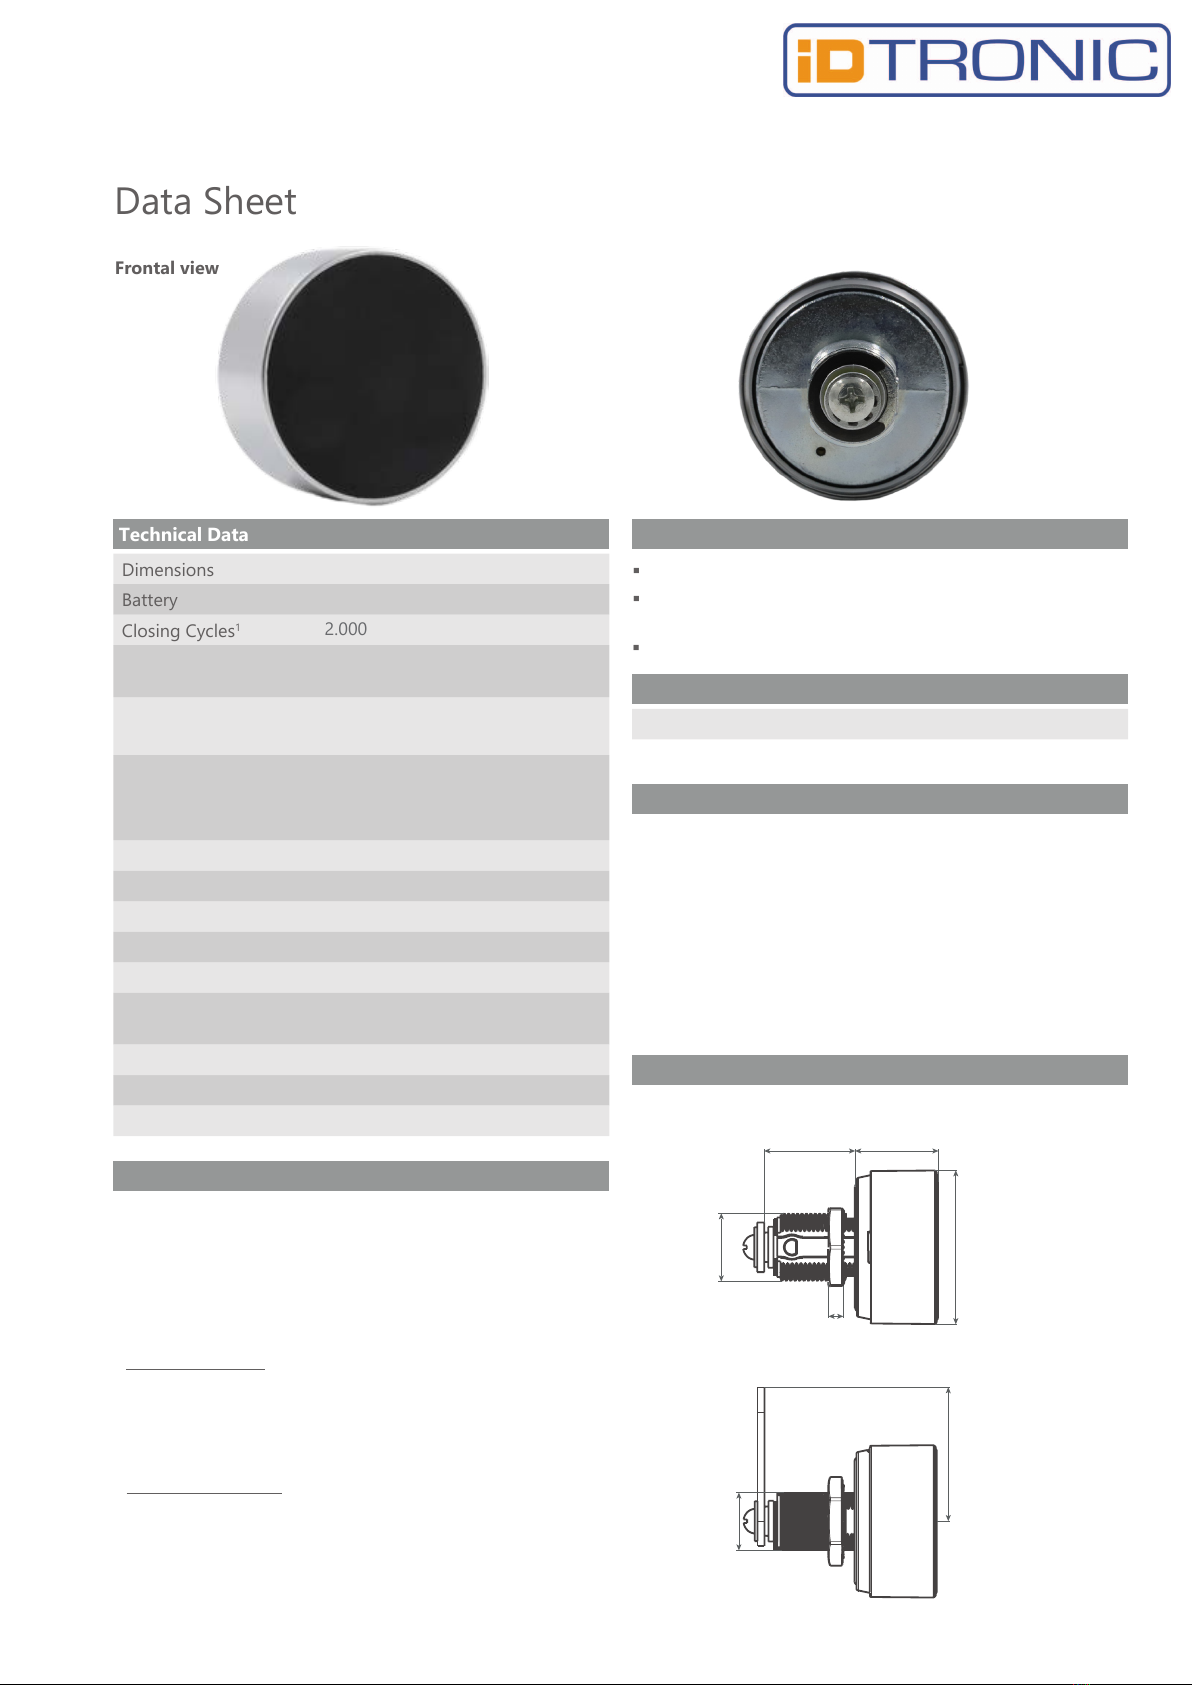
Dimensions
Battery
Closing Cycles1
Temperature range -20° C to 55° C
rel. humidity: 10% - 85%
Mode
Material
Installation dimensions
Fastening
Closing directions
Bolt-type
Max. Door-thickness
Multiuser-mode,
Private-mode
Casing: Zamak
Front cap: plastic
Bolt: steel
16 mm x 19 mm
M19 Nut (1x)
Left (90°), Door-hinge: DIN-right
B
RFID-Variant
Amt. Mastercards
Amt. Managercards
Amt. Usercards
MIFARE® Classic / Desfire EV
II (only reading)
max. 3
max. 2
max. 6
Technical Data
Data Sheet
Frontal view Rear view
Product dimensions
Scope of delivery
Ergonomic handling and high-quality design
External battery access and battery replacement
RFID standard: MIFARE® Classic / MIFARE® Desfire
EV II
Easy retrofit capability, e.g., for replacing mechanical
lever locks
Adjustable bolt in 45° increments
Emergency power supply via Micro-USB connection
Features
1x Closing system
1x Bolt fastening screw2 M4 x 8 mm
1x Shim 12 mm (DIN 9021 M4)
1x M19 Nut
Bolt type B, at
Single Packaging:
1x Length 53 mm, without crank (1-36 RIH-501 G)
1x Length 40 mm, with crank 3 mm (1-36 RIH-514 K)
1x Length 40 mm, with crank 6 mm (1-36 RIH-515 K)
Industry packaging: Bolt order-related
Optional accesories
Opening- and reset-PIN
Anti-twist-protection
(W-MSZ-01)
Function card "Mode change“
23,3 mm25,6 mm
4,5 mm
19 mm
43,3 mm
38 mm
16 mm
Side view
Plan view
Mode Private-mode
Default-settings
18 mm
2.000
Ø 43,3 mm
VARTA1 CR2450 (1x)
ID LOCK 6000 | 07-2023
1 The lock is approved for use with VARTA brand batteries. The
use of other batteries may result in a reduced number of possible
locking cycles.
2 The use of a screw with a different length may lead to damage to the
lock

Rev. 02 | English | 4
Mode: Fixed Authorization (Private-mode)
In this mode, a specific transponder medium is pre-set to
operate the lock. This mode is suitable for user groups where
user permissions should not change permanently, such as in an
office cabinet. The lock can be opened using the stored
transponder medium. Unregistered transponder media will be
rejected by the lock. To open, the transponder medium is held
in the middle in front of the lock. To close, the knob is turned
back (counterclockwise) until the bolt engages.
Mode: Multiuser Authorization (Multiuser-mode)
This mode is suitable for changing user groups where the
compartment is only temporarily or once used, such as in a
sports facility. Transponder media are valid for a single locking
operation and are deleted by the lock when the compartment
is reopened, allowing a new transponder medium to be used.
The bolt remains open until a new transponder medium
relocks the lock. Before locking, the door must be closed and
the knob turned counterclockwise. To close, the transponder
medium is held in the middle in front of the lock. The LED
starts blinking. The lock can only be opened with the same
transponder medium.
Master-card
The master-card can open the lock regardless of the set mode
(emergency opening). In Multiuser-mode, the transponder
medium used for closing is deleted by the lock. The master-
card also has the authorization to add and remove user-cards
in private-mode, as well as to delete all enrolled cards.
Manager-card (Private-mode)
The manager-card can open the lock regardless of the set
mode (emergency opening).
Mode-card
The mode-card can be used to switch between modes. The
mode-card is held in the middle in front of the knob. The
mode changes automatically.
LED Locking Indicator
When the lock is locked, the green LED flashes briefly every
three seconds.
Battery Warning
If the battery voltage drops below a certain level, the LED
briefly lights up when a transponder is presented. If the
voltage falls into the critical range, the lock can no longer be
operated.
Operation Configuration
Please carefully note the following instructions before
starting the configuration:
The first card held in front of the lock during initialization
is saved as the master-card.
Mode switching and resetting using the reset-PIN can only
be done when the lock is disassembled.
1 Enrolling Cards
a) Master-card
1. Insert the battery into the lock (page 6, "Battery
Replacement").
2. Hold the card to be enrolled in the middle in front of
the knob.
3. A beep sound confirms the successful process.
Note: A maximum of 3 master-cards can be enrolled.
b) Manager-card (Private-mode)
1. Hold the master-card in front of the knob four
times in a row. The green LED starts blinking.
2. Hold the card to be enrolled as a manager-card in
the middle in front of the knob.
3. A beep sound confirms the successful process.
4. Wait until the LED stops blinking.
Note: A maximum of 2 manager-cards can be enrolled.
c) User-card (Private-mode)
1. Hold the master-card in front of the knob three
times in a row. The green LED starts blinking.
2. Hold the card to be enrolled as a user-card in the
middle in front of the knob.
3. A beep sound confirms the successful process.
4. Wait until the LED stops blinking.
Note: A maximum of 6 user-cards can be enrolled.
2 Card Deletion
a) Per Reset-PIN
1. Briefly press the reset-PIN into the reset-hole on
the back of the lock.
2. Two beep sounds confirm the successful process.
3. Remove the reset-PIN.
Note: The reset button can only be accessed when the lock
is disassembled.
ID LOCK 6000 | 07-2023
During this process, all cards will be deleted from the
lock. Cards cannot be deleted individually. The set
mode remains active.

Rev. 02 | English | 5
Operation
b) Per Master-card
1. Hold the master-card in front of the knob six times
in a row.
2. Two beep sounds confirm the successful process.
3 Switching Modes (using the Mode-card)
1. Hold the master-card in front of the knob.
2. Hold the mode-card in front of the knob.
3. One long beep for private-mode or three long
beeps for multiuser-mode confirm the successful
process.
4. Remove the mode-card from the lock.
Note: During this process, all cards (master-
cards, manager-cards, and user-cards) will
be deleted.
1 Private-mode
a) Opening
1. Hold the user-card in front of the knob. A longer
beep sound and the green LED confirm the
successful process.
2. Within 3 seconds, turn the knob to the right
(clockwise) and pull open the door.
Note: Unauthorized cards will be rejected by the lock
with three consecutive beep sounds.
b) Closing
The lock will automatically close within 4 seconds.
The LED briefly blinks. To close, turn the knob to
the left (counterclockwise) until it locks into place.
2 Multiuser-mode
a) Closing
1. Hold the user-card in front of the knob. A beep sound
and the red LED confirm the successful process.
2. To close, turn the knob to the left (counterclockwise)
until it locks into place.
b) Opening
1. Hold the user-card in front of the handle, in the center.
A longer beep and the green LED will confirm the
successful process.
2. Rotate the handle clockwise within 3 seconds and pull
open the door.
Note: Unauthorized cards will be rejected by the lock
with three consecutive beeps..
Emergency Power Supply
If the batteries do not have sufficient voltage, an external
power supply can be connected via the Micro-USB port. To
do this, the touchpad needs to be connected to a power
source such as a power adapter, notebook, or power bank
using a Micro-USB cable. The lock can then be operated
again.
Note: We recommend replacing the batteries promptly.
Swapping Batteries
2. Remove the battery compartment as shown in the illustration
and replace the battery. Insert the battery according to the
symbols (+ / -) (see page 2).
Note: The surface of the battery must be free from residue
and fingerprints, as it may cause disturbances. If the surface
is dirty, clean it with a dry cloth.
If the lock displays a low battery level, the battery should be
replaced promptly.
Note: The lock is approved for use with VARTA brand
batteries. The use of other batteries may result in a reduced
number of possible locking cycles.
1. Press the reset-PIN into the side opening of the lock according
to the illustration. Rotate the housing slightly to the left and pull
it forward.
3. Insert the battery compartment and push the housing back onto
the lock. Rotate the housing until it clicks into place.
ID LOCK 6000 | 07-2023

Rev. 02 | English | 6
Disposal- and Battery-Instructions
Reset to factory settings
To reset, briefly press the reset-PIN into the reset-hole
on the back. This process will delete all saved data
from the lock.
Important: The reset-hole can only be accessed
when the device is in a disassembled state.
The EU Directive 2012/19/EU regulates the proper collection,
treatment, and recycling of used electronic devices.
Every consumer is legally obligated to dispose of batteries,
accumulators, or electrical and electronic devices ("waste
equipment") separately from household waste as they contain
pollutants and valuable resources. Disposal can be done at an
authorized collection or return point, such as a local recycling
center. Waste electrical and electronic equipment, batteries, or
accumulators are accepted there free of charge and subjected to
environmentally friendly and resource-efficient recycling.
Waste electrical and electronic equipment, used batteries, or
accumulators can also be returned to us. The return shipment
must be adequately postage-paid to the address provided
below.
The following symbol on the waste electrical and electronic
equipment, batteries, or accumulators indicates that they must
not be disposed of in household waste:
Caution when using batteries!
The battery can explode or release flammable gases if
mishandled, damaged, or if an incorrect battery type is used.
Do not recharge the battery, disassemble it, expose it to
extremely high temperatures, or throw it into a fire.
On batteries containing hazardous substances, you will find
abbreviations indicating the presence of Cadmium (Cd),
Mercury (Hg), and Lead (Pb) as ingredients.
iDTRONIC
Ludwig-Reichling-Straße 4
67059 Ludwigshafen am Rhein
+49 621 669 009 20
Ver 1.2 | 10.7.23
ID LOCK 6000 | 07-2023
Other iDTRONIC RFID System manuals


