IGM BR500 User manual

Distributor:
IGM nástroje a stroje s.r.o.
Ke Kopanině 560, 252 67, Tuchoměřice
Czech Republic, EU
Phone: +420 220 950 910
E-mail: [email protected]
Website: www.igmtools.com
Portable cordless edgebander for ABS
Operationg instructions
2022-07-12
142-BR500 IGM Portable Edgebander for ABS Manual EN v2.4.00 A4ob
142-BR500
www.igmtools.info
PDF ONLINE

-2-www.igmtools.com
Please read this manual thoroughly and follow the safety instructions in it! Technical changes and
printing errors reserved!
Dear customer,
This manual contains important instructions and information for the installation and proper use of
edgebanders BR500.
This manual is part of the machine and therefore it should not be kept elsewhere than in the vicinity of the
machine so that you can be consulted at any time by you or other persons operating the machine.
Please read and follow the safety instructions!
Carefully read these instructions before using the machine. Operation of the machine will be
simpler and you will also lower the risk of injury while eliminating the probability of incorrect
operation and possible damage to the machine.
Because of our policy of constant improvement, the design, construction or pictures may differ
1. DECLARATION OF CONFORMITY
The undersigned: IGM nástroje a stroje s.r.o.
Address: Ke Kopanině 560
Tuchoměřice, Praha-západ, PSČ 252 67
Czech Republic, EU
Phone no.: +420 220 950 910
Certifies the
Product: Manual Edgebander for ABS
Type: BR500
Manufacturer: CO-MATIC Machinery Co.,
Ltd.,No.473-16,
San Feng Road, Houli District, Taichung
City,Taiwan, R.O.C. 42156
We declare under our own responsibility that the
product described in this manual complies with the
following norms: EN ISO 12100, EN ISO 13857, EN 349,
EN953, EN 60204-1, EN ISO 11202,
EN 55014-1, EN 55014-2 and is in accordance with the
2006/42/EC, 2004/108/EC, 2006/95/EC, 2002/95/EC.
Signed: Ivo Mlej
Managing Director
2. WARRANTY SERVICE
The warranty is subject to Terms and Conditions and
Warranty Conditions of IGM nástroje a stroje s.r.o.,
the current version of which are available at www.
igmtools.com.
Table of contents P.
1. DECLARATION OF CONFORMITY 2
2. WARRANTY SERVICE 2
3. SAFETY INSTRUCTIONS 3
3.1 Advice 3
3.2 General safety instructions 3
3.3 Risks 4
3.4 Important notice 4
4. SPECIFICATIONS OF THE MACHINE 4
4.1 Machine description 4
4.2 Technical data 4
4.3 Contents 5
5. TRANSPORT, UNPACKING AND ASSEMBLY 5
5.1 Transport and unpacking 5
5.2 Assembly 5
5.2.1 Mounting the corner guide 5
6. SETUP AND ADJUSTMENT 5
6.1 Preparing for work 5
6.1.1
How to measure and set up the width of the tape
5
6.1.2
Control and gauge set up on the supporting table
6
6.1.3 Adjusting the amount of glue 6
6.1.4 Adjusting tape thickness 6
6.1.5 Setting length of tape 6
6.1.6
Fastening the workpiece before edge banding
7
6.1.7 Refilling glue 7
6.2 Before turning on 7
6.3 Standby mode 7
6.4 Functions of control panel 7
7. WORKING WITH THE EDGEBANDER 8
7.1 Edgebanding 8
7.2 Stationary use 9
8. MAINTENANCE AND CONTROL 9
8.1 Maintenance after work 9
8.2 Glue control 9
9. MALFUNCTION ASSISTANCE 9
9.1 Error codes for BR500 9
9.2 Problem solving 9
10. ENVIRONMENTAL PROTECTION 10
11. ACCESSORIES SPARE PARTS 10
Operating instructions EN

-3-www.igmtools.com
3. SAFETY INSTRUCTIONS
3.1 Notice
This machine is designed for work with wood and
wooden materials.
Proper use also includes compliance with the regular
operational and maintenance work described in this
manual.
The machine can be operated only by persons familiar
with the operation procedures, maintenance and are
aware of potential risks.
Comply with the minimum age limits specified by
law. The machine may only be used when in perfect
technical condition.
All safety and protective components must be installed
when operating the machine.
Besides these instructions, also adhere to the safety
instructions of your country and to the generally
recognized technical practices concerning the
operation of woodworking machinery.
The manufacturer or the supplier are not responsible
for any damage resulting from improper use.
Every user is responsible for their own actions.
Warranty cannot be claimed if any of the following
principles are broken:
- Unsuitable work environment: high humidity,
contamination.
- Damage caused by an improper assembly and/or
improper storage.
- Use of damaged machinery.
- Failure to follow the operating instructions: transport,
storage, assembly, putting into operation, cleaning
and maintenance of the machine.
- Use of unauthorized spare parts.
- Unauthorized assembly of the machine.
- Do not use worn out spare parts.
3.2 General safety instructions
The machine can pose danger when improperly
operated.
Thoroughly read the operating instructions and make
sure that you understand everything before doing
anything with the machine.
Keep this user manual clean and protect it from dirt
and moisture; in case of re-selling, pass the manual
onto the new owner.
Any alterations or changes to the machine are
prohibited. Daily, before turning on the machine, make
sure that it runs smoothly and that the protective
covers are working. Replace any deficiencies or
damaged parts. The machine may only be used when
in perfect technical condition.
Use a hairnet or a hat to protect long hair. Wear tight-
fitting clothes, remove all bracelets, rings, necklaces
or ties. Wear work shoes only. In any case, do not wear
casual shoes or sandals during work. Abide by the
regulations of personal protection.
Always wear safety eyewear. Always use hearing
protection.
Abide by the„safety“ instructions in this manual. Make
sure you have enough space for your work.
Do not perform any operations that
are not suitable for this machine.
Make sure you have good lighting.
Make sure the power cord is not in your way when
working. Keep your work area clean. Never touch the
machine when it‘s running.
Make sure you are concentrating and paying attention.
Use caution. Never work under the influence of drugs
and/or alcohol.
Make sure there are no children around when
working with the machine. Never leave the machine
unattended. Always switch the machine off when
leaving the workspace.
Do not place anything on the machine.
The repair of electrical components can be only
carried out by a professional. Damaged electric cord
must be replaced immediately.
Before banding, remove nails and any other foreign
objects that could be in the way of your work.
The switch must be in the„OFF“ position before you
connect the machine to the power supply.
Do not use the machine if the ON-OFF switch does not
work correctly.
The use of any other accessories than recommended
by this manual be hazardous.
When the power cord is connected, temperature
shows up on the digital display but heating does NOT
begin.
Make sure the cable is long enough and there is no
excessive tension or bend over the table.
Keep away from flammable or explosive materials.
Operating instructions EN

-4-www.igmtools.com
09
10
11
12 13 14
01
02
03
08
07
06
04
05
3.3 Risks
Risk exists even when using the machine according to
the manual.
WATCH OUT! Heated glue may reach the
temperatures of 200°C. Do not touch any hot
parts.
The glue may contain harmful chemicals. Therefore,
ensure sufficient ventilation of your workplace.
3.4 Important notice
Make sure the machine has been off for at least 60 minutes
before storing it in the portable case. That way, the glue in
the container will cool down to 60°C. Use a piece of cloth
to wipe any adhesive residues on the machine.
The Edgebander is designed for interior work. Do NOT use
the machine outdoors!
If you want to prevent debris falling into the glue pot. Put
on the lid. If debris is already in the pot, remove the glue,
turn on the machine for approximately 3 minutes, the glue
should come out easily now. Re-fill with glue again.
1Infeed tape guide
2 Digital display - function settings
3
Set up of pressure of tape on application roller the
4 Main switch
5 Fuse
6 Cabel spring protection
7
Corner guide for simple of inner corners glueing
8 Speed regulation and off switch
9 Outfeed roller
10 Support table locking lever
11 Support table with a handle
12 Glue pot cover
13 Regulation of amount of glue
14 Infeed roller pressure plate
4. SPECIFICATIONS OF THE MACHINE
4.1 Machine description
4.2 Technical data
Input power 855 W / 230 V
Tape thickness 0,4 - 3 mm
Tape width 10 - 65 mm
Temperature range MODE I 120 ° - 200 °C
MODE II 80 ° - 155 °C
Feed speed 2 - 6 m/min
Shipping size 35x30x37,5 cm
Weight 8,8 kg
Shipping weight 11,1 kg
Warm-up time (120 °C) 4 minutes
Fuse F 6 A (230 V)
Cable length 5 m
Glue pot capacity 400 ml
Operating instructions EN

-5-www.igmtools.com
4.3 Contents
Edgebander Support
table Corner guide End
trimmer
Light transport bag
Sample tape from calibration procedures
5. 5. TRANSPORT, UNPACKING AND ASSEMBLY
5.1 Transport and unpacking
The machine is not assembled due to transport.
Assemble before operating. Remove the edgebander
from the packaging and place on a flat surface. Check
for any apparent transport damages, these could
damage the machine or your health.
5.2 Assembly
5.2.1 Mounting the corner guide
- Equip the corner guide only when banding inner
corners or a radius smaller than 50 mm. It would be
getting in your way during other operations.
- Place the corner guide on your edgebander
according to pic.5 and tighten the screw.
6. SETUP AND ADJUSTMENT
6.1 Preparing for work
6.1.1 How to measure and set up tape width
- Loosen the screw on the tape stop (pic.6)
- Place the tape under the stop and measure the
height (pic.7), tighten the screw.
- Measure the thickness of the banded piece and set
up the support table accordingly, make sure to tighten
the locking lever properly (pic.8)
Fig 7
pic.5
Fig1
pic.6
Fig3
333
pic.8
Fig2
pic.7
Operating instructions EN

-6-www.igmtools.com
6.1.3 Adjusting the amount of applied glue The
amount of glue is pre-set and should suit the majority
of operations.
- If the amount of glue is not convenient. Prepare a test
tape, warp up your machine and load the tape. Use the
amount of glue adjustment knob to set the demanded
quantity. Turning left adds and turning right decreases
the amount of applied glue (pic.6) The scale displays the
amount of glue.
- Caution: Do not turn the adjustment knob until the
glue has reached operating temperature.
- Too much glue overflows on the visible side of the tape.
Not enough glue is not evenly applied along the whole
width of the tape.
6.1.4 Thickness of tape
Set up thickness only when you have a softer or
thinner tape than 1 mm. Otherwise, the pressure
automatically ajdusts to the tape. The thickness can be
simply set by a turn of the knob (pic.11).
pic.9a
pic.9b
2
pic.9c
6.1.5 Setting up tape length
- Measure the length of the banded edge and leave a
bit more of the tape for final trimming.
- Apply enough pressure when trimming the edge, this
will improve the finish.
10
accordingly by loosen the handle and tight the handle after setting the width on guiding
plate.
2. Guiding place adjustment
The surface of the guiding plate must be perpendicular to the pressure roller. Loosen
screw (1) and place guiding place onto the workpiece. When the workpiece is
perpendicular to the pressure roller, tighten the screw (1). Loosen the screw (3), adjust
the plate to “0” (4) then tighten screw (3) again.
3. Glue Adjustment
When machine reach working temperature, prepare a testing edge band (approx. 20cm/
8”) and insert with lowest feeding speed and micro-adjust glue knob to desired
application. (Fig 4)
※Caution: Do not turn the glue knob when the machine has not reached its working
temperature.
4. Thickness adjustment:Adjust thickness adjustment knob and screw accordingly when
feeding soft or thin edge band. (Fig 5)
Fig1 Fig2
Fig3
Fig 4
Fig 5
pic.10
10
accordingly by loosen the handle and tight the handle after setting the width on guiding
plate.
2. Guiding place adjustment
The surface of the guiding plate must be perpendicular to the pressure roller. Loosen
screw (1) and place guiding place onto the workpiece. When the workpiece is
perpendicular to the pressure roller, tighten the screw (1). Loosen the screw (3), adjust
the plate to “0” (4) then tighten screw (3) again.
3. Glue Adjustment
When machine reach working temperature, prepare a testing edge band (approx. 20cm/
8”) and insert with lowest feeding speed and micro-adjust glue knob to desired
application. (Fig 4)
※Caution: Do not turn the glue knob when the machine has not reached its working
temperature.
4. Thickness adjustment:Adjust thickness adjustment knob and screw accordingly when
feeding soft or thin edge band. (Fig 5)
Fig1 Fig2
Fig3
Fig 4
Fig 5
pic.11
6.1.2 Control and gauge set up of the support table
- The pre-set support table is perpendicular to the
pressure plate. Place the support table on a mitre gauge
(pic.2, gauge not supplied) to check proper allignment. If
the table is not perpendicular, loosen the screw (1). Align
the table according to the mitre gauge, tighten screw
(1). Release screw (3) and set up the gauge (4) to„0“, then
tighten again.
Operating instructions EN

-7-www.igmtools.com
6.1.7 Refilling the adhesive
- Regularly check the amount of glue in the glue pot.
We recommend to refill the glue when there is only
half of the pot left.
- Loosen the screw on the cover so that it can be lifted.
DO NOT TOUCH THE COVER - it‘s hot.
6.1.6 Proper fastening before edgebanding
Fasten the workpiece to a worktop using clamps. Make
sure the edge of the workpiece you will edgeband
extends beyond the edge of your worktop. It may be
more comfortable to use a vacuum suction cup. You
can order one from IGM as an optional accessory. Use
of the vacuum cup (pic.12)
pic.12
6.2 Advice for proper operation
- Keep the machine clean throughout the whole operation.
- Store the workpiece and the tape at room temperature.
- Cold tape or workpiece can affect the quality of adhesion.
- Always maintain enough pressure on the tape when
working. Insufficient pressure may result in a weak
connection between the tape and the workpiece.
- Store your glue in a cool and dry place.
- A pot full of glue is enough for approximately
(depending on the type of glue) 50 m of tape (width
25 mm) or 25 m of tape (width 65 mm).
- Make sure the glue has completely melted before
working.
- Use glue supplied by IGM which has an operating
temperature of 120-150 °C.
- Use the lowest feed speed when turning on the
machine for the first time. Adjust the speed according
to your experience and complexity of the workpiece.
6.3 Standby mode
MODE I –
operating mode (default setting after switching
on)
MODE II – Standby mode
- The machine can be switched into a standby mode II
when you need it ready immediately. The temperature
will decrease by 50°C. So the glue isn‘t overburning
while maintaining the glue in a preheated state.
When switched back to MODE I, the glue in the pot is
warmed up far quicker to the desired temperature.
- After turning on, the edgebander automatically runs
in MODE I, to switch modes hold for 3 seconds. When
in MODE II, the current temperature is alternating with
the temperature set-up on the display every 3 seconds.
6.4 Control panel features
pic.13
Feed speed control: the button turns
the feed on and off. Turning the ring
changes feed speed from 2-6 m/min
(clockwise rotation increases speed).
1
Operating instructions EN

-8-www.igmtools.com
pic.14
7. OPERATING THE MACHINE
7.1 Edgebanding
- Check for debris or dust in the glue pot, turn on
the main switch and trigger the heating next to the
display. The button on the handle (2) will light up when
the temperature reaches 120°C, press the button (1)
to accelerate the melting process. Make sure the glue
is properly stirred up before working. Turn the feed
off and place the tape on the infeed roller. Place the
support table on the workpiece and hold the machine
firmly with both hands (2), (3). Place the pressure roller
approximately 5 cm from the workpiece.
Turn the feed on (1), and wait for the tape to reach
the pressure roller. Press the tape to the workpiece
using the pressure roller. Then allow the machine to
run at its feed speed and only check the proper feed of
the tape.
How to switch between °C a °F
When the light is on, the temperature
is in °C and feed speed in m/min.
When the light is on, the temperature
is in °F and the feed speed is in Ft./min.
Heating switch; After turning on the
main power switch, turn on the heating
switch to begin heating the glue.
The glue is being heated when the
light is on.
Temperature setup; The temperature
changes by one degree after pressing
the button once
Quick set-up: by holding the button
for 3 seconds, you will hear a beep
and the temperature set-up will rise
quickly.
1
2
3
4
5
2
1 3 5
2 6 8 4 7 9
The display shows the current
temperature in the glue pot
Operating indicator light: lights up
when the temperature is over 120 °C
(250 F), you can speed up the heating
by turning on the tape feeder.
Speed indicator
Safe storage light:
When you turn off the heating, this light
will light up. And will go out when the
temperature in the glue pot goes below
60 °C (140 F). Now you can safely store
your machine in the carry bag.
7
8
9
6
Operating instructions EN

-9-www.igmtools.com
7.2 Stationary use
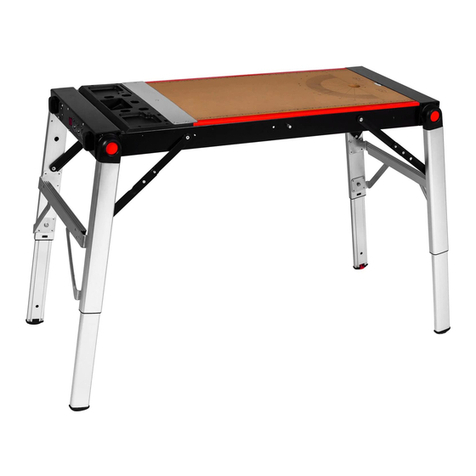
It‘s better to use the machine with a when banding
smaller pieces, the worktable is available at IGMtools.
com as an optional accessory. That way, you can band
edges like on a stationary edgebander.
8. MAINTENANCE AND CONTROL
8.1 Maintenance after work
Clean the machine properly after every operation and
get rid of any glue on the edgebander with a proper
tool or a dissolvent to prevent glue build-up.
We recommend having the machine checked after
500 hours of work or every 6 months of use. During
regular weekly maintenance, you should lubricate the
timing chain and the pressure plate with silicone oil.
Loosen screws, see (pic.17), and remove the plastic
cover. Now you can lubricate the chain and the plate.
After maintenance, place the cover back and tighten
the screws.
To keep the glue pot clean, it has to be cleaned
out every two months or every 50 hours of
edgebanding. Remove the rest of the glue and refill
with a new one.
pic.17
pic.18
The machine has to be turned off and disconnected
from the power source during maintenance.
8.2 Preemptive control
- Regularly check the glue status in the glue pot. Refill
the glue when the glue pot is half empty. The heater
should be always submerged in the glue.
9. MALFUNCTION ASSISTANCE
9.1 BR500 error messages
The BR500 Edgebander is designed to detect
malfunctions and to picture them on its display.
Er1 - Voltage error: the voltage is not optimal for the
proper function of the machine.
Er2 - Engine error: please contact an authorized
service to check on the function of the motor.
Er3 - Heating error: should the temperature exceed
220°C, contact the authorized service centre to check
on the heating function.
Er4 - Internal error: please contact an authorized
electrical service centre.
9.2 Solution to problems
Malfunction Cause Repair
Cannot turn on the
machine Damaged fuse Replace the fuse (use a fuse with the same value
- F6A(230V))
The tape is not
completely covered
with the glue
The glue is not properly melted Open the glue pot and check if the glue has
dissolved properly.
The amount of glue in relation
to the width of the tape is
improperly set
Increase the amount of glue with the control
knob. (see chapter 6.1.3)
Deformed tape Use a tape of better quality.
The glue was applied poorly to
the banding roller
Turn on the feed and let the glue circle between
the applicator and the glue pot
The tape is not
completely covered
with the glue
The pressure roller isn‘t
perpendicular to the edge of the
workpiece
Adjust the angle of the support table so that it‘s
perpendicular to the edge (see chapter 6.1.2)
Overheating can degrade the
properties of the glue Replace the old glue in the pot with the new one
The glue hasn‘t been heated to
the right temperature
Check the label on the glue and set the
temperature accordingly
The tape has twisted
while banding
The feed speed is slower than the
feed of the tape
Increase pressure on the workpiece, adjust feed
rate
Operating instructions EN

Operating instructions EN
The tape is slipping on
the infeed roller Dust or debris on the infeed roller Clean the infeed roller
The feed won‘t turn on
The glue isn‘t melted enough,
the operating temperature hasn‘t
been reached so far
The motor can be turned on after reaching 12 °C
to ensure proper temperature for work.
Overheating Malfunctioning temperature
control
Let a qualified electrician replace the
tempereature detector
10. PROTECTION OF THE ENVIRONMENT
Protect the environment.
Your machine contains materials that can be recycled.
Please, let specialized institutions handle the machine.
11.ACCESSORIES (spare parts)
iGM Tape Holder for Edgebander DR500-BR300
142-BC25
IGM Battery Set for Edgebander DR500 142-LB24
IGM PD80 Edgeband Trimmer 142-PD80
IGM End Trimmer for Shaped and Straight Panels
M951
IGM Fachmann Edge Banding Hand Trimmer
M950-00001
IGM Worktable for Edgebander and Trimmer for
DR500-BR300 142-ST95A
IGM Straightline Edgebanding and Trimming Kit for
Worktable ST95A 142-ST97
Glue Technomelt KS224 for IGM Manual Edgebanders -
1kg pack M967-1
Glue Technomelt KS224 for IGM Manual Edgebanders -
5kg pack M967-5
Glue Technomelt KS224 for IGM Manual Edgebanders -
25kg pack M967-25
IGM Vacuum Clamp One-sided, set M964
IGM Lever Valve for Vacuum Clamp M964 M966-01
IGM PlasticT-splitter forVacuum Clamp M964
M966-02
IGM nástroje a stroje s.r.o., Ke kopanině 560,
Tuchoměřice, 252 67, Czech Republic, E.U.
+420 220 950 910,www.igmtools.com
© 2022 IGM nástroje a stroje s.r.o.
This manual suits for next models
1
Table of contents

