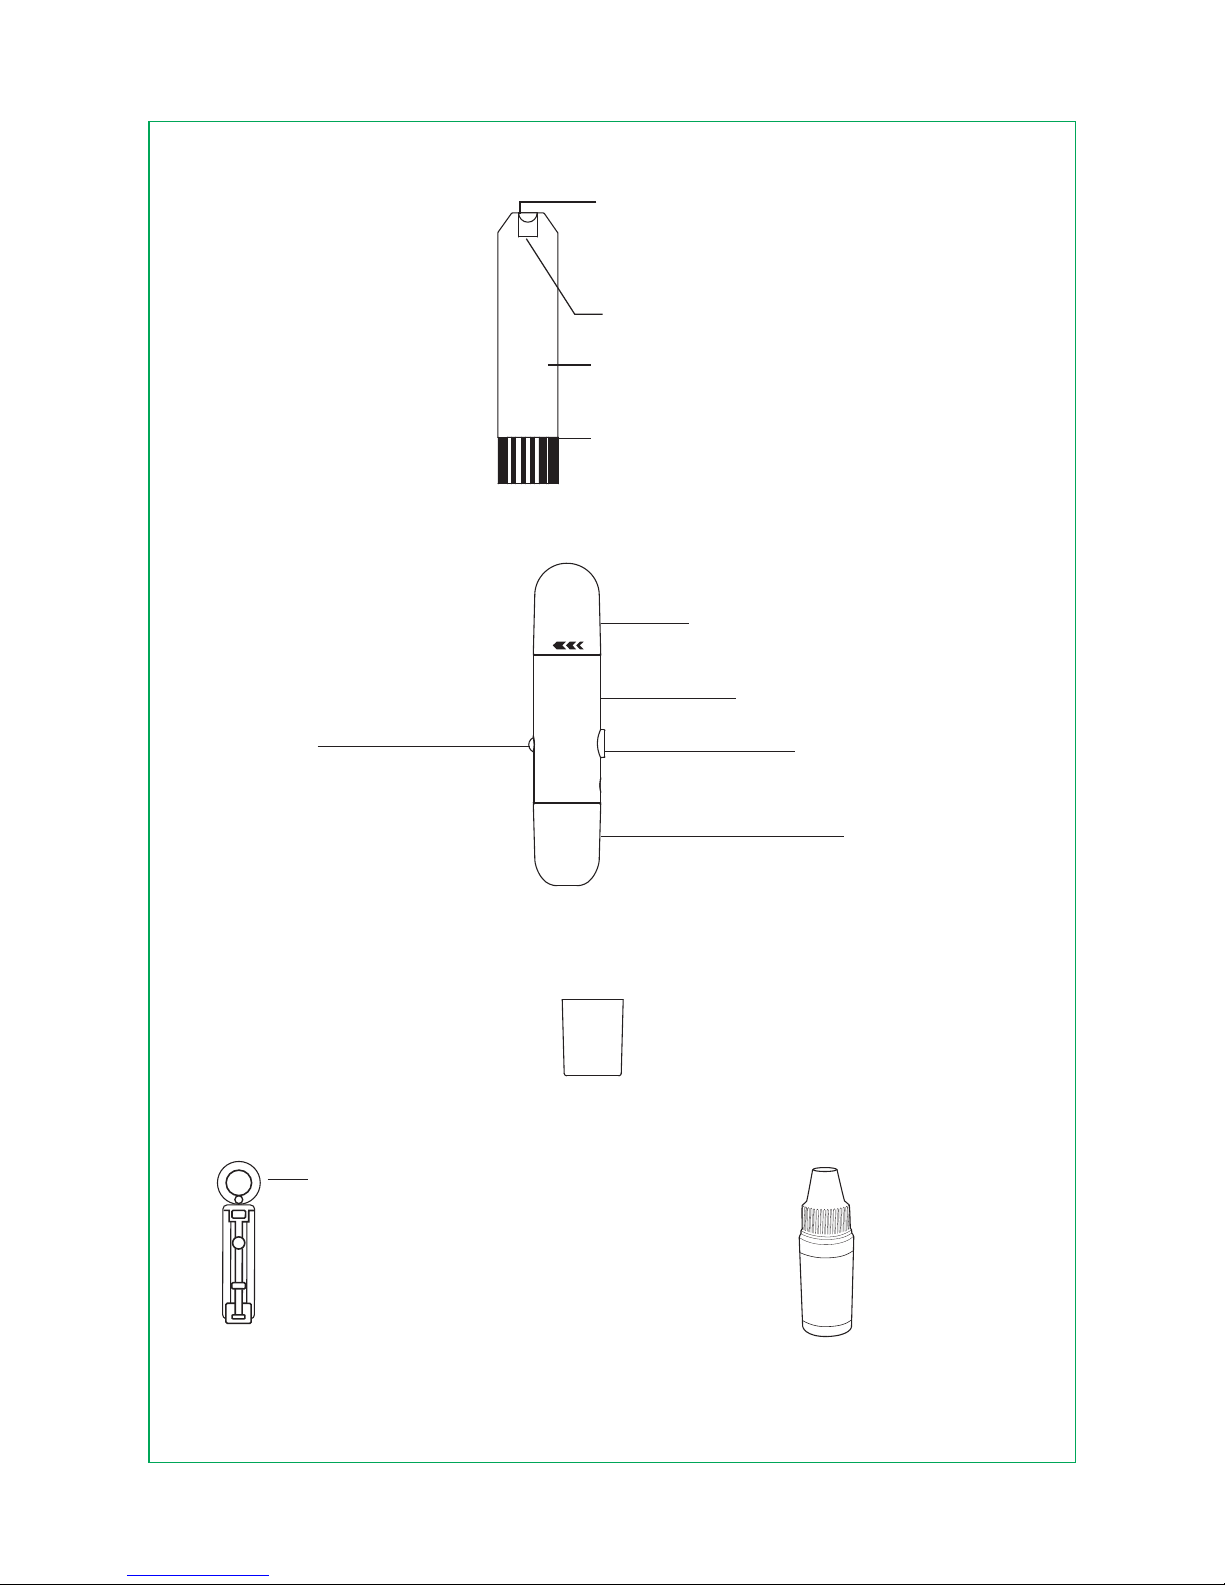
iHealth Gluco-Monitoring System User manual

Wireless Smart Gluco-Monitoring System
OWNER’S MANUAL

For in vitro diagnostic use only
Read instructions before use for self-testing
iHealth®Wireless Smart Gluco-Monitoring System
OWNER’S MANUAL
Table of Contents
INTRODUCTION
INTENDED USE
IMPORTANT SAFETY INSTRUCTIONS
CONTENTS OF THE WIRELESS SMART GLUCO-
MONITORING SYSTEM
Parts and Displays
Mobile Device Compatibility
TEST PRINCIPLE
IMPORTANT TEST INFORMATION
FIRST TIME SETUP INSTRUCTIONS
DATA SYNCING
REVIEWING SAVED TEST RESULTS ON THE METER
CLEANING AND DISINFECTION
SIGNS OF POTENTIAL PHYSICAL AND PERFORMANCE
DETERIORATION
INFORMATION ABOUT ALTERNATE SITE TESTING (AST)
What is Alternate Site Testing?
What is the Advantage of Alternate Site Testing?
When Should You Use Alternate Site Testing?
IMPORTANT INFORMATION ABOUT CONTROL
SOLUTION TESTS
PERFORMING A CONTROL SOLUTION TEST
Out-of-Range Results
1
1
1
2
4
6
6
6
7
12
13
13
14
15
15
16
16
17
17
19

COMPARING GLUCOSE METER TEST RESULTS WITH
LABORATORY RESULTS
Before the Lab Test
While at the Lab
TEST STRIP VIAL LABEL
IHEALTH WIRELESS SMART GLUCOMONITORING SYSTEM
SPECIFICATIONS
MAINTENANCE AND STORAGE OF YOUR IHEALTH SYSTEM
LIMITATIONS OF USE
SYSTEM TROUBLESHOOTING
DISPLAY MESSAGES
TROUBLESHOOTING
INTERNATIONAL BLOOD GLUCOSE MEASUREMENT UNITS
WARRANTY INFORMATION
EXPLANATION OF SYMBOLS
IMPORTANT INFORMATION REQUIRED BY THE FCC
19
20
20
20
20
21
22
23
23
25
26
27
29
30

INTRODUCTION
INTENDED USE
IMPORTANT SAFETY INSTRUCTIONS
Thank you for purchasing the iHealth Wireless Smart
Gluco-Monitoring System (the iHealth system). This manual
provides important information to help you use the system
properly. Before using this product, please read the Owner’s
Manual thoroughly.
The iHealth system is intended to be used for:
•Quantitative measurement of glucose in fresh capillary whole
blood samples drawn from the ngertip, palm, forearm, upper
arm, calf, or thigh
•Single person measurement only (it should not be shared)
•Self-testing outside the body (in vitro diagnostic use) by people
with diabetes at home as an aid to monitor the eectiveness of
diabetes control
The iHealth system should not be used for the diagnosis of or
screening for diabetes, or for neonatal use.
Please read the following information carefully before using the
iHealth system. Always keep these instructions in a safe place for
reference.
• Misuse of the iHealth system can cause electrocution, burns,
re, and other hazards.
• The meter and lancing device are for single patient use.
Do not use either item on multiple patients.
• Do not share the meter or lancing device with anyone,
including other family members.
• Do not place the iHealth system in or near liquid.
• Use the iHealth system only for the purpose described in the
Owner’s Manual.
1

•Use only accessories that are supplied by the manufacturer.
•Do not use the iHealth system if it has sustained any damage or
is not working properly.
•Keep the iHealth system away from heat at all times. Do not let
the iHealth system come into contact with surfaces that are
hot to the touch.
•Do not block test port or place the iHealth system on soft
surfaces that may block them. Keep test port free from lint,
hair, debris, etc.
•Do not place anything on top of the iHealth system.
•Do not place foreign objects into any opening in the iHealth
system.
•Do not use the meter in a manner not specied by the
manufacturer.
•All parts of the iHealth system are considered biohazards and
can potentially transmit infectious diseases, even after you have
performed cleaning and disinfection.
•Please refer to the resources identied below for detailed
information:
“FDA Public Health Notication: Use of Fingerstick Devices on
More than One Person Poses Risk for Transmitting Bloodborne
Pathogens: Initial Communication” (2010)
http://www.fda.gov/MedicalDevices/Safety/AlertsandNotices/uc
m224025.htm
“CDC Clinical Reminder: Use of Fingerstick Devices on More than
One Person Poses Risk for Transmitting Bloodborne Pathogens”
(2010)
http://www.cdc.gov/injectionsafety/Fingerstick-DevicesBGM.html
2
• iHealth Blood Glucose Meter(the meter)
Note:Ifanyitemsaremissingfromyour packageorthepackage
appearstohavebeenopenedpriortouse,pleasecalliHealth
LabsCustomerServiceat1-855-816-7705.
Parts and Displays

3
LED DISPLAY
Insert the test strip
into the strip port to
automatically turn on
the meter.
STRIP PORT
Test result, symbols,
and messages
appear here.
MINI USB PORT
Charge the meter through
provided USB cable.
MEMORY BUTTON
Located on the side of the meter.
It is used to turn on the meter and
view past test results.
EJECT BUTTON
Located at the back side of the
meter. It is used to automatically
remove the test strip.
BLUETOOTH SYMBOL
Appears when the meter is
connected with iOS device
through Bluetooth function.
TEST RESULT DISPLAY
Displays test result.
MEASUREMENT UNIT
Appears with the test result
either in mg/dL or mmol/L.
LOW BATTERY SYMBOL
Appears when the battery is low.
CTL SYMBOL
Appears when doing a
control solution test and
indicates that the result
won’t be stored in the
memory.
BLOOD SAMPLE SYMBOL
Flashes when the meter is ready
to accept the blood sample.
• iHealth Test Strip
Use only iHealth test strips with the meter. Each test strip can be
used only once, and consists of the following parts:

• Clear Cap for Alternate Site Testing
• Lancet • iHealth Control Solution
• iHealth Test Strip
Absorbent hole
Confirmation window
Test strip handle
Contact bars
Lancet cover
C
o
n
t
r
o
l
S
o
l
u
t
i
o
n
Mobile Device Compatibility
4
Head
Main body
Release button
Cap (for finger testing)
Remove lancet part

TEST PRINCIPLE
Testing with the iHealth system is based on the measurement of
electrical currents generated by the reaction of glucose with the
reagent of the test strip. The iHealth system measures the
current and converts it to the corresponding blood glucose level.
The strength of the current produced by the reaction depends
on the amount of glucose in the blood sample.
IMPORTANT TEST INFORMATION
Please read the following:
• Severe dehydration and excessive water loss may cause
inaccurate results. If you believe you are suering from severe
dehydration, consult your healthcare professional immediately.
• Inaccurate results may occur in severely hypotensive
individuals or patients who are in shock. Test results that are
lower than actual values may occur in individuals who are in a
hyperglycemic-hyperosmolar state, with or without ketosis.
Critically ill patients should not be tested with blood glucose
meters.
• If your blood glucose results are lower or higher than usual,
and you do not have symptoms of illness, rst repeat the test. If
you have symptoms or continue to get results that are higher
5
The iHealth system is compatible with select iOS and Android
devices. For a complete list of compatible devices, visit our
support page at www.ihealthlabs.com. The iHealth system
works with the following iOS version 5.0 or higher devices:
iPhone 3G3 or later
iPad 2 or later
iPod touch (4th generation) or later

FIRST TIME SETUP INSTRUCTIONS
• Download the companion app
or lower than usual, follow the treatment advice of your
healthcare professional.
• If you are experiencing symptoms that are inconsistent with
your blood glucose test, and you have followed all of the
instructions provided in this Owner’s Manual, contact your
healthcare professional immediately.
• Use only fresh whole blood samples to test your blood glucose.
• Do not use test strips that are expired or appear to be damaged
as they may return inaccurate results.
• The lancing device is for self-use only. Do not share or re-use
lancets. Please refer to the Lancing Device Manual for the
detailed procedure.
For more detailed information, please refer to the resources
identied below:
“FDA Public Health Notication: Use of Fingerstick Devices on
More than One Person Poses Risk for Transmitting Bloodborne
Pathogens: Initial Communication” (2010)
http://www.fda.gov/MedicalDevices/Safety/AlertsandNotices/uc
m224025.htm
“CDC Clinical Reminder: Use of Fingerstick Devices on More than
One Person Poses Risk for Transmitting Bloodborne Pathogens”
(2010)
http://www.cdc.gov/injectionsafety/Fingerstick-DevicesBGM.html
6
Prior to rst use, download and install the free iHealth Gluco-
Smart App from the App Store to your iOS device. Follow the
on-screen instructions to create your iHealth ID.

• Access iHealth Cloud
You can use your iHealth ID to gain access to free and secure
Cloud Services. Go to www.ihealthlabs.com and click on“Sign
I n ”.
• Charge the battery
Out of the box
Your meter is powered by a built-in, rechargeable battery. Plug
one end of the charging cable into the side of the meter and
the other end into your computer’s USB port. Charge it for two
to four hours before rst use. A fully charged battery can
typically take up to 200 tests depending on your daily usage.
Low battery message
After you have used your meter for some time, appears
for three seconds when the battery in your meter is low on
power. You must recharge the battery before using it again.
After three seconds, the meter shuts o automatically. The
meter does not take any measurement when the battery is
low.
Important: If battery is completely drained, fully charge the
battery and launch the app to sync the meter before using it
again.
• Sync the meter
Prior to rst use, follow the steps below to connect the meter
to the app on your iOS device to set your meter’s time and
date. By connecting the two, the date and time of the meter
will be synced with your iOS device.
1. Enable Bluetooth on your mobile device.
7
Settings
AT&T 7:28 AM
Bluetooth
Bluetooth
98%

2. Press and hold the “Memory” button for three seconds to turn
the meter on.
3. (First press "Scan" or "Search" to nd the meter if you are on
Android devices.) Select the model name “BG5xxxxxx” in the
Bluetooth menu to pair and connect.
4. Launch the app to connect the meter to the app. The
Bluetooth symbol “ ”will ash and remain lighted on the
meter.
Memory button
8
Settings
AT&T 7:28 AM
Bluetooth
Bluetooth
BG5 XXXXXX
DEVICES
Now Discoverable
Connected
98%
i

9
Note: Repeat steps 1-4 when switching to a dierent iOS device.
• Test blood glucose level
[1] Turn Bluetooth on and launch the app
Connect your meter to the mobile device and open the app.
Your mobile device must stay connected to the internet.
[2] Scan the QR code
Scan the QR code on top of the iHealth test strip vial to calibrate
the test strips with the meter. You must scan the QR code ONLY
when a new vial is opened for the rst time.
NOTE:You can skip step 1&2 to take readings without
connecting the meter to the app if
- the meter has been synced (refer to "Sync the meter" section)
- A vial of test strip has previously been scanned already (refer to
"Scan the test strips" section)
[3] Insert the test strip into the meter’s strip port.
Make sure the red arrow marker on the test strip is facing the
same direction as the iHealth logo on the meter.
[4] Prepare the lancing device.
uSnap o the lancet device cap
vInsert a new lancet rmly into the lancing holder cup

10
wTwist the lancet cover o
xReplace the lancing device cap
ySet the lancing level
zCock the handle until it clicks
[5] Obtain a blood sample.
Press the lancing device against the site to be lanced. Press
the release button to puncture the site. Gently squeeze your
nger until a drop of blood forms. Wipe away the rst blood
drop and squeeze until a second small blood drops forms.
[6] Apply the blood sample to the test strip.
Quickly apply the blood sample to the absorbent hole of the
test strip. Make sure the conrmation window of the test strip
is completely lled with the blood sample.

11
Quickly remove your nger from the test strip when the
countdown (from 5 to 1) begins on the meter display, or
when you hear a sound alert from your mobile device.
[7] Read the test results.
-If the meter is not connected to the app, the test result will
appear on the meter after counting down from 5 to 1.
- If the meter is connected to the app, the test result will
appear on the app.

REVIEWING SAVED TEST RESULTS ON THE METER
Press the memory button to view the test results stored in the
meter. The rst reading you’ll see is your most recent blood
glucose result. To review earlier test results, press the memory
button repeatedly.
[8] Discard the used test strip and lancet.
Remove the used test strip from the meter
using a small amount of tissue paper.
Discard the used test strip and lancet
properly. (Tip: Prior to disposal, stick the
lancet into the cover.)
DATA SYNCING
The meter can save up to 500 of the most recent blood glucose
test results. When the meter needs to save a new test result and
has already stored 500 test results, the oldest test result will be
overwritten by the new test result.
When the meter is connected to the app on your iOS device, tap
the “Upload” button to upload the saved data from the meter to
the app.
12
NOTE: Theresultsobtainedfromtheglucosemeterareplasma-
calibrated.Thishelpsyouandyour physicianorotherqualied
healthcareproviderstocompareyourmeterresultswith
laboratory tests.Refertotheinstructionsgivenbyyourphysician
orotherqualiedhealthcareproviders.Donotdeviatefrom
theseinstructionsonthebasisoftheresultwithoutrst
consultingyour physician.

CLEANING AND DISINFECTION
Cleaning and disinfection is a necessary and important part of
the test procedure. It can help to prevent infection, the potential
spread of infection, and cross-contamination. Cleaning can also
ensure that the meter works properly and that the display is
clear and readable.
The meter and lancing device should be cleaned and disinfected
following each use. We suggest that you use CaviWipes™
(Metrex® Research Corporation, EPA Reg. No. 46781-8, EPA Est.
No. 56952-WI-001). CaviWipes, with isopropanol and
diisobutyl-phenoxy-ethoxyethyl dimethyl benzyl ammonium
chloride as the active ingredient, have been shown to be safe for
use with the meter and lancing device.
You can purchase this product from the suppliers listed below:
(1) Visit the website www.metrex.com or contact Metrex at
800-841-1428 for product or technical information.
(2) Visit the website
http://www.endochoice.com/Equipment?search=wipe.
The meter and lancing device are validated to support 10,000
individual tests—and consequently 10,000 cleanings over their 5
year life spans.
Below are the steps on how to clean the meter and lancing
device.
13
When you reach the last test result, the word “End” will appear,
and the meter will shut o automatically. Similarly, the meter will
shut o automatically when it is idle for three minutes.

SIGNS OF POTENTIAL PHYSICAL AND PERFORMANCE
DETERIORATION
4. Use the same method with the CaviWipes to clean and
disinfect the lancing device.
Note:
jEach disinfection step requires a pre-cleaning step. Wash
hands thoroughly with soap and water after handling the
meter, lancing device, or test strips.
kOnly the surface of the meter can be cleaned and
disinfected with the disinfecting towelette. Do not insert the
disinfecting towelette into the test strip port , or else the
performance of the meter may be aected.
If you encounter one of the following circumstances, stop using
the meter and contact local customer services or the place of
purchase for assistance, or call the toll free customer service
number1-855-816-7705:
1. After a test, clean and wash your hands.
2. Use one CaviWipe to carefully clean the meter, front and back.
3. Then, disinfect the meter with another wipe and allow the
surface to dry naturally: this should take approximately 2
minutes.
14

What is Alternate Site Testing?
INFORMATION ABOUT ALTERNATE SITE TESTING (AST)
Alternate Site Testing (AST) is the use of parts of the body, other
than the ngertips, to check blood glucose levels. The iHealth
system allows you to test on the palm, forearm, upper arm, calf,
or thigh with equivalent results to ngertip testing when used at
appropriate times.
15
Upper Arm
Forearm
Palm
Finger
Calf
Thigh
1. The device does not work; for example, the iOS device can’t
begin testing when the meter is connected with the iOS
device or when a test strip is inserted into the meter.
2. Discoloration of the meter casing or lancing device; for
example, it is dicult to read the labeling information.
3. Corrosion, crazing (ne cracks), embrittlement, and/or
cracking of the meter casing or lancing device.

What is the Advantage of Alternate Site Testing?
Pain is felt more readily on the ngertips because they are full of
nerve endings (receptors). At other body sites where nerve
endings are not so condensed, pain is not felt as acutely.
When Should You Use Alternate Site Testing?
Food, medication, illness, stress, and exercise can aect blood
glucose levels. Capillary blood from the ngertips reects these
changes faster than capillary blood from other sites. Therefore,
when testing blood glucose levels during or immediately after
meals or exercise, or when another of the above-noted
conditions applies, take a blood sample from your ngertips
only. AST should be used only during steady-state times when
glucose levels are not changing rapidly.
Alternate Site Testing is suitable in the following instances:
• In a pre-meal or fasting state (two hours or more after the last
meal)
• Two hours or more after taking insulin
• Two hours or more after exercising
Caution: Alternate Site Testing should not be used to calibrate
continuous glucose monitoring systems (CGMs). Results from
Alternate Site Testing should not be used in insulin dose
calculations. Do not use AST if:
• You think your blood glucose is low
• You are unaware that you might have hypoglycemia
• You are testing for hyperglycemia
16
Caution: When performing Alternate Site Testing, please
remember to change the cap of the lancing device to the clear
cap specially designed for AST.
There are limitations for doing AST. Please consult your
healthcare professional before you conduct AST. The iHealth
system should only be used for AST under steady-state blood
glucose conditions.

IMPORTANT INFORMATION ABOUT CONTROL SOLUTION TESTS
PERFORMING A CONTROL SOLUTION TEST
Control solution contains a known amount of glucose that reacts
with test strips and is used to check that your meter and test
strips are working together properly.
• Your AST results do not match the way you feel
• Your routine glucose results uctuate often
[1] When the meter is not connected to your iHealth Gluco-Smart
App on your iOS device:
Step 1: Turn on the control solution test (CTL) mode.
Insert the test strip into the meter’s strip port to turn on the
meter. When the blood sample symbol appears on the meter
display, press the memory button to turn on the CTL mode.
When the CTL symbol appears, the meter is in control solution
test mode and will not save this test result in memory.
Materials needed to perform a control solution test:
• iHealth Blood Glucose Meter(the meter)
• iHealth Test Strip
• iHealth Control Solution
Perform a control solution test when:
17
• First receiving or purchasing the meter
• Checking the meter and test strips (which should be done at
least once a week)
• Using a new vial of test strips
• You suspect the meter or test strips are not working properly
• Your blood glucose test results are not consistent with your
expectation, or you think the results are not accurate
• Practicing the testing process
• The meter has been dropped or damaged
Table of contents
Other iHealth Blood Glucose Meter manuals

iHealth
iHealth BG1 User manual

iHealth
iHealth BG1 User manual

iHealth
iHealth BG1 User manual

iHealth
iHealth BG1 User manual

iHealth
iHealth BG5 User manual

iHealth
iHealth BG5 User manual

iHealth
iHealth BG1 User manual

iHealth
iHealth BG1 User manual

iHealth
iHealth BG5 User manual

iHealth
iHealth BG5 User manual
Popular Blood Glucose Meter manuals by other brands

Spirit Healthcare
Spirit Healthcare TEE2 quick start guide

Roche
Roche Accu-Chek Mobile Quick reference guide

Coaguchek
Coaguchek XS System How to use guide

Arkray
Arkray GLUCOCARD 01-mini Quick reference guide

Trividia
Trividia TRUEbalance Quick reference guide

Ideal Life
Ideal Life Gluco-Manager GMM0001 instruction manual