manuals.online logo
Brands
  1. Home
  2. •
  3. Brands
  4. •
  5. IHP
  6. •
  7. Indoor Fireplace
  8. •
  9. IHP Rhapsody42 User manual

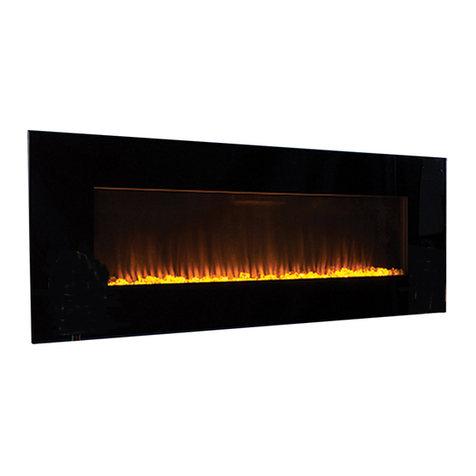
IHP Rhapsody42 User manual

NOTE: DIAGRAMS & ILLUSTRATIONS ARE NOT TO SCALE.
HEARTH PRODUCTS
KITS AND ACCESSORIES
P/N 900263-00
Rev. B 09/2016
LINEAR DIRECT-VENT FIREPLACES
ACCESSORY KITS
INSTALLATION INSTRUCTIONS FOR REQUIRED AND OPTIONAL ACCESSORIES
FOR USE ON 42- AND 54-INCH LINEAR DIRECT-VENT GAS FIREPLACES
[FIREPLACE MODELS: Rhapsody42, Rhapsody54, DRL6542 and DRL6554 Series]
* The Nake Liner Kit is not offered for DRL6500 series fireplaces
DANGER
HOT GLASS WILL CAUSE BURNS. DO NOT
TOUCH GLASS UNTIL COOLED.
NEVER
ALLOW CHILDREN TO TOUCH GLASS.
• Fireplaces surfaces get EXTREMELY HOT!
• Install only when fireplace is OFF and COLD.
• The glass on the front of the fireplace reaches
EXTREMELY HIGH temperatures and can cause severe
burns if touched. Even after the gas is turned off,
fireplace surfaces remain extremely hot.
• Keep children away from an operating fireplace. Closely
supervise children in any room where a fireplace is
operating to prevent contact with glass.
CAUTION
RISK OF PERSONAL INJURY OR PROPERTY DAMAGE.
• Never operate fireplace without liner panels installed. These
appliances are NOT approved for operation without liner panels.
• Do NOT abuse glass doors by striking or slamming shut
• Never operate fireplace with glass door assembly removed.
• Handle glass door assembly with extreme care.
Replace damaged glass door assembly with approved
replacement assembly only.
• Use only media approved for use with these fireplaces
(as applicable). Failure to use approved media may result
in sooting, delayed ignition, or other improper fireplace
operation, and may void the warranty.
NOTICE
• Read all steps before starting installation.
• LEAVE THESE INSTRUCTIONS WITH THE APPLIANCE.
• All warnings, precautions, and instructions in the Installation
and Operation Instructions provided with the appliance also
apply to these instructions.
• If you encounter any problems, need clarification of these
instructions, or are not qualified to properly install this
kit, contact your local distributor or dealer.
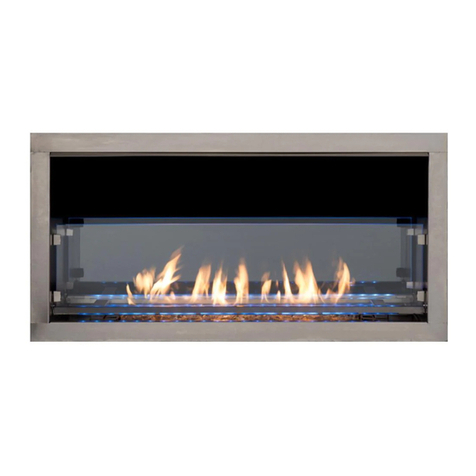
Figure 1 - 54 in. Rhapsody™ linear gas fireplaces with
designer floor kit and Nake firebox liner kit*
(both in black porcelain).
GENERAL INFORMATION
This document contains installation instructions for the
following required and optional accessories for Rhapsody and
DRL6500 series linear direct-vent gas fireplaces manufactured
by INNOVATIVE HEARTH PRODUCTS (IHP).
Kit descriptions, catalog/model numbers, and contents are listed
on the next page.
Required Accessory Kits
The following accessory kits are REQUIRED for complete
fireplace installation.
NOTE: Ensure these kits are available before installing the
fireplace.
• Firebox Liner Kit (Rhapsody models only)
• Floor Kit (Rhapsody models only)
• Media Kit *
* Media kit required with “Designer" style floor kits (Rhapsody option) or
DRL6500 series fireplaces only.
Media must not be used with Refection floor.
Optional Accessory Kits
The following accessories are OPTIONAL. However, to minimize
required labor, all options should be installed at time of
fireplace installation, if possible.
• Surround Kit
• Bezel Kit
• Firebox Backlight Kit ** (Rhapsody models only)
• Power Vent Kit
(see manual 506022-01 for installation instructions)
** Firebox backlight kit for use with "Cityscape" and "Illusion" style firebox
liner kits.
REQUIRED TOOLS
NOTE: Power tools are NOT recommended when installing
fireplace accessories, especially porcelain firebox liners.
• 5/16" Hex-head Nut Driver
• #3 Phillips Head Screwdriver
(for fireplace door removal/installation)
• Glass Cleaner (non-ammoniated)
• Non-abrasive rag
• High-temperature sealant
(e.g., Mill-Pac®; if installing firebox backlight kit)
• Safety Glasses
• Protective Work Gloves
NOTE: DIAGRAMS & ILLUSTRATIONS ARE NOT TO SCALE.
INNOVATIVE HEARTH PRODUCTS • LINEAR GAS FIREPLACES • REQUIRED AND OPTIONAL ACCESSORIES
2
REQUIRED ACCESSORIES
Firebox Liner Kits - Rhapsody Models Only
• (13) #10-16 x 3/8 Hex-head Sheet Metal Screws
• (2) Side Panels
• (1) Back Panel
Nake Back Panel
Description Cat.
No. Model No.
42 in. Nake—Black Porcelain H8834 NPK-BLP-RAP42
Nake—Black Satin Paint H8835 NPK-BLS-RAP42
54 in. Nake—Black Porcelain H8422 NPK-BLP-RAP54
Nake—Black Satin Paint H8423 NPK-BLS-RAP54
Table 1 - Required Firebox Liner Kits
Floor Kits - Rhapsody Models Only
• (4) #10-16 x 3/8 Hex-head Sheet Metal Screws
• (1) Rear Floor Section
• (1) Front Floor Section
Designer Floor Kit
Description Cat. No. Model No.
42 in. Designer—Black Satin * H8837 DFK-BLS-RAP42
Designer—Black Porcelain * H8836 DFK-BLP-RAP42
54 in. Designer—Black Satin * H8426 DFK-BLS-RAP54
Designer—Black Porcelain * H8427 DFK-BLP-RAP54
Table 2 - Required Floor Kits
* Designer floor kits require one media kit.
Media Kits
• (1) Media, 5 lb bag
NOTE: See media kit instructions (P/N 900077-07).
Description Cat. No. Model No.
Reflective Black H8412 CRSHGL-RBLK
Reflective Blue H8424 CRSHGL-RBLU
Platinum H8413 CRSHGL-P
Goldfinger H8538 CRSHGL-GF
Copper H8539 CRSHGL-C
Table 3 - Required Media Kits
OPTIONAL ACCESSORIES
Surround Kits
• (9) #10-16 x 3/8 Hex-head Sheet Metal Screws
NOTE: Surround and bezel should be installed together.
Description Cat. No. Model No.
42 in. Black Satin F2259 CS-BLS-RAP42
54 in. Black Satin F2256 CS-BLS-RAP54
Table 4 - Optional Surround Kits
Bezel Kits
• (1) Bezel Assembly
NOTE: Surround and bezel should be installed together.
Description Cat. No. Model No.
42 in.
Black Satin F2269 BZL-BLS-RAP42
Black Nickel F2267 BZL-BLNI-RAP42
Brushed Nickel F2268 BZL-BRNI-RAP42
54 in.
Black Satin F2266 BZL-BLS-RAP54
Black Nickel F2264 BZL-BLNI-RAP54
Brushed Nickel F2265 BZL-BRNI-RAP54
Table 5 - Optional Bezel Kits
Other Optional Accessories
Description Cat. No. Model No.
Power Vent Kit (manual P/N 506022-01) H7387 LPVK-110**
Power Vent Adaptor Kit (manual P/N 900077-04) H8574 PVK-RHAP **
Gas Conversion Kit, NG to LP (manual P/N 506019-90) H8540 GCK-RAPNP
Table 6 - Other Optional Accessories
** For use with 42 in. and 54 in. models.
NOTE: DIAGRAMS & ILLUSTRATIONS ARE NOT TO SCALE.
INNOVATIVE HEARTH PRODUCTS • LINEAR GAS FIREPLACES • REQUIRED AND OPTIONAL ACCESSORIES
3
To remove optional Bezel:
Grasp lower portion of bezel frame and pull forward to release
from bottom of door.
Swing bezel out slightly and lift up to clear top bracket from
door frame.
If Bezel is installed, barrier frame shown in Figure 2 will not be
present.
Remove glass door assembly
1. Remove the three (3) screws securing the lower edge of the
glass door assembly to the fireplace (Figure 3).
2. Grasp the glass door assembly by the sides, swing the lower
edge out, and then lift up to unhook it from the fireplace.
NOTE: Take care not to damage the glass.
3. Set aside the screws and glass door assembly in a secure
location for later reinstallation.
Glass Door Assembly
[CROSS-SECTION]
Barrier
Flanges
Door Trim
Barrier
Figure 2 - Removing the bezel
INSTALLATION INSTRUCTIONS
Complete all steps in the order shown, including the installation
of optional accessories (if applicable).
Remove barrier assembly
1. Remove the barrier assembly by lifting it up to disengage its
notches from tabs and pull directly away from the fireplace.
2. To replace the barrier if damaged, remove the three (3)
screws from the top and bottom and one (1) screw from
each side. Reverse these instructions to install the new
manufacturer's barrier (Figure 2).
Figure 3 - Removing the glass door assembly
Remove baffle from fireplace floor, if installed
1. If unpacking the fireplace for the first time, remove the
baffle from fireplace floor, where it is packed for shipping
(Figure 4).
2. Set aside the baffle in a secure location for later installation.
Baffle (as shipped)
Figure 4 - Removing the baffle
Access the control compartment
1. Remove the two (2) screws securing the burner assembly
to the burner brackets. Carefully slide the burner to the left,
to clear the venturi from the orifice. Rotate the burner to
release the air shutter adjustment rod from the air shutter
lever (Figure 5). Lift and remove the burner assembly,
and set aside the screws and burner assembly in a secure
location for later reinstallation.
Air Shutter Rod
Figure 5 - Releasing the air shutter adjustment rod
NOTE: DIAGRAMS & ILLUSTRATIONS ARE NOT TO SCALE.
INNOVATIVE HEARTH PRODUCTS • LINEAR GAS FIREPLACES • REQUIRED AND OPTIONAL ACCESSORIES
4
~
Reflector
Fireplace
Front
Tab
Rear Ledge
Install side panels (from required firebox liner kit)
1. Align the screw hole in the top flange of the side panel with
the upper hole in the inside wall of the fireplace (Figure 8).
2. Align the screw holes in the bottom flanges of the side
panel with the holes in the front and rear ledges.
3. Secure each panel with three (3) #10-16 x 3/8 hex-head
sheet metal screws provided with the firebox liner kit.
Left Side
Panel
Right
Side
Panel
~
Left Side
Panel
Front
Ledge
Rear
Ledge
~
Install back panel (from required firebox panel kit)
1. Insert the bottom edge of the back panel into the fireplace
first, then position it in front of the previously installed
reflector (Figure 9).
NOTE: Lift the back panel over the tabs on the rear ledge of
the fireplace.
2. Align the screw holes in the top and bottom edges of the
back panel with the holes in the fireplace ceiling and rear
ledge. Secure using seven (7) #10-16 x 3/8 hex-head sheet
metal screws provided with the firebox liner kit.
~
Fireplace
Front
Left Side
Panel
Back Panel
Reflector
Tab
Rear Ledge
Figure 6 - Accessing the control compartment
3. Remove the control compartment access door and gasket by
removing the twelve (12) screws securing it. Set aside the
screws, door, and gasket for later reinstallation (Figure 6).
Figure 7 - Installing the reflector
Figure 8 - Installing the side panels
Figure 9 - Installing the back panel
NOTE: DIAGRAMS & ILLUSTRATIONS ARE NOT TO SCALE.
INNOVATIVE HEARTH PRODUCTS • LINEAR GAS FIREPLACES • REQUIRED AND OPTIONAL ACCESSORIES
5
Install rear floor section (from required floor kit)
1. Place lower back edge of rear floor section on rear ledge of
fireplace, behind the tabs (Figure 10).
2. Align outermost front hole on either side of rear floor
section with hole in center lower tab in each side panel. Pull
rear floor section forward until it butts against the burner,
and secure using two (2) #10-16 x 3/8 hex-head sheet
metal screws provided with the floor kit (one screw per
side).
Rear
Floor
Section
Rear
Ledge
Tab
~
Side Panel
(Center Lower Tab)
Figure 10 - Installing the rear floor section
Install front floor section (from required floor kit)
1. Engage the lower front lip of the front floor section under
the locking clips attached to the fireplace front ledge, and
then slide it back (Figure 11).
2. Align the notches in the back edge of the front floor section over
the holes in the rear floor section. Push the front floor section
backward until it butts against the burner, and screw the front
floor section as shown in Figure 11.
Figure 11 - Installing the front floor section
Install media (from optional media kit)
1. If installing a floor kit that requires media, place an even
layer of media in the recessed area around the burner (see
bold outlined area in Figure 12; also refer to Figure 1).
Figure 12 - Placement of media
WARNING
• Handle media only when cool. Turn OFF all electricity
to the appliance before installing media. Media gets
very HOT during fireplace use and will remain hot up
to ONE HOUR after the gas supply is turned off.
• Any attempt to use media not specified for your fireplace
configuration will result in incomplete combustion,
sooting, and poor flame quality, and will void the
warranty.
• Do NOT mound up media, especially on the burner.
• If using multiple colors of media, NEVER use more
than five (5) pounds total (approximately) at one time.
• Do NOT allow media to get into the pilot hole.
Locking Clip
Front
Ledge
Notch
Rear
Floor
Section
Front
Floor
Section
Lip
NOTE: DIAGRAMS & ILLUSTRATIONS ARE NOT TO SCALE.
INNOVATIVE HEARTH PRODUCTS • LINEAR GAS FIREPLACES • REQUIRED AND OPTIONAL ACCESSORIES
6
Baffle
Slots in
Back Panel
Spring Clip Firebox Ceiling
Tabs
Figure 13 - Installing the baffle
Install baffle (provided with fireplace)
1. With the baffle oriented as shown (Figure 13), slide the rear
tabs into the slots in the back panel.
2. While sliding the tabs into the slots, engage the front lip of
the baffle under the spring clips in the firebox ceiling.
Clean porcelain panels (if applicable)
1. If applicable, use non-ammoniated glass cleaner and a soft
rag to remove fingerprints and smudges from porcelain
panels and floors.
Install glass door assembly
1. Hold the glass door assembly by the sides, and hook the
top edge to the fireplace. Then swing the bottom edge in
toward the fireplace (reverse of Figure 14).
NOTE: Be careful not to damage the glass.
2. Align the screw holes below the door assembly with the
holes in the fireplace, and secure using the (3) provided
screws.
Door gasket instructions
1. Reinstall the door. If the door does not fully close easily,
the door gasket will need to be dressed. See Figure 15 and
Warning below.
Correctly dressed Gasket.
Screwdriver works well
to dress gasket.
WARNING
The door should easily close without needing to
be pressed down. If it has to be pressed down to
close, the gasket in the top of the door should be
dressed so it lays on the glass.
Correctly Dressed Gasket Improperly Dressed Gasket
Improperly dressed gasket.
No gap between gasket
door channel.
Rating plate and lighting instructions
are attached to door bracket.
Figure 14 - Installing the glass door assembly
Figure 15 - Door gasket
Glass Door Assembly
NOTE: DIAGRAMS & ILLUSTRATIONS ARE NOT TO SCALE.
INNOVATIVE HEARTH PRODUCTS • LINEAR GAS FIREPLACES • REQUIRED AND OPTIONAL ACCESSORIES
7
Surround mounting
brackets (provided
with surround kit)
Clean
Face Frame
(removed first)
Bezel and Barrier
(added after Surround
- not shown)
One (1) Top non
-combustible
board
Clean
Face Frame
(removed first)
Figure 18 - Remove clean face trim and install brackets
Install optional surround
1. Remove clean face trim and install brackets - Remove the
clean face frame shown in Figure 18.Attach surround mount-
ing brackets to unit (10 screws). See Figure 16. Surround
will be mounted to these brackets (see Figure 17).
2. Attach the surround and secure it using the nine (9) screws
provided with the surround kit (Figure 17).
Finishing with optional Surround and Bezel
1. With unit in framing, secure nailing flanges to the wall framing.
2. Retrieve and secure heat shield to top front of unit with two
screws.
3. Remove the clean face frame (see Figure 18).
4. Place insulation flat across the top of the fireplace lengthwise
behind heat shield.
5. Install top, bottom and two (2) side surround support pieces
with screws from step 1 (see Figure 18).
6. Cut top noncombustible fireboard to size and install flush with
top frame pieces (side noncombustible boards not used).
7. Install glass media.
8. Remove top, bottom and two side trim pieces of barrier as-
sembly. Insert remaining barrier assembly into bezel assem-
bly and attach with screws.
9. Reinstall the door.
10. Attach surround to surround support with six (6) screws.
11. Hang barrier assembly on door and snap underneath door.
Figure 16 - Surround Mounting Brackets
Figure 17 - Installing optional surround
NOTE: DIAGRAMS & ILLUSTRATIONS ARE NOT TO SCALE.
INNOVATIVE HEARTH PRODUCTS • LINEAR GAS FIREPLACES • REQUIRED AND OPTIONAL ACCESSORIES
8
Installing Barrier into Bezel
NOTE: See Barrier Removal Instructions on Page 3, if applicable.
1. Remove barrier assembly that is shipped with unit.
2 Remove barrier screen from assembly by removing 3
screws top and bottom and one on each side.
3 Place barrier screen on Bezel assembly. See Figure 19.
Figure 19 - Place barrier screen on Bezel assembly
4. Hook the bezel upper flange to the top edge of the glass
door assembly, and then swing the lower edge of the bezel
toward the door (Figure 20).
5. Gently push the lower edge of the bezel to attach the bezel
lower flange to the lower edge of the glass door frame.
[CROSS-SECTION]
Barrier
Flanges
Door Trim
Barrier
Figure 20 - Barrier assembly
Figure 21 - Secure Barrier screen to Bezel assembly
6 Secure Barrier screen to Bezel assembly with screws
removed in step 2 (see Figure 21)..
7 Install barrier/bezel assembly onto glass door.
NOTE: DIAGRAMS & ILLUSTRATIONS ARE NOT TO SCALE.
INNOVATIVE HEARTH PRODUCTS • LINEAR GAS FIREPLACES • REQUIRED AND OPTIONAL ACCESSORIES
9
Red
Green
Ground
Screw
Black
Hot Side of
Receptacle
Tab Cut
Tab Intact
Green White
Neutral Side of
Receptacle
120 VAC—Black
Neutral—White
Ground—Green
J-BOX / RECEPTACLE
WIRING
120V, 60HZ, 1PH
Junction Box
Field Wired
Factory Wired
(Power Supply
Unswitched)
Figure 22 - Junction Box Wiring
CAUTION
Ground supply lead must be connected to the wire attached to the green ground screw located on the outlet box. Failure to
do so will result in a potential safety hazard. The appliance must be electrically grounded in accordance with local codes, or
in the absence of local codes, the National Electrical Code, ANSI/NFPA 70, latest edition (in Canada, the current CSA C22.1
Canadian Electrical Code).
Pilot Tube
COLOR CODE:
B = BLACK
BB = BROWN W/BLACK STRIPE
BG = BROWN W/GREEN STRIPE
BL = BLUE
BR = BROWN
G = GREEN
GY = GRAY
O = ORANGE
R = RED
W = WHITE
Y = YELLOW
Spark Electrode
Flame Sensor
IPI Pilot
885 Valve Optional
Split Flow
BL
W
Y
Y
BR
G
O
O
R
R
B
B
GY
GY
R
B
BL
W
B
BB
B
BR
BB
BG
W
W
G
Battery Holder w/Switch
ON/ Remote
/OFF
Battery Holder
Wire Harness
Reset Switch
“see instructions”
Optional Variable Light
Power Vent Blower
Power Vent
Models Only
Optional Circulation
Blower
Air Pressure Switch
Power Vent Only
Models w/o pressure switch have
these connectors plugged together
Main Wire
Harness
Main Power Cord
Control Module
G
B
G
W
B
Fuse
BG
BG
ELECTRONIC WIRING DIAGRAM
Ground Y
B
Schematic Representation Only
Battery Holder w/Switch
ON/Remote/Off
Figure 23 - Gas Valve Electronic Wiring Diagram - SIT ProFlame II
INNOVATIVE HEARTH PRODUCTS • LINEAR GAS FIREPLACES • REQUIRED AND OPTIONAL ACCESSORIES
Printed in U.S.A. © 2015 Innovative Hearth Products
P/N 900263-00 Rev. B 09/2016 1508 Elm Hill Pike, Suite 108, Nashville, TN 37210
IHP reserves the right to make changes at any time, without notice, in design, materials,
specifications, prices and also to discontinue colors, styles, and products. Consult your local
distributor for fireplace code information.

This manual suits for next models

3

Other IHP Indoor Fireplace manuals

IHP sv4.5htss User manual

IHP

IHP sv4.5htss User manual

IHP mpe27-2 User manual

IHP

IHP mpe27-2 User manual

IHP Superior Fireplaces MHD40STDMN Owner's manual

IHP

IHP Superior Fireplaces MHD40STDMN Owner's manual

IHP astria Mission Mission42TMN User manual

IHP

IHP astria Mission Mission42TMN User manual

IHP Sentry 45 Installation instructions

IHP

IHP Sentry 45 Installation instructions

IHP PT Series User manual

IHP

IHP PT Series User manual
IHP astria Sirius42TEN User manual

IHP

IHP astria Sirius42TEN User manual

IHP 900005-02 User manual

IHP

IHP 900005-02 User manual

IHP Superior Fireplaces WRT3920WS Owner's manual

IHP

IHP Superior Fireplaces WRT3920WS Owner's manual

IHP Superior Fireplaces VRE4536RS Owner's manual

IHP

IHP Superior Fireplaces VRE4536RS Owner's manual

IHP COMPASS Series Guide

IHP

IHP COMPASS Series Guide

IHP Superior WRE6842RS Owner's manual

IHP

IHP Superior WRE6842RS Owner's manual

IHP Comfort Flame Columbus Series Owner's manual

IHP

IHP Comfort Flame Columbus Series Owner's manual

IHP BLKBP-MPDP35 User manual

IHP

IHP BLKBP-MPDP35 User manual

IHP Superior ERC4054 User manual

IHP

IHP Superior ERC4054 User manual

IHP RHAPSODY RHAP42N User manual

IHP

IHP RHAPSODY RHAP42N User manual

IHP Shiloh36RWS User manual

IHP

IHP Shiloh36RWS User manual

IHP Astra Fireplaces Altair Series User manual

IHP

IHP Astra Fireplaces Altair Series User manual

IHP CAPELLA 33 User manual

IHP

IHP CAPELLA 33 User manual

IHP IronStrike Performer C210TGL User manual

IHP

IHP IronStrike Performer C210TGL User manual

IHP capella 27 User manual

IHP

IHP capella 27 User manual

IHP capella 27 Owner's manual

IHP

IHP capella 27 Owner's manual

IHP Ravenna RDV33 Owner's manual

IHP

IHP Ravenna RDV33 Owner's manual

IHP Superior Fireplaces Merit WRT2042WS Owner's manual

IHP

IHP Superior Fireplaces Merit WRT2042WS Owner's manual

Popular Indoor Fireplace manuals by other brands

Nu-Flame Finestra Line Instructions for use and safety

Nu-Flame

Nu-Flame Finestra Line Instructions for use and safety

Regency Fireplace Products H2104 Owners and installation manual

Regency Fireplace Products

Regency Fireplace Products H2104 Owners and installation manual

livn DUBLIN instruction manual

livn

livn DUBLIN instruction manual

Heatilator BIR42-B owner's manual

Heatilator

Heatilator BIR42-B owner's manual

Valor L1 1600KN installation manual

Valor

Valor L1 1600KN installation manual

EcoSmart Fire Ark 40 Clearances & Installation Manual

EcoSmart Fire

EcoSmart Fire Ark 40 Clearances & Installation Manual

Bellfires SMART BELL 80-70 PF Instructions for use & manual daily maintenance

Bellfires

Bellfires SMART BELL 80-70 PF Instructions for use & manual daily maintenance

Costway EP24205 user manual

Costway

Costway EP24205 user manual

Miles Industries LEGEND G3 installation instructions

Miles Industries

Miles Industries LEGEND G3 installation instructions

Monessen Hearth BBV400NV Installation, operation and maintenance manual

Monessen Hearth

Monessen Hearth BBV400NV Installation, operation and maintenance manual

Arada Deck Open Chimeneas user guide

Arada

Arada Deck Open Chimeneas user guide

FMI P324E Owners manual and installation manual

FMI

FMI P324E Owners manual and installation manual

Continental Fireplaces CDVS500-1 Installation and operation manual

Continental Fireplaces

Continental Fireplaces CDVS500-1 Installation and operation manual

Lennox Hearth Products B-ENC0353VDE Homeowner's care and operation instructions

Lennox Hearth Products

Lennox Hearth Products B-ENC0353VDE Homeowner's care and operation instructions

Valor 941 Installer and owner guide

Valor

Valor 941 Installer and owner guide

Desa CGEF26 Safety information and installation manual

Desa

Desa CGEF26 Safety information and installation manual

Riello 40 G10 Installation, use and maintenance instructions

Riello

Riello 40 G10 Installation, use and maintenance instructions

Nordpeis Monaco C High Base Left installation manual

Nordpeis

Nordpeis Monaco C High Base Left installation manual

manuals.online logo
manuals.online logoBrands
  • About & Mission
  • Contact us
  • Privacy Policy
  • Terms and Conditions

Copyright 2025 Manuals.Online. All Rights Reserved.