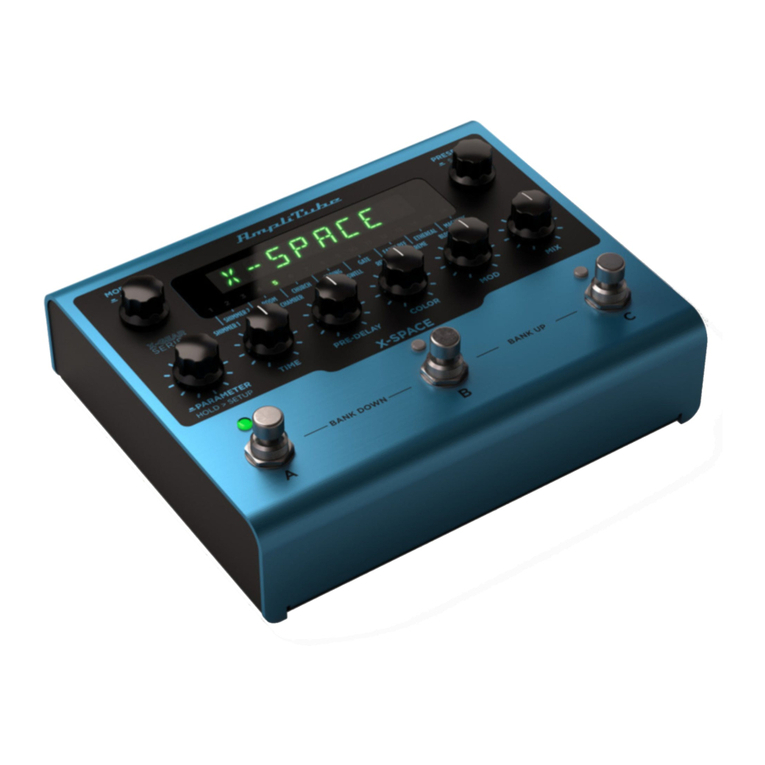
IK Multimedia AmpliTube X-SPACE User manual

AmpliTube
X-SPACE
USER MANUAL

AmpliTube X-SPACE
Contents
2
Table of Contents
Contents 2
Front Panel Overview 3
Rear Panel Overview 5
Firmware update 6
Saving presets 7
External Control Setup 8
Expression pedal & single switch (creating macros) 8
Double switch 9
Expression pedal calibration 10
Reverb Models 11
SHIMMER 1 11
SHIMMER 2 13
HALL 15
ROOM 17
CHAMBER 19
CHURCH 21
PLATE 23
SPRING 25
SWELL 27
GATE 29
REVERSE 30
EARY REF 32
EXTREME 33
ETHEREAL 34
BLOOM 35
MAGNETIC 36
Global Setup 37
Preset Setup 40
Safe Mode 41
Temporary Mode 42
Interface Mode 43
Included applications 44
MIDI Specifications 45
Features 46
System Requirements 47
AmpliTube X-GEAR series 48

AmpliTube X-SPACE
Front Panel Overview
3
Front Panel Overview
1
3
9
4 5 6
10
7 8
2
1. MODEL encoder
Turn the MODEL encoder to select the preferred X-SPACE model among the 16 advanced algorithms
available.
Push to go back when browsing menus.
2. PRESET encoder
Turn the PRESET encoder to browse among the 300 preset slots available in the machine.
Push to save a preset and choose its name and bank position.
3. PARAMETER encoder
Each model inside X-SPACE has its own parameter set.
Push the PARAMETER encoder to access the additional parameters of the selected model. The last edited
parameter is always available by pressing or rotating the parameter encoder.
Hold the PARAMETER encoder to access the global and preset setups.
4. TIME knob
The TIME knob controls the reverb tail length.

AmpliTube X-SPACE
Front Panel Overview
4
5. PRE-DELAY knob
The PRE-DELAY knob controls mainly the pre-delay amount.
6. COLOR knob
The COLOR knob controls the frequency response of the reverb.
7. MOD knob
The MODULATION knob controls the amount of modulation happening in the reverb.
8. MIX knob
The MIX knob controls the balance of dry and wet signal. At 0% the signal is fully dry, while at 100% the
signal is fully wet. At around 85% the dry and wet signal have the same level.
9. A, B & C LEDs
Green if preset is active.
Amber if preset has been edited.
Blinking amber when browsing among banks.
Off if bypassed.
10. A, B & C footswitches
Press to engage or bypass preset of the current bank.
Hold while preset is ON to access the X-MODE for selected model.
Hold while preset is OFF to activate that preset temporary while the footswitch is held down.
Press A+B to select a lower bank.
Press B+C to select a higher bank.

AmpliTube X-SPACE
Rear Panel Overview
5
Rear Panel Overview
3 4 5 621 7
1. INPUT L & R
Plug your instrument in here.
If you have a mono instrument use only the left input.
2. OUTPUT L & R
Connect to an amplifier, stomp box, PA or other devices.
If you use X-SPACE with mono output use only the left output.
3. MIDI IN
Connect to external MIDI controllers to automatically browse presets and modulate parameters via control
changes.
4. MIDI OUT
Connect to external MIDI devices.
Through this port X-SPACE can send out MIDI messages anytime a switch is pressed or a knob is turned.
5. EXT. CONTROL
Hook up an external expression or single switch pedal to control any combinations of parameters with a
single action.
Hook up a double switch pedal to easily move among banks or presets.
6. USB
Use this port to connect X-SPACE to your Mac/PC as an audio interface and for using the Librarian app to
organize and load presets. It can also be used to send or receive MIDI signals.
7. POWER 9V DC
Power the pedal via a 9V DC center negative power supply.
At least 260mA.

AmpliTube X-SPACE
Firmware update
6
Firmware update
Before doing anything with your X-GEAR pedal it’s highly recommended to hook it up to the X-GEAR Librarian
and check if any firmware update is available to make sure you are running the most updated and stable
firmware available.
To do so:
1. Install the X-GEAR librarian on your computer following the instructions found in the box.
2. Connect your pedal to your computer using the provided USB cable.
3. Launch the X-GEAR librarian and select the connected pedal.
4. Click the top right gear icon and click “Check for updates.”
5. If the librarian or the X-GEAR need to be updated, you’ll be asked to do so and by clicking “Update” you’ll
start the updating process.
After updating you can start using your X-GEAR pedal.

AmpliTube X-SPACE
Saving presets
7
Saving presets
To quickly save a preset, hold down the PRESET encoder until the display shows SAVED.
The preset will be saved with the same name in the same location.
To change name or location when saving a preset:
1. Press the PRESET encoder to enter the saving process.
2. The first letter of the preset’s name starts blinking indicating the cursor’s position.
3. Rename the preset:
a. Turn the PRESET encoder to select a character.
b. Turn the MODEL encoder to change the cursor’s position.
4. Push the PRESET encoder to confirm the name.
5. The display shows a location (bank-number and slot).
6. Rotate the PRESET encoder to select the desired location.
7. Push the PRESET encoder to select the location an save the preset with the chosen
name in the chosen location.
N.B. When choosing a different location saving a preset will overwrite the preset that was previously stored in
that location and the new one gets copied over it.

AmpliTube X-SPACE
External Control Setup
8
External Control Setup
The EXT. CONTROL jack can be connected to various types of external pedals:
• Expression pedal
• Single switch
• Double switch
Expression pedal & single switch (creating macros)
An expression pedal and a single switch pedal can be assigned to a parameter or to various parameters to
create macros. A macro is an ensemble of parameters, which can be modulated simultaneously via the external
control.
To setup a macro on the selected preset using an expression pedal or a single switch pedal, do as follows:
1. Hook it up to the EXT. CONTROL.
2. Hold the PARAMETER encoder and choose GLOBAL SETUP.
3. Select EXT. CTRL and choose one of the following:
a. TRS EXP PEDAL: if you are using a TRS type expression pedal.
b. RTS EXP PEDAL: if you are using a RTS type expression pedal.
c. N.O. SWITCH: if you are using a normally open single switch pedal.
d. N.C. SWITCH: if you are using a normally close single switch pedal.
4. Press the MODEL knob to go back and choose PRESET SETUP.
5. In the PRESET SETUP menu, select ON from the EXT. CTRL option.
6. Come back to the PRESET SETUP menu, select EXT. LEARN and choose LEARN.
7. While LEARN A is being displayed, position the parameters of the preset as you wish they would be when
the external control is in position A, then press the PRESET encoder when the A setup is done.
8. While LEARN B is being displayed, position the parameters of the preset as you wish they would be when
the external control is in position B, then press the PRESET encoder when the B setup is done.
9. Once the SAVE button (PRESET encoder) is pressed, the pedal returns to its default behavior and the
macro is assigned to the external control.
N.B.
In a single switch pedal position A refers to the off status. In an expression pedal position A refers to the heel
status.
In a single switch pedal position B refers to the on status. In an expression pedal position B refers to the tip
status.
The only difference between a single switch or an expression pedal is that with the first one changing from
position A to position B is an instant transition (pressing the footswitch), while the second one is a smooth
transition (moving the expression pedal).

AmpliTube X-SPACE
External Control Setup
9
Double switch
Connect a double switch pedal to browse among presets or banks more easily.
To setup a double switch pedal do as follows:
1. Hook it up to the EXT. CONTROL.
2. Hold the PARAMETER encoder and choose GLOBAL SETUP.
3. Select EXT. CTRL and choose N.O. DUAL SWITCH, if your double switch pedal is normally open or N.C.
DUAL SWITCH, if your double switch pedal is normally closed.
4. In the GLOBAL SETUP browse to DUAL SWITCH MODE and choose BANK, if you want to use your
double switch pedal to move among banks or PRESET, if you want it to move among presets.

AmpliTube X-SPACE
Expression pedal calibration
10
Expression pedal calibration
If you feel that your expression pedal doesn’t work as expected, you may need to calibrate it to get its full
functionality.
To calibrate an expression pedal do as follows:
1. Hook it up to the EXT. CONTROL in the rear panel.
2. Hold the PARAMETER encoder and choose GLOBAL SETUP.
3. In the GLOBAL SETUP select EXP. CALIBRATION.
4. While HEEL is being displayed move your expression pedal to its heel position then press the
PARAMETER encoder to confirm.
5. While TIP is being displayed move your expression pedal to its tip position then press the PARAMETER
encoder to confirm.
6. When the display shows DONE, the calibration is set.

AmpliTube X-SPACE
Reverb Models
11
Reverb Models
SHIMMER 1
A complex shimmer that offers increasing feedback. The pitch can go from 1/4 semitone up to an octave
creating many different customizable shifting voicings.
Parameters
• TIME: controls the reverb tail length.
From 5 s to 20 s.
• PRE-DELAY: not available.
• COLOR: controls the frequency response of the reverb. At minimum the reverb gets darker, at maximum
the reverb gets brighter. Set in the middle the reverb is flat.
From -10 to +10.
• MOD: controls the amount of modulation of the reverb.
From 0% to 100%.
• MIX: controls the balance of dry and wet signal. At 0% the signal is fully dry, while at 100% the signal is
fully wet. At around 85% the dry and wet signal have the same level.
From 0% to 100%.
• SHIFT: controls the pitch of the note generated by the shimmer. It can be set to perfect pitch or fine-tuned
with 1/8 of a tone.
From -12 semitones to +12 semitones.
• SIZE: controls the dimension of the ambience from which the reverb is generated. With size set to
minimum the pitch build up is quicker, set to max the pitch build up is slower.
From 50% to 150%.
• MOD RATE: controls the rate of the reverb modulation.
From 0.1 Hz to 7 Hz.
• MODE: chooses among 3 modes.
• NO PICH: offers the shimmer characteristics without the feedback build up.
• SINGLE: the pitch of the feedback keeps building up according to the SHIFT parameter.
• DUAL: the pitch of the feedback keeps building up according to the SHIFT parameter both upwards and
downwards.
• X-MODE: engages the most possible tail length.
ON or OFF.

AmpliTube X-SPACE
Reverb Models
12
SHIMMER 1 Control Changes
Parameter Control Change # Values
TIME 21 0 – 127
COLOR 23 0 – 127
MOD 24 0 – 127
MIX 25 0 - 127
SHIFT 46 0 - 127
SIZE 47 0 - 127
MOD RATE 48 0 - 127
MODE 49 0 - 127
X-MODE 13 0 - 127
When a parameter range is not linear its values are equally divided among the 128 steps of a Control Change
value.

AmpliTube X-SPACE
Reverb Models
13
SHIMMER 2
Shimmer 2 differs from the first one because there is no buildup in the feedback and the two different pitched
voices can be set in parallel to create custom harmonizations.
Parameters
• TIME: controls the reverb tail length.
From 6 s to 20 s.
• PRE-DELAY: not available.
• COLOR: controls the frequency response of the reverb. At minimum the reverb gets darker, at maximum
the reverb gets brighter. Set in the middle the reverb is flat.
From -10 to +10.
• MOD: controls the amount of modulation of the reverb.
From 0% to 100%.
• MIX: controls the balance of dry and wet signal. At 0% the signal is fully dry, while at 100% the signal is
fully wet. At around 85% the dry and wet signal have the same level.
From 0% to 100%.
• SHIFT 1: controls the pitch of the note generated by the shimmer of the first voice. It can be set to perfect
pitch or fine-tuned with 1/8 of a tone.
From -12 semitones to +12 semitones.
• GAIN 1: controls the level of the first voice.
From 0 to 10.
• SHIFT 2: controls the pitch of the note generated by the shimmer of the second voice. It can be set to
perfect pitch or fine-tuned with 1/8 of a tone.
From -12 semitones to +12 semitones.
• GAIN 2: controls the level of the second voice.
From 0 to 10.
• SIZE: controls the dimension of the ambience from which the reverb is generated.
From 50% to 150%.
• MOD RATE: controls the rate of the reverb modulation.
From 0.1 Hz to 7 Hz.
• MODE: chooses among 3 modes.
• DUAL: the shimmer offers both pitched voices.
• SINGLE: the shipper offers only the first pitched voice.
• NO PITCH: the shimmer offers its characteristics without the pitched voices.
• X-MODE: engages the most possible tail length.
ON or OFF.

AmpliTube X-SPACE
Reverb Models
14
SHIMMER 2 Control Changes
Parameter Control Change # Values
TIME 21 0 – 127
COLOR 23 0 – 127
MOD 24 0 – 127
MIX 25 0 - 127
SHIFT 1 46 0 - 127
GAIN 1 47 0 - 127
SHIFT 2 48 0 - 127
GAIN 2 49 0 - 127
SIZE 47 0 - 127
MOD RATE 48 0 - 127
MODE 49 0 - 127
X-MODE 13 0 - 127
When a parameter range is not linear its values are equally divided among the 128 steps of a Control Change
value.

AmpliTube X-SPACE
Reverb Models
15
HALL
This model recreates the ambience of a live concert hall with controlled decay and a reverb time range from 1
to 9 seconds to replicate from smaller venues up to larger clubs. With an advanced parameter set that features
a 3-band decay trimmer, the sound of the hall can be highly tweaked to always find the perfect tail in which to
place the instrument.
Parameters
• TIME: controls the reverb tail length.
From 1 s to 9 s.
• PRE-DELAY: controls the pre-delay amount.
From 0 ms to 1000 ms.
• COLOR: controls the frequency response of the reverb. At minimum the reverb gets darker, at maximum
the reverb gets brighter. Set in the middle the reverb is flat.
From -10 to +10.
• MOD: controls the amount of modulation of the reverb.
From 0% to 100%.
• MIX: controls the balance of dry and wet signal. At 0% the signal is fully dry, while at 100% the signal is
fully wet. At around 85% the dry and wet signal have the same level.
From 0% to 100%.
• HPF: controls the cut-off frequency of the high-pass filter.
From 22 Hz to 1000 Hz.
• MOD RATE: controls the rate of the reverb modulation.
From 0.1 Hz to 7 Hz.
• SIZE: controls the dimension of the ambience from which the reverb is generated.
From 50% to 150%.
• L DECAY: controls the low-frequency band decay.
From -10 to 10.
• M DECAY: controls the mid-frequency band decay.
From -10 to 10.
• H DECAY: controls the high-frequency band decay.
From -10 to 10.
• X-MODE: engages the most possible tail length.
ON or OFF.

AmpliTube X-SPACE
Reverb Models
16
HALL Control Changes
Parameter Control Change # Values
TIME 21 0 – 127
PRE-DELAY 22 0 – 127
COLOR 23 0 – 127
MOD 24 0 – 127
MIX 25 0 - 127
HPF 46 0 - 127
MOD RATE 47 0 - 127
SIZE 48 0 - 127
L DECAY 49 0 - 127
M DECAY 50 0 - 127
H DECAY 51 0 - 127
X-MODE 13 0 - 127
When a parameter range is not linear its values are equally divided among the 128 steps of a Control Change
value.

AmpliTube X-SPACE
Reverb Models
17
ROOM
This model adds the third dimension of a room to the direct sound in order to place it in a physical space and
obtain a more natural sounding performance. Thanks to the 3-band decay trimmer any room can be recreated
giving infinite possibilities. Its time range goes from 0.2 to 3 seconds offering a great option for a reverb that
adds character without noticing the reverb itself.
Parameters
• TIME: controls the reverb tail length.
From 0.2 s to 3 s.
• PRE-DELAY: controls the pre-delay amount.
From 0 ms to 1000 ms.
• COLOR: controls the frequency response of the reverb. At minimum the reverb gets darker, at maximum
the reverb gets brighter. Set in the middle the reverb is flat.
From -10 to +10.
• MOD: controls the amount of modulation of the reverb.
From 0% to 100%.
• MIX: controls the balance of dry and wet signal. At 0% the signal is fully dry, while at 100% the signal is
fully wet. At around 85% the dry and wet signal have the same level.
From 0% to 100%.
• HPF: controls the cut-off frequency of the high-pass filter.
From 22 Hz to 1000 Hz.
• MOD RATE: controls the rate of the reverb modulation.
From 0.1 Hz to 7 Hz.
• SIZE: controls the dimension of the ambience from which the reverb is generated.
From 50% to 150%.
• L DECAY: controls the low-frequency band decay.
From -10 to 10.
• M DECAY: controls the mid-frequency band decay.
From -10 to 10.
• H DECAY: controls the high-frequency band decay.
From -10 to 10.
• X-MODE: engages the most possible tail length.
ON or OFF.

AmpliTube X-SPACE
Reverb Models
18
ROOM Control Changes
Parameter Control Change # Values
TIME 21 0 – 127
PRE-DELAY 22 0 – 127
COLOR 23 0 – 127
MOD 24 0 – 127
MIX 25 0 - 127
HPF 46 0 - 127
MOD RATE 47 0 - 127
SIZE 48 0 - 127
L DECAY 49 0 - 127
M DECAY 50 0 - 127
H DECAY 51 0 - 127
X-MODE 13 0 - 127
When a parameter range is not linear its values are equally divided among the 128 steps of a Control Change
value.

AmpliTube X-SPACE
Reverb Models
19
CHAMBER
This model offers the typical chamber sound found in many professional recording studios and provides a highly
reflected and bright tail that’s perfect for aggressive reverb tones. Its time range goes from 0.6 to 3 seconds like
the hall model, but the chamber has way more character and vibe.
Parameters
• TIME: controls the reverb tail length.
From 0.6 s to 3 s.
• PRE-DELAY: controls the pre-delay amount.
From 0 ms to 1000 ms.
• COLOR: controls the frequency response of the reverb. At minimum the reverb gets darker, at maximum
the reverb gets brighter. Set in the middle the reverb is flat.
From -10 to +10.
• MOD: controls the amount of modulation of the reverb.
From 0% to 100%.
• MIX: controls the balance of dry and wet signal. At 0% the signal is fully dry, while at 100% the signal is
fully wet. At around 85% the dry and wet signal have the same level.
From 0% to 100%.
• HPF: controls the cut-off frequency of the high-pass filter.
From 22 Hz to 1000 Hz.
• MOD RATE: controls the rate of the reverb modulation.
From 0.1 Hz to 7 Hz.
• SIZE: controls the dimension of the ambience from which the reverb is generated.
From 50% to 150%.
• L DECAY: controls the low-frequency band decay.
From -10 to 10.
• M DECAY: controls the mid-frequency band decay.
From -10 to 10.
• H DECAY: controls the high-frequency band decay.
From -10 to 10.
• X-MODE: engages the most possible tail length.
• ON or OFF.

AmpliTube X-SPACE
Reverb Models
20
CHAMBER Control Changes
Parameter Control Change # Values
TIME 21 0 – 127
PRE-DELAY 22 0 – 127
COLOR 23 0 – 127
MOD 24 0 – 127
MIX 25 0 - 127
HPF 46 0 - 127
MOD RATE 47 0 - 127
SIZE 48 0 - 127
L DECAY 49 0 - 127
M DECAY 50 0 - 127
H DECAY 51 0 - 127
X-MODE 13 0 - 127
When a parameter range is not linear its values are equally divided among the 128 steps of a Control Change
value.
Other manuals for AmpliTube X-SPACE
1
Table of contents
Other IK Multimedia Music Pedal manuals

IK Multimedia
IK Multimedia AmpliTube X-TIME User manual

IK Multimedia
IK Multimedia AmpliTube X-VIBE User manual

IK Multimedia
IK Multimedia irig pads User manual

IK Multimedia
IK Multimedia iRig Stomp I/O User manual

IK Multimedia
IK Multimedia AmpliTube X-SPACE User manual

IK Multimedia
IK Multimedia AXE I/O SOLO User manual

IK Multimedia
IK Multimedia Z-TONE DI User manual

IK Multimedia
IK Multimedia AmpliTube X-TIME User manual

IK Multimedia
IK Multimedia irig 2 User manual

IK Multimedia
IK Multimedia StealthPedal CS User manual