DANSK 10
1. Kontrollér vandtilslutningen
Kontroller, at opvaskemaskinen er koblet til vandforsyningen,
og at hanen er åben.
2. Tænd for opvaskemaskinen
Åbn lågen, og tryk på TÆND/SLUK-knappen.
3. Sæt service i kurvene (se FYLDNING AF KURVENE)
4. Påfyldning af opvaskemiddel
(se PÅFYLDNING AF OPVASKEMIDDEL).
5. Vælg program og tilpas cyklussen
Vælg det bedst egnede program afhængig af servicet og
tilsmudsningsgraden (se PROGRAMBESKRIVELSEN) ved at
trykke på knappen
ENGLISH
7
Control panel
Product description
1
2
3
4
5
6
10
7
11
9
8
First use
ADVICE REGARDING THE FIRST TIME USE
FILLING THE SALT RESERVOIR
(see PRODUCT DESCRIPTION)
SALT REFILL indicator light
1 2 3 4 5 6 7 8 9 10 11
3sec
h
.
Vælg de ønskede indstillinger (se FUNKTIONER).
6. Start
Start vaskecyklussen ved at trykke på knappen START/Pause
(lysdioden skifter fra blink til tændt) og lukke lågen indenfor
4 sekunder. Der lyder ét enkelt bip, når program starter. Hvis
lågen ikke lukkes indenfor 4 sekunder, høres der en lydalarm.
I dette tilfælde skal lågen åbnes, knappen START/Pause
trykkes og lågen lukkes igen indenfor 4 sekunder.
7. Afsluttet opvaskeprogram
Når opvaskeprogrammet slutter, lyder en biplyd, og
vaskeprogrammet blinker på displayet. Åbn lågen, og sluk for
maskinen ved at trykke på knappen TÆND/SLUK.
Vent nogle minutter, før servicet tages ud – det er meget
varmt. Tøm kurvene. Begynd med den nederste.
Maskinen slukkes automatisk, når den har været inaktiv
i en vis periode, for at minimere strømforbruget. Hvis
servicet kun er let snavset eller er skyllet af, før det sættes
i opvaskemaskinen, skal mængden af opvaskemiddel
reduceres.
Æændring af et igangværende program
Hvis der er valgt et forkert program, kan det ændres, forudsat at
det lige er startet: Åbn lågen, tryk og hold knappen TÆND/SLUK
trykket. Maskinen vil slukke.
Tænd for maskinen igen med knappen TÆND/SLUK, og
vælg en ny vaskecyklus og de ønskede indstillinger; Start
opvaskeprogrammet ved at trykke på knappen START/Pause og
lukke lågen inden for 4 sekunder.
Isætning af ekstra service
Åbn lågen, uden at slukke for maskinen (lysdioden START/Pause
begynder at blinke) (vær opmærksom på den VARME damp!) og
sæt servicet i opvaskemaskinen. Tryk på knappen START/Pause
og luk lågen indenfor 4 sekunder. Programmet genstartes fra
det punkt, det blev afbrudt i.
Hændelige afbrydelser
Hvis døren åbnes under et opvaskeprogram eller i tilfælde af
en strømafbrydelse, stopper programmet. Tryk på knappen
START/Pause og luk lågen indenfor 4 sekunder. Programmet
genstartes fra det punkt, det blev afbrudt i.
Daglig brug
EN
11
OPTIONS AND FUNCTIONS
OPTIONS can be selected directly by pressing the corresponding button (see CONTROL PANEL).
If an option is not compatible with the selected program see PROGRAMS TABLE, the corresponding LED ashes rapidly 3 times
and beeps will sound. The option will not be enabled.
TABLET (Tab)
This setting allows you to optimize the performance of
the program according to the type of detergent used.
Press the START/PAUSE button for 3 seconds (the
corresponding symbol will light up) if you use combined
detergents in tablet form (rinse aid, salt and detergent in
1 dose).
If you use powder or liquid detergent, this option
should be off.
NaturalDry
NaturalDry is a convection drying system which automatically
opens the door during/after drying phase to ensure exceptional
drying performance every day. Door opens at the temperature
that is safe to your kitchen furniture, thus door will not be opened
when the option of SHORT TIME is on.
As additional steam protection, special designed protection foil is
added together with the dishwasher. To see how to mount protec-
tion foil please refer to (INSTALLATION GUIDE).
NaturalDry functionality could be disabled by the user as follows:
1.Go to the Dishwasher software menu pressing and holding
button (6 sec).
2.You are currently in Light Control Menu (please refer to
OPERATION INDICATOR description), if you don’t want to
change anything please press and hold button (until one of
the two letters appears on the display)
3.You switched to NaturalDry Control Menu, you could change
status of NaturalDry functionality by pressing button:
E– enabled d– disabled
To conrm the change and exit from the Control Menu please
press and hold button (3 sec).
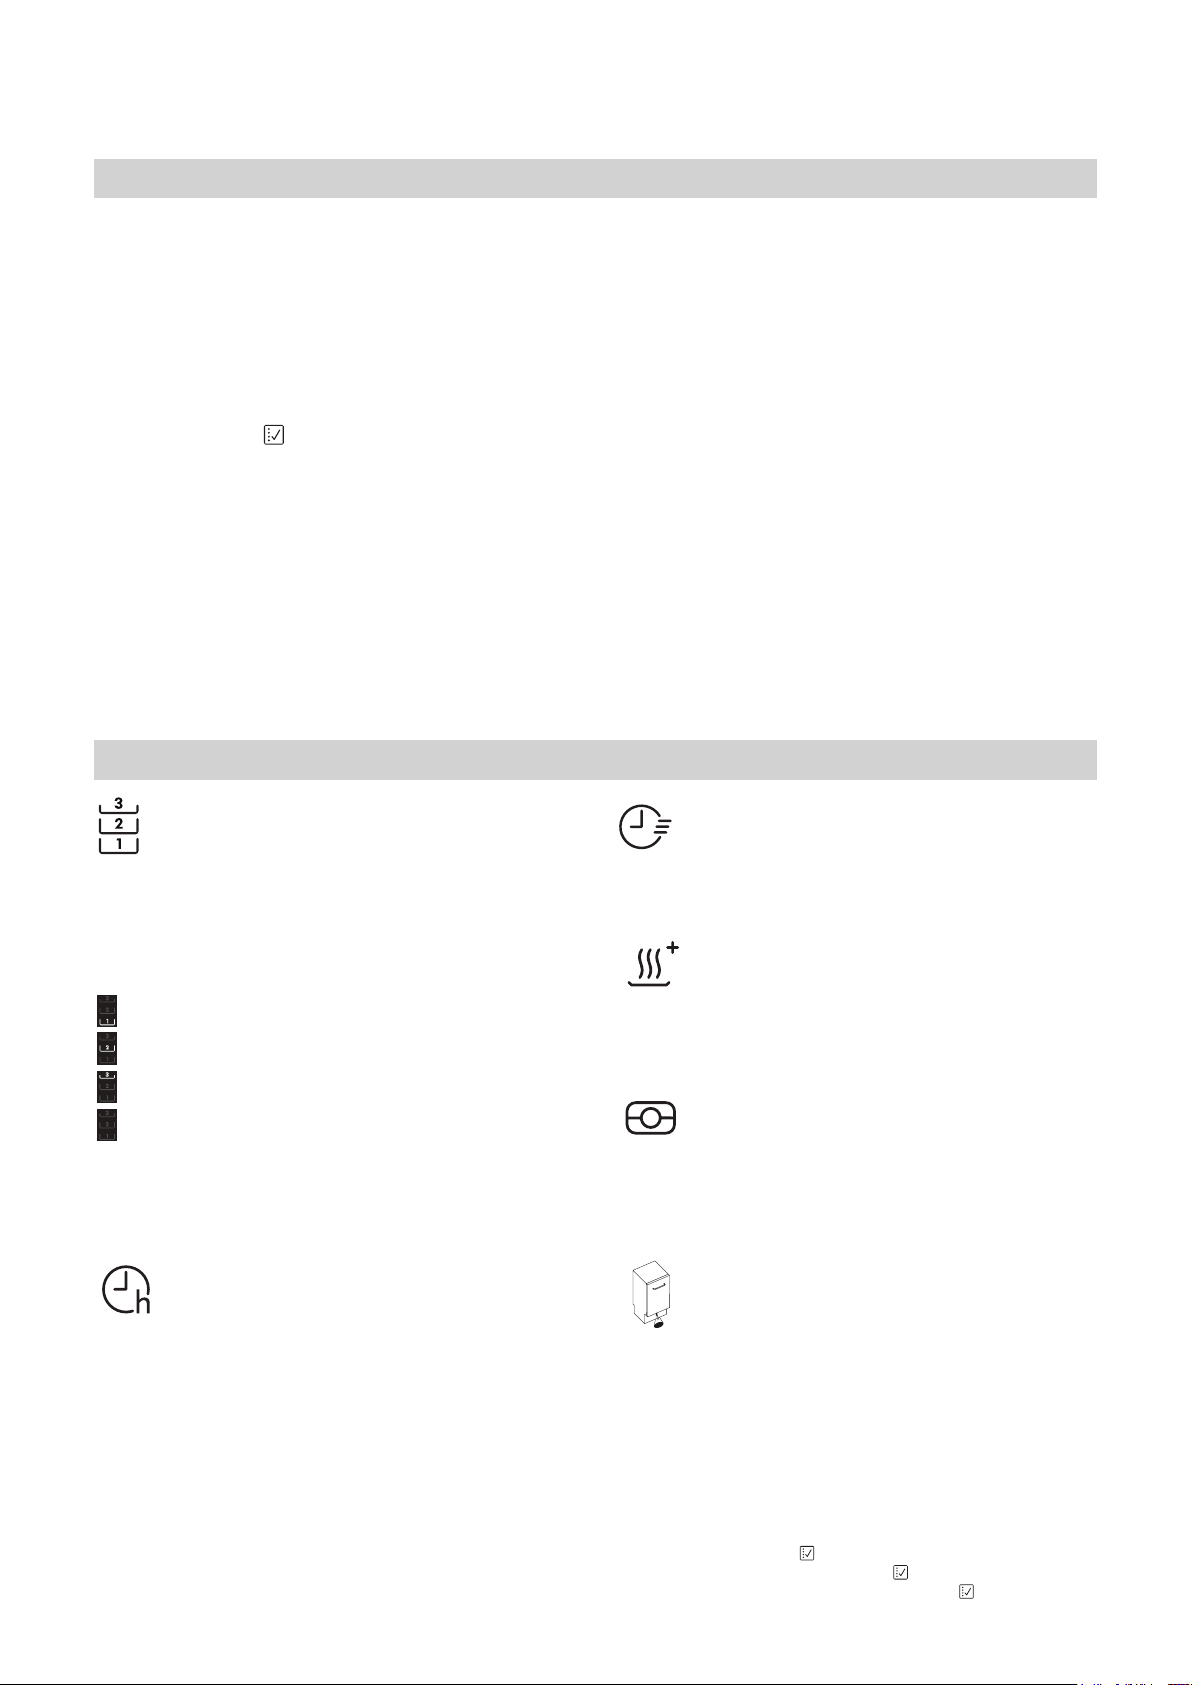
DELAY
The start time of the program may be delayed for a period
of time between 1and 12 hours.
1.Press the DELAY button: the corresponding «h» symbol
appears on the display; each time you press the button,
the time (1h, 2h, etc. up to max. 12h) from the start of
the selected wash cycle will be increased.
2.Select the wash program, press the START/PAUSE
button and within 4 seconds close the door: the timer
will begin counting down.
3.Once this time has elapsed, the indicator light «h»
switches off and the wash cycle begins.
To adjust the delay time and select a shorter period of time,
press the DELAY button. To cancel it, press the button
repeatedly until the selected delayed start indicator light
«h» switches off.
The DELAY function cannot be set once a wash cycle
has been started.
FLEXI WASH
If there are not many dishes to be washed, a half loading
may be used in order to save water, electricity and
detergent.
Select the program and then press the FLEXI WASH button:
the symbol of the chosen rack will appear on the display.
By default the appliance washes dishes in all racks.
To wash only the specic rack, press this button repeatedly:
shown on the display (only lower rack)
shown on the display (only upper rack)
shown on the display (only cutlery rack)
shown on the display (option is OFF and the appliance will
wash dishes in all racks).
Remember to load the upper or lower rack only, and to
reduce the amount of detergent accordingly.
If upper rack is removed, please apply detergent
directly to tub instead of detergent dispenser.
SHORT TIME
This option can be used to reduce the duration of the main
programs while maintaining the same washing and drying
performance levels.
After selecting the program, press the SHORT TIME button
and the indicator light will switch on. To deselect the option,
press the same button again.
EXTRA DRY
To improve the drying of the dishes, after selecting the
program, press the EXTRA DRY button and the indicator
light comes on.
A higher temperature during the nal rinse and an extended
drying phase allow for improving drying. To deselect the
option, press the same button again. The EXTRA DRY
option results in the lengthening of the wash cycle.
OPERATION INDICATOR
A LED light projected on the oor indicates that the
dishwasher is working. One of the following operating
modes can be selected:
a) Disabled function.
b) When the cycle starts the light goes on for few seconds,
stays off during the cycle and ashes at the end of the
cycle.
c) The light stays on during the cycle and ashes at the
end of the cycle (default mode).
If the delayed start was set, the light goes on either for the
rst few seconds or the entire duration of the countdown,
based on whether mode b) or c) was set.
The light goes off every time the door is opened. To select
the mode you prefer, switch on the machine, hold down
button Puntil one of the three letters appears on the display,
press button Puntil you reach the desired letter (or mode),
hold down button P to conrm the selection.
Note: If NaturalDry is active and it opens the door, then
Operation Indicator will not ash at the end of cycle.
FLEKSIBEL VASK
Hvis der kun skal vaskes en lille mængde service,
kan maskinen køres på programmet for halvt fyldt
maskine, for at spare vand, strøm og opvaskemiddel.
Vælg programmet, og tryk herefter på knappen
FLEXIBLE WASH: Den valgte kurvs symbol vil tænde på
displayet.
Som default vasker maskinen service i alle kurvene.
Tryk ere gange på denne knap, for kun at vaske i en
bestemt kurv:
EN
11
OPTIONS AND FUNCTIONS
OPTIONS can be selected directly by pressing the corresponding button (see CONTROL PANEL).
If an option is not compatible with the selected program see PROGRAMS TABLE, the corresponding LED ashes rapidly 3 times
and beeps will sound. The option will not be enabled.
TABLET (Tab)
This setting allows you to optimize the performance of
the program according to the type of detergent used.
Press the START/PAUSE button for 3 seconds (the
corresponding symbol will light up) if you use combined
detergents in tablet form (rinse aid, salt and detergent in
1 dose).
If you use powder or liquid detergent, this option
should be off.
NaturalDry
NaturalDry is a convection drying system which automatically
opens the door during/after drying phase to ensure exceptional
drying performance every day. Door opens at the temperature
that is safe to your kitchen furniture, thus door will not be opened
when the option of SHORT TIME is on.
As additional steam protection, special designed protection foil is
added together with the dishwasher. To see how to mount protec-
tion foil please refer to (INSTALLATION GUIDE).
NaturalDry functionality could be disabled by the user as follows:
1.Go to the Dishwasher software menu pressing and holding
button (6 sec).
2.You are currently in Light Control Menu (please refer to
OPERATION INDICATOR description), if you don’t want to
change anything please press and hold button (until one of
the two letters appears on the display)
3.You switched to NaturalDry Control Menu, you could change
status of NaturalDry functionality by pressing button:
E– enabled d– disabled
To conrm the change and exit from the Control Menu please
press and hold button (3 sec).
DELAY
The start time of the program may be delayed for a period
of time between 1and 12 hours.
1.Press the DELAY button: the corresponding «h» symbol
appears on the display; each time you press the button,
the time (1h, 2h, etc. up to max. 12h) from the start of
the selected wash cycle will be increased.
2.Select the wash program, press the START/PAUSE
button and within 4 seconds close the door: the timer
will begin counting down.
3.Once this time has elapsed, the indicator light «h»
switches off and the wash cycle begins.
To adjust the delay time and select a shorter period of time,
press the DELAY button. To cancel it, press the button
repeatedly until the selected delayed start indicator light
«h» switches off.
The DELAY function cannot be set once a wash cycle
has been started.
FLEXI WASH
If there are not many dishes to be washed, a half loading
may be used in order to save water, electricity and
detergent.
Select the program and then press the FLEXI WASH button:
the symbol of the chosen rack will appear on the display.
By default the appliance washes dishes in all racks.
To wash only the specic rack, press this button repeatedly:
shown on the display (only lower rack)
shown on the display (only upper rack)
shown on the display (only cutlery rack)
shown on the display (option is OFF and the appliance will
wash dishes in all racks).
Remember to load the upper or lower rack only, and to
reduce the amount of detergent accordingly.
If upper rack is removed, please apply detergent
directly to tub instead of detergent dispenser.
SHORT TIME
This option can be used to reduce the duration of the main
programs while maintaining the same washing and drying
performance levels.
After selecting the program, press the SHORT TIME button
and the indicator light will switch on. To deselect the option,
press the same button again.
EXTRA DRY
To improve the drying of the dishes, after selecting the
program, press the EXTRA DRY button and the indicator
light comes on.
A higher temperature during the nal rinse and an extended
drying phase allow for improving drying. To deselect the
option, press the same button again. The EXTRA DRY
option results in the lengthening of the wash cycle.
OPERATION INDICATOR
A LED light projected on the oor indicates that the
dishwasher is working. One of the following operating
modes can be selected:
a) Disabled function.
b) When the cycle starts the light goes on for few seconds,
stays off during the cycle and ashes at the end of the
cycle.
c) The light stays on during the cycle and ashes at the
end of the cycle (default mode).
If the delayed start was set, the light goes on either for the
rst few seconds or the entire duration of the countdown,
based on whether mode b) or c) was set.
The light goes off every time the door is opened. To select
the mode you prefer, switch on the machine, hold down
button Puntil one of the three letters appears on the display,
press button Puntil you reach the desired letter (or mode),
hold down button P to conrm the selection.
Note: If NaturalDry is active and it opens the door, then
Operation Indicator will not ash at the end of cycle.
vist på displayet (kun nedre kurv)
vist på displayet (kun øvre kurv)
vist på displayet (kun bestikkurv)
vist på displayet (ekstrafunktionen er slukket, og
maskinens vasker servicet i alle kurvene).
Husk kun at stille service i den øverste eller nederste
kurv og at reducere mængden af opvaskemiddel
tilsvarende. Hvis den øverste kurv fjernes, skal man
kun fylde opvaskemiddel direkte i maskinen i stedet
for doseringsrummet.
9
ENGLISH
1.Press the DELAY button: the corresponding «h» symbol
appears on the display; each time you press the button,
the time (1h, 2h, etc. up to max. 12h) from the start of
the selected wash cycle will be increased.
2.Select the wash program, press the START/PAUSE
button and within 4 seconds close the door: the timer
will begin counting down.
3.Once this time has elapsed, the indicator light «h»
switches off and the wash cycle begins.
To adjust the delay time and select a shorter period of time,
press the DELAY button. To cancel it, press the button
repeatedly until the selected delayed start indicator light
«h» switches off.
The DELAY function cannot be set once a wash cycle
has been started.
NaturalDry
Door opening system NaturalDry is a convection drying system
which automatically opens the door during/after drying phase to
ensure exceptional drying performance every day. Door opens at
the temperature that is safe to your kitchen furniture.
As additional steam protection, special designed protection foil is
added together with the dishwasher. To see how to mount protec-
tion foil please refer to (INSTALLATION GUIDE).
NaturalDry functionality could be disabled by the user as follows:
1.Go to the Dishwasher software menu pressing and holding
button (6 sec).
2.You switched to NaturalDry Control Menu, you could change
status of NaturalDry functionality by pressing button:
E– enabled d– disabled
To conrm the change and exit from the Control Menu please
press and hold button (3 sec).
DELAY
The start time of the program may be delayed for a period
of time between 1and 12 hours.
Program
Drying
phase
Natural
Dry
Available
options *)
Duration of
wash pro-
gram
(h:min)**)
Water
consumption
(litres/cycle)
Energy
consumption
(kWh/cycle)
50° 2:45 12.0 0.92
1 Eco
2 Conventional
wash and dry 55° 2:00 15.0 1.35
3Intensive 65° - 2:30 15.0 1.50
4Fast 50° -- 0:55 11.5 1.10
5Sanitizing 65° - 1:40 11.5 1.30
6Pre-Wash
-
-- 0:10 4.5 0.01
7Self-Clean 65° --0:50 8.0 0.80
ECO program data is measured under laboratory conditions according to European Standard EN 60436:2019.
Note for Test Laboratories: For information on comparative EN testing conditions, please send an email to the following
Pre-treatment of the dishes is not needed before any of the programs.
*) Not all options can be used simultaneously.
**) Values given for programes other than the eco program are indicative only. The actual time may vary depending on many
factors such as temperature and pressure of the incoming water, room temperature, amount of detergent, quantity and type of
load, load balancing, additional selected options and sensor calibration.
Standby consumption: Left-on mode consumption: 5 W - Off mode consumption: 0.5 W
PROGRAMS DESCRIPTION
UDSKUDT START
Programmets starttidspunkt kan udskydes med
mellem 1 og 12 timer.
1. Tryk på knappen Udskudt start: Det tilsvarende
symbol «h» vises på displayet. Hver gang du trykker på
knappen, forlænges tiden (1t, 2t osv. op til maks. 12t),
til det valgte program starter.
2. Vælg vaskeprogrammet, tryk på knappen START/
PAUSE, og luk lågen inden for 4 sekunder: Timeren
betynder at tælle ned.
3. Når den indstillede tid er gået, slukkes indikatorens
lys «h», og programmet starter. Tiden til start kan
indstilles, og en kortere periode kan vælges, ved at
trykke på knappen Udskudt start. Tryk ere gange på
knappen, indtil kontrollampen for udskudt start «h»
slukkes, for at annullere.
Funktionen Udskudt start kan ikke indstilles, efter
et opvaskeprogram er startet.
EN
11
OPTIONS AND FUNCTIONS
OPTIONS can be selected directly by pressing the corresponding button (see CONTROL PANEL).
If an option is not compatible with the selected program see PROGRAMS TABLE, the corresponding LED ashes rapidly 3 times
and beeps will sound. The option will not be enabled.
TABLET (Tab)
This setting allows you to optimize the performance of
the program according to the type of detergent used.
Press the START/PAUSE button for 3 seconds (the
corresponding symbol will light up) if you use combined
detergents in tablet form (rinse aid, salt and detergent in
1 dose).
If you use powder or liquid detergent, this option
should be off.
NaturalDry
NaturalDry is a convection drying system which automatically
opens the door during/after drying phase to ensure exceptional
drying performance every day. Door opens at the temperature
that is safe to your kitchen furniture, thus door will not be opened
when the option of SHORT TIME is on.
As additional steam protection, special designed protection foil is
added together with the dishwasher. To see how to mount protec-
tion foil please refer to (INSTALLATION GUIDE).
NaturalDry functionality could be disabled by the user as follows:
1.Go to the Dishwasher software menu pressing and holding
button (6 sec).
2.You are currently in Light Control Menu (please refer to
OPERATION INDICATOR description), if you don’t want to
change anything please press and hold button (until one of
the two letters appears on the display)
3.You switched to NaturalDry Control Menu, you could change
status of NaturalDry functionality by pressing button:
E– enabled d– disabled
To conrm the change and exit from the Control Menu please
press and hold button (3 sec).
DELAY
The start time of the program may be delayed for a period
of time between 1and 12 hours.
1.Press the DELAY button: the corresponding «h» symbol
appears on the display; each time you press the button,
the time (1h, 2h, etc. up to max. 12h) from the start of
the selected wash cycle will be increased.
2.Select the wash program, press the START/PAUSE
button and within 4 seconds close the door: the timer
will begin counting down.
3.Once this time has elapsed, the indicator light «h»
switches off and the wash cycle begins.
To adjust the delay time and select a shorter period of time,
press the DELAY button. To cancel it, press the button
repeatedly until the selected delayed start indicator light
«h» switches off.
The DELAY function cannot be set once a wash cycle
has been started.
FLEXI WASH
If there are not many dishes to be washed, a half loading
may be used in order to save water, electricity and
detergent.
Select the program and then press the FLEXI WASH button:
the symbol of the chosen rack will appear on the display.
By default the appliance washes dishes in all racks.
To wash only the specic rack, press this button repeatedly:
shown on the display (only lower rack)
shown on the display (only upper rack)
shown on the display (only cutlery rack)
shown on the display (option is OFF and the appliance will
wash dishes in all racks).
Remember to load the upper or lower rack only, and to
reduce the amount of detergent accordingly.
If upper rack is removed, please apply detergent
directly to tub instead of detergent dispenser.
SHORT TIME
This option can be used to reduce the duration of the main
programs while maintaining the same washing and drying
performance levels.
After selecting the program, press the SHORT TIME button
and the indicator light will switch on. To deselect the option,
press the same button again.
EXTRA DRY
To improve the drying of the dishes, after selecting the
program, press the EXTRA DRY button and the indicator
light comes on.
A higher temperature during the nal rinse and an extended
drying phase allow for improving drying. To deselect the
option, press the same button again. The EXTRA DRY
option results in the lengthening of the wash cycle.
OPERATION INDICATOR
A LED light projected on the oor indicates that the
dishwasher is working. One of the following operating
modes can be selected:
a) Disabled function.
b) When the cycle starts the light goes on for few seconds,
stays off during the cycle and ashes at the end of the
cycle.
c) The light stays on during the cycle and ashes at the
end of the cycle (default mode).
If the delayed start was set, the light goes on either for the
rst few seconds or the entire duration of the countdown,
based on whether mode b) or c) was set.
The light goes off every time the door is opened. To select
the mode you prefer, switch on the machine, hold down
button Puntil one of the three letters appears on the display,
press button Puntil you reach the desired letter (or mode),
hold down button P to conrm the selection.
Note: If NaturalDry is active and it opens the door, then
Operation Indicator will not ash at the end of cycle.
SHORT TIME (KORT TID)
Denne indstilling kan bruges til at reducere
hovedprogrammernes varighed, samtidig med at vaske-
og tørreresultatet bevares. Vælg et program, og tryk
derefter på knappen SHORT TIME, hvorefter kontrollampen
tænder. Tryk på den samme knap igen for at annullere
indstillingen.
EN
11
OPTIONS AND FUNCTIONS
OPTIONS can be selected directly by pressing the corresponding button (see CONTROL PANEL).
If an option is not compatible with the selected program see PROGRAMS TABLE, the corresponding LED ashes rapidly 3 times
and beeps will sound. The option will not be enabled.
TABLET (Tab)
This setting allows you to optimize the performance of
the program according to the type of detergent used.
Press the START/PAUSE button for 3 seconds (the
corresponding symbol will light up) if you use combined
detergents in tablet form (rinse aid, salt and detergent in
1 dose).
If you use powder or liquid detergent, this option
should be off.
NaturalDry
NaturalDry is a convection drying system which automatically
opens the door during/after drying phase to ensure exceptional
drying performance every day. Door opens at the temperature
that is safe to your kitchen furniture, thus door will not be opened
when the option of SHORT TIME is on.
As additional steam protection, special designed protection foil is
added together with the dishwasher. To see how to mount protec-
tion foil please refer to (INSTALLATION GUIDE).
NaturalDry functionality could be disabled by the user as follows:
1.Go to the Dishwasher software menu pressing and holding
button (6 sec).
2.You are currently in Light Control Menu (please refer to
OPERATION INDICATOR description), if you don’t want to
change anything please press and hold button (until one of
the two letters appears on the display)
3.You switched to NaturalDry Control Menu, you could change
status of NaturalDry functionality by pressing button:
E– enabled d– disabled
To conrm the change and exit from the Control Menu please
press and hold button (3 sec).
DELAY
The start time of the program may be delayed for a period
of time between 1and 12 hours.
1.Press the DELAY button: the corresponding «h» symbol
appears on the display; each time you press the button,
the time (1h, 2h, etc. up to max. 12h) from the start of
the selected wash cycle will be increased.
2.Select the wash program, press the START/PAUSE
button and within 4 seconds close the door: the timer
will begin counting down.
3.Once this time has elapsed, the indicator light «h»
switches off and the wash cycle begins.
To adjust the delay time and select a shorter period of time,
press the DELAY button. To cancel it, press the button
repeatedly until the selected delayed start indicator light
«h» switches off.
The DELAY function cannot be set once a wash cycle
has been started.
FLEXI WASH
If there are not many dishes to be washed, a half loading
may be used in order to save water, electricity and
detergent.
Select the program and then press the FLEXI WASH button:
the symbol of the chosen rack will appear on the display.
By default the appliance washes dishes in all racks.
To wash only the specic rack, press this button repeatedly:
shown on the display (only lower rack)
shown on the display (only upper rack)
shown on the display (only cutlery rack)
shown on the display (option is OFF and the appliance will
wash dishes in all racks).
Remember to load the upper or lower rack only, and to
reduce the amount of detergent accordingly.
If upper rack is removed, please apply detergent
directly to tub instead of detergent dispenser.
SHORT TIME
This option can be used to reduce the duration of the main
programs while maintaining the same washing and drying
performance levels.
After selecting the program, press the SHORT TIME button
and the indicator light will switch on. To deselect the option,
press the same button again.
EXTRA DRY
To improve the drying of the dishes, after selecting the
program, press the EXTRA DRY button and the indicator
light comes on.
A higher temperature during the nal rinse and an extended
drying phase allow for improving drying. To deselect the
option, press the same button again. The EXTRA DRY
option results in the lengthening of the wash cycle.
OPERATION INDICATOR
A LED light projected on the oor indicates that the
dishwasher is working. One of the following operating
modes can be selected:
a) Disabled function.
b) When the cycle starts the light goes on for few seconds,
stays off during the cycle and ashes at the end of the
cycle.
c) The light stays on during the cycle and ashes at the
end of the cycle (default mode).
If the delayed start was set, the light goes on either for the
rst few seconds or the entire duration of the countdown,
based on whether mode b) or c) was set.
The light goes off every time the door is opened. To select
the mode you prefer, switch on the machine, hold down
button Puntil one of the three letters appears on the display,
press button Puntil you reach the desired letter (or mode),
hold down button P to conrm the selection.
Note: If NaturalDry is active and it opens the door, then
Operation Indicator will not ash at the end of cycle.
EXTRA DRY (EKSTRA TØR)
Tørringen af servicet forbedres ved først at vælge et
program og derefter trykke på knappen EXTRA DRY.
Herefter tændes indikatorlampen. En højere temperatur
under sidste skyl og længere tørringsfase sikrer bedre
tørring. Tryk på den samme knap igen for at annullere
indstillingen. Indstillingen EXTRA DRY medfører, at
vaskeprogrammet forlænges.
Check that the dishwasher is connected to the water supply
and that the tap is open.
Open the door and press the ON/OFF button.
(see LOADING THE RACKS)
(see PROGRAMS TABLE).
Select the most appropriate program in accordance with the
type of crockery and its soiling level (see PROGRAMS
DESCRIPTION) by pressing the button.
Select the desired options (see OPTIONS AND FUNCTIONS).
Start the wash cycle by pressing START/Pause button (led
is lit) and closing the door within 4 sec. When the program
starts you hear a single beep. If the door was not closed within
4sec., the alarm sound will be played. In this case, open the
door, press START/Pause button and close the door again
within 4 sec.
The end of the wash cycle is indicated by beeps and by the
ashing of the wash cycle number on the display. Open the
door and switch off the appliance by pressing the ON/OFF
button.
Wait for a few minutes before removing the crockery - to avoid
burns. Unload the racks, beginning with the lower one.
If a wrong program was selected, it is possible to change it, pro-
vided that it has only just begun: open the door, press and hold
the button, the machine will switch off.
Switch the machine back on using the button and select
the new wash cycle and any desired options; Start the wash cycle
by pressing button and closing the door within 4 sec.
Without switching off the machine, open the door (
led starts blinking) () and place the
crockery inside the dishwasher. Press the button
and close the door within 4 sec., the cycle will resume from the
point at which it was interrupted.
If the door is opened during the wash cycle, or if there is a power
cut, the cycle stops. Press the button and close
the door within 4 sec., the cycle will resume from the point at
which it was interrupted.
DAILY USE
Functions
- Normally soiled crockery. Standard program, the most efficient in terms of its combined energy and water
consumption.
- Mixed soil. For normally soiled dishes with dried food residues.
- Program recommended for heavily soiled crockery, especially suitable for pans and saucepans (not to be used
for delicate items).
- Use to refresh crockery planned to be washed later. No detergent to be used with this program.
- Normally soiled crockery. Everyday cycle, that ensures optimal cleaning performance in shorter time.
- Normally or heavily soiled crockery, with additional antibacterial wash. Can be used to perform
maintenance of the dishwasher.
- Program to be used to perform maintenance of the dishwasher. It cleans the interior of the appliance
using hot water.
OPTIONS can be selected directly by pressing the corresponding button (see CONTROL PANEL).
see PROGRAMS TABLE
If there are not many dishes to be washed, a half load
cycle may be used in order to save water, electricity and
detergent. Select the program and press the HALF LOAD
button: the indicator light will light up. Press the HALF
LOAD button to deselect this option.
To adjust the delay time and select a shorter period of time,
press the DELAY button. To cancel it, press the button
repeatedly until the selected delayed start indicator light
«h» switches off.
This setting allows you to optimize the performance of
the program according to the type of detergent used.
Press the START/PAUSE button for 3 seconds (the
corresponding symbol will light up) if you use combined
detergents in tablet form (rinse aid, salt and detergent in
1 dose).
1.Go to the Dishwasher software menu pressing and holding
button (6 sec).
2.You switched to NaturalDry Control Menu, you could change
status of NaturalDry functionality by pressing button:
– enabled – disabled
To conrm the change and exit from the Control Menu please
press and hold button (3 sec).
TABLET (Tab)
Med denne indstilling kan du optimere programmets
ydeevne i forhold til det opvaskemiddel, der anvendes.
Tryk på knappen START/PAUSE i 3 sekunder (det tilsvarende
symbol tændes), hvis du bruger opvasketabs, der
kombinerer afspændingsmiddel, salt og opvaskemiddel.
Hvis du bruger opvaskemiddel i pulver- eller
væskeform skal denne valgmulighed fravælges.
EN
11
OPTIONS AND FUNCTIONS
OPTIONS can be selected directly by pressing the corresponding button (see CONTROL PANEL).
If an option is not compatible with the selected program see PROGRAMS TABLE, the corresponding LED ashes rapidly 3 times
and beeps will sound. The option will not be enabled.
TABLET (Tab)
This setting allows you to optimize the performance of
the program according to the type of detergent used.
Press the START/PAUSE button for 3 seconds (the
corresponding symbol will light up) if you use combined
detergents in tablet form (rinse aid, salt and detergent in
1 dose).
If you use powder or liquid detergent, this option
should be off.
NaturalDry
NaturalDry is a convection drying system which automatically
opens the door during/after drying phase to ensure exceptional
drying performance every day. Door opens at the temperature
that is safe to your kitchen furniture, thus door will not be opened
when the option of SHORT TIME is on.
As additional steam protection, special designed protection foil is
added together with the dishwasher. To see how to mount protec-
tion foil please refer to (INSTALLATION GUIDE).
NaturalDry functionality could be disabled by the user as follows:
1.Go to the Dishwasher software menu pressing and holding
button (6 sec).
2.You are currently in Light Control Menu (please refer to
OPERATION INDICATOR description), if you don’t want to
change anything please press and hold button (until one of
the two letters appears on the display)
3.You switched to NaturalDry Control Menu, you could change
status of NaturalDry functionality by pressing button:
E– enabled d– disabled
To conrm the change and exit from the Control Menu please
press and hold button (3 sec).
DELAY
The start time of the program may be delayed for a period
of time between 1and 12 hours.
1.Press the DELAY button: the corresponding «h» symbol
appears on the display; each time you press the button,
the time (1h, 2h, etc. up to max. 12h) from the start of
the selected wash cycle will be increased.
2.Select the wash program, press the START/PAUSE
button and within 4 seconds close the door: the timer
will begin counting down.
3.Once this time has elapsed, the indicator light «h»
switches off and the wash cycle begins.
To adjust the delay time and select a shorter period of time,
press the DELAY button. To cancel it, press the button
repeatedly until the selected delayed start indicator light
«h» switches off.
The DELAY function cannot be set once a wash cycle
has been started.
FLEXI WASH
If there are not many dishes to be washed, a half loading
may be used in order to save water, electricity and
detergent.
Select the program and then press the FLEXI WASH button:
the symbol of the chosen rack will appear on the display.
By default the appliance washes dishes in all racks.
To wash only the specic rack, press this button repeatedly:
shown on the display (only lower rack)
shown on the display (only upper rack)
shown on the display (only cutlery rack)
shown on the display (option is OFF and the appliance will
wash dishes in all racks).
Remember to load the upper or lower rack only, and to
reduce the amount of detergent accordingly.
If upper rack is removed, please apply detergent
directly to tub instead of detergent dispenser.
SHORT TIME
This option can be used to reduce the duration of the main
programs while maintaining the same washing and drying
performance levels.
After selecting the program, press the SHORT TIME button
and the indicator light will switch on. To deselect the option,
press the same button again.
EXTRA DRY
To improve the drying of the dishes, after selecting the
program, press the EXTRA DRY button and the indicator
light comes on.
A higher temperature during the nal rinse and an extended
drying phase allow for improving drying. To deselect the
option, press the same button again. The EXTRA DRY
option results in the lengthening of the wash cycle.
OPERATION INDICATOR
A LED light projected on the oor indicates that the
dishwasher is working. One of the following operating
modes can be selected:
a) Disabled function.
b) When the cycle starts the light goes on for few seconds,
stays off during the cycle and ashes at the end of the
cycle.
c) The light stays on during the cycle and ashes at the
end of the cycle (default mode).
If the delayed start was set, the light goes on either for the
rst few seconds or the entire duration of the countdown,
based on whether mode b) or c) was set.
The light goes off every time the door is opened. To select
the mode you prefer, switch on the machine, hold down
button Puntil one of the three letters appears on the display,
press button Puntil you reach the desired letter (or mode),
hold down button P to conrm the selection.
Note: If NaturalDry is active and it opens the door, then
Operation Indicator will not ash at the end of cycle.
FUNKTIONSINDIKATOR
En lysstråle på gulvet fra en lysdiode angiver at
opvaskemaskinen kører. En af følgende driftstilstande kan
vælges:
a) Deaktiveret funktion.
b)Når cyklussen starter tændes lampen i nogle få
sekunder, hvorefter den slukkes, mens cyklussen kører, og
blinker, når cyklussen er slut.
c) Lampen lyser, mens cyklussen kører, og blinker, når
cyklussen er slut (standardtilstand).
Hvis Udskudt start er valgt, tændes lampen enten i de
første sekunder eller under hele nedtællingen, afhængig
af om b) eller c) er valgt. Lyset slukkes, hver gang lågen
åbnes.
Vælg den ønskede tilstand ved at tænde for maskinen,
holde knappen
ENGLISH
8
Rinse aid makes dish DRYING easier. The rinse aid dispenser
should be lled when the
in the control panel is lit.
1. Open the dispenser by pressing and pulling up the tab on
the lid.
2. Carefully introduce the rinse aid as far as the maximum
(110 ml) reference notch of the lling space - avoid spilling it.
If this happens, clean the spill immediately with a dry cloth.
3. Press the lid down until you hear a click to close it.
A
B
If you are not completely satised with the drying results, you can
adjust the quantity of rinse aid used.
• Switch the dishwasher on using the ON/OFF button.
• Switch it off using the ON/OFF button.
• Press button three times - a beep will be heard.
• Switch it on using the ON/OFF button.
•
•
The current selection level number and rinse aid indicator light ash.
Press button to select the level of rinse aid quantity to be
supplied.
• Switch it off using the ON/OFF button.
Setting is complete!
If the rinse aid level is set to ZERO (ECO), no rinse aid will be
supplied. The LOW RINSE AID indicator light will not be lit if you
run out of rinse aid. A maximum of 5 levels can be set according to
the dishwasher model. The factory setting is specic to the model,
please follow instruction above to check this for your machine.
•If you see bluish streaks on the dishes, set a low number (1-2).
• If there are drops of water or limescale marks on the dishes,
set a high number (3-4).
To achieve the best washing and drying results, the combined
useof detergent, rinse aid liquid and rened salt is required.
We recommend using detergents that do not contain phosphates
or chlorine, as these products are harmful to the environment.
Good washing results also depend on the correct amount of
detergent being used.
Exceeding the stated amount does not result in a more effective
wash and increases environmental pollution.
The amount can be adjusted to the soil level. In the case of
normally soiled items, use approximately either 35g (powder
detergent) or 35ml (liquid detergent) and additional tea spoon of
detergent directly inside the tub. If tablets are used, one tablet
will be enough.
If the crockery is only lightly soiled or if it has been rinsed with
water before being placed in the dishwasher, reduce the amount
of detergent used accordingly (minimum 25 g/ml) e.g. skip the
powder/gel putted inside the tub.
1.
2.
When measuring out the detergent refer to the mentioned ear-
lier information to add the proper quantity. Inside the dispenser
there are indications to help the detergent dosing.
Remove detergent residues from the edges of the dispenser
and close the cover until it clicks.
3. Close the lid of the detergent dispenser by pulling it up until
the closing device is secured in place.
inde, til et af de tre bogstaver vises på
displayet, trykke på knappen
ENGLISH
8
Rinse aid makes dish DRYING easier. The rinse aid dispenser
should be lled when the
in the control panel is lit.
1. Open the dispenser by pressing and pulling up the tab on
the lid.
2. Carefully introduce the rinse aid as far as the maximum
(110 ml) reference notch of the lling space - avoid spilling it.
If this happens, clean the spill immediately with a dry cloth.
3. Press the lid down until you hear a click to close it.
A
B
If you are not completely satised with the drying results, you can
adjust the quantity of rinse aid used.
• Switch the dishwasher on using the ON/OFF button.
• Switch it off using the ON/OFF button.
• Press button three times - a beep will be heard.
• Switch it on using the ON/OFF button.
•
•
The current selection level number and rinse aid indicator light ash.
Press button to select the level of rinse aid quantity to be
supplied.
• Switch it off using the ON/OFF button.
Setting is complete!
If the rinse aid level is set to ZERO (ECO), no rinse aid will be
supplied. The LOW RINSE AID indicator light will not be lit if you
run out of rinse aid. A maximum of 5 levels can be set according to
the dishwasher model. The factory setting is specic to the model,
please follow instruction above to check this for your machine.
•If you see bluish streaks on the dishes, set a low number (1-2).
• If there are drops of water or limescale marks on the dishes,
set a high number (3-4).
To achieve the best washing and drying results, the combined
useof detergent, rinse aid liquid and rened salt is required.
We recommend using detergents that do not contain phosphates
or chlorine, as these products are harmful to the environment.
Good washing results also depend on the correct amount of
detergent being used.
Exceeding the stated amount does not result in a more effective
wash and increases environmental pollution.
The amount can be adjusted to the soil level. In the case of
normally soiled items, use approximately either 35g (powder
detergent) or 35ml (liquid detergent) and additional tea spoon of
detergent directly inside the tub. If tablets are used, one tablet
will be enough.
If the crockery is only lightly soiled or if it has been rinsed with
water before being placed in the dishwasher, reduce the amount
of detergent used accordingly (minimum 25 g/ml) e.g. skip the
powder/gel putted inside the tub.
1.
2.
When measuring out the detergent refer to the mentioned ear-
lier information to add the proper quantity. Inside the dispenser
there are indications to help the detergent dosing.
Remove detergent residues from the edges of the dispenser
and close the cover until it clicks.
3. Close the lid of the detergent dispenser by pulling it up until
the closing device is secured in place.
, til det ønskede bogstav
(eller tilstand) vises, og holde knappen
ENGLISH
8
Rinse aid makes dish DRYING easier. The rinse aid dispenser
should be lled when the
in the control panel is lit.
1. Open the dispenser by pressing and pulling up the tab on
the lid.
2. Carefully introduce the rinse aid as far as the maximum
(110 ml) reference notch of the lling space - avoid spilling it.
If this happens, clean the spill immediately with a dry cloth.
3. Press the lid down until you hear a click to close it.
A
B
If you are not completely satised with the drying results, you can
adjust the quantity of rinse aid used.
• Switch the dishwasher on using the ON/OFF button.
• Switch it off using the ON/OFF button.
• Press button three times - a beep will be heard.
• Switch it on using the ON/OFF button.
•
•
The current selection level number and rinse aid indicator light ash.
Press button to select the level of rinse aid quantity to be
supplied.
• Switch it off using the ON/OFF button.
Setting is complete!
If the rinse aid level is set to ZERO (ECO), no rinse aid will be
supplied. The LOW RINSE AID indicator light will not be lit if you
run out of rinse aid. A maximum of 5 levels can be set according to
the dishwasher model. The factory setting is specic to the model,
please follow instruction above to check this for your machine.
•If you see bluish streaks on the dishes, set a low number (1-2).
• If there are drops of water or limescale marks on the dishes,
set a high number (3-4).
To achieve the best washing and drying results, the combined
useof detergent, rinse aid liquid and rened salt is required.
We recommend using detergents that do not contain phosphates
or chlorine, as these products are harmful to the environment.
Good washing results also depend on the correct amount of
detergent being used.
Exceeding the stated amount does not result in a more effective
wash and increases environmental pollution.
The amount can be adjusted to the soil level. In the case of
normally soiled items, use approximately either 35g (powder
detergent) or 35ml (liquid detergent) and additional tea spoon of
detergent directly inside the tub. If tablets are used, one tablet
will be enough.
If the crockery is only lightly soiled or if it has been rinsed with
water before being placed in the dishwasher, reduce the amount
of detergent used accordingly (minimum 25 g/ml) e.g. skip the
powder/gel putted inside the tub.
1.
2.
When measuring out the detergent refer to the mentioned ear-
lier information to add the proper quantity. Inside the dispenser
there are indications to help the detergent dosing.
Remove detergent residues from the edges of the dispenser
and close the cover until it clicks.
3. Close the lid of the detergent dispenser by pulling it up until
the closing device is secured in place.
inde for at
bekræfte valget.
Funktioner