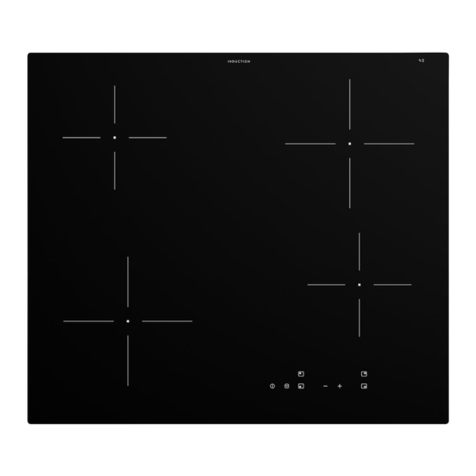
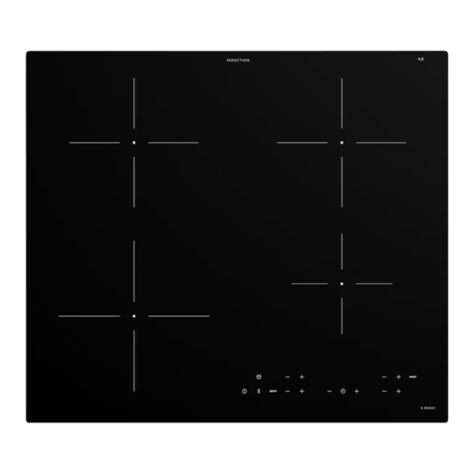
IKEA LAGAN User manual

LAGAN
Design and Quality
IKEA of Sweden
GB
TR
GR

ENGLISH 3
TÜRKÇE 16
ΕΛΛΗΝΙΚΑ 30

ENGLISH 3
Subject to change without notice.
Safety information
Before the installation and use of the appliance, carefully read
the supplied instructions. The manufacturer is not responsible
if an incorrect installation and use causes injuries and damage.
Always keep the instructions with the appliance for future
reference.
Children and vulnerable people safety
• This appliance can be used by children aged from 8 years
and above and persons with reduced physical, sensory or
mental capabilities or lack of experience and knowledge if
they have been given supervision or instruction concerning
use of the appliance in a safe way and understand the
hazards involved. Children shall not play with the appliance.
Cleaning and user maintenance shall not be made by
children without supervision.
• Children less than 8 years of age shall be kept away unless
continuously supervised.
• Do not let children play with the appliance.
• Keep all packaging away from children and dispose of it
appropriately.
• Keep children and pets away from the appliance when
it operates or when it cools down. Accessible parts may
become hot during use.
Content
Safety information 3
Safety instruction 5
Installation 7
Product description 8
Indicators 9
Daily use 9
Cookware guidance 11
Care and cleaning 12
Troubleshooting 13
Technical data 14
Energy efficiency 14
Environmental concerns 15
IKEA guarantee 15

ENGLISH 4
• If the appliance has a child safety device, it should be
activated.
• Children shall not carry out cleaning and user maintenance
of the appliance without supervision.
General Safety
• WARNING: The appliance and its accessible parts become
hot during use. Care should be taken to avoid touching
heating elements.
• Do not operate the appliance by means of an external timer
or separate remote-control system.
• WARNING: Unattended cooking on a hob with fat or oil can
be dangerous and may result in fire.
• NEVER try to extinguish a fire with water, but switch off
the appliance and then cover flame e.g. with a lid or a fire
blanket.
• CAUTION: The cooking process has to be supervised. A short
term cooking process has to be supervised continuously.
• WARNING: Danger of fire: Do not store items on the cooking
surfaces.
• Metallic objects such as knives, forks, spoons and lids should
not be placed on the hob surface since they can get hot.
• Do not use the appliance before installing it in the built-in
structure.
• Disconnect the appliance from the electrical supply before
maintenance.
• Do not use a steam cleaner to clean the appliance.
• After use, switch off the hob element by its control and do
not rely on the pan detector.
• If the glass ceramic surface / glass surface is cracked, switch
off the appliance and unplug it from the mains.
• If the supply cord is damaged, it must be replaced by the
manufacturer, its service agent or similarly qualified persons
in order to avoid a hazard.

ENGLISH 5
• WARNING: Use only hob guards designed by the
manufacturer of the cooking appliance or indicated by the
manufacturer of the appliance in the instructions for use as
suitable or hob guards incorporated in the appliance. The
use of inappropriate guards can cause accidents.
Safety instruction
Installation
Warning! Plug-in installation. Please
ensure a suitable power supply
compatible with the appliance.
Follow the Assembly instructions
supplied with the appliance.
• Remove all the packaging.
• Do not install or use a damaged appliance.
• Keep the minimum distance from other
appliances and units.
• Always take care when moving the
appliance as it is heavy. Always use safety
gloves and enclosed footwear.
• Seal the cut surfaces with a sealant to
prevent moisture to cause swelling.
• Protect the bottom of the appliance from
steam and moisture.
• Do not install the appliance adjacent to a
door or under a window. This prevents hot
cookware falling from the appliance when
the door or the window is opened.
• Make sure that the space underneath the
hob is sufficient for air circulation.
• The bottom of the appliance can get
hot. If the appliance is installed above
the drawers, make sure to install a non-
combustible separation panel under
the appliances to prevent access to the
bottom.
Electrical Connection
Warning! Risk of fire and electric
shock.
• The appliance must be earthed.
• Before carrying out any operation make
sure that the appliance is disconnected
from the power supply.
• Make sure that the parameters on the
rating plate are compatible with the
electrical ratings of the mains power
supply.
• Make sure the appliance is installed
correctly. Loose and incorrect electricity
mains cable or plug (if applicable) can
make the terminal become too hot.
• Use the correct electricity mains cable.
• Do not let the electricity mains cable
tangle.
• Make sure that a shock protection is
installed.
• Make sure the mains cable or plug
(if applicable) does not touch the hot
appliance or hot cookware, when you
connect the appliance to the near sockets.
• Do not use multi-plug adapters and
extension cables.
• Make sure not to cause damage to the
mains plug (if applicable) or to the mains
cable. Contact our Authorised Service
Centre or an electrician to change a
damaged mains cable.

ENGLISH 6
• The shock protection of live and insulated
parts must be fastened in such a way that
it cannot be removed without tools.
• Connect the mains plug to the mains
socket only at the end of the installation.
Make sure that there is access to the
mains plug after the installation.
• If the mains socket is loose, do not connect
the mains plug.
• Do not pull the mains cable to disconnect
the appliance. Always pull the mains plug.
Use
Warning! Risk of injury, burns and
electric shock.
• Remove all the packaging, labelling and
protective film (if applicable) before first
use.
• This appliance is for household use only
• Do not change the specification of this
appliance.
• Make sure that the ventilation openings
are not blocked.
• Do not let the appliance stay unattended
during operation.
• Set the cooking zone to "off" after each
use.
• Do not rely on the pan detector.
• Do not put cutlery or saucepan lids on the
cooking zones. They can become hot.
• Do not operate the appliance with wet
hands or when it has contact with water.
• Do not use the appliance as a work surface
or as a storage surface.
• If the surface of the appliance is cracked,
disconnect immediately the appliance
from the power supply. This to prevent an
electrical shock.
• Users with a pacemaker must keep a
distance of minimum 30 cm from the
induction cooking zones when the
appliance is in operation.
• When you place food into hot oil, it may
splash.
Warning! Risk of fire and explosion.
• Fats and oil when heated can release
flammable vapours. Keep flames or heated
objects away from fats and oils when you
cook with them.
• The vapours that very hot oil releases can
cause spontaneous combustion.
• Used oil, that can contain food remnants,
can cause fire at a lower temperature than
oil used for the first time.
• Do not put flammable products or items
that are wet with flammable products in,
near or on the appliance.
Warning! Risk of damage to the
appliance.
• Do not keep hot cookware on the control
panel.
• Do not put a hot pan cover on the glass
surface of the hob.
• Do not let cookware boil dry.
• Be careful not to let objects or cookware
fall on the appliance. The surface can be
damaged.
• Do not activate the cooking zones with
empty cookware or without cookware.
• Do not put aluminium foil on the
appliance.
• Cookware made of cast iron, aluminium
or with a damaged bottom can cause
scratches on the glass /glass ceramic.
Always lift these objects up when you have
to move them on the cooking surface.
• This appliance is for cooking purposes
only. It must not be used for other
purposes, for example room heating.
Care and cleaning
• Clean the appliance regularly to prevent
the deterioration of the surface material.
• Switch off the appliance and let it cool
down before cleaning.
• Do not use water spray and steam to clean
the appliance.
• Clean the appliance with a moist soft cloth.
Only use neutral detergents. Do not use
abrasive products, abrasive cleaning pads,
solvents or metal objects.
ENGLISH 7
Disposal
Warning! Risk of injury or suffocation.
• Contact your municipal authority for
information on how to discard the
appliance correctly.
• Disconnect the appliance from the mains
supply.
• Cut off the mains electrical cable close to
the appliance and dispose of it.
Installation
Warning! Refer to Safety chapters.
General information
380 mm
300 mm
274
mm
±1
352
mm
±1
min.
500mm
min.
100mm
min.
55mm
min.
28mm
min.
28mm
min.
5mm
max.
R5mm
Installation process must follow the
laws, ordinances, directives and
standards (electrical safety rules
and regulations, proper recycling in
accordance with the regulations, etc.)
in force in the country of use!
• For further information on the installation
refer to the Assembly Instruction.
• If there is no oven beneath the hob, install
a separation panel under the appliance
according to the Assembly Instruction.
• Do not use silicon sealant between the
appliance and the worktop.

ENGLISH 8
Product description
Cooking surface layout
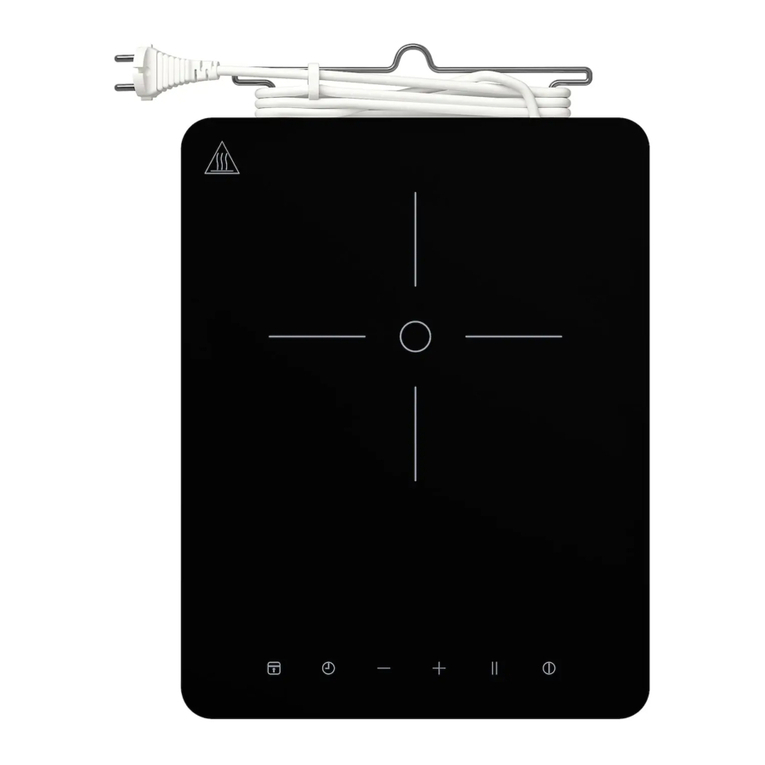
Single cooking zone (150 mm) 2000 W
Control panel
Control panel layout
21 4 5
6
3
On/Off Touch Control sensor fields and displays
You operate the hob by touching sensor fields.
Displays and acoustic signals (short beep)
confirm the selection of a function.
Timer control
Power level/Timer display
Pause
Lock/Child lock
Power level setting - / +

ENGLISH 9
Indicators
Pot incorrectly positioned or missing
This symbol appears if the pot is not suitable
for induction cooking, is not positioned
correctly or is not of an appropriate size
for the cooking zone selected. If no pot is
detected within 30 seconds of making the
selection, the cooking zone switches off.
Residual heat
If display shows "H", the cooking zone is still
hot. When the cooking zone cools down, the
display goes off.
Warning! Risk of burns from residual
heat! After you switch the appliance off,
the cooking zones need some time to
cool down. Look at the residual heat
indicator .
Use residual heat for melting and keeping
food warm.
Don't disconnect the product without waiting
for the to be removed from display.
Daily use
Connecting to socket
1. After insert the plug into main supply,
the child lock will be activated. Press and
hold the Child Lock key for 2 seconds to
deactivate.
ON/OFF
1. Press the ON/OFF key, the screen will
display "0" as in standby mode and the
power indicator light will light up. If there
is no heat setting selected within 1 minute,
the hob will switch off automatically
without pressing the ON/ OFF key.
2. Press ON/OFF key during operation, the
hob will switch off.
Power level/Timer setting
1. Press or to control the heat level or
timer setting during operation.
2. Press , the power level will go straight
to "9". Press to decrease the power level
from "9" to "0".
3. Press , the power level will increase from
"0". Press to increase the power level
from "0" to "9".
Lock function
When the cooking zones operate, you
can lock the control panel. It prevents an
accidental change of the heat setting. The
hob can still be shut off by the ON/OFF key.
Activate Lock function:
1. Set the wanted heat setting.
2. Activate lock function by pressing the Lock
key for 2 seconds. The Lock key is activated
when it is lit up and a sound is given. If
active the Timer key, it will stay on.

ENGLISH 10
Deactivate lock function:
1. Deactivate lock function by pressing the
Lock key for 2 seconds. The Lock key is
deactivated when the light stops and a
sound is given.
2. The heat setting will return to the previous
setting.
Child lock function
You can also keep control panel locked
when the hob is not operating. This function
prevents an accidental operation of the
appliance.
Activate the child lock
1. Activate the appliance with the ON/OFF
key. Do not set any power level.
2. Press the Lock key for 3 seconds. The
function is activated when Lock key
indicator is lit up and a sound is given.
3. Deactivate the appliance with the ON/OFF
key.
Deactivate the child lock
1. Press the Lock key for 3 seconds. The
function is deactivated when the Lock key
indicator goes off and a sound is given.
Pause
1. Press the Pause key under operation, the
screen will display " ", and the hob will
be paused temporarily. The hob will stop
heating and no power output.
2. Press this key again, it will resume to the
previous cooking setting.
3. If you do not press the Pause key to return
to operation within 10 minutes during
pause status, the hob will enter to standby
mode.
Timer
1. The timer function is used to set cooking
time with a maximum time of 99 minutes.
Press the Timer key to activate Timer, the
screen will display "00".
2. Press or to set timer. If there is no
operation of time within 5 seconds, the
timer will be canceled.
3. To set wished timer setting, press to
increase time setting starting from 00
minutes. When pressing for longer
time, setting will increase by 10 minutes.
Press to decrease time setting starting
from 99 minutes. When pressing for
longer time, setting will decrease by
10 minutes.
4. During the Timer status, the power level
and time will be alternately displayed
in the screen. When the power level
is decreased to "0", the timer will be
deactivated.
5. When the timer is deactivated, the hob will
beep 3 times and switch off automatically.
Automatic Switch off
The function switches the hob off
automatically if:
• You do not set the heat setting after
switching on the hob within 1 minute.
• You do not switch a cooking zone off or
you do not modify the heat setting after
2 hours, or if the overheating occurs

ENGLISH 11
Cookware guidance
Warning! Refer to Safety chapters.
What pots to use
Only use pots and pans with bottom made
from ferromagnetic material which are
suitable for use with inductions hobs:
• cast iron
• enamelled steel
• carbon steel
• stainless steel (although not all)
• aluminium with ferromagnetic coating or
ferromagnetic plate
To determine if a pot or pan is suitable,
check for the symbol (usually stamped on
the bottom). You can also hold a magnet to
the bottom. If it clings to the underside, the
cookware will work on an induction hob.
To ensure optimum efficiency, always
use pots and pans with a flat bottom that
distributes the heat evenly. If the bottom
is uneven, this will affect power and heat
conduction.
How to use
Minimum diameter of pot/pan base for
the different cooking areas
To ensure that the hob functions properly,
the pot must cover one or more of the
reference points indicated on the surface of
the hob, and must be of a suitable minimum
diameter.
Always use the cooking zone that best
corresponds to the diameter of the bottom
of the pan.
Cooking zone Recommended cookware
diameter [mm]
Middle rear
cooking zone 120-200
Empty or thin-based pots/pans
Do not use empty or thin-based pots/pans
on the hob as it will not be able to monitor
the temperature or turn off automatically if
the temperature is too high, damaging the
pan or the hob surface. If this occurs, do not
touch anything and wait for all components
to cool down.
If an error message appears, refer to
"Troubleshooting".
Hint/tips
Noise during cooking
When a cooking zone is active, it may hum
briefly. This is a characteristic of all ceramic
glass cooking zones and does not impair the
function or life of the appliance. The noise
depends on the cookware used. If it causes
considerable disturbance, it may help to
change the cookware.

ENGLISH 12
Care and cleaning
Warning! Switch the appliance off and
let it cool down before disconnecting it.
Warning! Switch the appliance off and
let it cool down before you clean it.
Warning! For safety reasons, do not
clean the appliance with steam blasters
or high-pressure cleaners.
Warning! Sharp objects and abrasive
cleaning agents will damage the
appliance. Clean the appliance and
remove the residues with water and
washing up liquid after each use.
Remove also the remnants of the
cleaning agents!
Scratches or dark stains on the glass
ceramic that cannot be removed do not
affect the functioning of the appliance.
Removing the residues and stubborn
residues:
• Food containing sugar, plastics, tin foil
residues should be removed at once, best
tool for cleaning glass surface is a scraper
(not included with the appliance). Place a
scraper on the glass ceramic surface at an
angle and remove residues by sliding the
blade over the surface. Wipe the appliance
with a damp cloth and a little washing up
liquid. Finally, rub the appliance dry using
a clean cloth.
• Limescale rings, water rings, fat splashes,
shiny metallic discolorations should be
removed after the appliance has cooled
down using cleaner for glass ceramic or
stainless steel.

ENGLISH 13
Troubleshooting
Problem Possible Cause Solution
The appliance does not
operate.
Power shortage or power short
circuit in the power source of
your home.
Power connection to socket not
performed properly.
Overlook the power supply to
hob for correct connection.
More than 10 seconds have
passed since the appliance was
switched on.
Switch the appliance on
again.
Child lock is switched on. Deactivate Child lock. (See the
section "Child lock function").
Several sensor fields were
touched at the same time. Only touch one sensor field.
Appliance stops
operating.
Error indication:
The cookware is not suitable for
induction.
Change to a cookware
suitable for induction.
No cookware on cooking zone or
cookware diameter is less than
120mm.
Place cookware on the
cooking zone.
Appliance stops
operating.
Error indication:
The temperature sensor of IGBT
is short circuit or open circuit.
Turn off the appliance and
restart after 5 minutes. If
E2 persists, please contact
nearest IKEA store.
Appliance stops
operating.
Error indication:
The main power supply is over
AC 270V.
Change to product suitable
power supply.
Appliance stops
operating.
Error indication:
The main power supply is lower
than AC 95V.
Change to product suitable
power supply.
Appliance stops
operating.
Error indication:
The temperature sensor of the
appliance is short circuit or open
circuit.
Turn off the appliance and
restart after 5 minutes. If
E2 persists, please contact
nearest IKEA store.
Appliance stops
operating.
Error indication:
Internal exception
Turn off the appliance and
restart after 5 minutes. If
E0 persists, please contact
nearest IKEA store.
Error code shows when the hob is powered on and error is detected, E and numbers are
displayed intermittently (1 second) and circulation.
If there is a fault, try to resolve it by following
the troubleshooting guidelines. If the
problem cannot be resolved, contact your
nearest IKEA store.
If you operated the appliance wrongly,
dealer may not take place free of
charge, even during the warranty
period.

ENGLISH 14
Technical data
Rated Power 2000W
Rated Voltage 220V-240V~
Rated Frequency 50-60Hz
Depth 380mm
Width 300mm
Height 57mm
Net Weight 3.5kg
Energy efficiency
Model identification LAGAN
205-060-65
Type of hob Built-In Hob
Number of cooking zones 1
Heating technology Induction
Diameter of circular cook-
Middle 15.0 cm
Energy consumption per
cooking zone (EC electric
cooking)
Middle 193.5 Wh/Kg
Energy consumption of
the hob (EC electric hob) 193.5 Wh/Kg
InformationontheproductpursuanttoEUregulationn°66/2014Referencestandards:
EN/IEC-60350-2 BS-EN/IEC-60350-2
This appliance has been designed,
manufactured and sold in
compliance with EEC Directives.
The technical data is provided on the
rating plate affixed to the bottom of
the product.

ENGLISH 15
Environmental concerns
Recycle materials with the symbol . Put
the packaging in relevant containers to
recycle it. Help protect the environment and
human health by recycling waste of electrical
and electronic appliances. Do not dispose of
appliances marked with the symbol
with
the household waste. Return the product to
your local recycling facility or contact your
municipal office.
Energy saving
You can save energy during everyday
cooking if you follow below hints.
• When you heat up water, use only the
amount you need.
• If it is possible, always put the lids on the
cookware.
• Before you activate the cooking zone put
the cookware on it.
• Put the smaller cookware on the smaller
cooking zones.
• Put the cookware directly in the centre of
the cooking zone.
• Use the residual heat to keep the food
warm or to melt it.
IKEA guarantee
Do you need extra help?
For any additional questions, like
clarifications on installation of the IKEA
appliance in the dedicated IKEA kitchen
furniture or for clarification on functions
of the IKEA appliances, please contact
your nearest IKEA Customer Support
Centre, the number is available on
www.IKEA.com. We recommend you read the
appliance documentation carefully before
Read about our guarantee terms on
www.ikea.com
For quicker service, always refer to the IKEA
article name and number (8-digit code) found
on the rating plate ofyour appliance.
SAVE THE SALES RECEIPT.

TÜRKÇE 16
Güvenlik Bilgileri
Çocuklarınvekorunmayamuhtaçkişileringüvenliği
•
•
•
•
•
•
İçindekiler
Kurulum 20
Sorun Giderme 26
Teknik veriler 27
IKEA Garantisi 28

TÜRKÇE 17
•
GenelEmniyetTalimatları
•
•
•
•
•
•
•
•
•
•
•
•
•
•
sebep olabilir.

TÜRKÇE 18
Güvenliktalimatı
Kurulum
Uyarı!
Cihazla birlikte verilen Montaj
•
•
•
•
dikkatli olun. Daima koruyucu eldiven ve
•
•
koruyun.
•
•
•
ElektrikselBağlantılar
Uyarı!
•
•
•
emin olun.
•
•
•
engel olun.
•
•
•
•
kablosuna zarar vermemeye dikkat
•
•
•
•
Kullanım
Uyarı! Yaralanma, yanma ve elektrik
•
•
•
•
•
•
•
•
•
•
•
•

TÜRKÇE 19
•
Uyarı!
•
•
•
olabilir.
•
Uyarı!
•
•
•
•
•
•
•
•
Bakımvetemizlik
•
•
•
•
Bertaraf etme
Uyarı!
tehlikesi.
•
•
•

TÜRKÇE 20
Kurulum
Uyarı!
Genel bilgiler
380 mm
300 mm
274
mm
±1
352
mm
±1
min.
500mm
min.
100mm
min.
55mm
min.
28mm
min.
28mm
min.
5mm
maks.
R5mm
• Kurulumla ilgili daha fazla bilgi edinmek
•
•
Other manuals for LAGAN
70
This manual suits for next models
1
Table of contents
Languages:
Other IKEA Hob manuals

IKEA
IKEA BARMHARTIG User manual

IKEA
IKEA NUTID HGA4K User manual

IKEA
IKEA GRUNDAD User manual

IKEA
IKEA HACKSTAD User manual

IKEA
IKEA VASASTAN User manual

IKEA
IKEA VALBILDAD User manual

IKEA
IKEA TILLREDA User manual

IKEA
IKEA BARMHARTIG User manual

IKEA
IKEA SKALAN 805.235.71 User manual

IKEA
IKEA FRAMTID User manual

IKEA
IKEA SMAKOKA User manual

IKEA
IKEA LIVSLAGA User manual

IKEA
IKEA INDUCTION COOKTOP User manual

IKEA
IKEA Matmassing User manual

IKEA
IKEA LAGAN HGC3K Quick start guide

IKEA
IKEA GRUNDAD User manual

IKEA
IKEA HOGVARDIG User manual

IKEA
IKEA LIVSLAGA User manual

IKEA
IKEA SMAKLIG User manual

IKEA
IKEA Livsgnista User manual