F
FI
IN
NA
AL
LP
PR
RE
EP
PA
AR
RA
AT
TI
IO
ON
N_
__
__
__
__
__
__
__
__
__
__
__
__
__
__
__
__
__
__
__
__
__
__
__
__
__
__
__
__
__
__
__
__
__
__
__
__
__
__
__
__
__
__
__
__
__
__
__
__
__
__
_
The camera's auto focus feature is utilized underwater. For best results, move in
close to your subject and use the wide angle range to shoot thru as little water as
possible. The full zoom range is accessible underwater.
Remove the lens cap and cord from the camera. Otherwise, it may interfere with
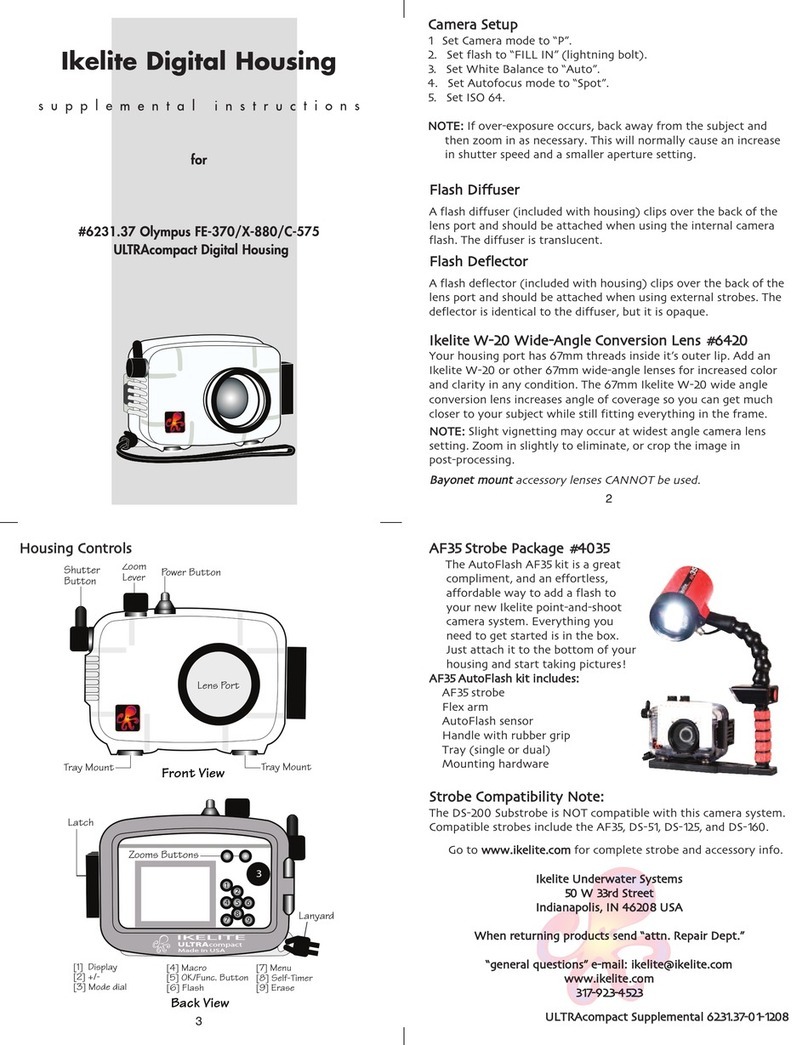
the housing seal. The chart shows recommended initial settings underwater.
It may be necessary to add up to 1.4k (3 lbs.) of lead weight to maintain the slight
negative buoyancy when using the Ikelite Pro Video-Lite 3.
L
LE
EN
NS
SP
PO
OR
RT
T_
__
__
__
__
__
__
__
__
__
__
__
__
__
__
__
__
__
__
__
__
__
__
__
__
__
__
__
__
__
__
__
__
__
__
__
__
__
__
__
__
__
__
__
__
__
__
__
__
__
__
__
__
__
__
__
__
__
__
__
_
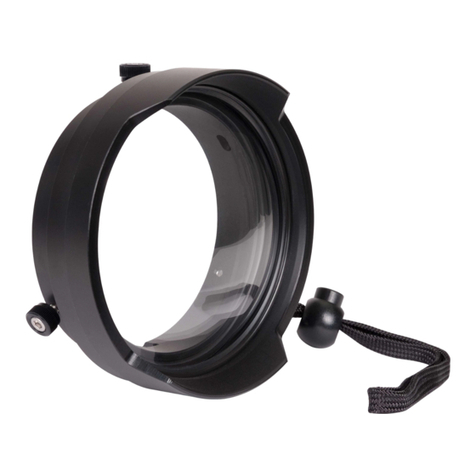
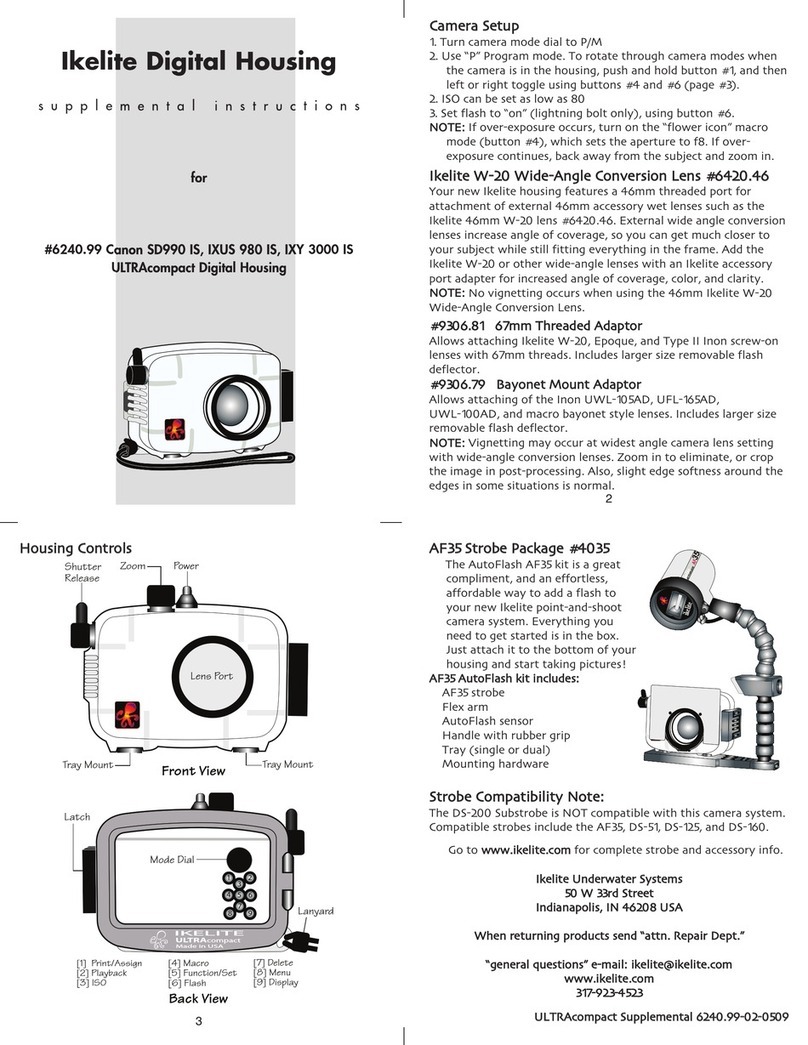
This Video Case features an optical grade flat port rather than the dome port
referenced in the general instruction manual.
Treat the housing lens port the same as a camera lens. The port sleeve helps protect
the optical grade lens from scratches. Upon entering the water, gently wipe the front of
the lens port with your fingers to remove the small air bubbles. Immediately after use,
rinse and gently dry the lens port to avoid water spotting.
C
CL
LE
EA
AN
NI
IN
NG
GT
TH
HE
EL
LE
EN
NS
S_
__
__
__
__
__
__
__
__
__
__
__
__
__
__
__
__
__
__
__
__
__
__
__
__
__
__
__
__
__
__
__
__
__
__
__
__
__
__
__
__
__
__
__
__
__
__
__
__
__
__
_
Immediately after use, rinse and gently dry the lens port to avoid water spotting.
D
DO
ON
NO
OT
Tuse alcohol or window cleaners on the lens port as either may cause cracking.
Use a mild soap solution or lens cleaner. Minor exterior scratches will usually fill with
water and not affect the picture quality.
The optical grade flat lens is factory sealed to the lens port; D
DO
ON
NO
OT
Tremove the
lens from the port assembly.
S
SH
HO
OO
OT
TI
IN
NG
GU
UN
ND
DE
ER
RW
WA
AT
TE
ER
R_
__
__
__
__
__
__
__
__
__
__
__
__
__
__
__
__
__
__
__
__
__
__
__
__
__
__
__
__
__
__
__
__
__
__
__
__
__
__
__
__
__
__
__
__
__
_
The Ikelite housing is designed to use the camera's auto focus feature underwater.
For best results, shoot thru as little water as possible. Picture quality and color
rendition improve dramatically as you move in closer to your subject. The wide angle
setting of the zoom control has excellent depth of field and allows you to move in closer.
M
MA
AN
NU
UA
AL
LF
FO
OC
CU
US
SO
OP
PE
ER
RA
AT
TI
IO
ON
N_
__
__
__
__
__
__
__
__
__
__
__
__
__
__
__
__
__
__
__
__
__
__
__
__
__
__
__
__
__
__
__
__
__
__
__
__
__
__
__
__
__
__
_
Manual focus may be preferred in low light levels or when the subject possesses
little contrast.
Set the auto/manual focus button (focus lock control) to Manual. This cancels the
auto focus and locks the focus. If you want to manually adjust the focus, rotate the manual
focus control as desired. To reactivate the auto focus, set the focus switch to Auto.
V
VI
IG
GN
NE
ET
TT
TI
IN
NG
G_
__
__
__
__
__
__
__
__
__
__
__
__
__
__
__
__
__
__
__
__
__
__
__
__
__
__
__
__
__
__
__
__
__
__
__
__
__
__
__
__
__
__
__
__
__
__
__
__
__
__
__
__
__
__
__
__
__
__
_
Due to the physical limitations of the housing, you may notice slight vignetting
when in full wide angle. Therefore, the camera might record one or more corners of the
lens port on film in full wide angle. A slight shading of the corners (vignetting) would be
noticed when viewing thru the electronic viewfinder.
To eliminate vignetting, simply zoom out of full wide angle slightly. This reduces the
overall coverage angle only slightly.
C
CA
AM
ME
ER
RA
AS
SE
ET
TT
TI
IN
NG
G
Power On/Off – Camera (On)
Zoom Lever – Wide Angle Setting
Focus – Auto Mode
ND Filter – Off
Exposure – Auto Mode
Program AE – Auto Mode
Shutter Speed – 1/60 Normal
White Balance – Auto Mode (see section)
Steady Shot – Off
I
IN
NS
ST
TA
AL
LL
LA
AT
TI
IO
ON
N
C
CA
AM
ME
ER
RA
AT
TR
RA
AY
Y_
__
__
__
__
__
__
__
__
__
__
__
__
__
__
__
__
__
__
__
__
__
__
__
__
__
__
__
__
__
__
__
__
__
__
__
__
__
__
__
__
__
__
__
__
__
__
__
__
__
__
__
__
__
__
__
__
_
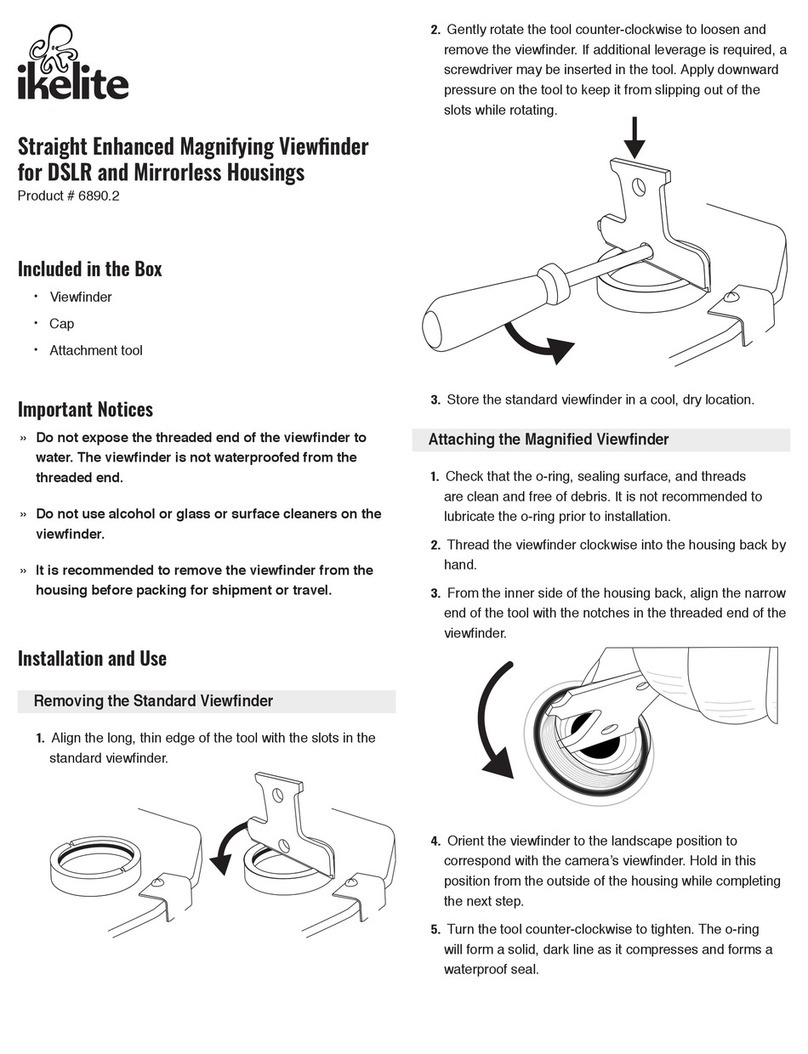
Note the placement of the camera tray underneath the guides; slide the camera tray
out of the housing.
Place the camera against the stabilizing pins on the tray. Secure the camera to the
tray with the tripod mounting bolt. The camera should fit easily on the tray and should
be parallel with the sides of the tray.
I
IN
NS
SE
ER
RT
TI
IN
NG
GT
TH
HE
EC
CA
AM
ME
ER
RA
A_
__
__
__
__
__
__
__
__
__
__
__
__
__
__
__
__
__
__
__
__
__
__
__
__
__
__
__
__
__
__
__
__
__
__
__
__
__
__
__
__
__
__
__
__
__
__
_
Pull the housing controls out to provide clearance for the camera. Slowly slide the
camera tray (with camera mounted) back into the housing.
D
DO
ON
NO
OT
Tforce this installation; if the controls are out of the way and everything is
lined up properly, the camera and tray will fit easily inside. Make certain that the tray is
completely in the housing.
H
HO
OU
US
SI
IN
NG
GC
CO
ON
NT
TR
RO
OL
LS
S_
__
__
__
__
__
__
__
__
__
__
__
__
__
__
__
__
__
__
__
__
__
__
__
__
__
__
__
__
__
__
__
__
__
__
__
__
__
__
__
__
__
__
__
__
__
__
__
__
__
_
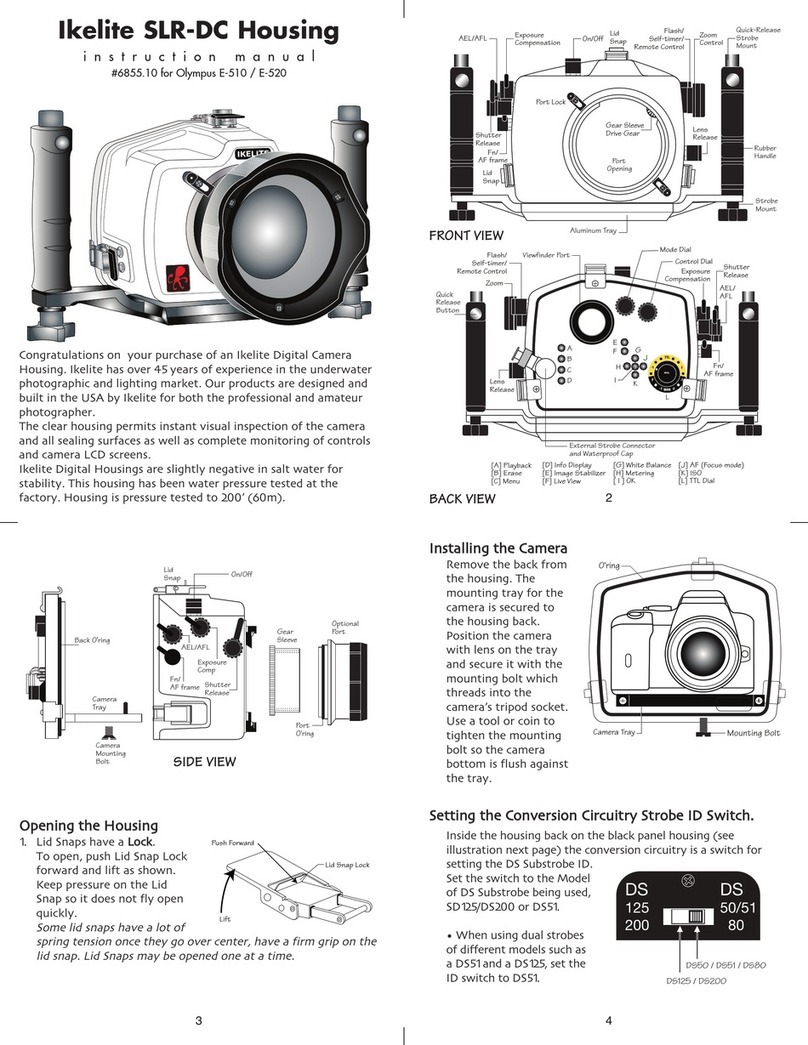
Slide the housing controls back in place making sure they properly align with the
camera functions.
Operate each control to see how it works with the camera. Some controls such as
start/stop will be used frequently. Other controls may seldom be utilized. Refer to your
camera owner's manual for the proper function of each camera control. Look thru the
back to be sure that you can see into the viewfinder.
When using the housing controls, especially the start/stop, D
DO
ON
NO
OT
Tuse excessive
force because you could damage the camera.
C
CA
AU
UT
TI
IO
ON
N
Remove the lens cap and cord from the camera. Otherwise, the cord may interfere with the housing
seal. If the housing controls are not properly positioned, they could interfere with the housing seal.
I
IK
KE
EL
LI
IT
TE
EU
UN
ND
DE
ER
RW
WA
AT
TE
ER
RS
SY
YS
ST
TE
EM
MS
S
50 West 33rd Street • PO Box 88100 • Indianapolis, IN 46208 USA • 317.923.4523
6042-02-0906

