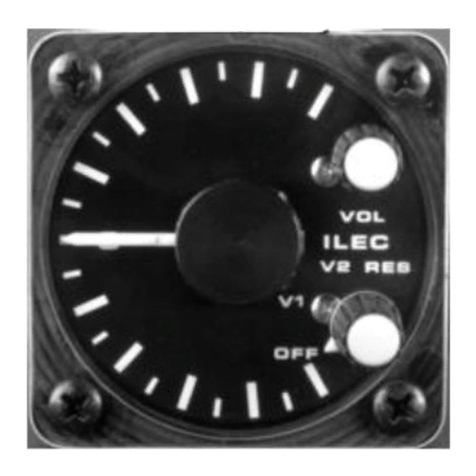
Ilec SC-7 User manual

1
CLUBVARIOMETER
SC-7
HANDBUCH
EINBAU UND BEDIENUNG
NOTICE D´UTILISATION
INSTRUCTION MANUAL
ILEC Industrie- und Luftfahrtelektronik GmbH
Friedrich-Puchta-Str. 6 D-95444 Bayreuth
Tel: 0921-13733 Fax: 0921-82731

2
LIST OF CONTENTS
1. Description of the system
1. Principle of measurement
2. Signal conditioning
3. Audio generator
4. Battery and temperature display
5. McCready-disk
6. Additional displays
7. Remote speaker
8. Altitude error
2. Installation
1. Unpacking
2. Warranty
3. Mechanical installation
4. Electrical installation
5. Pneumatic connection
3. Maintenance
1. General indications
2. Verifications
3. Cleaning the instrument
4. Adjustments at the SC-7
1. General
2. Zeroing of the transducer
3. Temperature calibration
5. The SC-7 variometer in flight
1. The 1-second- and the 3-second-response
2. Turbulence and gusts
3. The averager
4. Cruise
This manual is valid for all appliances of type SC-7 starting from serial number 951260.
State of manual: September 1995.

3
1. DESCRIPTION OF THE SYSTEM
1.1. Principle of measurement
The transducer is a thermal flow measurement device using thermistors at constant temperature,
developed by ILEC. It exells by a very good stability of zero output, by a very short response time of 5
miiliseconds, and strong independance of calibration of changes in temperature of the instrument.
They ensure the instrument´s high precision.
1.2. Signal conditioning
The raw variometer signal coming from the transducer is fed to three different electronic filters in
parallel. With the help of the 1-sec- / 3-sec-filter switch, the display (visual and acoustic) can
alternatively be switched on one of the following filters:
1-sec-filter: active second order filter with a fast, however strongly damped response.
3-sec-filter: active first order filter with a response equivalent to the one of a
good moving
vane type variometer.
The third filter has a response similar to the 1-sec-filter, however with a much larger time constant. It
serves to determine the average vertical speed of which the value can be read on the solid state
display. The conduct of the three filters is described in detail in the appendix.
1.3. Audio generator
The full scale range of the audio generator is +/- 15 m/s (or +/- 30 knots). In this way vertical speed far
outside the range of the visual display can still be perceived. The audio generator produces a sound
with rising frequency during climbing, which is additionally interrupted in the climbing range. In the sink
range a constant sound with decreasing frequency is produced, which can be muted by using the
MUTing-switch. This function provides silence when cruising.
1.4. Battery and temperature display
With the help
of the TEMP-BAT-swith, the solid state display can be swithed from displaying
the averager value to displaying the temperature or the remaining battery capacity. The correct value of
the battery display follows from a power consumption corresponding to 1/10 of the battery capacity of a
lead-gel-accumulator customary in trade. For the customary 6,5Ah accumulator this is a charging of
650 mA. This way all consumers can be switched on during the inquiry of the remaining battery
capacity. The battery is practically empty if the tension voltage has fallen to 11V (display 0%), however
the appliance can still work for hours if all other loads to the battery are switched of, because the SC-7
consumes very little power, and still works at 9V.
1.5. The McCready-disk
The transparent McCready-disk is put on the pin in the middle of the indicator window. Various
versions for the different glider types are available, optionally also unmarked disks.
1.6. Additional displays
At the installation of the SC-7 in the two seater, the additional indicator for the seat in the back can be
connected at the rear connector of the SC-7.
1.7. Remote speaker
A second speaker can be installed in a good spot in the cockpit, if the already installed speaker should
not be loud enough. The additional speaker should have at least 8 Ohms and is to be installed at the
rear connector of the SC-7. To save current, the built-in speaker can be disconnected.

4
1.8. Altitude error
The calibration factor (not the zero point) of the variometer depends on air density and therefore on
altitude. When measuring the actual vertical speed, the indicated value decreases at 5% per 1000
meters increase in altitude. In the altitude from 200 to 2200 m NN the altitude error remains within +/-
5%, at 1220 m NN, the calibration altitude, the error is zero.
2. INSTALLATION
2.1. Unpacking
Unpack the instrument carefully and make a visual inspection of the unit for evidence of damage
incurred during shipment. If a claim for damage is to be made, save the shipping container to
substantiate the claim. Leave protective caps on hose connectors until installing the instrument.
2.2. Warranty
Warranty of the manufacturer covers failures in material and manufacturing of the product for a period
of 2 years after delivery. ILEC will replace or repair parts of the instrument, which have failed in the
warranty period, provided the instrument has been returned free of charge to the manufecturer or his
authorized representative, and provided it had been operated within the limits specified in this manual
and in the SC-7 brochure. ILEC cannot be held responsible for consequential damages caused by the
failure of an instrument or its improper use.
In particular, no warranty can be claimed in cases where any liquid or foreign particles have been
allowed to penetrate into the pneumatic system.
In case of trouble, describe the malfunction as exactly as possible, to avoid unnecessary enquiries.
Statements such as "vario out of order" e.g. will not be sufficient. Please state a telephone number
where a person competent can be reached and do not forget to name the sender. When packing the
instrument, take care to close the rear pneumatic connector to prevent contamination of the measuring
system. Use large case and fill void with styrofoam chips for shock absorption during shipment.
2.3. Mechanical installation.
When choosing the place where the instrument is to be installed the following point should be taken
into account:
- Since the variometer is read rather frequently, the instrument should be placed at the upper rim of
the instrument panel.
- If a compass is installed in the panel, all other non magnetic instruments should be grouped around it
(altimeter, air speed indicator, moving vane variometer), all electrical instruments at a distance of at
least 10 to 15 cm. The same applies to a compass mounted on the cover over the panel: the speaker
at the rear end of the instrument may disturb in this case. Remedy: mount the SC-7 further down, or
have loudspeaker taken out by the manufacturer and use a remote speaker.
- During transport, take off and landing, the glider will be submitted to rather severe shocks which
should be kept off all instruments. Contrary to a widespread opinion, the best suspension is the one
that will link all instruments to the primary structure of the fuselage in the most r i g i d way. For this
reason instrument panels should be designed for maximum rigidity and linked to the fuselage in the
most rigid way.
- Installation of temperature sensor:
The best spot for the temperature sensor is in the ventilation canal, because there it is well provided
with air from the outside, it is secluded from insolation and additionally is protected against damage. To
install just drill a hole of 5,5 mm into the ventilation canal, put the sensor into it and fix it with adhesive
tape.

5
- Cut out in the panel, fixing bolts
Figure 1 shows the dimension of the 80-mm- and 57-mm-openings to be machined in the panel. If they
are not yet there, work with precision. It must be possible to insert the instrument and in particular the
bolts freely without any jamming, otherwise the nut inserts may be damaged. Fixing bolts delivered are
M4x10, non magnetic, black, Phillips-head 3. Never use longer bolts.
Figure 1: Opening in the instrument panel
Dimensions in mm, dimensions in brackets for 57-mm-norm (additional display)
2.4. Electrical installation
Electrical appliances are absolutely just as reliable as mechanical ones, provided that they are just as
well installed as most of the people do that with mechanical appliances.
General remarks (unfortunately all confirmed by experience):
- Main switches in the electrical system can be a source of serious trouble, particular where there are
radio sets connected to them. When turning on or off the main switch with the radio on, heavy negative
going pulses may be generated on the - positve - bus line during the typical bouncing periods of the
main switch. These Pulses can destroy instruments, if not at once, then they will do it in the long run,
also yours!
- If master switches are not avoided altogether, individual instruments MUST be switched ON AFTER
the main switch, and OFF BEFORE it.
- The smallest possible number of switches, cable connectors, sockets, fuses, etc. in the wiring!
- All current carrying parts must be insulated: danger of short circuits
- All connectors must have a solid mechanical lock: danger of opening
- Exclude all possibilities of false polarity connections by at least using colour codes, much better
keyed connectors. The SC-7 is protected against false polarity connection.
- Use only professional components, no cheap automotive or do-it-yourself components, they are
unreliable.
- Cables must be fixed at critical points, no pull may be transmitted to them, unless they may break
when stressed.
- When crimping or screwing wire, never tin. Tin flows under stress and releases tension: open circuits
or intermittant contacts

6
- Every conductor going to the battery MUST have a fuse NEAR the battery:
Burning wires are a danger to your life.
- Use only cable with fire retardant insulation material (aircraft type cable).
- Use one fuse per one instrument, wherever possible: In case of a short circuit somewhere, only one
instrument will be dead, instead of all of them.
- Use only female connectors on the battery side: protruding pins are a short circuit hasard.
- Insulate connector solder lugs with the help of rubber sleeves or heat shrinkable tube after soldering.
- Use a soldering pin compatible with the size of contacts to be made.
- Avoid cold soldering spots by heating up to sufficient temperature and that for quite enough time.
The tin has to be shiny. Use only soldering wire for electronis.
- Some pieces of advice to reduce electromagnetic interference to ALL instruments, in particular the
one caused by a VHF transmitter:
- All wires must be as short as possible.
- Separate antenna wire from all other wires.
- Use only good antennas. Bad or badly adapted antennas send back a big part of the rf power of the
sender on the outside of the antenna wire. The whole aircraft will be contaminated by this stray rf
radiation.
- ALL supply grounds must collect in one mutual spot. The cases of all electrical instruments are also
to be connected to this central "GROUND". This central ground point itself must be connected well and
short with the ground of the glider, e.g. with the steering system. This is not just a precaution against
disturbances caused by interference, which can be very bothering, but also a necessary protection
against flashes of lightning for the pilot.
- A very good central ground point is the old-fashioned metallic instrument panel.
- The minus wire of the battery has to be connected with the central ground point via a very short flex.
Figure 2: Wiring
- The battery, the additional indicator for the back-seat, the additional speaker and the temperature
sensor are to be connected as shown in connection diagram in figure 2.
- The battery wires must have a cross section of at least 0,5 sqmm (AWG20).
- Numbers indicated are identification numbers on the rear connector.
- Wires of remote indicators are colour coded as are the connectors.
- There is no warranty given by ILEC if damage is caused by false electrical connections. The battery
connection of the SC-7 is protected against false polarity connection.

7
2.5. Pneumatic connection
Input pressure
The instrument must be connected to a TE-probe via the tubing connector on the rear. As the quality of
the variometer's response depends entirely on the quality of the TE-pressure, a good TE-probe should
be used. It should be sufficiently insensitive to slip and changes in angle of attack and should be
placed in a good position, generally high up on the tail fin. ILEC has developed a probe with excellent
properties. These probes are available with a 6mm or 8mm connection diameter for installation on the
fuselage or the tail fin.
Protection against water and dust
Any pneumatic instrument can be damaged by dust or water ingested. Therefore a water separator
must be inserted into any line leading outboard. As on top of that most tubing on gliders is
contaminated by dust from sanding, small gasoline filters, available from ILEC or in car shops, must be
inserted into each tube next to the instrument. Certainly they should never be reversed, this would be
the best way to drive the dust collected into the instrument. These filters are excellent water separators
at the same time.
It must be repeated here, that ILEC will refuse any warranty where instruments have suffered from
water or dirt ingestion.
Pneumatic connection
The pneumatic connector is for flexible tubes with inner diameter of 4 to 5 mm, PVC-tubes with inner
diameter of 5 mm and a side-thickness of 1,5 mm are customary. In case a tube sits too tight, do not
pull with force. Cut it open carefully without damaging the connector. Use an adaptor where tubing is
too wide or too narrow.
Leak tightness:
The line from the measuring head of the TE-tube up to the variometer must be air tight, if the quality of
the display is not to suffer. The following is a rapid test, it should be carried out at least at the start of
the season:
1. Press flexible tube next to vario and hold it.
2. Seal off TE-probe (adhesive tape).
3. Release tube: vario produces a pulse in positive direction.
3. Wait 1 minute.
4. Open TE-probe: vario produces a pulse in negative direction of about the same magnitude as
above. If not, the system is not tight.
Mutual interference between variometers:
Where an SC-7 is run alone an a TE-tube, there is normally no problem. Where a variometer with a big
flask (big means here some liter, to be found with certain moving vane varios or gust filters), is hooked
up to the same tube: caution! The response of the SC-7 may be distorted by the large airflow in the
system in case of sink or climb. Here, a test flight with all other instruments disconnected should be
done for comparison.
Never there should be any capillaries or so called gustfilters in the conduit between TE-probe and the
SC-7. At best they would only cause a delay of the response of the SC-7. Contrary to the wide spread
opinion, errors of a poor TE-compensation can not be cured this way, only on the TE-probe istself.
3. MAINTENANCE
3.1. General indications
The SC-7 normally does not need any maintenance, neverthelesss some hints to ensure reliable
operation and long life:
- Most cases of malfunction are due to leak problems! Problems with electrical contacts would follow
(consult "Electrical Installation").
- Too much heat is of no good to any instrument, therefore the glider should not be abandoned in the
sun without the cockpit being covered. Temperatures in an cockpit not covered can easily reach 70°C

8
in the sun. There are at least some momentary measurement errors to be expected, if not worse. (We
have seen SC-7s with holes burnt into the front panel!) If no cover is available, then at least open the
canopy for ventilation.
- All tubing must be checked from time to time - and at any rate at the start of the flying season - for
leak tightness, good tension around the pneumatic connector, sharp bends and squeezes. Tubes gone
hard must be replaced. This is particularly necessary in the case of PVC tubing.
- Protect your instruments and their tubing against dust and dirt!
- Before doing any repair on your glider, disconnect all tubes and shut off their ends.
- Must be checked from time to time: Connectors, switches, fuseholders for good contact, insulation;
and all cables for chafing, kinks, jamming, in order to spot possible sources of intermittant contacts.
- An old, feeble battery must be replaced immediately. Recharge the battery systematically after every
flight.
- The instrument panel hitting structure of your fuselage upon bouncing around during take off and
landing because of too sloppy a suspension, is to be avoided absolutely.
3.2. Verifications
Mechanical zero
The pointer of the indicator must be within +/- 0,1 m/s around 0, when the SC-7 is off (about the width
of the pointer). Normally a correction is not necessary. As a consequence of an extremely hard shock,
during transport e.g., one of the 2 spiral springs of the meter movement may become trapped in its
support; the needle then will be wrong by 0,5 m/s about, and will show much friction. Here the
instrument must be returned to the manufacturer.
Electrical Zero
Shut off the pneumatic connector of the instrument and switch on the SC-7. The needle of the indicator
should now be within +/- 0.1 m/s of the mechanical zero. In case the offset is larger, adjust the vario
zero (see chapter 4.2 for details). After a long rest period, several weeks or months e.g., larger errors
may result after switching on. However they should disappear gradually within one hour with the SC-7
switched on.
3.3. Cleaning the instrument
For cleaning the exterior, the meter screen e.g., one must never use a strong solvent like spirit or
nitrocellulose, because they will damage or even destroy the plastic parts. Well suited are soap suds,
washing-up liquid or special detergent for synthetics.
The screen of the indicator is of polycarbonate and sensitive to static electricity. It should not be rubbed
with a dry cloth. In case the needle gets trapped by static charges, humidify the screen and cleanse
with an antistatic product.
4. ADJUSTMENTS AT THE SC-7
4.1. General
Normally there is no need for any adjustment or programming, as this is done by the manufacturer.
This chapter is intended for the case where the customer wants to change something by himself.
For all adjustments one of the 2 halfshells of the case must be removed. To do this, first remove the 6
corresponding selftapping countersunk screws and pull off the halfshell up-, or downwards. Never take
away both halfshells at the same time, as the instrument's parts will no longer be held together. After
finishing the job, mount the halfshell again.
ATTENTION :
- When remounting a halfshell, first turn the selftapping screws backwards until they fall back into their
old track, then turn forward.
- When mounting the lower shell, take care not to squeeze the silicon tube!
- Observe the most stringent measures of cleanliness. Even the smallest magnetic particles can
disturb seriously the meter movement!
- Always pull off the battery connector before working on the instrument.
- Do not touch sealed trimpots, calibration would be lost!

9
4.2. Zeroing of the Transducer
Remove upper halfshell after having closed the pneumatic connection tightly. The sensor board is
located next to the indicator. The sensor board has got two adjustment potentiometers, that can be
reached from the top. One of them is secured with red paint. It must not be misplaced. For adjusting
turn the other adjustment potentiometer with a small srew-driver until the zero-point is correct. Install
the halfshell back and reconnect the SC-7 to the TE-probe.
4.3. Temperature calibration
At first delivery the SC-7 is calibrated to the enclosed temperature sensor. When changing the sensor,
the instrument should be readjusted. A comparing thermometer is to be brought to the same
temperature together with the sensor. Therefore both of them should be put in a glass of water. For
adjustment the lower halfshell has to be removed. On the left side of the instrument is a switch, that is
inscribed with numbers from 0 to 9 and letters from A to F. Turn this switch until the temperature
display is correct. Now install lower halfshell back on.
5. THE SC-7 VARIOMETER IN FLIGHT
The following chapter has been written in order to help the user to draw a maximum of benefit from the
information delivered by the instrument. It is always worth while to read it, as the matter treated here is
rarely or not at all covered in the general literature on soaring.
5.1. The 1-second- and the 3-second-response
With the 1s-3s-switch the display filters can be switched from the quick 1-s-filter (a filter of second
order) to the slower 3-s-filter (a filter of first order). Figure 3 shows what happens upon flying through
an idealised thermal updraft, and the corresponding responses of the two different filter outputs, or
otherwise, the indication of the vario needle when one or the other response has been selected. For
the example a standard class glider with normal wing loading has been assumed. Airspeed be 90 km/h
(50 kts), and constant during passing the updraft. The square trace 1 shows the updraft as a function
of time: in front of the jump, there is calm air, within it, the air rises at 2 m/s (4 knots). The diameter of
the updraft be 100 m (100 yards).
Before entering, the plane sinks steadily at 0.7 m/s (1.4 kts). Upon entering, it is accelerated upwards,
the pilot will feel this clearly on the seat of his pants. The transition to the new vertical speed is fast, the
time constant being only 0,4 seconds. The acceleration at the beginning is 0,5 g, the g-meter will jump
from its steady state indication of 1 g to 1.5 g. Upon leaving the same sequence will happen, however
this time downwards. Curve 2 shows the response of the glider. Curve 3 describes the indication by the
1-second filter: after a short hesitation of about 0.2 s the needle swiftly swings upwards, after 2
seconds already 90 % of the change are reached, after 2.5s 100 % of the real climb rate of the glider,
now being 1.3m/s (2.6 kts) upwards, are attained. The indicator needle remains there to the very end
of the updraft, and returns to its original sink of 0.7 m/s (1.4 kts) as fast as it mounted upon leaving the
thermal.
For a first order filter to be as fast, its time constant would have to be 1 second. Such a filter would be
useless in normal thermal conditions as one would not be able to read it because of its permanent
random jitter induced by turbulence. Curve 4 shows the behaviour of the slow 3-s filter. This one
corresponds to the response of a good moving vane variometer: The output creeps up slowly. For it to
reach 90 % of the change in input,one would have to wait 7sec. At the end of our thermal it just arrived
at 0.8 m/s (instead of 1.3 m/s).
Which response to use to search for thermals? As the main problem here consists of discriminating
between "gusts" and useful lift, a short consideration: diameter of the general useful thermal is about
150 m. This distance at a speed of 90 km/h (50 kts) will be covered in about 6 s, at 180 km/h (100 kts)
in 3 seconds. With this in mind, one can say that it is worth while to take on a "thermal" when the climb
lasts at least 3 to 5 seconds, and when on top of that it has the strength looked for. Be it, one is
convinced to have cut the lift just on its border. If now we look at figure 3, we can set up a simple rule
for day to day use very quickly: When the 1-s-vario-display climbs to the lift waited for, then count to 3.
If the needle is still there, then take it on. This thermal is large enough to be centered in 9 out of 10
cases. If not, continue straight on.

10
In case the slow 3-s-filter has been selected, one will have to not only observe the position of the
pointer, but also its tendency: Does it still climb (after 3 seconds), and does it at least indicate half of
what is waited for, then take it. In case it stands still or even falls, continue on your way.
Figure 3: Passing through an updraft
5.2. Turbulence and gusts
Everything which is shorter than a useful lift is only a disturbance. Therefore it would be nice, if a vario
would not indicate these short gusts. Suppressing horizontal gusts at the TE-vario is principally
impossible. As changes in airspeed also leave their mark in the measuring of the vario-display (the
principle of measuring is to eliminate "control-stick-thermal"), horizontal gusts are also indicated
proportionately as rising or sinking. This being so, we will have to content ourselves to filter out the
gusts without loosing too much in speed of response.
To show the influence of a gust on the indication of a TE-vario, let us assume the following case: A
standard class glider flies at 150 km/H (83 kts). On the one hand it enters a thermal with a vertical air
speed of 2 m/s (4 knots), on the other hand a zone with windshear or a whirl with horizontal axis such,
that the plane's airspeed increases suddenly by 2 m/s (4 kts). What happens in both cases? Figure 3
shows it for the first case, with the exception that the initial sink rate is 1,8 m/s (3,6 kts) rather than 0,7
m/s (1,4 kts). The initial thrust of vertical acceleration is stronger, due to the higher airspeed. The plane
is accelerated upwards from 1,8 m/s to +0,2 m/s, 150/90 times as strong as in fig.3. The g-meter would
bounce from 1,0g, its steady state value, to 1,8 g and back to 1 g with a time constant of only 0,3 s.
Fig.4 shows the case of the horizontal gust: The airspeed indicator jumps from 150 km/h to 157 km/h
(from 83 kts to 87 kts), damped by its inertia. The plane is being accelerated upwards only a little bit,
just 0.1g. The trajectory of the glider that follows depends mainly on the pilot's reaction. He can
continue at the increased airspeed, or swap the cinetic energy he has gained for a bit more altitude (in
the example this would be 8.7 m !) and then continue at his original airspeed. This maneuver however
has little influence on the response of the TE -vario. At the entry of the gust, the TE-vario "sees" a jump
in dynamic pressure corresponding to the above mentioned altitude jump of 8.7 m. It will interpret this
pressure jump correctly as a gain in energy and produce a positive pulse. This pulse will be
proportional to the potential gain in altitude. Its size and duration depends on the filter of the vario.
Thereafter it is irrelevant to the TE-vario whether the potential gain in altitude is realised or not, as
there would be no change in total energy involved in the maneuver, only an exchange between cinetic
and potential energy.

11
Figure 4: Flying into a horizontal Gust
However, the needle's excursion is larger here than in the case of the thermal. The indication eases off
again, how fast, that depends on the kind of filter being used. The slow 3-second response might feign
generation of energy which is not there anymore. The fast 1-second response of the SC-7 swings
higher at first, but comes back a lot quicker.
It should not be overlooked that in reality turbulences is rarely as sharp edged as presented in our
model for simplicity. The leading edge of the response will therefore be "rounder" than shown in figures
3 and 4.
Now, which lessons can be drawn from these facts for practical flying?
1. If the vario climbs fast, without being accompanied by a strong upward thrust of acceleration, then
as a rule, this is a horizontal gust. One can "pull up" to profit from the increase in airspeed, however,
one will have to "push down" again as there is a negative jump to follow.
2. If the vario climbs up rapidly after an upward thrust of acceleration, then normally there is a lift.
3. In weak thermal conditions the vario will usually climb slowly. Now a large field of lift may announce
itself. Mostly one will not notice any particular acceleration in the context. In this case it is advisable to
reduce the speed and observe the vario-display carefully.
5.3. The Averager
The average vertical speed whilst spiralling in thermals is by far the most important value to know. It
decides whether the thermal one is exploiting at the moment is good enough to reach the goal. Further
it plays a decisive role when setting the McCready value. Thus it helps to determine the right cruising
speed. As one will overestimate the average climb rate by 50 to 100 % when relying on the vario
display and one's power of estimation alone, the SC-7 is fitted out with an averaging filter. Figure 5
shows the response of the averager upon entering and circling in a thermal with an updraft of constant
2 m/s (4 knots).

12
Figure 5: Averager
The plane, curve 2, accelerates very fast to its new climb rate of 1.3 m/s. The slight increase in the
sinkrate of the glider has been neglected. After one full circle, exactly after 25 seconds, the averager
shows the new climb rate (curve 3). Even during the transition the average value is being shown with
good accuracy, as can be seen from the comparison between curve 3 and the theoretical average in
curve 4. This holds true even if the lift is very irregular and oscillates between 0 and 4 m/s e.g. The
averager will indicate decreasing lift immediately.
5.4. Cruise
We will not treat general tactics in transition or dolphin flying here, one will find this in the special
literature. We only give some hints to pilot the glider and to interpret the speed command display.
The McCready disk is turned such, that its zero mark (outer point) comes to ly on the McCready value
seen on the vario scale. When cruising, one does not read the vertical speed on the vario scale, but
the airspeed indicated on the McCready disk by the vario pointer. One is to accelerate if the airspeed
indicator shows less than the disk, and one should decelerate if the airspeed indicator shows more
than the disk.
The by far most important parameter to be set is the McCready value, which is to be set according to
the tactical situation. The basis for that is always the average climb rate expected in the next updraft,
as long as tactical considerations do not determine it alone, as when flying over an obstacle e.g. It
must be taken into account here, that even large deviations from the theoretically correct setting, will
lead to negligible losses in average speed only. Therefore one reduces the McCready value in order to
avoid unnecessary risk.
It is not only of no advantage but stresses the pilot´s physical condition as much as it makes the
average speed suffer, to practice aerobatics instead of speed-to-fly by following the pointer blindly. It is
of no use to change the speed within short stretches of up- or downdrafts. Only when a speed-to-fly
error lasts longer, one should correct cruise speed.
How to change airspeed in cruise?
When increasing airspeed, the sink rate of the glider will increase, this means the vario pointer will sink
even more when one accelerates. The optimal speed-to-fly will be larger than the speed indicated
before accelerating. By how much is it larger?
Rule of thumb: To the difference between the indications on the disk and on the airspeed indicator
add one half. This will be the amount by which the airspeed is to be changed.
Table of contents
Other Ilec Measuring Instrument manuals
