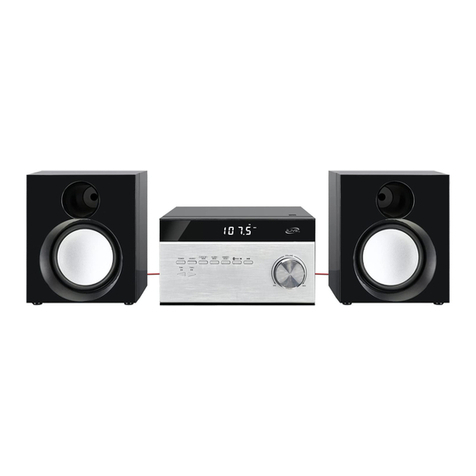
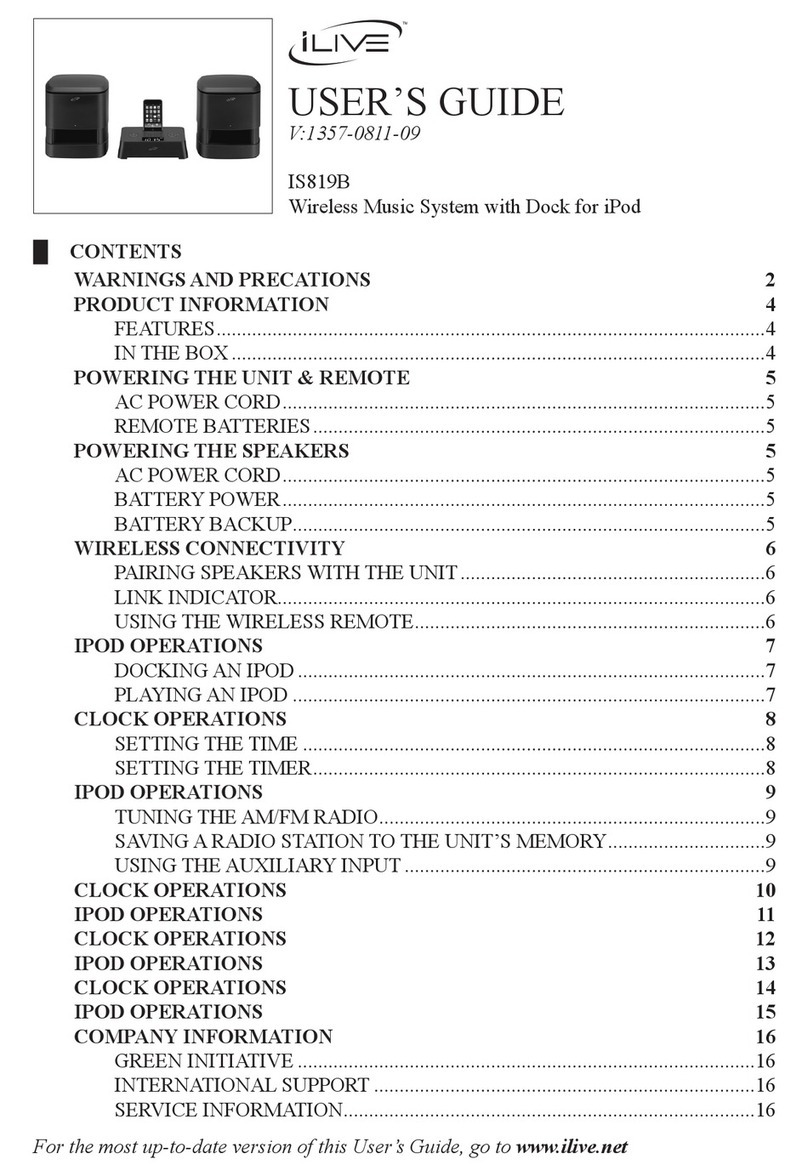
iLive IS819B User manual

1.-.1 USER'S GUIDE
V:1457-0312-09
IS819B
Wireless Music System with Dock for iPod
ICONTENTS
WARNINGS
AND
PRECAUTIONS 2
PRODUCT INFORMATION 4
FEATURES 4
IN THE
BOX
4
POWERING THE UNIT &REMOTE 5
AC
POWER
CORD 5
REMOTE BATTERIES 5
POWERING THE SPEAKERS 5
AC
POWER
CORD· 5
BATTERY POWER 5
BATTERY BACKUP 5
WIRELESS CONNECTIVITY . 6
PAIRING SPEAKERS WITH THE UNIT 6
LINK INDICATOR 6
USING THE WIRELESS REMOTE 6
IPOD OPERATIONS 7
DOCKINGAN IPOD 7
PLAYING
AN
IPOD 7
CLOCKOPERATIONS 8
SETTING THE TIME 8
SETTING THE TIMER 8
IPOD OPERATIONS 9
TUNING THEAM/FM RADIO 9
SAVING ARADIO STATION TO THE
UNIT'S
MEMORY 9
USING THE AUXILIARY INPUT 9
CLOCK OPERATIONS 10
IPOD OPERATIONS
11
CLOCKOPERATIONS
12
IPOD OPERATIONS
13
CLOCKOPERATIONS 14
IPOD OPERATIONS 15
COMPANY INFORMATION 16
GREEN INITIATIVE 16
INTERNATIONAL SUPPORT 16
SERVICE INFORMATION 16
For the most up-to-date version
of
this User s
Guide,
go
to
www.ilive.net

\\
\R'\I'\CS
\'\1>
PREC\l
TIO'\S
•CAUTION: TO PREVENT ELECTRIC
SHOCK, MATCH WIDE BLADE OF
PLUG TO WIDE SLOT, FULLY INSERT.
•WARNING:
To
prevent fire or shock
hazards, do not expose this unit to rain or
moisture.
•
CAUTION:
Use
of
controls
or
adjustments
or performance
of
procedures other than
those specified may result in hazardous
radiation exposure.
•WARNING: Changes or modifications
to this unit not expressly approved by the
party responsible for compliance could void
the user's authority to operate the equip-
ment.
•WARNING: Do not place the unit on top
of
any soft, porous, or sensitive surfaces to
avoid damaging the surface. Use aprotec-
tive barrier between the unit and surface to
protect the surface.
•WARNING: Use
of
this unit near fluores-
cent lighting may cause interference regard-
ing use
of
the remote.
If
the unit is display-
ing erratic behavior move away from any
fluorescent lighting, as it may be the cause.
•
CAUTION:
Danger
of
explosion ifbattery
is incorrectly replaced. Replace only with
the same or equivalent type.
•PRECAUTION: Dangerd'explosion
si
les
piles sontremplacees defa90n incorrect.
Remplacer les piles seulement
par
Ie
meme
type de
pile
ou I'equivalent.
•WARNING: There is adanger
of
explosion
if
you attempt to charge standardAlkaline
batteries in the unit. Only use rechargeable
NiMH batteries.
•WARNING: The remote control's button
cell battery contains mercury. Do not put in
the trash, instead recycle or dispose
of
as
hazardous waste
•WARNING: Lithium ion batteries, like all
rechargeable batteries are recyclable and
should be recycled or disposed
of
in normal
household waste. Contact your local gov-
ernment for disposal or recycling practices
in your area. They should never be inciner-
ated since they might explode.
Do not mix old and new batteries.
Do not mix alkaline, standard (carbon-
zinc), or rechargeable (ni-cad, ni-mh, etc)
batteries.Tum que omante, vid pecesim
aximei igingultum pubitere comant. Casta,
The lightning flash with arrowhead
symbol, within
an
equilateral triangle,
is intended
to
alert the user
to
the
presence
of
uninsulated "dangerous
voltage" within the product's enclosure
that may be
of
sufficient magnitude
to
constitute arisk
of
electric shock to
persons.
WARNING:
TO REDUCE
THE
RISK
OF
ELECTRIC SHOCK,
DO
NOT
REMOVE
COVER
(OR BACK).
NO
USER-SERVICEABLE PARTS
INSIDE. REFER SERVICING TO
QUALIFIED SERVICE PERSONNEL.
The exclamation point within
an
equilateral triangle is intended to alert
the user to the presence
of
important
operating and maintenance (servicing)
instructions in the literature accompa-
nying the appliance.
This product utilizes aClass Ilaser to read Compact Discs. This laser Compact Disc Player is equipped with safety
switches to avoid exposure
when
the
CD
door is open and the safety interlocks are defeated. Invisible laser radia-
tion is present when the
CD
Player's
lid is open and the system's interlock has failed
or
been defeated.
It
is very
important that you avoid direct exposure to the laser beam at all times. Please do not attempt to defeat
or
bypass the
safety switches. \

IMPORTANT
SAFETY
INSTRUCTIONS
1.
Read these Instructions.
2.
Keep these Instructions.
3.
Heed all Warnings.
4. Follow all instructions.
5.
Do not use this apparatus near water.
6. Clean only with adry cloth.
7. Do not block any ventilation openings. Install in
accordance with the manufacturer's instructions.
8.
Do not install near any heat sources such as radiators, heat
registers, stoves,
or
other apparatus (including amplifiers)
that produce heat.
9.
Do not defeat the safety purpose
of
the polarized or
grounding -type plug. Apolarized plug has two blades
with one wider than the other. Agrounding type plug has
two blades and athird grounding prong. The wide blade
or the third prong are provided for your safety. When the
provided plug does not fit into your outlet, consult an
electrician for replacement
of
the obsolete outlet.
10.
Protect the power cord from being walked on orpinched
particularly at plugs, convenience receptacles, and the
point where they exit from the apparatus.
11.
Only use attachments/accessories specified by the
manufacturer.
12.
Use only with acart, stand, tripod, bracket, or table
specified by the manufacturer, or sold with the apparatus.
When acart is used, use caution when moving the cart!
apparatus combination to avoid injury from tip-over.
13.
Unplug this apparatus during lightning storms or when
unused for long periods
of
time.
14.
Refer all servicing to qualified service personnel.
Servicing
is
required when the apparatus has been
damaged in any way, such as power-supply cord orplug
is damaged, liquid has been spilled or objects have fallen
into the apparatus, the apparatus has been exposed to
rain or moisture, does not operate normally, or has been
dropped.
Additional Warnings
•The apparatus shall
not
be
exposed
to
drip-
ping or splashing and that
no
objects
filled
with liquids, such
as
vases, shall be placed
on
apparatus.
L'appareil
ne
doit pas
eire
expose
aux
ecoule-
ments
ou
aux ec/aboussures et aucun objet ne
contenant
de
liquide,
tel qu'un
vase,
ne
doit
eire
place sur
/'objet.
•Main plug
is
used
as
disconnect device and
it
should remain readily operable during intended
use.
In
order
to
disconnect
the
apparatus
from
the
mains completely,
the
mains plug should
be
disconnected
form
the
mains
socket outlet
completely.
Laprise
du
secteur
ne
doit pas
eire
obstruee
ou
doit
eire
facilement accessible pendantson
utilisation. Pour
eire
completement deconnecte
de
/'alimentation d'entree,
la
prise doit
eire
debranchee
du
secteur.
•Battery shall
not
be exposed
to
excessive heat
such
as
sunshine,
fire
or
the
like.
Les piles ne doivent pas
eire
exposees a
de
forte
chaleur,
tel qu'a
la
lumiere du solei/,
au
feu
ou
autres choses
de
semblable.
•Caution marking
is
located at
the
bottom
of
apparatus.
Les precautions d'emploi sont inscrites
en
bas
de
I'appareil.
•
The
marking information
is
located at the bot-
tom
of
apparatus.
Les marquages sont inscrits
en
bas
de
/'appareil.
FCC Warnings
NOTE:
This equipment
has
been tested and
found
to comply with
the
limits
for
aClass B
digital device, pursuant
to
Part
15
of
the
FCC
Rules.
These limits
are
designed
to
provide
reasonable protection against harmful interfer-
ence
in
aresidential installation. This equip-
ment generates,
uses,
and can radiate radio
frequency energy
and,
if
not installed
and
used
in
accordance
with
the
instructions,
may
cause
harmful interference to radio communications.
However, there
is
no
guarantee that interference
will
not occur
in
aparticular installation.
If
this equipment
does
cause
harmful
interference
to
radio or television reception, which can
be
determined
by
turning
the
equipment offand
on,
the user
is
encouraged
to
try
to
correct
the
interference
by
one
or
more
of
the
following
measures:
•Reorient or relocate
the
receiving antenna.
•Increase the separation between
the
equipment
and receiver.
•Connect the equipment into
an
outlet
on
a
circuit different
from
that
to
which
the
receiver
is
connected.
•Consult the dealer or
an
experienced
radiofTV
technician
for
help.

PRODl
('I
1:\
FOR'.
\1"10'\
I
FEATURES
Dock
plays
and
charges
iPod
Wireless
speakers
AMlFMradio
I
INTHEBOX
IS819B
RF Wireless Remote Control
Docking Brackets for iPod
Supports multiple speakers Documentation
Advanced hi-fi sound with Channel
Purity®
Remote
Digital volume control
Pairing button
Left, right,
or
mono selections
Weather resistant
Digital 2.4GHz ISM wireless transmitter
------
----
----------------
LCD display with white backlight
------------_._
..
_._-._---_.
__
.
__
._--_
..
-
Digital clock
Play/pause, skip up/down functions for
iPod
On/Off, mute, function and pairing
controls
Independent volume settings for each
speaker
Transmission range: 200ft line
of
sight,
90ft indoors
Auxiliary input for iPod shuftle and other
audio devices
AC
power: built-inAC cord
DC
power: requires 6
AA
batteries per
speake~notincluded
_.-
-
--
.---------
_.-
--
_.
--
._
..
_.
- -
--
---
-
Includes: remote control, docking
brackets for iPod
4

IAC
POWER
CORD
Plug the includedAC cord into astandard
AC outlet
(120V~60Hz)
IREMOTE BATTERIES
Requires 2
AA
batteries, not included.
r1
r1
.-=-
......-
•
CD
~
~
•I I
~
~
CD
•
'--
I::::=l
l-J
PO\\
ERI\C
TilE
l\1'1' &
RE\tOTE
IBATTERYBACKUP
Requires 2
AA
batteries, not included.
@)
@)
"======!I
I~I
The battery backup is meant
for
short,
unexpected
power
outages. The unit
cannotfullyfunction
off
of
the backup
batteries alone.
PO',"ERI:\G
TilE
SPE,\KERS
IAC POWER CORD
Plug the includedAC cord into astandardAC
outlet
(l20V-60Hz)
IBATTERY POWER
Battery Power (Requires 6 D batteries, not
included)
5

\\
IRELESS
CO'\'\E(
11\
Ir,
I
PAIRING
SPEAKERS
WITH
THE
UNIT
Note: The speakers needto be
paired
with the unit before any audio can be heard.
_.
1.
Press the Power Button on the unit to turn the unit on.
2. Press the Power Button on the speakers to turn the speakers on.
3. Press and hold the Pair Button
on
the unit until the Link Indicator begins blinking.
4. Note: The Link Indicators will flash when the unit is in Standby Mode.
5. Press and hold the Pair Button on the speakers until the Link Indicator begins blinking.
6. The Link Indicator will shine solid on both the unit and speaker once they are paired
together.
Transmission range: 200ft line-ol-sight, 90ft indoors (please consider these numbers
estimates, as results will vary depending on location).
Caution: The includedspeakers are not designed
for
use outdoors.
Any
exposure to
precipitation may ruin the speakers.
I
LINK
INDICATOR
011-
The unit is powered off.
Flashing- The unit is in Standby Mode:
Blinking- The unit is attempting to pair with nearby wireless speakers.
Solid- The unit is paired with one or more nearby wireless speakers and playing.
I
USING
THE
WIRELESS
REMOTE
The includedremote is wireless
and
does not require line-ol-sight to control the unit.
The wireless remote can control the unit from approximately
half
the distance
of
the
speaker reception. (Approximately 100ft line-of-sight, or 45ft indoors depending on
location)
.......................
The Volume
Buttons
on the remote control will adjust the master volume
of
the unit,
affecting all linked speakers.
The includedspeakers have independent volume controls that can be used
to
fine tune the
volume
of
the individual speakers.
6

I
POD
OPER,\TIO,\S
IDOCKINGAN
IPOD
1.
Locate the numbered bracket that fits the
iPod that will be docked.
Each includedBracket has anumber
on
it,
indicating which iPodmodel that
bracket is compatible with. See the
separate bracket chart
page
to identify
which bracket is needed.
2.
Snap the bracket into place over the iPod
Connector in the dock.
3.
Connect the iPod to the iPod Connector
inside the dock.
When the unit is
plugged
in,
usingAC
power, the dockediPodwill charge.
IPLAYINGAN
IPOD
•
•
U.
•.
D
1.
After Docking an iPod, press the Power Button to
tum
the unit on.
2.
Press the Source Button to switch to iPodMode.
3.
Press the Play/Pause Button to begin playing audio from the docked iPod.
.......................................................................................................................................................................
•Press the iPod MenulMem Button to move back to previous menus on adocked iPod.
This button works exactly like the menu button on an iPod.
•Press the Select Button to make selections on adocked iPod.
This button works exactly like the select button on an iPod.
.........................................................................................................................................................................................................................................
•Press the Menu/Preset +and Menu/Preset -Buttons to move up and down in any
of
the
iPodmenus.
•Press the Skip/Tun -and Skip/Tun+ Buttons to skip between tracks on adocked iPod.
•Press and hold the Skip/Tun -and Skip/Tun+ Buttons to search and individual track on a
docked iPod.
7

CI.OCh:
OPEI{
\TIO\S
I
SETTINGTHETIME
1.
Press the
Power
Button
to turn the unit
off.
2. Press and hold the
Time/Dimmer
Button.
I
SETTING
THE
TIMER
1.
Press the
Power
Button
to
tum
the unit
on.
2.
Press and hold the
Timer
On/Off
Button.
3.
While holding the
Time/Dimmer
Button,
3.
press the Skip/Tun-.
Button
to adjust the
hour, and the SkiplTun+
Button
to adjust
the minutes.
A
"PM"
indicator will appear on the
display when the time is set in the
PM
While holding the
Timer
On/Off
Button,
press the SkipfTun-
Button
to adjust the
hour, and the Skip/Tun+
Button
to adjust
the minutes.
A
"PM"
indicator will appear on the
display when the time is set in the
PM
4.
Release the
Time/Dimmer
Button
to
finish setting the time.
8
4. Press the Source
Button
to adjust the
timer source.
----------
The Timer Source is thefunction that the
unit will
power
on to when the
set
time is
reached.
5.
Release the
Timer
On/Off
Button
to
finish setting the timer.
6.
Press the
Power
Button
to
tum
the unit
off.
7.
Press the
Timer
On/Off
Button
to
activate
or
deactivate the timer.
The text "Timer
On"
willappear on the
display when the timer is activated.

ITUNING
THE
AMlFM
RADIO
1.
Press the
Power
Button
to turn the unit
on.
2.
Press the Source
Button
to switch to
AM
or
FM
Radio Mode.
3.
Press the SkiplTun- and Skip/Tun+
Buttons to adjust the AM or FM radio
station.
ISAVINGARADIO STATION
TO
THE
UNIT'S
MEMORY
1.
After tuning the radio to the desired
station, press the iPod
Menu/Mem
Button.
2.
Press the MenulPreset+and Menu!
Preset
-Buttons to select the memory
slot to save the current station to.
Up
to
20
AM
and
20
FM
stations can be
saved.
3.
Once the desired memory slot is selected,
press the iPod
Menu/Mem
Button
to
save the currentAM or FM station to that
memory slot.
4.
Press the MenulPreset+and Menu!
Preset -Buttons to cycle through saved
AM and FM radio stations.
IPOD
OPER
\TIO'\S
IUSING
THE
AUXILIARY
INPUT
1.
Connect an MP3 Player or other audio
source to the Auxiliary Input.
,~"'~
•••
_
.'
••
~~,
..
,
.•
,
•••••••••.
,
.....
._",.
__
.n
......
_
•••••••.••••
'
•••••
__
••••
__
••
_._
••
,._.
.,
•
__
• .
__
,._.,
•••••••.•
_
•••
_
...
_
..
_
..
'
•••••
,_._
....
,
••
_
••
_
••••••
_
.•
__
••.
..
_
•••
_
2.
Press the
Power
Button to turn the unit
on.
3.
Press the Source
Button
to
switch the
unit to
Aux
Mode.
Use the connected device's controls to
control the audio playing through the unit.
9

('LOCh:
OPER\TIO'\S
9
8
10
...
• • ••••••••
..........
• • • • ••• • •
••••••• • • • •
•••
:J@)~
.~
..
..
~~~~
.
•
•
•
...
,:.'------------_.-
•
•
.....
• • ••••
IIClUME
•••••••••• •
•••
• •
••
• •
[JoE]
[J
[J
1:J
•
•
•
• • • • • • •• • •
• • • •••••••
• • • • • •••••••
•
•
•
•
•
•
1
••• • • • ••• •
2
• • •••••• • •
3
·.••••••••
4
••
5
• •
6
••
7
• •
lJNl(
()
11
• • • • • • • • ••••••••••
==
====
====
c==>
c=::::::)
<==::)
c:=»
c=:=>
c=:=)
c::::=:::)
c:=>
====
====
~~c:=:::>c:=::::::)
==
el
AA
uv
D$
$11
AA
uv
Ie
12
•••
10

01.
iPod
Connector
Use the iPod Connector to dock an iPod
onto the unit.
02.
Power
Button
Press the Power Button to tum the unit
off
and on.
03. Volume Buttons
Press the Volume Buttons to adjust the
volume
of
the unit.
04.
Mute
Button
Press the Mute Button to mute the volume
of
the unit.
05. Source
Button
Press the Source Button to switch
between iPod, AM, FM, and
Aux
Modes.
06. Select
Button
Press the Select Button to make selections
on adocked iPod.
07.
iPod
Menu/Mem
Button
Press the iPod Menu Button to move to
the previous menu on adocked iPod.
This button works exactly like the menu
button on an iPod.
Press the Mem Button to save the current
AM or FM radio station to the unit's
memory.
Up
to
20
AM
and
20
FM
stations can be
programmed.
08.
Time/Dimmer
Button
With the unit powered off, press the Time
Button to set the unit's time.
IPon
OPFI{
\"IIO'\S
09.
Timer
On/Off
Button
With the unit powered on, press the Timer
On/OffButton to set the timer.
With the unit powered off, press the
Timer On/OffButton to activate or
deactivate the timer.
10. MenulPreset+ &MenulPreset-
Button
Press the Menu +and Menu -Buttons to
move up and down through the menus on
adocked iPod
._._
_
•............
_ _ _ _ _
..
_
__
..
_._-
__
..
_ _ _
..
_ _
..
_
..
_._
..
__
..
_
_----_
__
_.
__
_-_._
..•........
-.-._
_-
•....
Press the Preset+ and Preset -Buttons
to move through the presetAM and FM
radio stations.
•
Skipffun-
&
Skipffun+
Buttons
Press the Skip Buttons to skip through
tracks on adocked iPod.
--
--------------------------_.
Press and hold the Skip Buttons to search
through an individual track on adocked
iPod.
Press the Tun- and Tun+ Buttons to tune
the AM
orFM
radio.
•PlaylPause
Button
Press the Play/Pause Button to play or
pause adocked iPod.
11.
Link
Indicator
Off- The unit is powered off.
Flashing- The unit is in Standby Mode.
Blinking- The unit
is
attempting to pair
with nearby wireless speakers.
Solid- The unit is paired with one or more
nearby wireless speakers and playing.
With the unit powered on, press the
-----
..
----------------------
-
....
-. ------.-
12.
Battery
Compartment
Dimmer Button to adjust the brightness
of
Requires 2AAbatteries, not included.
the display. .
.....
__
._..
___._.
. _
11

CLOCI'
OPER\TIO'\S
20
13
@•• • • • • • • • • ••• • • • • • • • •
•
•• • 0
••
•
_II
•
..-
14
••
===
•
•••••
===
•
===
•
IOC-
21
15
•
==~
•
~c:;=wt~.
•••••••• • •
••• • ••• • • •
..
_.
=
16
••••• • ••• • • • • •• • • • • • • • • • • • • •
•
•• • • • • • •• • •••• • ••
•
•
22
••••••• • •
17
•••
III'T
.....,
9===;===:;==r:l::====r==
......
23
• • •
().
......................
24
••••• • •• •
18
......................
~~~~~~~~~~=~~~~
19
•••• • •• • • • • • • ••••••••
Caution: The includedspeakers are not designed
for
use outdoors.
Any
exposure to
precipitation may ruin the speakers.
12

13.
Pair
Button
Press the Pair Button to pair the unit to
wireless speakers.
14. Reset Button
Use apaperclip or like object to press
the Reset Button and reset the unit to it's
default settings.
IPOI>
OPER.\TIO'S
21. AC Power
Cord
Use the AC Power Cord to power the
speakers as an alternative to using battery
power.
22. Power Button
Press the Power Button to
tum
the
speakers on and off.
--_._
...
__
._---------------_._------------~----_.
__
.
---------
--
15. Auxiliary
Input
Use the Auxiliary Input to connect an
MP3 player or other audio source to the
unit.
16. Volume Dial
Turn the Volume Dial to adjust the
volume
of
the speaker.
The included speakers have independent
volume controls that can be used to
fine tune the volume
of
the individual
speakers.
The Volume Buttons on the remote control
will adjust the master volume
of
the unit,
affecting all /inkedspeakers.
17. Left/RightIMono Button
Turn the LeftlRight/Mono Button to
switch between left, right, and mono
speaker modes.
18. Battery Compartment (Requires 6 D
batteries, not included)
19. AC Power
Cord
Use the AC Power Cord to power the
speakers as an alternative to using battery
power.
20. FM WireAntenna
Use the
FM
Wire Antenna to improve
FM
radio reception
An
AM
antenna is built into the unit.
Adjust theposition
of
the unit to improve
AM
radio reception.
23.
Pair
Button
Press and hold the Pair Button to have the
speaker search for anearby unit to link to.
24.
Link
Indicator
Off- The unit is powered off.
Flashing- The unit is in Standby Mode.
Blinking- The unit is attempting to pair with
nearby wireless speakers.
Solid- The unit is paired with one
or
more
nearby wireless speakers and playing.
13

CLOCK
OPER\TIO\S
POWER
MUTE
25
.@
(~)
30
•• • •••••••••••• • •••• • • ••••••••••••••• • • • •••
SOURCE
RANDOM
26
·0
O·
31
•
••
••••• • •••• • ••••••• • • • •• • •• • •••••••••••• •
•
••••••
• •
•
PRESET
•••
••
••
••
••
••
•••
27
••
• • • ·................ • •
•
••
••
•
•••
••
••
••
•
PRESET
•
•••
•••••••
+ + +
28
• • • • ••••••••••• • ••••••
TREBLE
BASS
VOL
• • • 32
·..................
29
·...................••••••••• • • •
14

25. Power Button
Press the Power Button to
turn
the unit
off
and on.
26. Source Button
Press the Source Button to switch
between iPod, AM, FM, andAux Modes.
27. Skip/Search Buttons
Press the Skip/Search Buttons to skip
between tracks on adocked iPod
Press and hold the Skip/Search Buttons
to search through an individual track on a
docked iPod.
•Preset+&Preset -Buttons
Press the Preset +&Preset -Buttons to
cycle throughAM and
FM
radio stations
saved to the unit's memory.
•Play/Pause Button
Press the Play/Pause Button to play or
pause adocked iPod.
28. Treble Buttons
Press the Treble Buttons to adjust the
level
of
treble output from the unit.
29. Bass Buttons
Press the Bass Buttons to adjust the level
of
bass output from the unit.
30. Mute Button
Press the Mute Button to mute the volume
of
the unit.
31. Random Button
Press the Random Button to activate the
ShufJie Mode and play tracks on adocked
iPod in random order.
This activates the native ShufJie Mode on
the docked iPod.
32. Volume Buttons
Press the Volume Buttons to adjust the
volume
of
the unit.
IPOD
OPER\TIO\S
15

CO'I
P.\:\'YI:\'
FOR'I.\TIO,\
IGREEN INITIATIVE
Environmental Commitment to
'Protect
for Today
and
Sustain for Tomorrow'
2009 marks the official launch
of
DPI, Inc.'s corporate campaign for agreener and
cleaner world. DPI and its four brands, iLive, WeatherX, Capri, and GPX, are building
upon environmental initiatives introduced at all
of
their facilities to help formulate and
sustain significant and important conservation efforts within its manufacturing and
marketing communities. In addition to targeting and selecting energy efficient product
features, and structuring 'green office' procedures, other initial program efforts include:
•Reduction
of
all packaging sizes
•Recyclable plastics for clamshell packages, with aplan to
eventually replace plastic with recyclable paper
•Recycled fiber board in place
of
the polyfoam in packing boxes
•Recycled plastics in place
of
the virgin material in product construction
IINTERNATIONAL SUPPORT
To
download this User's Guide in English, Spanish,
or
French, visit the support section at
www.ilive.net.
Para transferir esta guia de usuario en ingles, espanol, 0frances, visite la secci6n de la
ayuda en www.ilive.net.
Pour telecharger ce guide de l'utilisateur en anglais, espagnol, ou
fran~ais,
visitez la
section de soutien chez www.ilive.net.
ISERVICE INFORMATION
Address: 2116 Carr Street, St. Louis MO, 63106
Phone: 1-314-621-2881
Fax: 1-314-588-1805
Email: [email protected]
Parts Email: [email protected]
Website: www.ilive.net
©2009 Digital Products International (DPI, Inc.) IAll other trademarks appearing herein are the property
of
their
respective owners. Specifications are subject to change without notice

Compatibility information and Chart 819B
Please note:
For
additional iPod brackets, please contact customer service. Contact information for customer
service can
be
found on the back page
of
the instruction manual.
iPod Model Play &Charge
Compatibility Included
Bracket
~
IPodmlnl
e
4GB
6GB
~
IPod e
~
4th generation
20GB
~
IPod e
~
4th generation
40GB
IIPod eG
4th generation (color display)
20GB
30GB
IIPod e
4th generation (color display)
40GB
60GB
~
IPod
shuffle
1
st
generation
512MB
1GB
;
IPodnano
e e
1st generation
1GB
2GB
4GB
~
IPod eG
5th generation (video)
30GB
~
I!»od e
~
5th generation (video)
60GB
80GB
~
IPodnano
ee
2nd generation (aluminum)
2GB
4GB
8GB
IPod
shuffle
~
2nd generation
1GB
~
IPod classic e
~
@
80GB
~
IPod classic e
~
@
160GB
~
IPodnano
eG)
3rd generation (video)
4GB
8GB
D
iPodtouch
e
~
1st generation
8GB
16GB
32GB
0iPhone
Airplane
Mode
Only
4GB
8GB
16GB
DiPhone
3G
Airplane
Mode
Only
8GB
16GB
~
iPodnano
ee
4th generation (video)
8GB
16GB
o
iPodtouch
e
~
2nd generation
o
8GB
16GB
32GB

Infonnations et tableau de compatibilite des
adap_ta_te_ur_s
8_l9_B
Anoter :pour plus
d'
adaptateurs iPod, contactez notre service client. Les coordonnees de notre service client
se situent a
la
derniere page
dumanuel
d'utilisation.
Modele d'iPod
Compatiblire
de
lecture
&
mise
en
charge
Adaptateur
foumi
~
IPocImlnl e
@
4Go
6Go
~
IPoci
e~
o
=~tIon
~
IPoci
e
~
~~
04OGo·
I'- e
~
o
~
generation
(couleur)
2OGo
30G0
I~
e
o
=~tIon
(couleur)
~
~shufIIe
l~e~
S12Mo
lGo
;~~
e e
1~~
olGo
2Go
4Go
I
=~tion
(vkJeo) e
~
1~1
=
~tion
(vkJeo) e~
06OGoSOGo
~Fod~
ee
o2eme
~tIon
(aluminum)
2Go
4Go
8Go
~shufIIe
~
2eme~tIon
lGo
iFod~
e
~
@SOGo
~Fod~
e
~
®
16OGo
i
WodMnO
e
~
3eme
~tion
(vkJeo)
o
4Go
8Go
0"'- e
~
1ere generation
aGo
16Go 32Go
D~16Go
~ne
ModeOnly
DI~3G
Airplane ModeOnly
aGo
16Go
~
IPocinano ee
@4emegeneration (video)
aGo 16Go
D"'- e~
2eme generation
o8Go
16Go
32Go

Garantia Limitada 90 Dias
El
fabricante garantiza este producto
al
comprador inicial contra
todo
defecto
de
material y
de
fabricaci6n, bajo condiciones
normales, por
un
periodo
de
90
dlas apartir
de
la
fecha
de
compra inicial.
Un
afto
en
partes comenzando
del
dia
de
compra.
EI
fabricante
Ie
proporcionara partes
s610
a
los
productos reparados
en
el Departamento
de
Servicios
de
iLive
en
St.
Louis,
MO
y
costos
de
envio tienen
que
ser pagados por
el
c1iente
en
anticipo despues
de
90
dias.
EI
fabricante acepta, a
su
discrecion durante
el
periodo de vigencia
de
esta garantia, reparar todo defecto
de
material 0
de
fabri-
cacion 0reemplazar
el
producto defectuoso por
el
mismo producto sin costo adicional. Esta reparacion 6reemplazo esta sujeta/
a
la
verificacion
del
defecto 0
del
mal
funcionamiento
del
aparato yprueba mostrando
el
nfunero
de
modelo
de
iLive
en
el recibo
original
de
compras
con
la
fecha.
Para obtener este servicio, envle
su
unidad asegurada y
con
el
transporte
PAGADO
POR
ADELANTADO
a:
Consumer
Service
2116
CARR
STREET,
ST. LOUIS,
MO
63106
•Embale
la
unidad
en
una
caja
de
carton resistente, con relleno protector.
•Adjunte
una
copia
de
su
recibo
de
venta para verificar
la
fecha
de
compra
del
producto.
•
Inc1uya
su
nombre, direcci6n y
nfunero
de
telefono.
EI
fabricante
decidirii
reparar 0reemplazar
el
producto garantizado sin costo adicional.
NOTA:
Esta
garantia
no
cubre
ningUn
producto
daiiado
por
causas
de
fuerza
mayor,
mala
utilizacion,
negligencia,
accidente,
abuso,
uso
comercial
0
modificacion
de
0a
cualquier
parte
del
producto,
incluyendo
la
antena.
Esta
garantia
no
cubre
tampoco
los
daiios
causados
a
medios
extemos
como
DVD,
discos
compactos,
discos
de
larga
duraci6n,
cintas
y/o
aparatos
de
memoria
ni
tampoco
el
costo
de
envlo
del
producto
para
su
reparaci6n.
El
fabricante
no
es
responsable,
bajo
ninguna
circunstancia,
de
perdidas
(directas,
indirectas,
secundarias,
previstas,
imprevistas,
especiales)
0
de
dailos
que
resulten
de
0
por
el
uso
de
este
producto.
iPods
no
son
cubierto por esta garantla.
Esta
garantia
no
cubre
los
daftos
que
resulten
de
la
utilizacion 0
del
mantenirniento incorrecto,
de
la
conexion auna fuente
de
voltaje inapropiada 0
de
un
intento
de
reparacion realizado por personal
no
autorizado por el fabricante ,
St.
Louis,
MO.
Esta
garantia
no
cubre
las
unidades fabricadas nuevamente,
los
productos vendidos
TAL
CUAL
0productos
de
liquidaci6n.
Esta
garantia
es
valida ooicamente
en
Estados Unidos yconfiere derechos legales especificos. Usted puede tener otros derechos
que
varian
de
Estado aEstado.
NOTA:
Para
los
productos
que
contienen memoria intema para almacenar musica, informacion, etc.,
la
cantidad
de
memoria
que
su
sistema operativo reporta puede variar
segim
la
memoria
que
este aparato indica.
IMPORTANTE:
NO
ENviE
ESTE
PRODUCTO
AL
NEGOCIO
EN
QUE
LO
COMPR6
PARA
REPARACI6N.
CON-
SULTE ESTAGARANTIA PARA
OBTENER
INFORMACIONES
AL
RESPECTO.
Garantie Limitee 90 Jours
Le
constructeur garantit
ce
produit
al'acheteur initial contre
tout
defaut
de
materiel
et
de
fabrication,
en
conditions
normales,
pour
une
periode
de
90
jours a
compter
de
la
date
d'achat
initial
du
produit.
Un
an
sur
des
parties
de
jour d'achat
Le
constructeur
fournira
des
pieces
seulement
pour @
Ie
centre
commercial
service
par
produits
de
iLive
a
St
Louis,
MOIS.
Le
travail
et
les
honoraires
de
S&H
doivent
etre
payes
par
Ie
client
apres
90-days,
al'avance.
Le
constructeur
accepte
a
son
choix,
pendant
la
duree
de
cette
garantie,
de
reparer
tout
defaut
de
materiel
et
de
fabrication
ou
de
remplacer
Ie
produit
defectueux
par
Ie
meme
produit
sans
frais.
Cette
reparation
ou
ce
remplacement
sera
effectue
moyennant
la
verification
du
defaut
ou
du
mauvais
fonctionnement
de
l'appareil
et
la
presentation d'une
preuve
d'achat
dans
la
forme
d'un
re~u
de
vente
original
date
en
montrantle
numero
de
type
de
iLive.
Pour
obtenir
ce
service,
envoyez
Ie
produit
assure,
avec
fret
PAYE
D'
AVANCE
a:
ConsumerService
2116
CARR STREET, ST. LOUIS,
MO
63106
•
Emballez
votre
produit
dans
une
boitede
carton
rembourree.
•
Joignez
une
copie
de
votre
r~u
de
ventes
pour
verification
de
la
date
d'achat
du
produit.
•
Indiquez
votre
nom,
adresse
et
numero
de
telephone.
Le
constructeur choisira
de
reparer
ou
de
remplacer
tout
produit
garanti,
sans
frais.
REMARQUE:
Cette
garantie
ne
couvre
pas
les
produits
endommages
par
cause
de
force
majeure,
mauvaise
utilisation, negligence,
accident,
mauvais
traitement, utilisation commerciale
ou
modification
de
ou
a
quelque
part
que
ce
soit
de
ces
produits, y
compris
l'antenne.
Cette
garanlie
ne
couvre
pas
non
plus
les
dommages
causes
aux
medias
eXlerieurs
leis
que
des
DVD,
disques
compacts,
albums,
cassettes
et/ou
appareils
de
memoire
ni
Ie
cout
d'
envoi
du
produil pour
sa
reparation.
En
aucun
cas,
Ie
constructeur
ne
sera
pas
lenu
responsable
des
pertes
(directes, indirectes, secondaires,
prevues,
imprevues,
speciales)
ou
des
dommages
qui
decoulent
de
ou
en
raison
de
I'utilisation
de
ce
produit.
iPods
ne
sonl
pas
couverture
par
cette
garantie.
Sont
exclus
de
cette
garantie
les
defauts
pouvant
survenir par
la
suite
de
l'utilisation
et
de
l'entretien
anormaux,
du
raccordement
a
une
source
de
tension
inadequate
ou
des
reparations effectuees par
du
personnel
non
autorise par
Ie
constructeur,
St.
Louis,
MO.
Cette
garantie
ne
couvre
pas
les
produits
fabriques
a
nouveau
ou
les
produits
vendus
TEL
QUELS
ou
produits
liquides.
Cette
garantie
n'est
valable
qu'aux
Etats-Unis
et
vous
confere
des
droits
legaux
specifiques.
Vous
pouvez
avoir d'autres
droits
en
vertu
des
lois
etaliques.
REMARQUE:
Pour
les
produits
qui
contiennent
memoire
interne
pour stocker
de
la
musique,
information,
etc.,
la
quantite
de
memoire
que
votre
systeme
d' exploitation
rapporte
peut
varier
selon
la
memoire
que
cel
appareil
indique.
IMPORTANT: N'ENVOYEZ
PAS
CE
PRODUITAU DETAILLANT POUR REPARATION. LISEZ
CETTE
GARANTIE
POUR OBTENIR DES INFORMATIONS SUR LES SERVICES FOURNIS.
2116 CARR STREET -
ST.
LOUIS, MO 63106 -TEL: 314-621-2881- FAX: 314-588-1805

,~N
~
Lly=
Limited
90
Day
Warranty
The manufacturer warrants this product to the original purchaser to be free from defects in
material and workmanship, under normal conditions, for aperiod
of
90 days from date
of
original purchase.
The manufacturer agrees, at its option during the warranty period, to repair any defect in
material or workmanship or to furnish an equal product in exchange without charge. Such
repair
or
replacement is subject to verification
of
the defect
or
malfunction and proof
of
purchase as confirmed by showing iLive Model number on original dated sales receipt.
To
obtain service, return the unit insured and freight PREPAID to:
Consumer Service
2116
CARR
STREET, ST. LOUIS,
MO
63106
•Pack the unit in awell-padded, sturdy carton.
•Enclose acopy
of
your sales receipt to verify the date
of
purchase.
-Include your name, address and phone number.
The manufacturer will elect to repair
or
replace properly warrantied product free
of
charge.
NOTE: This warranty does not cover any product which has been subject to damage due
to an act
of
God, misuse, neglect, accident, abuse, commercial use, or modification of,
or
to, any part
of
the product, including the antenna. Damage to external media such as DVD,
CD,
LP,
tape and/or memory devices are not covered nor is the cost incurred in shipping
the unit for warranty repair. Under no circumstances shall the manufacturer be liable for
any loss (direct, indirect, incidental, foreseen, unforeseen, special or consequential) or for
any damage arising out of, or in connection with, the use
of
this product.
iPods are not covered under this warranty.
This warranty does not cover damage due to improper operation or maintenance,
connection to improper voltage supply, or attempted repair by anyone other than the
manufacturer, St. Louis, MO.
This warranty does not cover re-manufactured units, product sold AS IS
or
closeout
product.
This warranty
is
valid only in the United States and grants specific legal rights. You may
also have other rights which vary from state to state.
NOTE: For products that contain internal memory for storage
of
music, data, etc., the
amount
of
memory your operating system reports may vary from the stated memory
of
this device.
IMPORTANT
NOTICE:
DO
NOT
RETURN
THIS
UNIT
TO
THE
RETAIL
STORE
FOR
SERVICE. INSTEAD,
FOLLOW
THE
ABOVE WARRANTY
SERVICE INSTRUCTIONS.
2116 CARR STREET -
ST.
LOUIS, MO 63106 -TEL: 314-621-2881- FAX: 314-588-1805
iPod is atrademark
of
Apple Inc., registered in the U.S. and other countries.
Other manuals for IS819B
1
Table of contents
Other iLive Media Converter manuals

iLive
iLive 1227-0324-09 User manual

iLive
iLive IHB613B User manual

iLive
iLive IT209B User manual

iLive
iLive IHB617B User manual

iLive
iLive IHB227 User manual

iLive
iLive IS819B User manual

iLive
iLive IKB333 User manual

iLive
iLive IHCTB627CW User manual

iLive
iLive IBD704B User manual

iLive
iLive IKBC384S User manual