ILP WTZ Series Instruction Manual

1
WTZ SERIES
INSTALLATION &
MAINTENANCE MANUAL
• To avoid the risk of fire, explosion, or electric shock, this product must be installed in accordance with the applicable
installaon code by a person familiar with the construcon and operaon of the product and the hazards involved.
• Be certain electrical power is OFF before and during installaon and maintenance. It is recommended that prior to
installaon the main breaker controlling the desired locaon for the fixture be turned off.
• The luminaire must be connected to a wiring system with an equipment-grounding conductor.
• Ensure the supply voltage is the same as the rated luminaire voltage.
• Inspect each fixture for any signs of damage before beginning installaon; do NOT install any fixture that is damaged.
• All wiring should be performed by a qualified technician and according to the appropriate local electrical code. Wear
gloves when disassembling fixture.
• Locate a posion to install the light fixture. The selected locaon must not hinder venlaon to the fixture unless
product specificaons indicate otherwise.
WARNING
General Wiring Diagram
The fixture comes pre-assembled from the factory. Depending on customer needs, the lighng fixture will either come with
or without an installed power cord.
Pre-installed power cord
• Make the appropriate wire connecons between the cord and the power source. All wire connecons should be
completed using approved/appropriate wire connecons according to all applicable electrical codes.
• Wires must not be exposed or frayed. Inspect wires for any signs of damage.
NO pre-installed power cord
If there is no pre-installed power cord with the fixture, access to the internal components will be needed to make the
appropriate wire connecons.
1. Remove the lens by locang and releasing the latches holding the lens to the housing. Support the lens while releasing
the latches to avoid dropping the lens.
2. The LED tray is held in place using clips down the center of the tray or in an alternate design, with four Quarter-Turn
fasteners. Support the tray while releasing it from the housing and as the LED tray swings down, gently hang it from the
fixture as it is supported by plasc Tethers. The 8models will ulize two separate 4long LED Trays.
3. Run the external power line wires through the end of the housing and make the appropriate wire connecons. All wire
connecons should be completed using appropriate wire connecons and according to local electrical code.
4. Use appropriate parts/accessories to ensure the housing wire port is sealed to prevent water/dust intrusion.
5. Inspect the closed cell polyurethane gasket for any gaps or damage.
6. Reaach the LED tray and lens.
Wiring
2
WTZ SERIES
INSTALLATION &
MAINTENANCE MANUAL
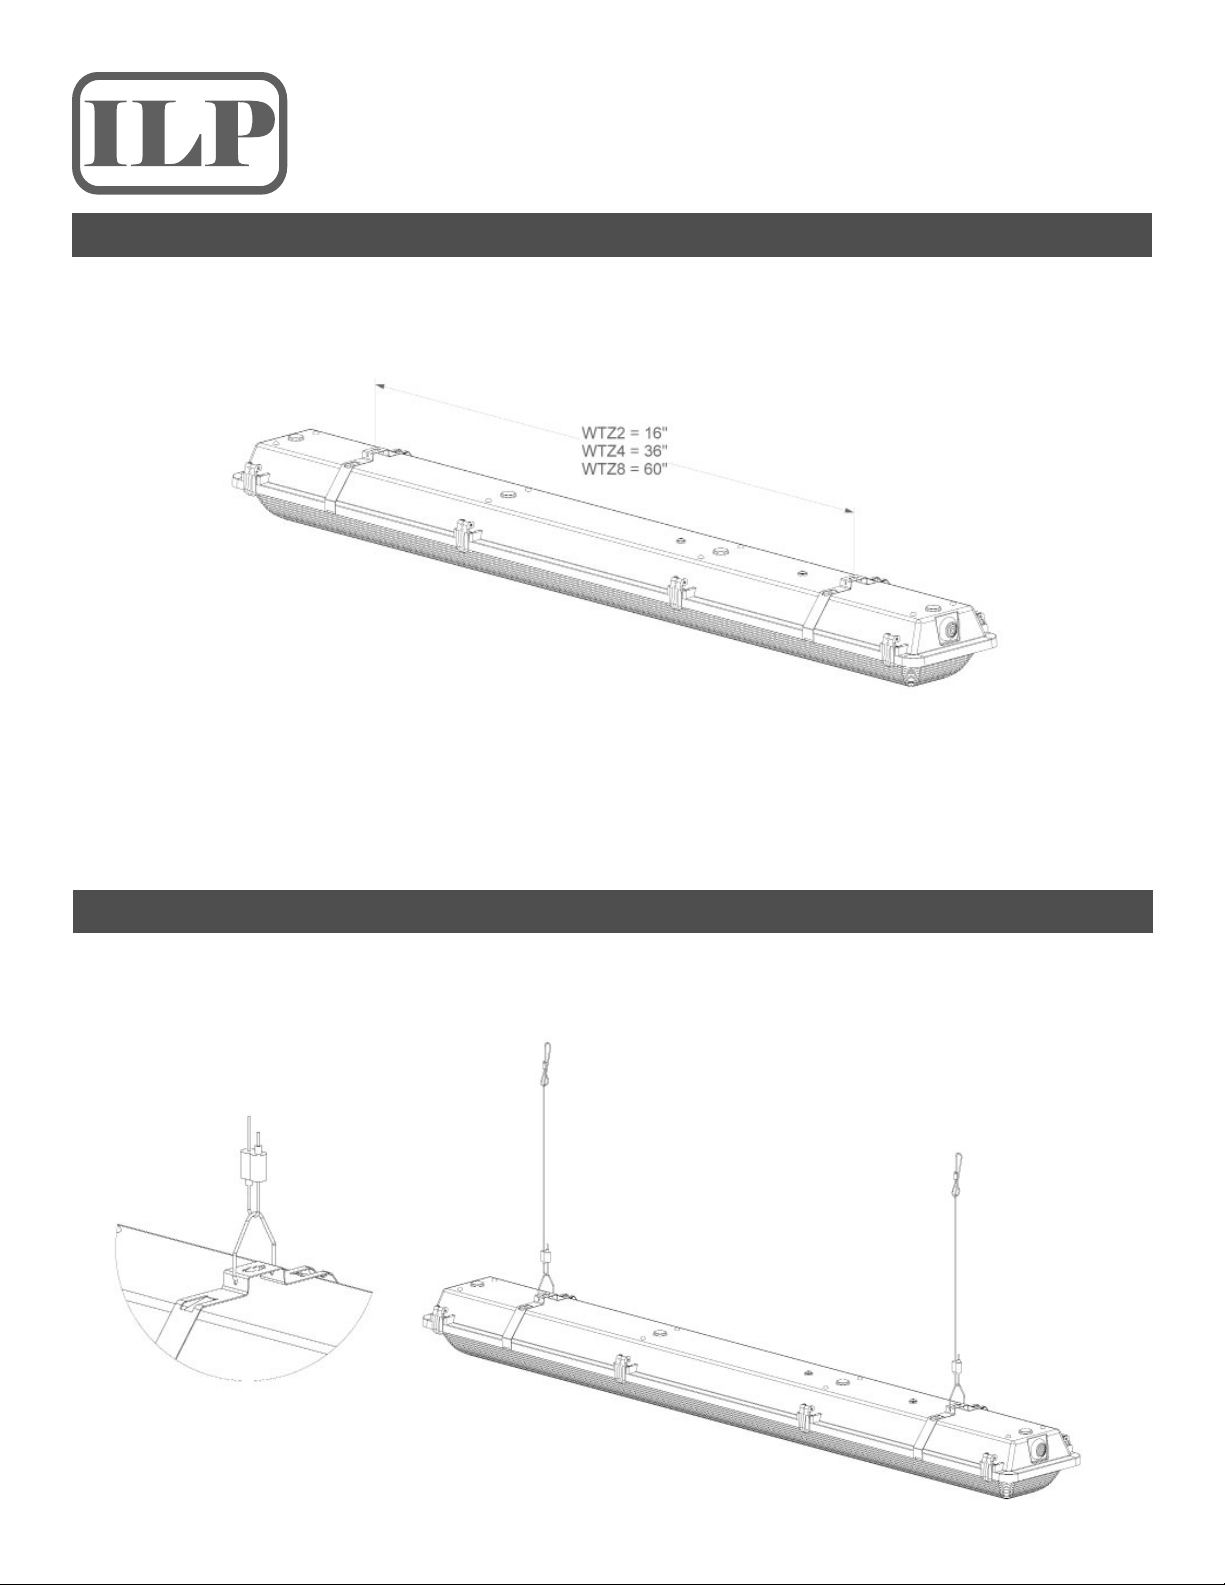
Screw the two mounng brackets to the ceiling structure using appropriate hardware (supplied by others). Snap
fixture into one end of each bracket. Rotate fixture into opposite side and snap into each bracket. Dimensions are
approximate.
Surface-Mount Installaঞon (Default)
Cable Kit Installaঞon
Connect the terminated end of the cable to the ceiling structure. Loop the other end of the cable into the mounng
clips located at each end of the fixture as shown below. Use the locking devices to level the fixture. Dimensions are
approximate.

3
WTZ SERIES
INSTALLATION &
MAINTENANCE MANUAL
The fixture will be supplied with the FMB Slide plate already mounted. Mount the FMB Box to the building pendant
conduit in preparaon to slide the fixture in place. Slide the fixture into the FMB Box and secure in place with one of
the supplied #8 screws. Perform the appropriate wiring connecons and then aach the FMB Door to the assembly
as shown using a #8 screw. For 8fixtures, two FMB boxes will be supplied and must be spaced accurately as shown
below.
FMB Kit Installaঞon
Install the two brackets into the desired surface using appropriate hardware (supplied by others). Aach the standard
surface-mount brackets to the 45DEG angle brackets as shown below using the supplied hardware. Aach the fixture
to the brackets using the same method shown in the Surface-Mount instrucon above. Dimensions are approximate.
45° Bracket Kit Installaঞon

4
WTZ SERIES
INSTALLATION &
MAINTENANCE MANUAL
If the fixture fails to operate once installaon has been completed:
• Ensure there is power to the fixture.
• Ensure the fixture is properly wired and grounded.
• Check to see if there are any loose wires inside the light fixture.
• Ensure the line voltage at the fixture is correct.
If none of these steps resolve the issue, contact your ILP representave for further assistance.
Depending on the applicaon of the fixture, maintenance schedules will vary and should be developed by the customer
following periodic observaon once fixtures are in operaon. At a minimum, the exterior surfaces should be wiped
down as part of regular maintenance.
Due to the IP rangs of the fixture, there should be no accumulaon of dust or moisture within the fixture. Therefore,
the fixture should only require dusng/wipe-down of the exterior surfaces as part of the regular maintenance.
However, if a more thorough cleaning is required or desired, the lens may be removed and washed according to the
following steps:
Lens Cleaning
1. Ensure power is turned offor disconnected before proceeding with maintenance. Once fixture is powered off,
ensure the fixture is given enough me to cool.
2. Idenfy the latches securing the lens to the housing. While supporng the lens in place, release all the latches.
Carefully lower lens from housing.
3. Clean the lens using warm water, then wipe down to dry. Use non-abrasive materials to prevent damage.
4. Inspect the closed cell polyurethane gasket around the perimeter of the housing before reinstalling the lens. The
gasket should have no gaps and should be capable of creang a ght seal.
5. Reinstall lens onto fixture housing.
Troubleshooঞng
Maintenance
Revision Date: 01/14/2021
This manual suits for next models
3
Table of contents
Other ILP Lighting Equipment manuals


