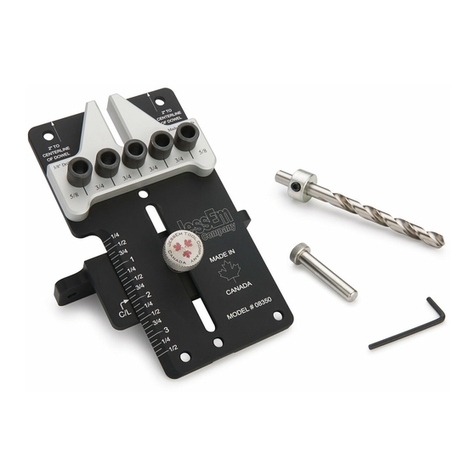
Impakt i1 System User manual

Impakt Tools
Pocket Hole Jig
Model I1 System
Instruction Manual

1
Introduction
Congratulations on your purchase of the Impakt Tools I1 Pocket-Hole Jig. Many
people will not use anything but 3/4-inch material. For that reason, the I1
Pocket-Hole Jig was designed, simple and economical. Please check the section
at the end that will give you some guidelines for using other thicknesses of
material.
You will be able to find other helpful information online at:
Safety Guidelines
GENERAL POWER TOOL SAFETY WARNINGS
Read all safety warnings and instructions. Failure to follow the warnings and
instructions may result in electrical shock, fire and/or serious injury.
SAVE ALL WARNINGS AND INSTRUCTIONS
FOR FUTURE REFERENCE
The term “power tool” in the warnings refers to your main-operated (corded)
power tool or battery operated (cordless) power tool.
impakttools.com

2
GENERAL SAFETY RULES
You will become very familiar with I1 System. Do not let that familiarity
with the tool make you become careless and forget the safety rules. A
careless moment can easily inflict severe injury.
For your own safety, read this instruction manual entirely before
operating the I1 Pocket Hole Joinery System. Learning the I1 Pocket
Hole Joinery System’s application, limitations, and specific hazards will
greatly minimize the possibility of accidents and injury.
When operating a power tool, wear proper apparel. Do not wear loose
clothing, gloves, neckties, rings, bracelets, or other jewelry which may
get caught in moving parts. Nonslip protective footwear is
recommended. Wear protective hair covering to contain long hair. Air
vents may cover moving parts and should also be avoided.
Do not use the I1 Pocket Hole Joinery System in a dangerous
environment. The use of power tools in damp or wet locations or in rain
can cause shock or electrocution.
Keep your work area well-lit to prevent tripping or placing arms, hands
and fingers in danger.
Before using the jig, check for proper settings, tightened knobs,
condition of the drill bit and secure setup.
Keep the work area clean. Cluttered areas and benches invite accidents.
Keep children away. All visitors should be kept at a safe distance from
work area. Your shop is a potentially dangerous environment.
Make workshops childproof with padlocks, master switches, or by
removing starter keys. The unauthorized start-up of a machine by a
child or visitor may result in injury.
Reduce the risk of unintentional starting. Make sure that the switch on
your drill is in the “off” position before connecting to the power
sources. In the event of a power failure, move the switch to the “off”
position. An accidental start-up can cause injury. Do not touch the
plug’s metal prongs when unplugging or plugging in the cord.
Remove adjusting keys and wrenches. Form a habit of checking to see
that keys and adjusting wrenches are removed from spindle before
turning tool on. Tools, scrap pieces and other debris can be thrown at
high speed, causing injury.

3
General Safety Rules cont.
Use the right drill. Don’t force the drill, damage to the drill and/or injury
may result. Make sure drill is turning the right direction before inserting
into the drill bushings.
Use recommended accessories. The use of accessories and attachments
not recommended by Impakt Tools may cause damage to the jig or
injury to the user.
Do not overreach while operating the power tool. Maintain a balanced
working stance at all times. When necessary, use only properly
positioned, safe platforms and scaffolding. WORK SAFE.
Turn the drill “off”, and disconnect the drill from the power source
before installing or removing accessories, changing bits, adjusting or
changing set-ups. When making repairs, unplug the tool / remove
battery and be sure to keep the start switch in the “off” position. An
accidental start-up can cause injury.
ALWAYS USE SAFETY GLASSES (ANSI Z87.1) and (CAN/CSA Z94.3).
Everyday eyeglasses are NOT safety glasses. Also use face or dust mask
if airborne dust is present. ALWAYS WEAR CERTIFIED SAFETY
EQUIPMENT:
oANSI Z87.1 eye protection (CAN/CSA Z94.3);
oANSI S12.6 (S3.19) hearing protection;
oNIOSH/OSHA/MSHA respiratory protection.

4
DRILL SAFETY RULES
WARNING: To reduce the risk of serious personal injury:
Read and understand the drill’s instruction manual before operating the
I1 Pocket Hole Joinery System.
Hold tool by insulated gripping surfaces when performing an operation
where the cutting tools may contact hidden wiring or its own cord.
Contact with a “live” wire will make exposed metal parts of the tool
“live” and shock the operator.
Maintain all drills and drill bits to be used in the jig in good working
condition. Keep tools sharp and clean for best and safest performance.
Poorly maintained tools and machines can further damage the jig
and/or cause injury.
Keep handles dry, clean and free from oil and grease.
Care should be taken if the jig is operated for long periods of time.
Vibration caused by the operating action of this tool may cause
permanent injury to fingers, hands, and arms. Use gloves to provide
extra cushion, take frequent rest periods, and limit daily time of use.
Use the proper extension cord. Make sure your extension cord is in
good condition. When using an extension cord, be sure to use one
heavy enough to carry the current your product will draw. An
undersized cord will cause a drop in line voltage, resulting in loss of
power and overheating. See the extension cord chart in your drill’s
owner manual for the correct size depending on the cord length and
nameplate ampere rating. If in doubt, use the next heavier gauge. The
smaller the gauge number, the heavier the cord.

5
I1 POCKET HOLE JOINERY SYSTEM SAFETY RULES
Clamp the I1 Pocket Hole Jig to a secure work surface or mount the jig
to a board that is then clamped to a secure work surface.
Turn the drill off, remove the drill from the I1 Pocket Hole Joinery
System and disconnect the drill from the power source before installing
and removing accessories, before adjusting or changing set-ups or
when making repairs. An accidental start-up can cause injury.
Handle drill bits by the smooth shaft only. The drill bit flutes are
extremely sharp.
Do not lock the drill on during drilling.
Always use the side handle supplied with the tool, if supplied. Keep a
firm grip on the drill at all times. Do not attempt to operate the drill
without holding it with both hands. Operating this tool with one hand
could result in loss of control.
Be sure the I1 Pocket Hole Joinery System is clamped or screwed
securely to a sturdy workbench or table before use.
Be sure the workpiece is free of nails and staples.
Secure the workpiece. Use clamps or a vise to hold long workpieces
when practical. Loss of control of a workpiece can cause injury.
Only use the included bit and drill bit depth collar or a proper IMPAKT
TOOLS replacement bit or collar sold for use with the I1 Pocket Hole
Joinery System.
NOTICE: To reduce the risk of tool or workpiece damage:
Verify the collar on your drill bit is calibrated properly according to
instructions and be sure it is tightened fully onto the bit’s shaft.
Be sure your drill is at full speed before drill bit contacts the workpiece
and a hole is drilled.
Only power drills should be used to drill holes. Do not use a router or
other similar tool.
The length of the workpiece should be at least as tall as the drill guide
bushings.

6
WARNING: Some dust created by power sanding, sawing, grinding, drilling,
and other construction activities could contain chemicals known to the State of
California to cause cancer, birth defects or other reproductive harm. Some
examples of these chemicals are:
lead from lead-based paint.
crystalline silica from bricks and cement and other masonry products.
arsenic and chromium from chemically-treated lumber (CCA).
Your risk from exposure to these chemicals varies, depending on how often you
do this type of work. To reduce your exposure to these chemicals: work in a well
ventilated area with approved safety equipment, such as dust masks that are
specially designed to filter out microscopic particles.
WARNING: Avoid prolonged contact with dust from power sanding, sawing,
grinding, drilling, and other construction activities. Wear protective clothing
and wash exposed areas with soap and water. Allowing dust to get into your
mouth, eyes, or lay on the skin may promote absorption of harmful chemicals.
WARNING: Use of this tool can generate and/or disburse dust, which may
cause serious and permanent respiratory damage or other injury. Always use
NIOSH/OSHA/MSHA approved respiratory protection appropriate for the dust
exposure. Direct particles away from face and body.

7
What’s in the Box
POCKET HOLE ACCESSORY PACK

8
Setup and Usage
Step #1
Mount your I1 Pocket-Hole Jig to a board or clamp it to you work surface with
the supplied 6-inch Face Clamp. For added support when working with larger
panels use short sections of 2x4’s.
Step #2
What is your material thickness? The I1 Pocket-Hole jig can drill 1/2 and 3/4
material. You can drill pocket-holes in other sizes but the screw will not exit the
center of the workpiece. Working with other thicknesses will be discussed later.
Step #3
Set the Depth Collar. There is an area under the toggle clamp that is used to set
the depth collar for use with 3/4 material.
Slide the depth collar onto the shank of the drill bit.
Insert the drill bit and depth collar into the area in the back and under
the toggle clamp.
Push the drill bit in until it stops.
Push the depth collar up to the stop surface in the back of the base of
the jig and tighten the depth collar with the supplied 1/8”hex key.

9
Step #4
Setting the toggle clamp.
Put the toggle clamp in the forward most position.
Place your work piece between the Clamp Pad and the Drill Guide. If the
workpiece will not fit, turn the screw in until the workpiece fits. You
may have to back off the nut until you can accomplish this.
With the workpiece in place turn the Clamp Pad until it touches the
workpiece.
Pull the handle of the toggle clamp backwards.
Give the Clamp Pad screw a turn outwards between 1/2 and 1 full turn.
This will give you the pressure necessary to hold the workpiece in place.
Put the toggle clamp in the forward most position. You should feel
resistance when doing this. If there is too much resistance, turn the
Clamp Pad screw in a little at a time until the clamp closes.
Test the clamp pressure by trying to move the workpiece. It should take
considerable effort to move the workpiece. If there is too much
pressure, the task of clamping, drilling and unclamping will get
tiresome. After some practice, you will determine the correct pressure
to hold the workpiece in place and secure. Tighten the hex nut.
This figure shows the I1
Pocket Hole Jig setup
properly.
Step #5
Drilling
Attach the stepped drill to a corded or cordless drill and tighten the
chuck securely
Insert the drill bit into the drill guide and feel for where the edge of
the workpiece is and back it up slightly
Turn the drill on to high speed and drill completely until the depth
collar stops on the top of the drill guide.
Repeat for both holes if required

10
Pocket-Hole Screws
When choosing a screw, there are a couple of things to consider.
What is the material that the threads will be going into?
oIs it hardwood or softwood/plywood?
Examples of common hardwoods are: Oak,
Maple, Cherry, Walnut.
Examples of common softwoods are: Pine, Cedar,
Douglas Fir, Redwood.
What is the thickness of both pieces you are joining?
If you are using hardwoods, you will want to use a fine thread screw.
If you are using softwoods or plywood, you will want to use a coarse thread
screw.
For material thicknesses, the next 2 figures are guidelines for you to use.

11
Pocket Hole Joinery Uses and Applications
Pocket hole joinery is fast, strong and the simplest type of joinery that can be
used in modern woodworking. That is why a novice to building wood projects
can have incredible success in a short time. It involves drilling an angled “pocket
hole” in just one of the pieces being joined.
Use an Impakt Tools Face Clamp that has the capacity to clamp across the joint
to hold it flush while driving the screws. A minimum of two screws per joint is
recommended. Although if the workpiece is very narrow, one screw can be used.
For a workpiece that is wide, more than 2 screws should be used. In the case of
a cabinet side for a bookcase, space the pocket holes 4-8 inches apart.

12
Use of all thicknesses with I1 Pocket-Hole Jig
The figures on the previous page can all be done with the I1 Pocket-Hole Jig.
Sizes from 3/4 to 1-1/2 are all done without any changes to the setup.
The applications showing a pocket-hole being drilled slightly off center.
These joints will still be very strong with the screw being off center.
The 5/8-inch thick workpieces are drilled with a change in the depth
collar position. Loosen the depth collar and insert the stepped drill bit
in the drill guide. Allow the tip of the drill bit to rest on the top of the
base and tighten the depth collar. This will make the screw head sit a
little deeper in the pocket-hole.
The 1/2-inch workpieces are drilled with a change in the depth collar
position and adding a spacer under the workpiece as you are drilling.
The spacer that can be used is a simple wood pencil.
To set the depth collar, lay the pencil on top of the base. Loosen the
depth collar and insert the stepped drill bit in the drill guide. Allow the
tip of the drill bit to rest on the top of the pencil. Pull the drill bit up so
there is about 1/16-inch gap between the tip of the bit and the pencil.
You can also use a penny to check this gap, a penny is 1/16-inch thick.
Tighten the depth collar.

13
Assembly
Now that you have drilled all your workpieces, you are ready to assemble them
by using a cordless drill / driver to drive your screws.
You need to be able to position the parts to be assembled in a way to get your
Face Clamp positioned across the joint. There are several ways to accomplish
this. Here are 2 ways to position your parts.
Method #1: Just hang the joint to be assembled over the edge of your work
surface and center the clamp pad on the joint. Make sure the large pad is on the
side opposite the drilled pocket holes. This will aid in keeping the joint flush.
Method #2: Similar to Method #1 but make yourself some risers to lift all of your
parts off the bench top and tall enough to clear the face clamp.

14
Common Applications
Here are just some typical applications and some that are a little bit more
advanced. Uses of pocket-hole joinery are only limited by your imagination.
Standard Face Frame
Attach Cabinet side to Face Frame
Picture Frame
Table Apron
Beveled Corner
Edge Joining
Edge Banding
Leg Rails
Stairs

15
Proposition 65
WARNING: This product contains chemicals known to the State of California
to cause cancer and birth defects or other reproductive harm.
WARNING: Some dust created by power sanding, sawing, grinding, drilling,
and other construction activities may contain chemicals known to the State
of California to cause cancer and birth defects or other reproductive harm.
Some examples of these chemicals are: lead from lead-based paints,
crystalline silica from bricks and cement and other masonry products, and
arsenic and chromium from chemically treated lumber. Your risk from
exposure to these chemicals varies, depending on how often you do this type
of work. To reduce your exposure, work in a well-ventilated area and with
approved safety equipment, such as dust masks that are specially designed
to filter out microscopic particles.
Warranty
Three Year Limited Warranty –Impakt Tools will repair or replace without
charge, any defects due to faulty materials or workmanship for three years from
the date of purchase.
Lifetime Warranty –Impakt Tools will replace any worn-out drill bushing for
the life of the product.
For further information visit –Impakttools.com
Impakttools.com
Table of contents
