IMT Woodpecker User manual

Woodpecker Operation Manual
Operation Manual
Woodpecker™
IMT Integral Medizintechnik AG
Haldenstrasse 5
6006 Luzern
Switzerland

Woodpecker Operation Manual
Table of Contents
Introduction 1
Proprietary Notice ........................................................................................
Limited Warranty..........................................................................................
Service Support............................................................................................
Indications for Use 2
Warnings, Cautions and Notes 3-4
Theory of Operation 5-7
Theory..........................................................................................................
Product Information .....................................................................................
Instructions for Use 8-16
Instruction for Cleaning and Sterilization 17-18
Maintenance and Service 19
Troubleshooting 20
Specifications 21
Service Support 22
Notes

Woodpecker Operation Manual
1
Introduction
Proprietary Notice
Information contained in this document is copyrighted by IMT Integral
Medizintechnik AG and may not be duplicated in full or part by any person
without prior written approval of IMT Integral Medizintechnik AG. Ist purpose is
to provide the user with adequately detailed documentation to efficiently install,
operate, maintain and order spare parts for the device supplied. Every effort has
been made to keep the information contained in this document current and
accurate as of the date of publication or revision. However, no guarantee is
given or implied that the document is error free or that it is accurate with regard
to any specification.
Limited Warranty
IMT Integral Medizintechnik AG warrants each new Woodpecker and
accessories to be free from defects in workmanship and materials under normal
use and service for a period of one (1) year from the date of shipment. IMT
Integral Medizintechnik AG sole obligation under this warranty will be to repair
or replace, at its option, products that prove to be defective during the warranty
period. The foregoing shall be the sole warranty remedy. Except as set forth
herein, seller makes no other warranties, either expressed or implied, including
the implied warranties of merchantability and fitness for a particular purpose. No
warranty is provided if the products are modified without the express written
consent of IMT Integral Medizintechnik AG and seller shall not be liable in any
event for incidental or consequential damage. This warranty is not assignable.
Service Support
If the device needs repair, contact our authorized IMT service center. When
calling, have the Woodpecker(s) serial number(s) ready. If you need to ship the
device, pack the device in its original packing materials, if possible, to prevent
shipping damage. You are responsible for all shipping and insurance costs to
and from IMT unless otherwise specified.
IMT Integral Medizintechnik AG
Haldenstrasse 5
CH-6006 Luzern
Tel: +41 41 210 54 34
Fax: +41 41 210 54 38

Woodpecker Operation Manual
2
Indications
The Woodpecker is indicated for:
Health Care professionals trained and licensed in Orthopaedic Surgery
Patients undergoing Total Hip Anthroplasty (THA).
Use in femoral broaching
This device is intended for multiple patient use with approved cleaning prior
to reuse.

Woodpecker Operation Manual
3
Warnings, Cautions and Notes
A warning indicates something that could hurt the patient/operator.
A caution indicates something that could damage the device.
A note indicates other important information.
WARNING: Always start with the smallest broach.
WARNING: Rotation during insertion of the broach is not recommended. If
done, this could cause axial or rotational pressure and fracture of the femur.
WARNING: Do not attempt to completely broach the intramedullary canal in one
pass. Forward pressure must be exerted for cutting; pull back while running to
clear bone debris.
WARNING: Forceful insertion of the final broach using a mallet or other
instrument is not recommended. If done, this could cause axial pressure and
fracture.
WARNING: Operating at pressures higher than 120 PSI (8 bar) may result in
personal injury or damage to the Woodpecker.

Woodpecker Operation Manual
4
WARNING: There are no user serviceable components on the Woodpecker.
Any attempt at making repairs by a non-authorized service center may result in
personal injury or damage to the Woodpecker.
CAUTION: There are no user serviceable components on the Woodpecker.
Any attempt at making repairs by a non-authorized service center may result in
personal injury or damage to the Woodpecker.
CAUTION: Use nitrogen or clean, filtered compressed air to power this
instrument.
CAUTION: Immersion or power washing is considered abuse; any resulting
damage is NOT covered under the manufacturer’s warranty or Preventive
Maintenance Program and will be repaired at the owner’s expense.
NOTE: Using less than 87 PSI (6 bar) of air pressure may cause unsatisfactory
broaching results
NOTE: Remove all watches and jewelry when operating the Woodpecker. 70 Hz
frequency may cause damage to watches or jewelry.
Woodpecker Operation Manual
5
Theory of Operation
Theory
The Woodpecker is a pneumatically powered device. The linear motion of the
Woodpecker has a total travel of 10 mm (.3937 inches) and operates at 70 Hz
(70 times per second). This linear back and forth motion of the Woodpecker
creates an efficient cutting movement on the forward stroke and clearing of
bone chips on the backward stroke, preventing the broach from
wedging/jamming in the cortical bone. The Woodpecker exerts no more than
1.0 newton of axial force on the femoral bone.
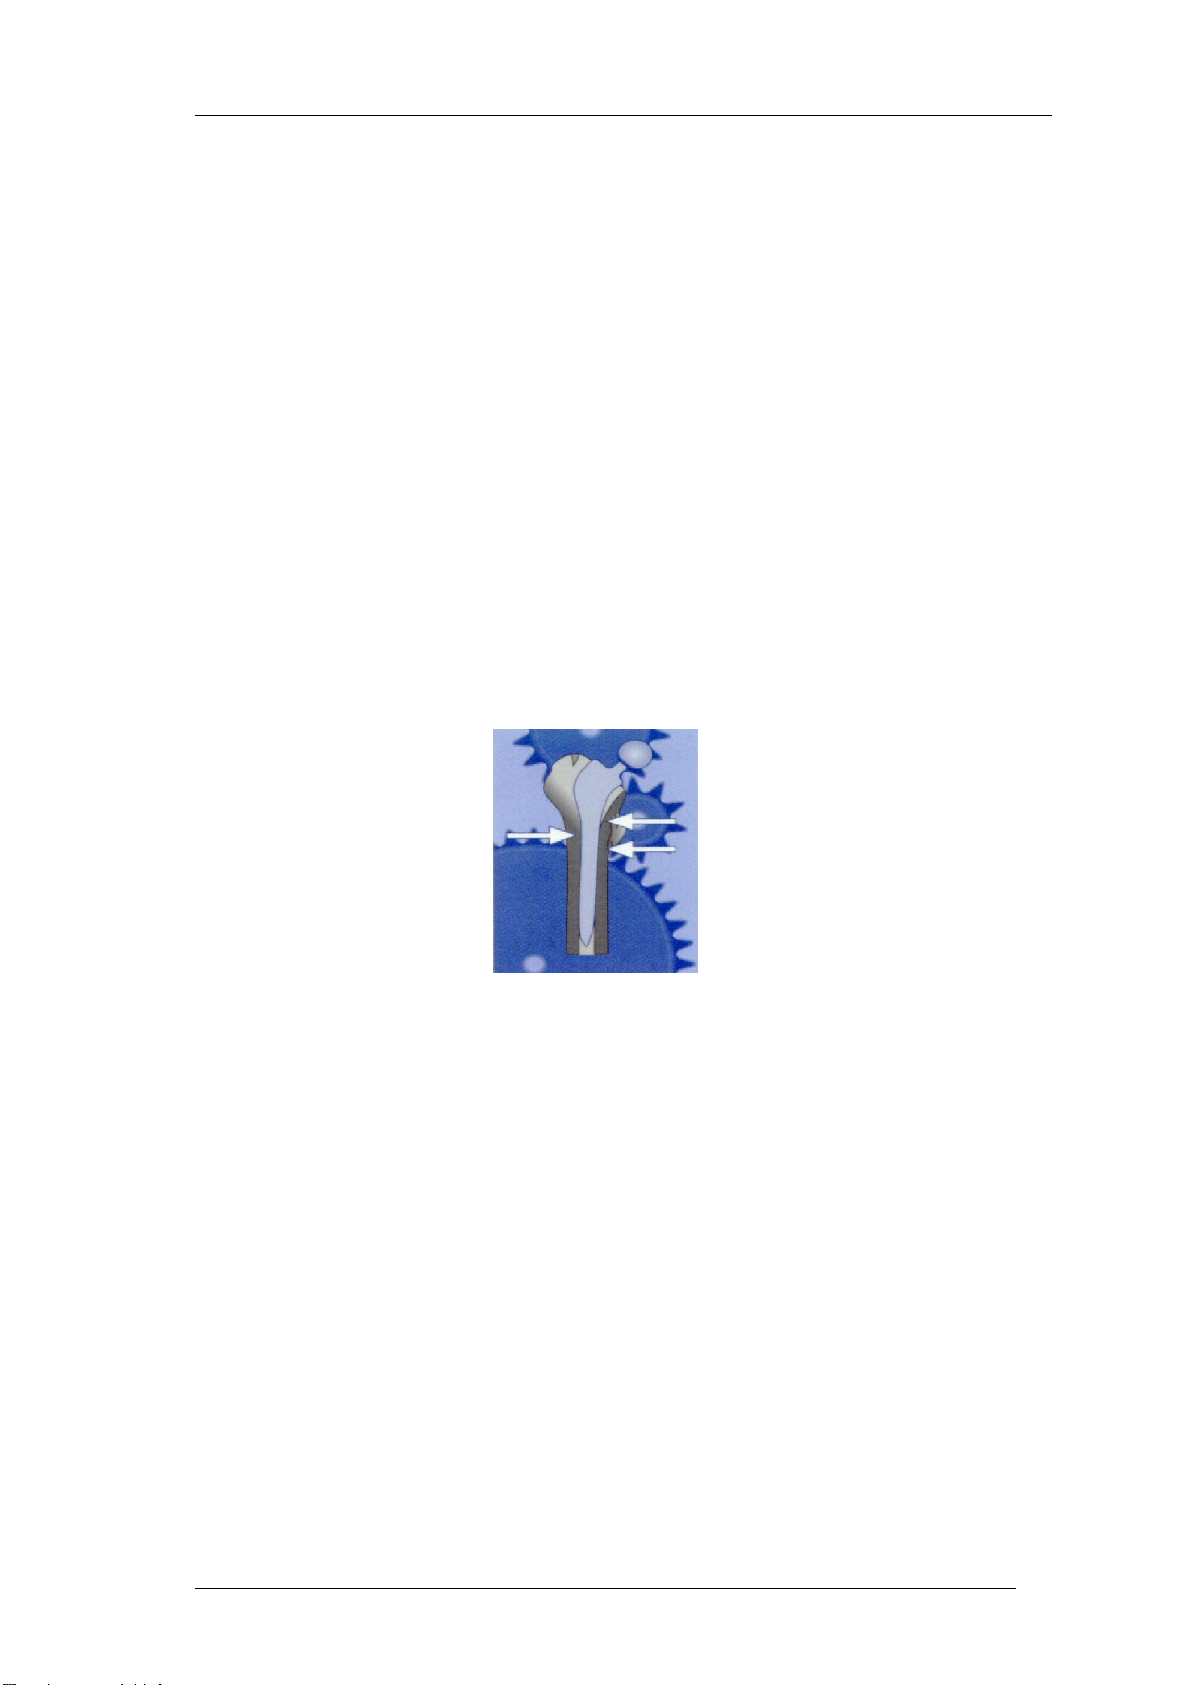
What’s great about pneumatic broaching with the
Woodpecker
Accurate shaping of the femoral canal provides improved fit. Gaps between
the bone and the prosthesis are avoided. Non-physiological dilation of the
femur, damage to the cortical bone and fissures are minimized substantially.
The high-frequency axial impulses of The Woodpecker reduce operation time.
Like thousands of other Surgeons have already discovered, you too will agree
that the Woodpecker gives you precise control, yielding consistent results;
every time.
The extremely low-level impulses of The Woodpecker
- Minimizes Hoop stresses and decreases the bone marrow emboli risk.
- Lower the risk of femoral fractures caused by excessive radial forces
Broaches or Adapters can be orientated in 90° increments to accommodate
Surgeon preference or approach
Woodpecker Operation Manual
6
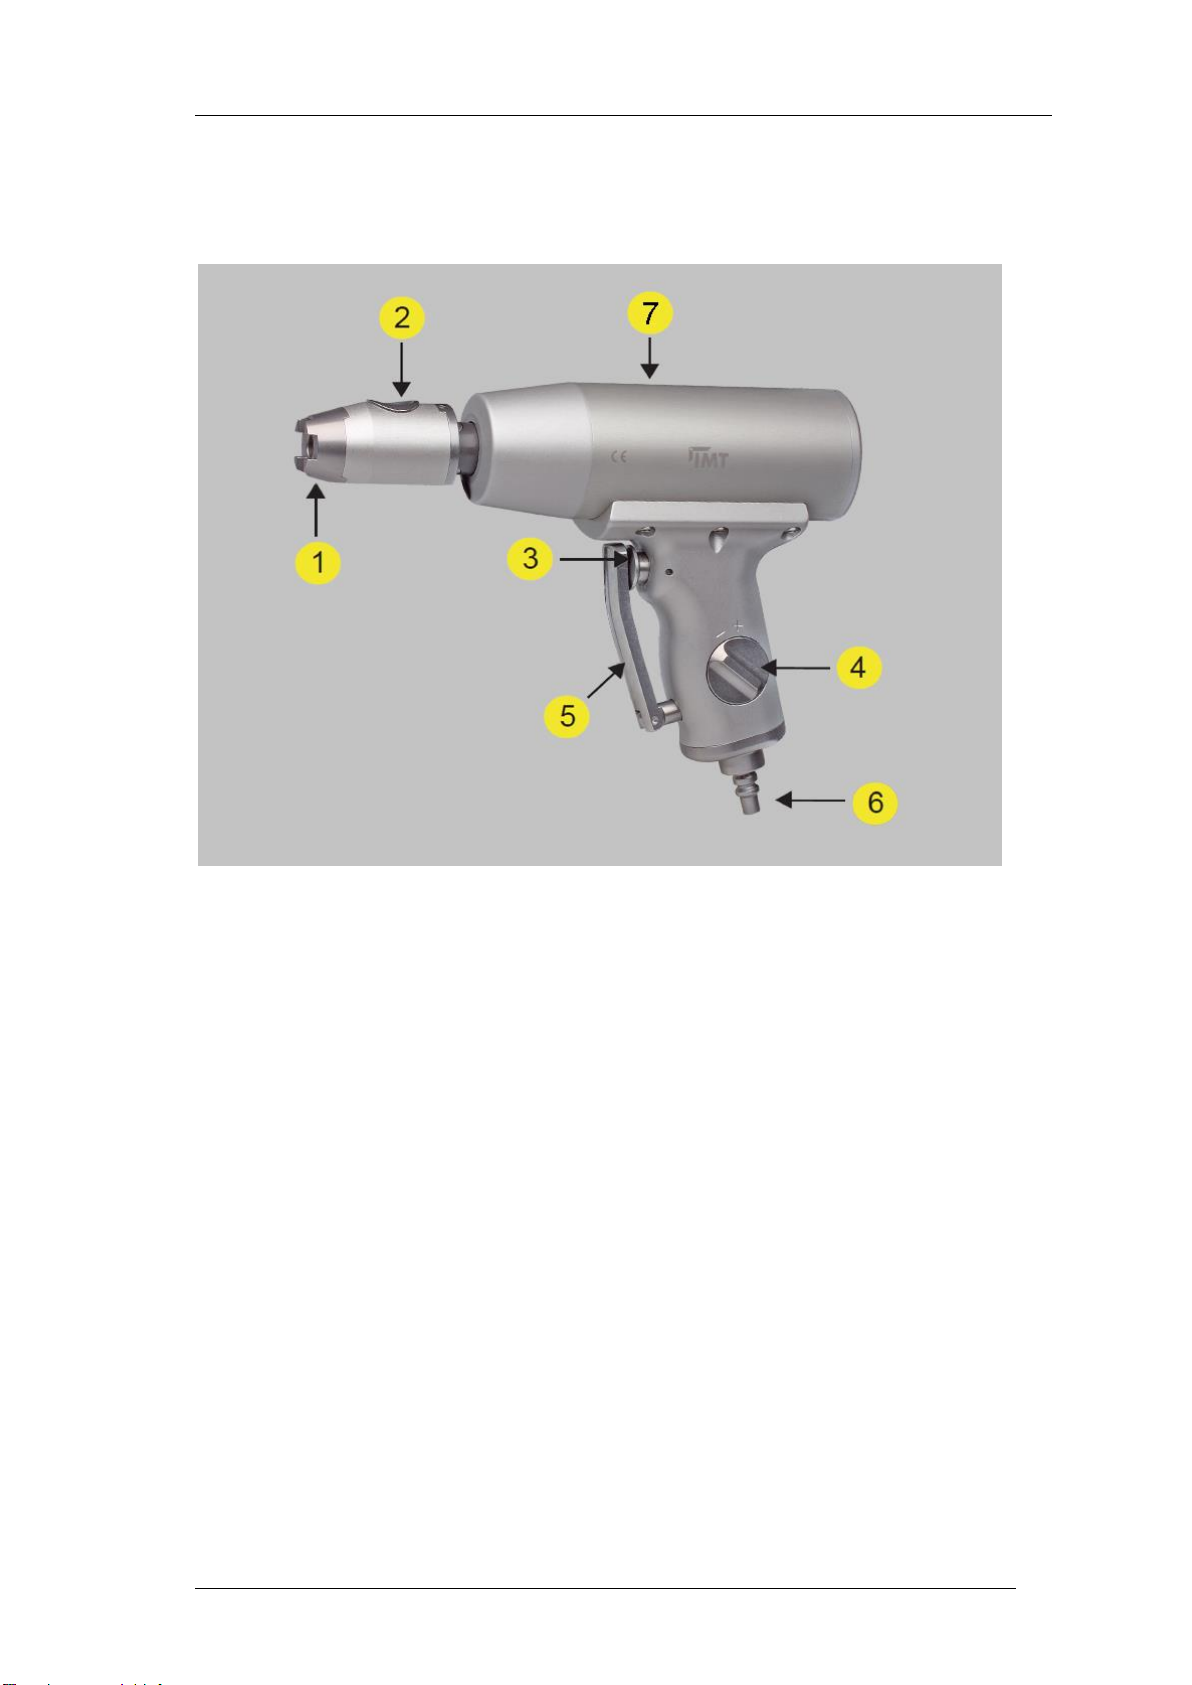
The Woodpecker
1. Upgrade Nosepiece
2. Lock/Release Push Button
3. Trigger Button
4. Force Control Knob
5. Trigger Bar
6. Quick Connect for Hose Assembly
7. Housing
Woodpecker Operation Manual
7
Theory of Operation (cont.)
Power
The Wodpecker is a pneumatically powered device and must be operated at a
pressure of 87-120 PSI (7-8 bar). Use nitrogen or clean, filtered compressed air
to power this device.
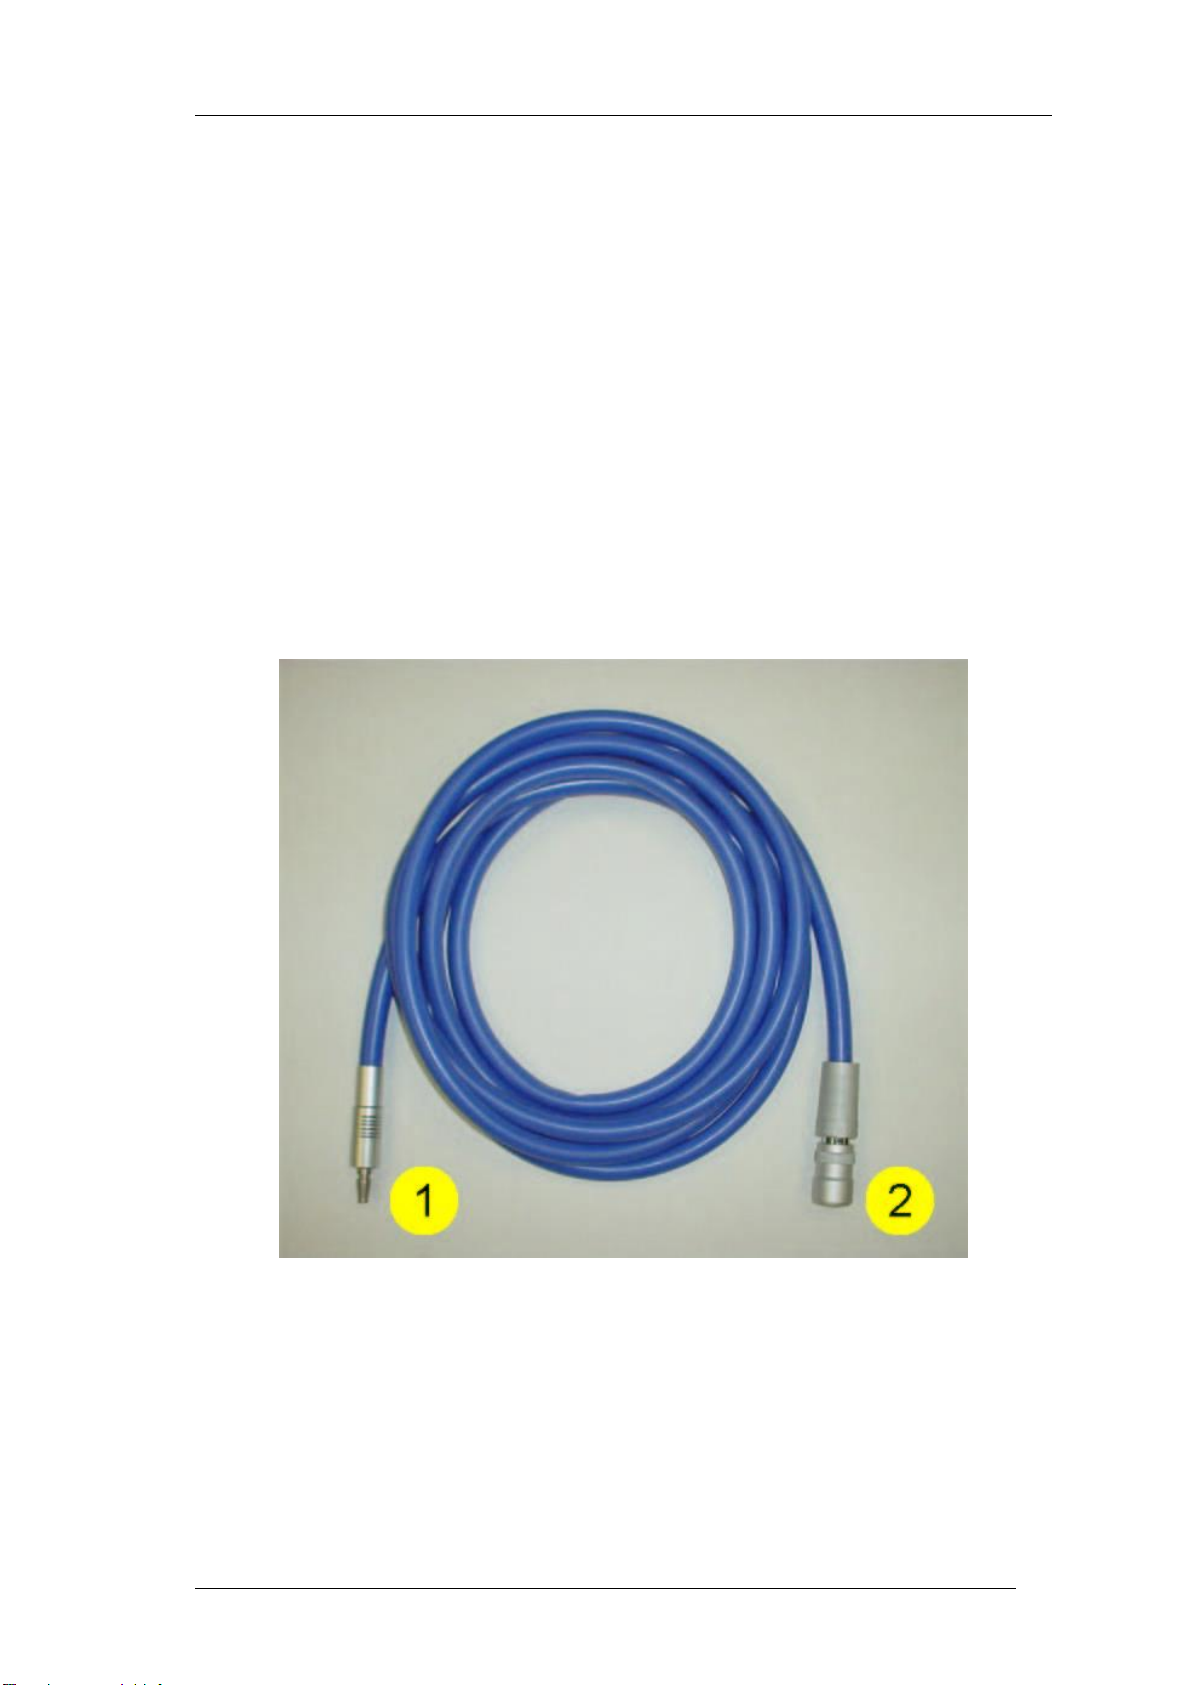
Air Hose
The Woodpecker is operated with an AO twin-hose (inner-hose Æ 18m and air
outlet hose).
Bent or kinked hoses may prevent the unit from operating satisfactorily.
1. Connection to air supply (male)
2. Quick disconnect fitting to the Woodpecker (female)

Woodpecker Operation Manual
8
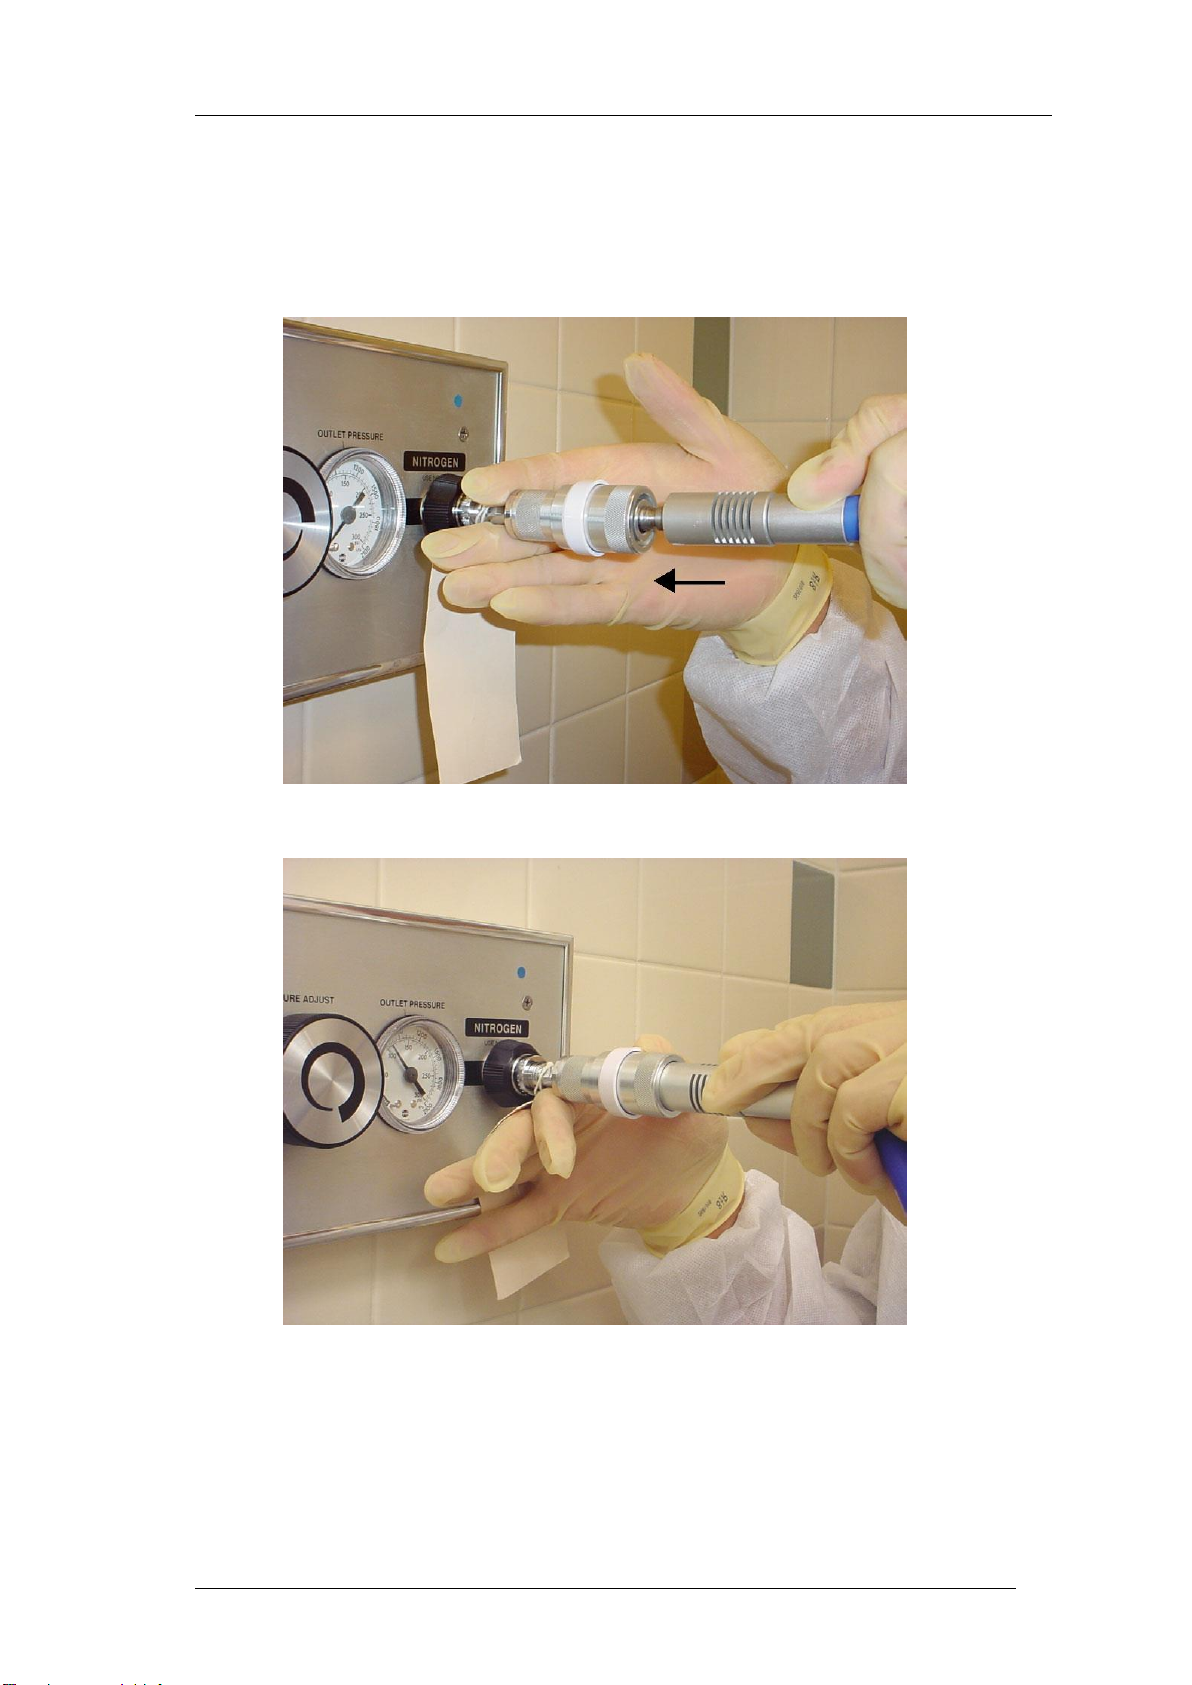
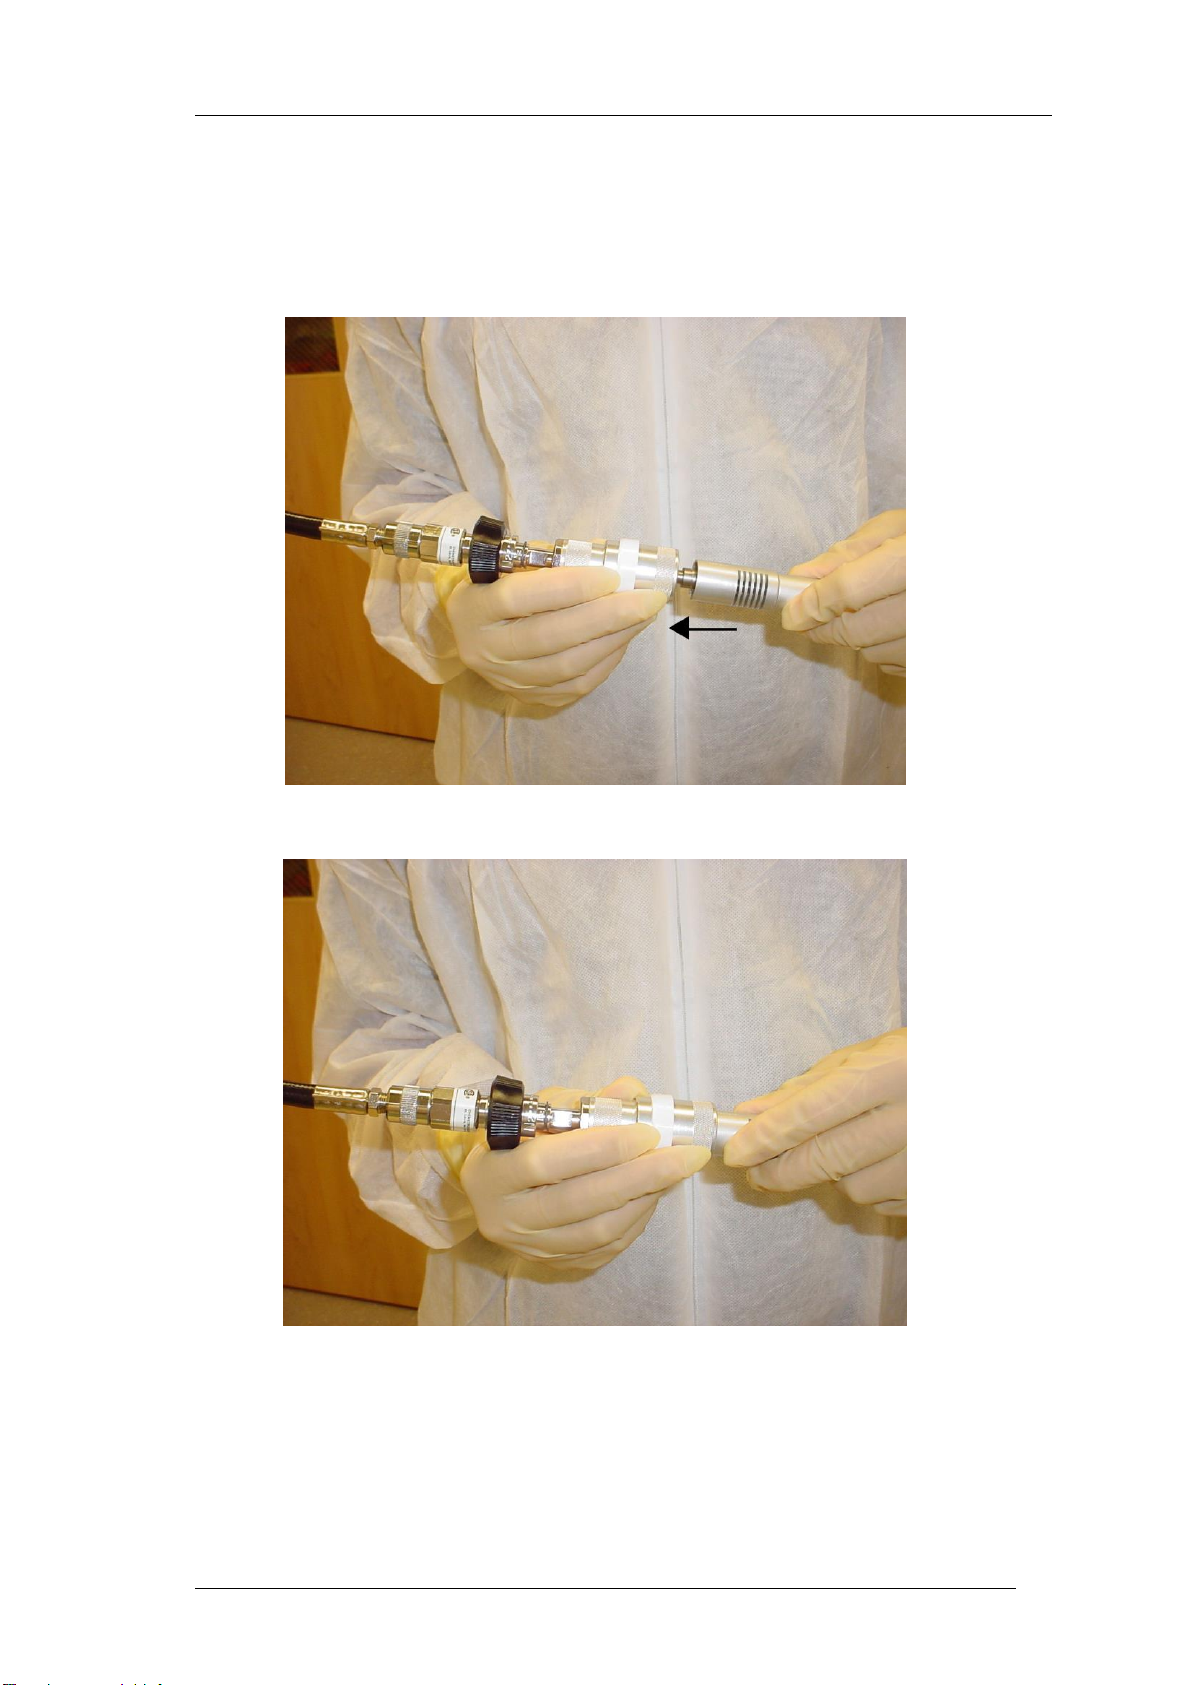
Instructions for use
Pull hose quick-disconnect outer-shell back and attach the hose to the
Woodpecker
Slide quick-disconnect outer-shell in direction shown to secure hose to the
Woodpecker.
Woodpecker Operation Manual
9
Instructions for use (cont.)
Wall manifold connection
Woodpecker Operation Manual
10
Instructions for use (cont.)
Drop connection

Woodpecker Operation Manual
11
Instructions for use (cont.)
Extension connection
Woodpecker Operation Manual
12
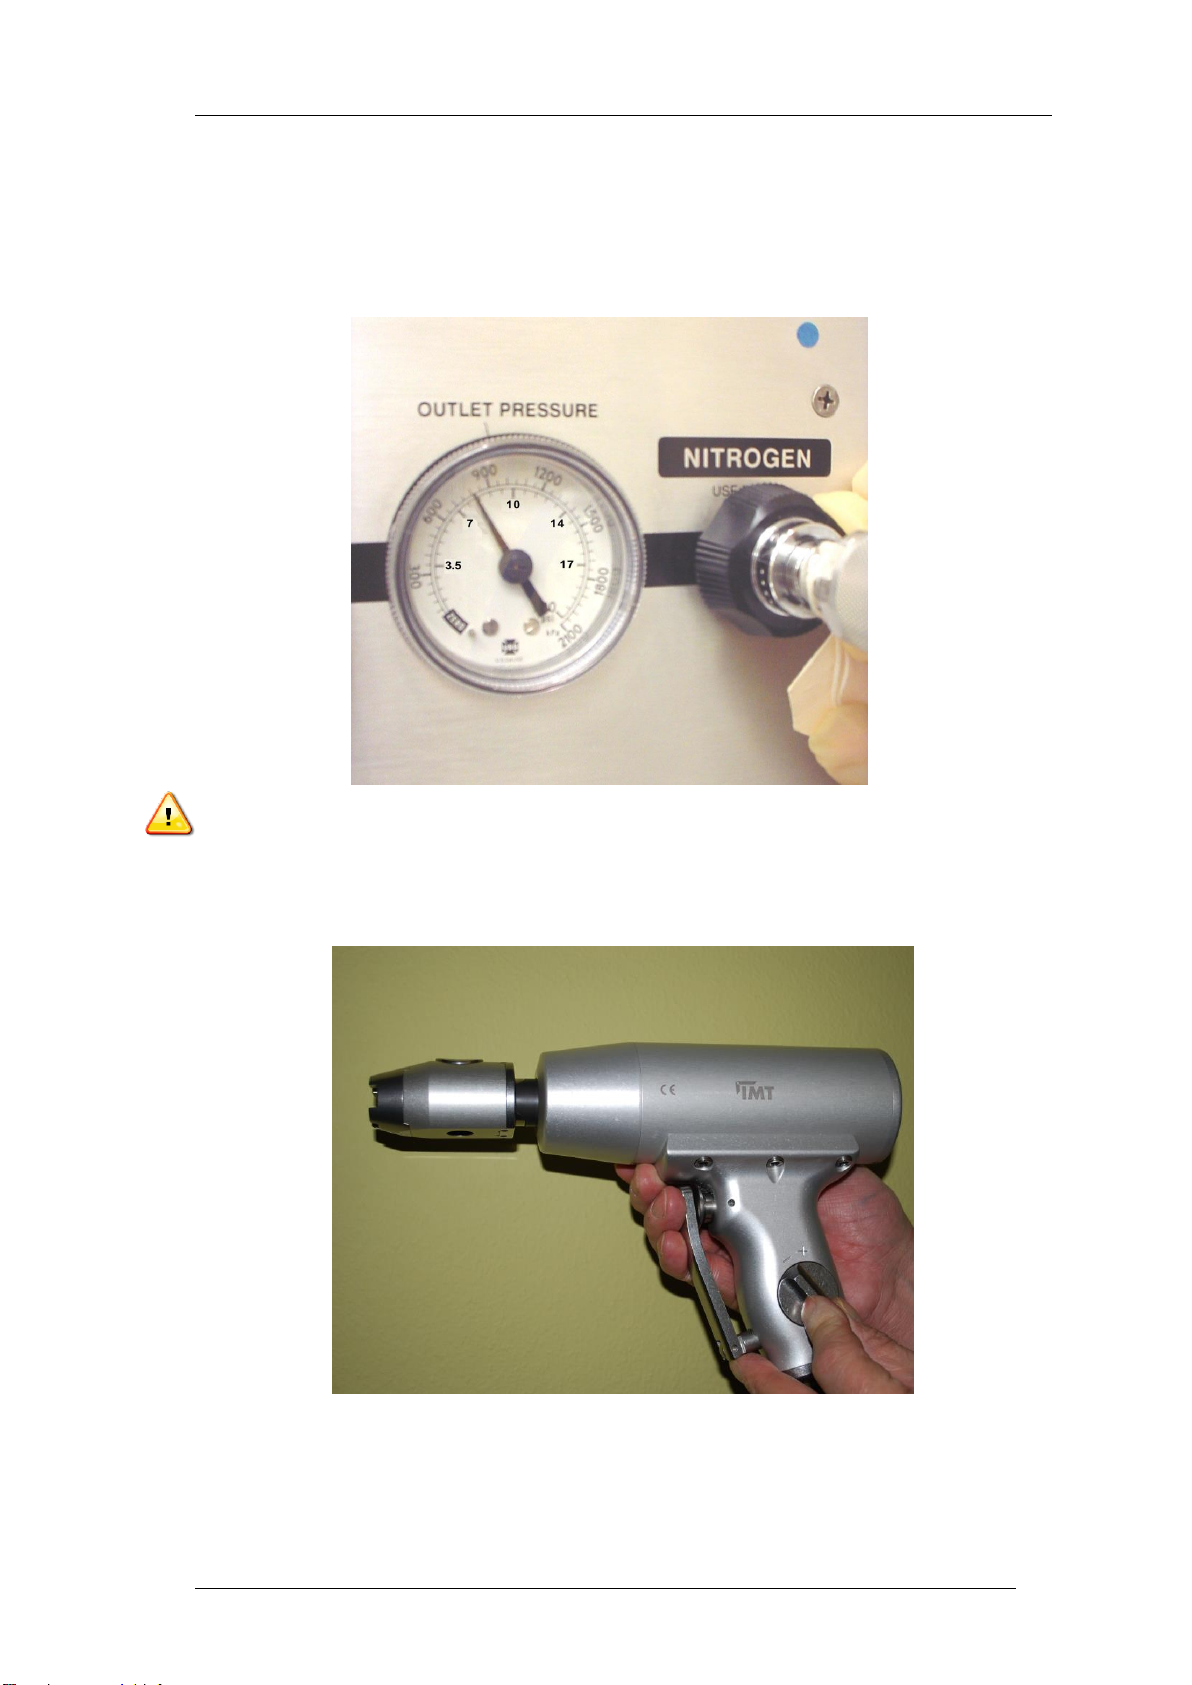
Instructions for use (cont.)
IMT AG recommends starting at 100 PSI (7 bar). Effective pressure range is
87 to 120 PSI (6-8 bar).
WARNING: Operating at pressures higher than 120 PSI (8 bar) may result in
personal injury or damage to the Woodpecker.
Set force control knob to the minus setting.
IMT AG recommends beginning the procedure at the minus (-) position. This
allows the Orthopaedic Surgeon to work efficiently in Type C cortical bone.
Moving the dial toward the plus (+) position increases the force required to
broach Type A cortical bone.

Woodpecker Operation Manual
13
Instructions for use (cont.)
Press trigger bar to test
Select broach adapter compatible with the femoral hip system to be
implanted. This may very depending on the hip system being used.

Woodpecker Operation Manual
14
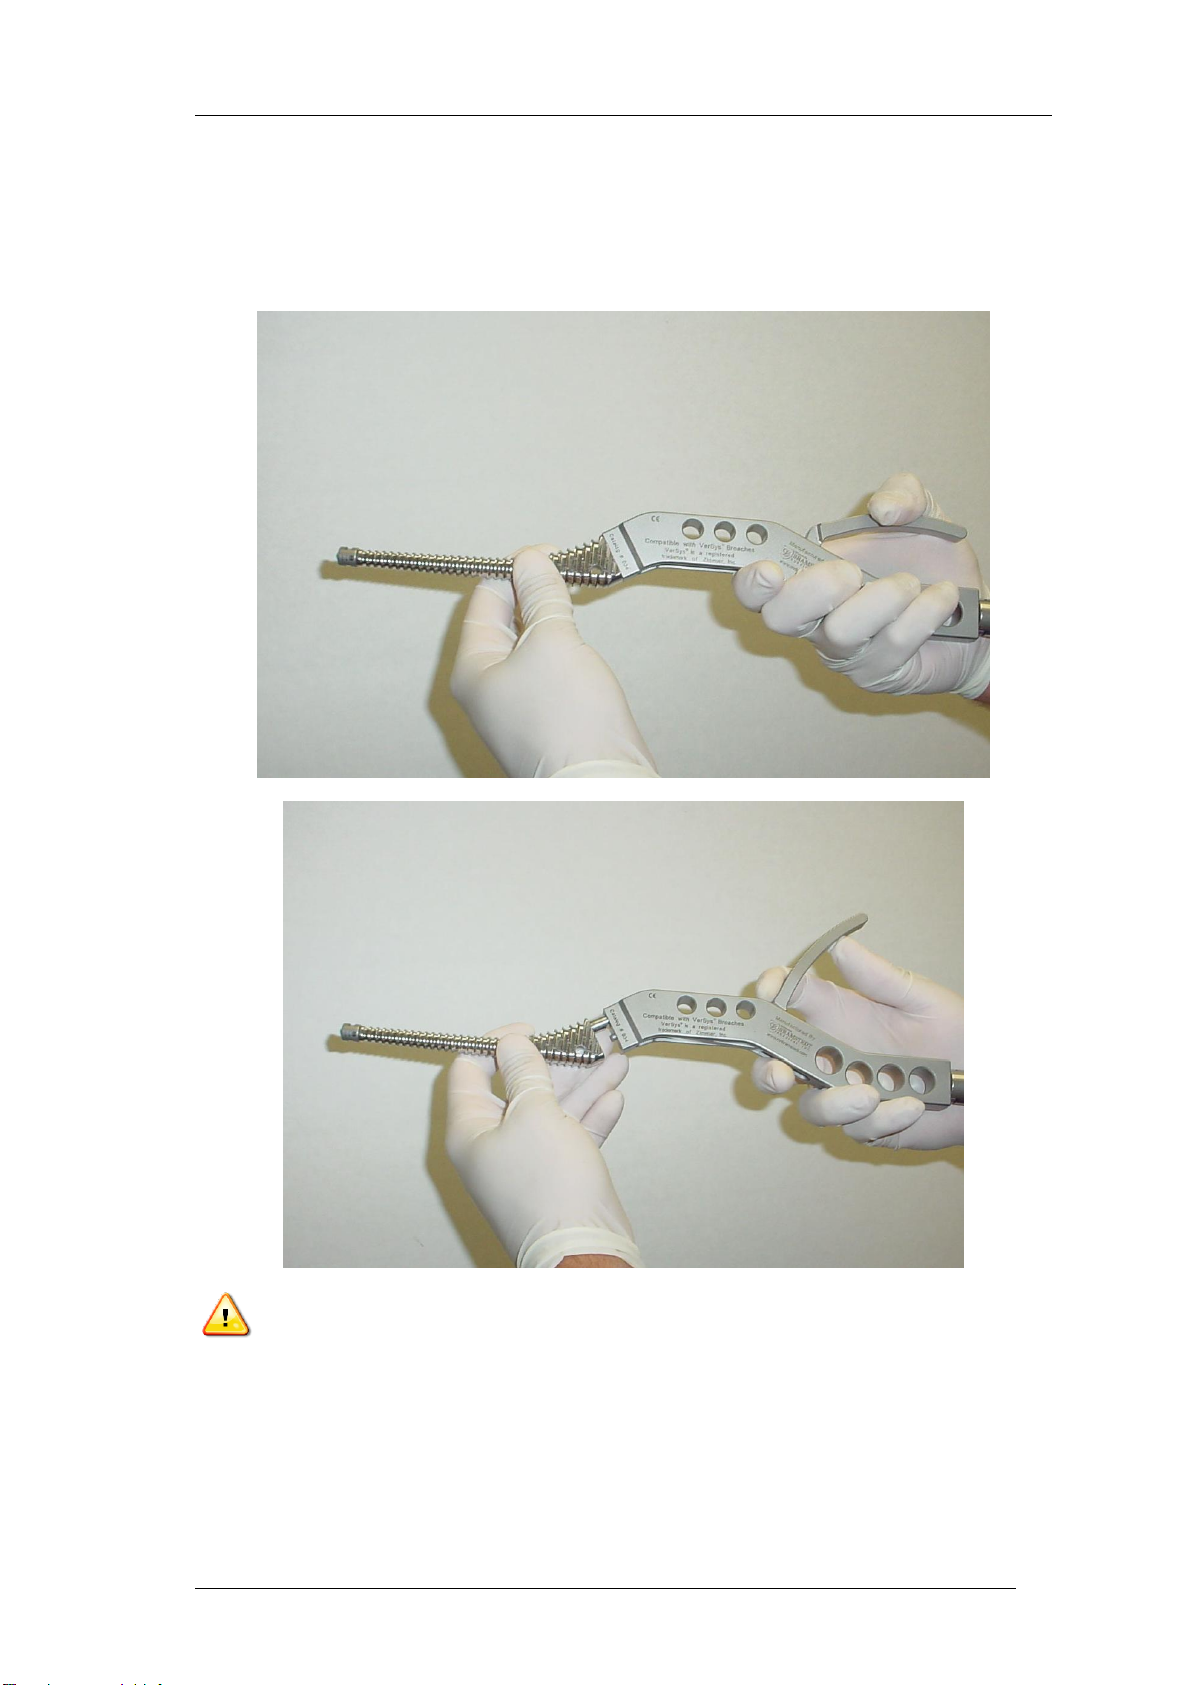
Instructions for use (cont.)
Press down and hold button on upgrade nose piece. Insert adapter to
preferred orientation.
Press lock/release push button to lock adapter into place.
To remove or change orientation of adapter, press and hold lock/release
push button and remove or readjust adapter.
Woodpecker Operation Manual
15
Instructions for use (cont.)
Insert broach into broach adapter. Lock into place.
NOTE: Broach and adapter shown are for illustration purposes only. Broach and
adapter types, shapes, mounting and clamping methods may vary from manufacturer
to manufacturer.

Woodpecker Operation Manual
16
Instructions for use (cont.)
Always begin with the force control set to the minus (-) setting.
Always start with the smallest broach.
Do not attempt to broach the intermedullary canal in one pass.
The linear back and forth motion of the Woodpecker creates an efficient
cutting movement on the forward stroke and clearing of bone chips on the
backward stroke, preventing the broach from wedging/jamming in the cortical
bone.
When using the Woodpecker run the unit continuously while broaching. Do
not start and stop the unit while broaching.
The Woodpecker is a pneumatically powered device and must be operated at
a pressure of 87-120 PSI (7-8 bar). IMT AG recommends starting at 100 PSI
(7 bar).
To obtain a precise, prosthesis seating over a large surface, it is sufficient to
continue broaching until the instrument can not insert the broach any further
due to resistance from the cortical bone.
Forceful insertion of the final broach using a mallet or other instrument is not
recommended. If done, this could cause axial pressure and fracture.

Woodpecker Operation Manual
17
Instructions for Cleaning and Sterilization
The Woodpecker and accessories are supplied non-sterile.
Non-sterile product
° Washing
All implants and instruments, which are supplied non-sterile, are packaged
individually in shipping/storage boxes or plastic bags.
To clean them prior to their first use or after surgery, we recommend a neutral
PH (or slightly alkaline) detergent according to the recommendations of the
detergent manufacturer.
Put the washing cup on for washing.
All instruments should then be thoroughly rinsed and dried prior to steam
sterilization.
° Sterilization
The washing cup must be removed before sterilization.
We recommend autoclaving according to standard hospital sterilization
procedures and within the guidelines of the autoclave manufacturer, to assume
a Sterility Assurance Level (SAL) <of 10ˉ6 according to the ANSI/AAMI ST33-
1990* validation method which is:
Pre Vacuum and hold at 270°F for at least 4 minutes.
*Reference:
American National Standard; Good Hospital Practice: Guidelines for the Selection and Use of Reusable Rigid
Sterilization Container Systems. AINSI/AAMI ST33-1990.

Woodpecker Operation Manual
18
CAUTION: Do not immerse or “Bucket Soak” The Woodpecker. Damage to the
Woodpecker will occur. Immersion is NOT covered under warranty
and will be repaired at owner’s expense.
CAUTION: Do not sterilize The Woodpecker with Ethylene Oxide (ETO). Damage to
the O-Rings and seals will occur. ETO sterilization is NOT covered under
the warranty and will be repaired at owner’s expense.
!
!
Table of contents


