Respirox E-20C User manual

English
Respirox®E-20C System
User Manual
0123

E-20C System User Manual V2.11
English
Table of Contents
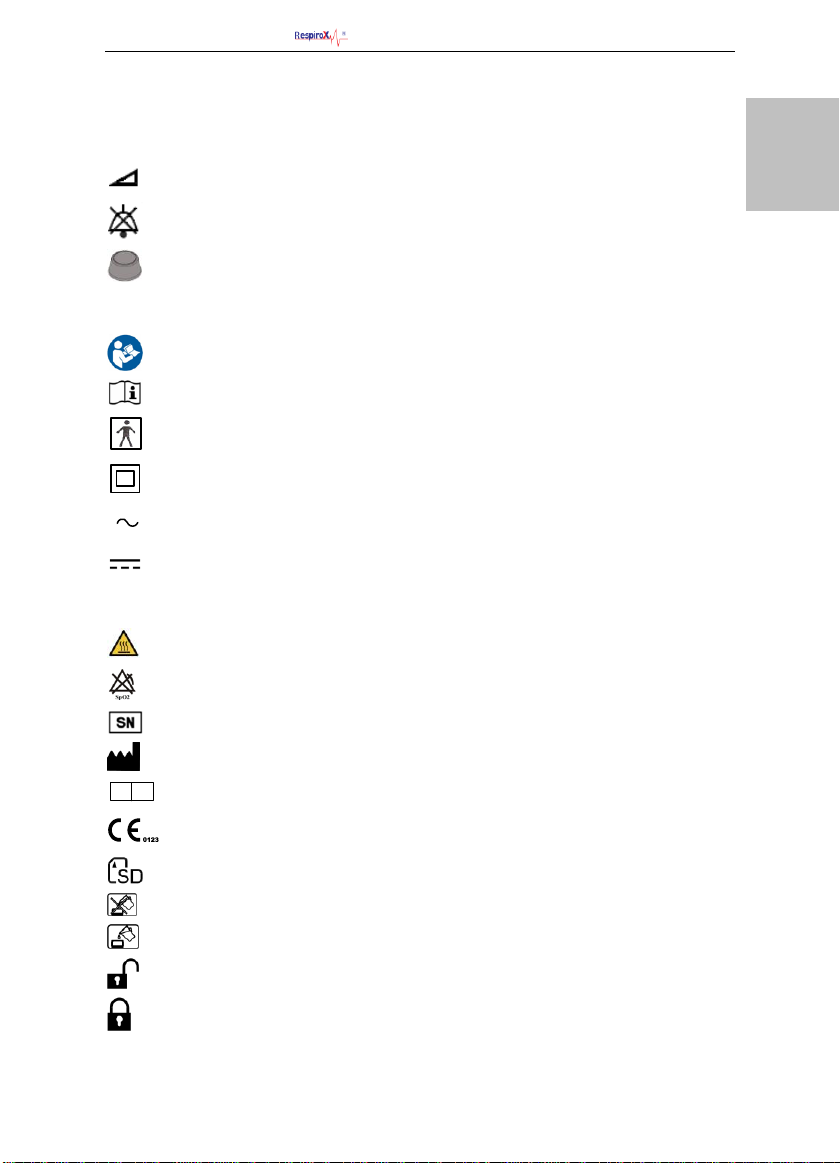
1. Symbols .................................................................................................................. 1
1.1 Control Buttons················································································ 1
1.2 Device Symbols················································································ 1
2. Warning, Caution and Important Tip.......................................................................... 2
3. Intended Use........................................................................................................... 2
4. Contraindications ..................................................................................................... 3
5. Specifications .......................................................................................................... 4
6. Available Therapy .................................................................................................... 5
7. Glossary .................................................................................................................. 6
8. Model ..................................................................................................................... 7
9. Package Contents .................................................................................................... 8
10. System Features .................................................................................................... 9
11. First Time Setup................................................................................................... 10
11.1 Placing the Device··········································································10
11.2 Installing the Air Filter and Filter Cap···················································11
11.3 Connecting to Power·······································································11
11.4 Assembling the Tube and Mask ··························································12
11.5 Using Oxygen with the Device ···························································13
11.6 Inserting the SD Card (Only for the device that equipped with SD card)········13
11.7 Using the SpO2Kit··········································································14
11.7.1 Connecting the SpO2Kit to the Main Device ································14
11.7.2 Removing the SpO2Kit from the Main Device·······························15
11.8 Using the H60 Heated Humidifier ·······················································17
11.9 Starting Treatment ·········································································17
12. Routine Use......................................................................................................... 17
12.1 Connecting the Tube·······································································17
12.2 Adjusting the Tube ·········································································17
12.3 Turning on the Airflow ·····································································17
12.4 Heating the Water in the Humidifier ····················································17
12.5 Using the Ramp Button····································································18
12.6 Turning the Device off ·····································································18
13. Navigating the Patient Menu ................................................................................. 18
13.1 Steps to Navigating the Patient Menu ··················································18
13.1.1 Accessing the Main Interface ··················································18
13.1.2 Bringing up the Initial Setup Interface ·······································18
13.1.3 Accessing the Setup Interface ·················································19
13.1.4 Selecting Options·································································19
13.1.5 Adjusting Options ································································19
13.1.6 Confirming Adjustments ························································20
13.1.7 Turning Pages·····································································20
13.1.8 Exiting the Patient Menu························································20
13.2 Options of the Patient Menu and Corresponding Descriptions ·····················22
14. Alert.................................................................................................................... 23
15. Cleaning and Disinfection...................................................................................... 24
15.1 Cleaning the Mask and Headgear ·······················································24
15.2 Cleaning the SpO2Kit······································································24
15.3 Cleaning the Water Chamber of the Humidifier·······································24
15.4 Cleaning the Enclosure ····································································24
15.5 Cleaning the Tube ··········································································24
15.6 Replacing the Air Filter ····································································25
15.7 Disinfection ··················································································25
16. Traveling with the Device...................................................................................... 26

E-20C System User Manual V2.11
English
17. Transferring the Device to Another Patient ............................................................. 27
18. Reordering .......................................................................................................... 27
19. Technical Support................................................................................................. 27
20. Disposal .............................................................................................................. 27
21. Troubleshooting ................................................................................................... 28
21.1 Common Problems in Patients and Corresponding Solutions·······················28
21.2 Common Problems in the Device and Corresponding Solutions ···················30
22. EMC Requirements............................................................................................... 31
23. Limited Warranty.................................................................................................. 36

E-20C System User Manual V2.11
1 / 36
English
1. Symbols
1.1 Control Buttons
Ramp Button
Mute Button
Knob
1.2 Device Symbols
Follow Instructions for Use
Operating Instructions
Type BF Applied Part (mask)
Class II (Double Insulated)
AC Power
DC Power
IP22
≥12.5 mm Diameter, Dripping (15°tilted)
Hot Surface
No SpO2Alarm
Serial Number of the Product
Manufacturer
EC REP
Authorized Representative in the European Community
European CE Declaration of Conformity
SD Card
Water Filling Prohibited Here
Water Inlet
Directional Indicator for Removing the Water Inlet Cap
Directional Indicator for Screwing the Water Inlet Cap

E-20C System User Manual V2.11
2 / 36
English
2. Warning, Caution and Important Tip
WARNING!
Indicate the possibility of injury to the user or operator.
CAUTION!
Indicate the possibility of damage to the device.
IMPORTANT TIP!
Place emphasis on an operating characteristic.
Warnings, Cautions, and Important Tips appear throughout this manual as they apply.
3. Intended Use
The E-20C system is a CPAP (Continuous Positive Airway Pressure) device designed for the
treatment of adult Obstructive Sleep Apnea (OSA) only, either in the hospital or at home.
The device is to be used only on the instruction of a licensed health care professional. Your
home care provider will make the correct pressure settings according to your health care
professional’s prescription.
Several accessories are available to make your OSA treatment with this device as convenient
and comfortable as possible. To ensure that you receive the safe, effective therapy prescribed
for you, use only Ece accessories.
WARNINGS!
• This device is intended for adult use only.
• This device is not intended for life support.
• The instructions in this manual are not intended to supersede established medical protocols.
•Do not bring the device or accessories into a Magnetic Resonance (MR) environment as it may
cause unacceptable risk to the patient or damage to the device or MR medical devices. The
device and accessories have not been evaluated for safety in an MR environment.
•Do not use the device or accessories in an environment with electromagnetic equipment such
as CT scanners, Diathermy, RFID and electromagnetic security systems (metal detectors) as it
may cause unacceptable risk to the patient or damage to the device. Some electromagnetic
sources may not be apparent, if you notice any unexplained changes in the performance of this
device, if it is making unusual or harsh sounds, disconnect the power cord and discontinue use.
Contact your home care provider.
CAUTION!
• This device is restricted to sale by or on the order of a physician.
IMPORTANT!
• Read and understand the entire user manual before operating this system. If you have any
questions concerning the use of this system, contact your home care provider or health care
professional.

E-20C System User Manual V2.11
3 / 36
English
4. Contraindications
Studies have shown that the following pre-existing conditions may contraindicate the use of
positive airway pressure therapy for some patients:
Absolute Contraindications: Pneumothorax, mediastinal emphysema; cerebrospinal fluid
leak, traumatic brain injury, or pneumocephalus; shock caused by a variety of conditions before
treatment; active epistaxis; upper gastrointestinal bleeding before treatment; coma or impaired
consciousness making the use of mask during therapy impossible; giant vocal fold polyp, etc.
Relative Contraindications: Severe coronary heart disease complicated with left ventricular
failure, acute otitis media, excessive respiratory secretions and weak cough, weak spontaneous
breathing, nasal or oral tracheal intubation and tracheotomy, severe nasal congestion caused
by a variety of conditions, lung bullae, and allergies to breathing masks, etc.
The following side effects may occur during treatment:
- Dryness of the mouth, nose and throat
- Abdominal bloating
- Ear or sinus discomfort
- Eye irritation
- Skin irritation due to the use of a mask
- Chest discomfort
IMPORTANTS!
• An irregular sleep schedule, alcohol consumption, obesity, sleeping pills, or sedatives may
aggravate your symptoms.
• Please use the mask which meets ISO17510:2015.
CAUTION!
• Contact your health care professional if symptoms of sleep apnea recur. Contact your health
care professional if you have any questions concerning your therapy.

E-20C System User Manual V2.11
4 / 36
English
5. Specifications
Device Size
Dimensions: 170 mm × 180 mm × 118 mm, or 290 mm × 180 mm × 134 mm (with the
humidifier)
Weight: 1.5 kg, or 2.5 kg (with the humidifier)
Product Use, Transport and Storage
Operation Transport and Storage
Temperature: 5°C to 35°C (41˚F to 95˚F) -25°C to 70°C (-13˚F to 158˚F)
Humidity: 15% to 93% Non-condensing 15% to 93% Non-condensing
Atmospheric Pressure: 760 to 1060 hPa 760 to 1060 hPa
Mode of Operation
Continuous
Work Mode
CPAP
SD Card
The SD card can record patient data and fault information.
AC Power Consumption
100 -240 V AC, 50 / 60 Hz, 2.0 A max
Main Device offer to USB Communications Port
5 V 2.0 A
Main Device offer to Humidifier
24 V 1.5 A
Type of Protection Against Electric Shock
Class II Equipment
Degree of Protection Against Electric Shock
Type BF Applied Part
Degree of Protection Against Ingress of Water
IP22
Pressure Range
4 to 20 hPa (in 0.5 hPa increments), ≤30 hPa under single fault conditions.
Pressure Display Accuracy
± (0.5 hPa + 4%)
Static Pressure Stability
± 0.5 hPa
Ramp
The ramp time ranges from 0 to 60 minutes.

E-20C System User Manual V2.11
5 / 36
English
Sound Pressure Level
<30 dB, when the device is working at the pressure of 10 hPa.
Sound Power Level
<38 dB, when the device is working at the pressure of 10 hPa.
Maximum Flow
Test Pressures (hPa)
4
8
12
16
20
Measured Pressure at the
Patient Connection Port (hPa)
3
7
11
15
19
Average Flow at the Patient
Connection Port (L/min)
80
92
91.5
91
96
SpO2
Range: 0 ~100%.
The margin of error for SpO2between 70% and 100% is ± 3%. No strict accuracy requirements
for SpO2below 70%.
Pulse Rate
Range: 40 ~240 BPM
Margin of Error: ± 3%
Wavelengths
Red: 663 nanometers
Infrared: 890 nanometers
Maximal Optical Output Power
Less than 1.5 mw maximum average.
Tube
Length: 6 ft. (1.83 m)
The Form and the Dimensions of the Patient Connection Port
The 22 mm conical air outlet complies with ISO 5356-1.
6. Available Therapy
The device delivers the following therapy:
CPAP
–
Delivers Continuous Positive Airway Pressure; CPAP maintains a constant level of
pressure throughout the breathing cycle. If your health care professional has prescribed ramp
for you, you can press the Ramp Button to reduce the pressure and then gradually
increase the pressure to the therapeutic pressure setting so that you can fall asleep more
comfortably.

E-20C System User Manual V2.11
6 / 36
English
7. Glossary
Apnea
A condition marked by the cessation of spontaneous breathing.
Auto Off
When this feature is enabled, the device automatically discontinues therapy whenever the mask
is removed. This feature is only available for E-20C-H-O.
Auto On
With this feature, the device automatically initiates therapy when you breathe into the mask.
This feature is always enabled. This feature is only available for E-20C-H-O.
CPAP
Continuous Positive Airway Pressure.
iCode
A feature that is intended to give access to compliance and therapy management information.
The “iCode” consists of six separate codes displayed in the Patient Menu, each code is a
sequence of numbers. The “iCode QR” and “iCode QR+” display two-dimensional codes.
LPM
Liters Per Minute.
OSA
Obstructive Sleep Apnea.
Patient Menu
The display mode in which you can change patient-adjustable device settings, such as the
starting pressure for the Ramp feature.
Ramp
A feature that may increase patient comfort when therapy is started. It can reduce pressure
and then gradually increase the pressure to the prescription setting so the patient can fall
asleep more comfortably.
Reslex
A therapy feature that is enabled by your home care provider to provide pressure relief during
exhalation.
Standby State
The state of the device when power is applied but the airflow is turned off.
min
Means the time unit “minute”.

E-20C System User Manual V2.11
7 / 36
English
h
Means the time unit “hour”.
yy mm dd / mm dd yy / dd mm yy
Means the date.
8. Model
Model
Product Description
Product
Contents
Optional
Accessory 1
Optional
Accessory 2
Work
Mode
Maximum
Work
Pressure
(hPa)
E-20C-H-O
Main device
Heated
Humidifier
SpO2 Kit
CPAP
20
E-20CJ-H-O

E-20C System User Manual V2.11
8 / 36
English
9. Package Contents
After unpacking the system, make sure you have everything shown here (Different models of
the product contain different components):
No.
Articles
Qty.
Notes
1
Main Device
1
2
Heated Humidifier
1
Optional
3
Shield
1
4
Air Filter
2
5
Power Adapter
1
6
Power Cord
1
7
SpO2 Kit
1
Optional
8
SD Card
1
Optional
9
Carrying Case
1
10
User Manual
1
11
Quick Operation Manual
1
All parts and accessories are not made with natural rubber latex.
The product’s service life shall be five years if the use, maintenance, cleaning and disinfection
are in strict accordance with the User Manual. If the key components are replaced, the service
life could be prolonged.
IMPORTANTS!
• If any of the above parts are missing, contact your home care provider.
•Contact your home care provider for additional information on the available accessories of this
device. When using optional accessories, always follow the instructions enclosed with the
accessories.
WARNINGS!
• This device should only be used with the mask and accessories manufactured or
recommended by Ece or with those recommended by your prescribing physician. The use of
inappropriate masks and accessories may affect the performance of the device and impair the
effectiveness of therapy.
• The use of accessories other than those specified, with the exception of cables sold by the
manufacturer of the equipment or system as replacement parts for internal components, may
result in increased emissions or decreased immunity of the equipment or system.
•When the insulation layer of the SpO2probe cable is damaged, do not connect the probe to
the patient.
•Please contact Ece to buy the SD card if you need it.

E-20C System User Manual V2.11
9 / 36
English
10. System Features
Humidifier Indicator
Mute Button
Knob
Ramp Button
Display Screen
Power Indicator
Air Outlet
Humidifier Connector
Shield
Fig. 10-1
Name
Function
Humidifier
Indicator
Indicate the humidity level. There are five levels in total. The number
of indicator lights that light up is directly proportional to the humidity
level. If none of the indicator lights light up, it means the humidifier is
turned off
Mute Button
Press this button to mute the alert. However, if the problem causing
the alert is not solved, the alert will sound again two minutes later
Knob
Start treatment and adjust device settings
Ramp Button
Enable the Ramp feature
Display Screen
Display menus for operation, messages, monitoring data, etc
Power Indicator
Indicate the power supply status
Air Outlet
Deliver pressurized air; connected to the tube or the air inlet of the
humidifier
Humidifier
Connector
Provide power to the humidifier which is connected to the main device
Shield
Connect the humidifier to the main device after this shied is removed

E-20C System User Manual V2.11
10 / 36
English
SD Card Slot
Communications Port
DC Inlet
Filter Cap
Fig. 10-2
Name
Function
SD Card Slot
Insert the SD card into this slot
Communications
Port
Connected to external equipment (Not for connection to
unrecommended devices)
DC Inlet
An inlet for the DC power supply
Filter Cap
Place the cap on the air filter, which is used to filter dust and pollen in
the air entering the device
11. First Time Setup
11.1 Placing the Device
Place the device on a firm, flat surface.
WARNINGS!
• If the device has been dropped or mishandled, if the enclosure is broken, or if water has
entered the enclosure, disconnect the power cord and discontinue use. Contact your home care
provider immediately.
• If the room temperature is warmer than 95˚F (35°C), the airflow produced by the device may
exceed 109.4˚F (43°C). The room temperature must be kept below 95˚F (35°C) while the
patient uses the device.
CAUTIONS!
• If the device has been exposed to either very hot or very cold temperatures, allow it to adjust
to room temperature (approximately 2 hours) before beginning setup.
• Make sure the device is away from any heating or cooling equipment (e.g., forced air vents,
radiators, air conditioners).
• The device is not suitable for use in high humidity environments. Make sure that no water
enters the device.
• Make sure that bedding, curtains, or other items are not blocking the filter or vents of the
device.
• To avoid explosion, this device must not be used in the presence of flammable gases (e.g.
anesthetics).
• Tobacco smoke may cause tar build-up within the device, leading to the malfunctioning of the

E-20C System User Manual V2.11
11 / 36
English
device.
• Air must flow freely around the device for it to work properly.
11.2 Installing the Air Filter and Filter Cap
(1) Attach the air filter to the filter cap, as shown in Fig. 11-1.
Filter CapAir Filter
Fig. 11-1
(2) Install the filter cap containing the air filter to the main device, as shown in Fig. 11-2.
Fig. 11-2
CAUTION!
• The air filter must be in place when the device is operating.
11.3 Connecting to Power
(1) Insert the plug of the power adapter into the DC Inlet on the back of the device;
(2) Connect the power cord to the power adapter;
(3) Plug the other end of the power cord into the power outlet.
DC Inlet
Main Device
Power Adapter
Power Cord
Fig. 11-3
WARNINGS!
• The device is powered on for use when the power cord and power adapter is connected. The
Knob turns the blower On / Off.
•Use of the device at an AC voltage beyond the stated range (see Section 5 “AC Power

E-20C System User Manual V2.11
12 / 36
English
Consumption”) may damage the device or cause device failure.
CAUTION!
• Inspect the power cord often for any signs of damage. Replace a damaged cord immediately.
IMPORTANTS!
• After interruption and restoration of the power supply, the device will restore its
pre-interruption working status automatically.
• To remove AC power, disconnect the power cord from the power outlet.
11.4 Assembling the Tube and Mask
(1) Connect one end of the tube to the air outlet of the main device, as shown in Fig. 11-4. If
the main device is used with a humidifier, connect one end of the tube to the air outlet of the
humidifier, as shown in Fig. 11-5.
Air Outlet
Tube
Fig. 11-4
Air Outlet
Tube
Fig. 11-5
(2) Connect the other end of the tube to the mask according to the user manual for the mask.
Wear the mask.
WARNINGS!
• If multiple persons are going to use the device (e.g., rental devices), a low-resistance, main
flow bacteria filter should be installed in-line between the device and tube. Pressures must be
verified by your home care provider when alternate or optional accessories are in place.
• If you are using a mask with a built-in exhalation port, connect the mask’s connector to the
tube.
• If you are using a mask with a separate exhalation port, connect the tube to the exhalation
port. Position the exhalation port so that the vented air is blowing away from your face. Connect
the mask’s connector to the exhalation port.
• If you are using a full-face mask (a mask covering both your mouth and nose), the mask must
be equipped with a safety (entrainment) valve.
• In order to minimize the risk of CO2rebreathing, the patient should observe the following

E-20C System User Manual V2.11
13 / 36
English
instructions:
- Use the accompanying tube and mask provided by Ece.
- Do not wear the mask for more than a few minutes while the device is not operating.
- Use only masks with vent holes. Do not block or try to seal the vent holes in the exhalation
port.
11.5 Using Oxygen with the Device
Oxygen may be added at the mask connection. Please observe the instructions listed below
when using oxygen with the device.
WARNINGS!
• Connect the oxygen tube to the oxygen inlet of the mask.
• The oxygen supply must comply with the local regulations for medical oxygen.
• Turn on the device before turning on the oxygen. Turn off the oxygen before turning off the
device. Explanation of Warning: When the device is turned off, but the oxygen flow still exists,
oxygen may accumulate within the device's enclosure and pose a fire hazard. Turning off the
oxygen before turning off the device will prevent oxygen accumulation in the device and reduce
the risk of fire. This warning applies to most CPAP devices.
• Oxygen supports combustion. Keep the device and the oxygen container away from heat,
open flames, any oily substances, or other sources of ignition. DO NOT smoke in the area near
E-20C or the oxygen container.
•Sources of oxygen should be located more than 1 m from the device.
• When using oxygen with this system, a Pressure Valve must be placed in-line with the patient
circuit between the device and the oxygen source. The pressure valve helps prevent the
backflow of oxygen from the patient circuit into the device when the unit is off. Failure to use
the pressure valve could result in a fire hazard.
• Do not connect the device to an unregulated or high pressure oxygen source. The pressure of
oxygen source does not exceed the work pressure of the device.
11.6 Inserting the SD Card (Only for the device that
equipped with SD card)
Insert the SD card into the SD Card Slot, as shown in Fig. 11-6.
SD Card Slot
Fig. 11-6
If the SD card is inserted correctly, a symbol indicating correct insertion will appear in the Main
Interface on the screen of the device, as shown in Fig. 11-7.

E-20C System User Manual V2.11
14 / 36
English
Fig. 11-7
If the SD card is inserted incorrectly or not inserted, a symbol indicating incorrect insertion or
no SD card present will appear in the Main Interface on the screen of the device, as shown in
Fig. 11-8.
Fig. 11-8
CAUTION!
•To avoid data loss or any damage to the SD card, the SD card can only be removed after the
main device stops delivering air.
11.7 Using the SpO2Kit
The SpO2Kit consists of a SpO2 Probe, Adapter, and Connector, as shown in Fig. 11-9.
SpO2 Probe Adapter Connector
Fig. 11-9
11.7.1 Connecting the SpO2Kit to the Main Device
(1) Pull the Adhesive-backed Paper off the Base Plate as indicated by the arrow icon in the
top left of Fig. 11-10.

E-20C System User Manual V2.11
15 / 36
English
Adhesive-backed Paper
Base Plate
Fig. 11-10
(2) Point the four holes of the Base Plate towards the four reference points on the back of the
main device to properly stick the plate to the device, as shown in Fig. 11-11.
Base Plate
Fig. 11-11
(3) Point the two Buckles at the back of the SpO2Kit adapter towards the two buckles of the
base plate, and push until the two units click into place. Insert the SpO2Kit connector into the
Communications Port of the main device, as shown in Fig. 11-12.
Buckle Communications Port
Fig. 11-12
11.7.2 Removing the SpO2Kit from the Main Device
First disconnect the SpO2Kit connector from the Communications Port; then press the Hook
at the top of the SpO2Kit adapter, and at the same time, pull the adapter and base plate apart
in opposite horizontal directions, as shown in Fig. 11-13.
Hook
Fig. 11-13
The SpO2Kit is intended to be used for continuous, non-invasive functional arterial oxygen
saturation (SpO2) and pulse rate monitoring for adults weighting greater than 40 kg.
The SpO2Kit is ready to use immediately when you connect it to the main device via the

E-20C System User Manual V2.11
16 / 36
English
Communications Port.
The model of the SpO2Kit is KS-CM01. The SpO2Kit is calibrated to display FUNCTIONAL
OXYGEN SATURATION.
Attach its sensor to the patient's index finger or any other finger.
The sampling rate of the SpO2signal is about 50 Hz, and the update rate of the frame is 1 Hz.
The value of SpO2and PR is calculated by the average of the former eight pulse waveforms.
If the SpO2Kit is in an abnormal state, the value of SpO2will be blank.
The screen of the main device then displays the Main Interface shown in Fig. 11-14. The
patient's blood oxygen saturation and pulse rate can be clearly seen during the course of
therapy.
Fig. 11-14
WARNINGS!
• Change the measurement point regularly according to the patient's conditions after prolonged
use. Change the measurement point, check the patient's skin integrity and circulatory
conditions, and make the right adjustments at least every three hours.
• Excessive ambient light, excessive motion, use of intravascular dyes, poorly perfused finger,
extreme finger sizes or improper placement may degrade the SpO2Kit's performance or affect
the accuracy of the measurement.
• Nail polish or false nails should be removed before the finger sensor is used, or it may cause
erroneous measurements results.
• Overly low blood pressure, overly low systolic blood pressure, severe anemia, or hypothermia
may cause erroneous measurements results.
•The SpO2Kit is designed for use with this device only.
•Verify the compatibility of the device and SpO2Kit before use, otherwise it may cause injury to
the patient.
•Misapplication of a SpO2Kit with excessive pressure for prolonged periods can induce
pressure injury.
•A FUNCTIONAL TESTER cannot be used to assess the ACCURACY of the SpO2Kit.
•Do not use the SpO2Kit during MRI scanning.
•Do not use the SpO2Kit if it appears damaged.
•Do not immerse the SpO2Kit as it causes short.
•SpO2Kit should only be connected or disconnected with the device unplugged or powered off.

E-20C System User Manual V2.11
17 / 36
English
11.8 Using the H60 Heated Humidifier
The H60 Heated Humidifier is available from your home care provider. The humidifier may
reduce nasal dryness and irritation by adding moisture (and heat if applicable) to the airflow.
For detailed information about the heated humidifier, please see the user manual for the
heated humidifier.
11.9 Starting Treatment
Connect the device to a power outlet, press the Knob , and the device will start delivering
air.
WARNINGS!
• Be sure to follow your physician’s instructions on adjusting the settings! To order any
accessories not included with this device, contact your equipment supplier.
• DO NOT connect any ancillary equipment to this device unless recommended by Ece or your
physician. If you suffer from chest discomfort, shortness of breath, stomach bloating, or severe
headache when using the device, contract your physician or qualified medical personnel
immediately.
12. Routine Use
12.1 Connecting the Tube
Connect the power cord, power adapter, and tube properly according to the instructions in the
First Time Setup (Chapter 11). Connect the mask and headgear according to the user manual
for the mask.
CAUTION!
• Before each use, examine the tube for any damage or debris. If necessary, clean the tube to
remove the debris. Replace any damaged tube. Make sure that the mask does not leak.
12.2 Adjusting the Tube
Lie down on your bed, and adjust the tube so it is free to move if you turn during sleep. Adjust
the mask and headgear until you have a comfortable fit and until there are no airflow leaks into
your eyes.
12.3 Turning on the Airflow
Press the Knob to turn on the airflow. The screen will display treatment pressure and
other information.
12.4 Heating the Water in the Humidifier
Pay attention to the humidifier indicator lights when using the device with a humidifier. The
indicator lights indicate the On / Off state of the humidifier. It is off when all indicator lights go
out.
Table of contents
Other Respirox Medical Equipment manuals
Popular Medical Equipment manuals by other brands

ResMed
ResMed AirFit N30i user guide

GE
GE LOGIQ S6 Service manual

WORLD OF MEDICINE
WORLD OF MEDICINE Stryker Pneumoclear Short Instruction

Apollo Healthcare Technologies Limited
Apollo Healthcare Technologies Limited APH059 user manual

Air Techniques
Air Techniques AirStar AS10 Assembly instructions

GE
GE DINAMAP ProCare 100 Service manual