manuals.online logo
Brands
  1. Home
  2. •
  3. Brands
  4. •
  5. INAPOD
  6. •
  7. Indoor Furnishing
  8. •
  9. INAPOD PHONE BOOTH Series User manual

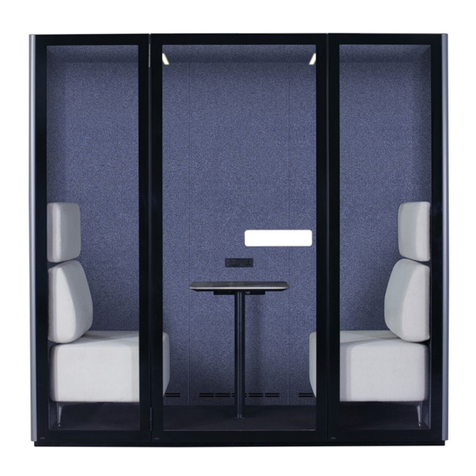
INAPOD PHONE BOOTH Series User manual

ASSEMBLY DIAGRAM
INSTALLATION MANUAL
PHONE BOOTH SERIES
C POD
ATTENTION
Please read installation manual carefully before assemble.
First remove the accesory box. Carton number (1)
Follow the carton number when unboxing.
Complete assemble each according to the carton number and proceed to the next.
REAR
TOP SUPPORT
REAR
BOTTOM SUPPORT
BASE FRAME
REINFORCE 'L' BRACKET
x4pcs
LEFT PANEL
RIGHT PANEL
REAR GLASS
x2pcs
VENTILATION FAN
TOP PANEL
GLASS SWING DOOR
DOOR LATCH
HANDLE
TABLE SET
BASE
CARPET BOARD
1
Leveling tool
DETAIL : (A)
BASE FRAME
DETAIL : (A)
Adjustable foot cap for leveling
Push to final position
before setting up the booth
Level the base before installation
Step 1
Step 2
Step 3
Adjustable Foot Cap
x10 pcs
2
REINFORCE 'L' BRACKET
DETAIL : (B)
DETAIL : (B)
Do not tighten
Cap screw with flat washer
(m8 x 20zp)
3
LEFT PANEL
RIGHT PANEL
DETAIL : (C)
Do not tighten
Cap screw with flat washer
(m8 x 20zp)
4
DETAIL : (D)
DETAIL : (E)
Cap screw with flat washer
(m5 x 16zp)
Rear
Top Support
Rear
Bottom Support
DETAIL : (D)
DETAIL : (E)
SPECIAL TOOL
SPECIAL TOOL
REAR VIEW
DETAILS
TOP PANEL
TOP PANEL
STEP 1
STEP 2
STEP 3
VENTILATION FAN
TOP PANEL
Binding head screw
(m5 x 10)
5
TOP PANEL
STEP 1 STEP 2 STEP 3
Rear Glass
Top Panel Rear
Top Support
Rear Glass
Top Panel Rear
Top Support
Rear Glass
Top Panel Rear
Top Support
REAR GLASS RUBBER SEAL
(1990mm x 2pcs)
REAR GLASS
(x2pcs)
REAR GLASS 'I' JOINT
(2025mm x 1pc)
REAR GLASS RUBBER SEAL
(2018mm x 1pc)
GLASS HOLDER BRACKET
(395mm x 15pcs)
6
DETAIL : (G)
DETAIL : (F)
Do not tighten
REAR GLASS
REAR GLASS
'I' JOINT
DETAIL : (F)
DETAIL : (G)
7
Binding head screw
(m4 x 12)
Cap screw
with flat washer
(m8 x 20zp)
STEP 1 STEP 2 STEP 3
STEP 4 STEP 5
REAR GLASS REAR GLASS RUBBER SEAL
(2018mm x 1pc)
GLASS HOLDER BRACKET
(395mm x 5pcs)
REAR GLASS RUBBER SEAL
(1990mm x 2pcs)
REAR GLASS HOLDER BRACKET
(395mm x 10pcs)
Do not tighten
Check Leveling
Tighten all screw to ensure steady structure
90°
90°
90°
90°
2032mm
8DETAIL : (H)
DETAIL : (I)
DETAIL : (J)
DETAIL : (K)
DETAIL : (H,I,J & K)
DETAIL : (H) DETAIL : (I) DETAIL : (J)
DETAIL : (K)
STEP 1
STEP 2
908mm
9
DETAIL : (L)
DETAIL : (L)
Cap screw with flat washer
(m8 x 20zp)
ALU FIXED GLASS (L)
ALU FIXED GLASS (R)
Cap screw with flat washer
(m8 x 20zp)
10
GLASS SWING DOOR
11
Pan Head Shelf Drilling Screw
(XR ZP #8 X 1/2")
DETAIL : (M)
Pan Head Shelf Drilling Screw
(XR ZP #8 X 1/2")
DETAIL : (M)
12
DETAIL : (N)
SCREW
COVER
SCREW
HANDLE
SHAFT
COVER
HANDLE
SCREW
GLASS PROTECTION NYLON
DOOR LATCH HANDLE
DETAIL : (N)
INCOMING SUPPLY
SENSOR
LED LIGHT
VENTILATION FAN 1
CONTROL BOX
SOCKET OUTLET
VENTILATION FAN 2
DETAIL : (O)
DETAIL : (O)
Before the first use,please open the battery
cover and remove the *protective film*
PAIR WITH RF RECEIVER
1- Click "learning key" on RF receiver
2- Click ON or OFF button on RF remote
3- LED lights connected with the receiver will
flicker once
4- The receiver is paired with remote successfully
HOW TO DELETE THE PAIRING
1- Press and hold down "learning key" on the
RF receiver for over 3 seconds until connected
LED lights flicker twice, which means the pairing
deleted successfully.
RF REMOTE
(REMOVE)
*PROTECTIVE FILM*
BATTERY COVER
BATTERY CR2430
13
VENTILATION FAN 2
LED LIGHT STRIP
RF RECEIVER
"LEARNING KEY"
6W SPLITTER
3W SPLITTER
VENTILATION FAN 1
1
2
3
5
TOP PANEL INTERNAL COVER
WITH LAMP HOLE
(Acoustic Board)
TOP PANEL INTERNAL COVER
(Acoustic Board)
RIGHT PANEL
INTERNAL COVER
(Acoustic Board)
LEFT PANEL INTERNAL COVER
(Acoustic Board)
Cap screw with flat washer
(m5 x 16zp)
14
BASE CARPET BOARD
x2pcs
4
1
DETAIL : (P)
SENSOR
SOCKET OUTLET
SENSOR
SOCKET OUTLET
SENSOR
SOCKET OUTLET
Cap screw with flat washer
(m8 x 20zp)
JCBC SCREW
(m6 x 16 ZP)
TABLE POLE
TABLE POLE
COVER
TABLE SUPPORT
TABLE TOP
15
Cap screw with flat washer
(m5 x 30zp)
Cap screw with flat washer
(m5 x 30zp)
JCBC SCREW
(m6 x 16 ZP)
Cap screw
with flat washer
(m8 x 20zp)
16
SIDE STEP
ALU FIXED GLASS SEAL
(2000mm x 2pcs)
S/S A2 CSK HD MC SCREW
(m5 x 12)

Other manuals for PHONE BOOTH Series

3

This manual suits for next models

1

Other INAPOD Indoor Furnishing manuals

INAPOD 2 Series User manual

INAPOD

INAPOD 2 Series User manual

INAPOD Office Pod Series User manual

INAPOD

INAPOD Office Pod Series User manual

INAPOD PHONE BOOTH Series User manual

INAPOD

INAPOD PHONE BOOTH Series User manual

INAPOD PHONE BOOTH Series User manual

INAPOD

INAPOD PHONE BOOTH Series User manual

INAPOD PHONE BOOTH Series User manual

INAPOD

INAPOD PHONE BOOTH Series User manual

Popular Indoor Furnishing manuals by other brands

Regency LWMS3015 Assembly instructions

Regency

Regency LWMS3015 Assembly instructions

Furniture of America CM7751C Assembly instructions

Furniture of America

Furniture of America CM7751C Assembly instructions

Safavieh Furniture Estella CNS5731 manual

Safavieh Furniture

Safavieh Furniture Estella CNS5731 manual

PLACES OF STYLE Ovalfuss Assembly instruction

PLACES OF STYLE

PLACES OF STYLE Ovalfuss Assembly instruction

Trasman 1138 Bo1 Assembly manual

Trasman

Trasman 1138 Bo1 Assembly manual

Costway JV10856 manual

Costway

Costway JV10856 manual

moss DESIGN Caisson Credenza Assembly instructions

moss DESIGN

moss DESIGN Caisson Credenza Assembly instructions

Aquaglide FULL DECK 15.0 owner's manual

Aquaglide

Aquaglide FULL DECK 15.0 owner's manual

AREBOS AR-HE-SW30 user manual

AREBOS

AREBOS AR-HE-SW30 user manual

Till-Hilft Fulda 87005.330 Assembly instructions

Till-Hilft

Till-Hilft Fulda 87005.330 Assembly instructions

Twoey Outside 2010 quick start guide

Twoey Outside

Twoey Outside 2010 quick start guide

Hettich Easys 200 operating instructions

Hettich

Hettich Easys 200 operating instructions

The bedboss RELAX 404 Series owner's manual

The bedboss

The bedboss RELAX 404 Series owner's manual

Oeseder Möbelindustrie Bern 991 720 Assembly instructions

Oeseder Möbelindustrie

Oeseder Möbelindustrie Bern 991 720 Assembly instructions

Costway HW68469 user manual

Costway

Costway HW68469 user manual

Next ALIX A27743 Assembly instructions

Next

Next ALIX A27743 Assembly instructions

BROSA Hans Assembly guide

BROSA

BROSA Hans Assembly guide

Prodigg MINIKA PBA015T-FUR installation manual

Prodigg

Prodigg MINIKA PBA015T-FUR installation manual

manuals.online logo
manuals.online logoBrands
  • About & Mission
  • Contact us
  • Privacy Policy
  • Terms and Conditions

Copyright 2025 Manuals.Online. All Rights Reserved.