INCANT IDEA Flair User manual
Brewing Guide
Warranty Information
Limited Warranty
The Flair Espresso Maker’s Press Stand and Brewing Cylinder are warranted against functional defects for 5
(ve) years from the purchase date, when used in accordance with all operating instructions. Parts that are
more subject to normal wear and tear, such as O-rings, Silicone Sleeve, Piston, and Portalter are warranted
against defects in material, design or workmanship for 6 (six) months from the purchase date, although these
items are expected to last beyond the warranty. Proof of purchase is required to validate the warranty period.
The warranty applies only when the product and parts are used in accordance with all operating instructions.
The warranty becomes void if the product or parts are modied, abused or improperly used, damaged by
accident or neglect, or if any parts are improperly installed. Call Customer Service with any questions about a
possible defect. All defective product claims will be handled on an individual basis by our Customer Service
that will ask you to describe the problem and provide the purchase date and location. Upon conrmation of
the defect, we will give you a Return Material Authorization (RMA) for you to use and return the product or
defective part. The RMA number must be clearly written on the side of the shipping box in which you return the
product. Unless otherwise instructed by us, the product or parts must be sent freight prepaid to our company
address and not to the store it was purchase from. Intact Idea makes no other warranties, express or implied,
and specically excludes warranties of merchantability and tness for a particular purpose. Intact Idea’s liability
under this warranty shall be limited to repair or replacement of the defective part(s), whichever may apply.
Intact Idea shall not be responsible for any damages or personal injuries, whether incidental or consequential,
or claims for such damages based on any legal theory, which may occur while using this product. This warranty
gives you specic legal rights, and you may also have other rights which may vary from state to state and country
to country.
27324 Camino Capistrano, Suite #211, Laguna Niguel, CA, 92677 USA
[email protected] • www.flairespresso.com
888.353.5339 or +1.949.449.9988 (Outside the U.S.)
© Intact Idea, All Rights Reserved
Flair is a trademark of Intact Idea, LLC. – Product designed in California, USA - Made in China
After You Brew
Troubleshooting & Support
www.flairespresso.com/brewguide
For additional information on how to best use
your Flair, including video demonstrations,
coee suggestions and accessories, please visit
us online at:
We want you to love your Flair! Our team is
standing by to help troubleshoot any issues
that may arise. If you experience any problems,
please contact us immediately at:
Cleaning Your Flair
How to Store Your Flair
To remove used espresso grinds from your
Flair you can knock them out against the side
of a trash can. In addition, you can invert the
portalter and gently blow into the opposite
end, or dig the grounds out with a utensil.
Once the grounds are removed, rinse all
brewing parts in cool water.
Do not clean in a dishwasher.
Remove the Piston with
Measuring Cup
Hand Wash Only
12 3 4
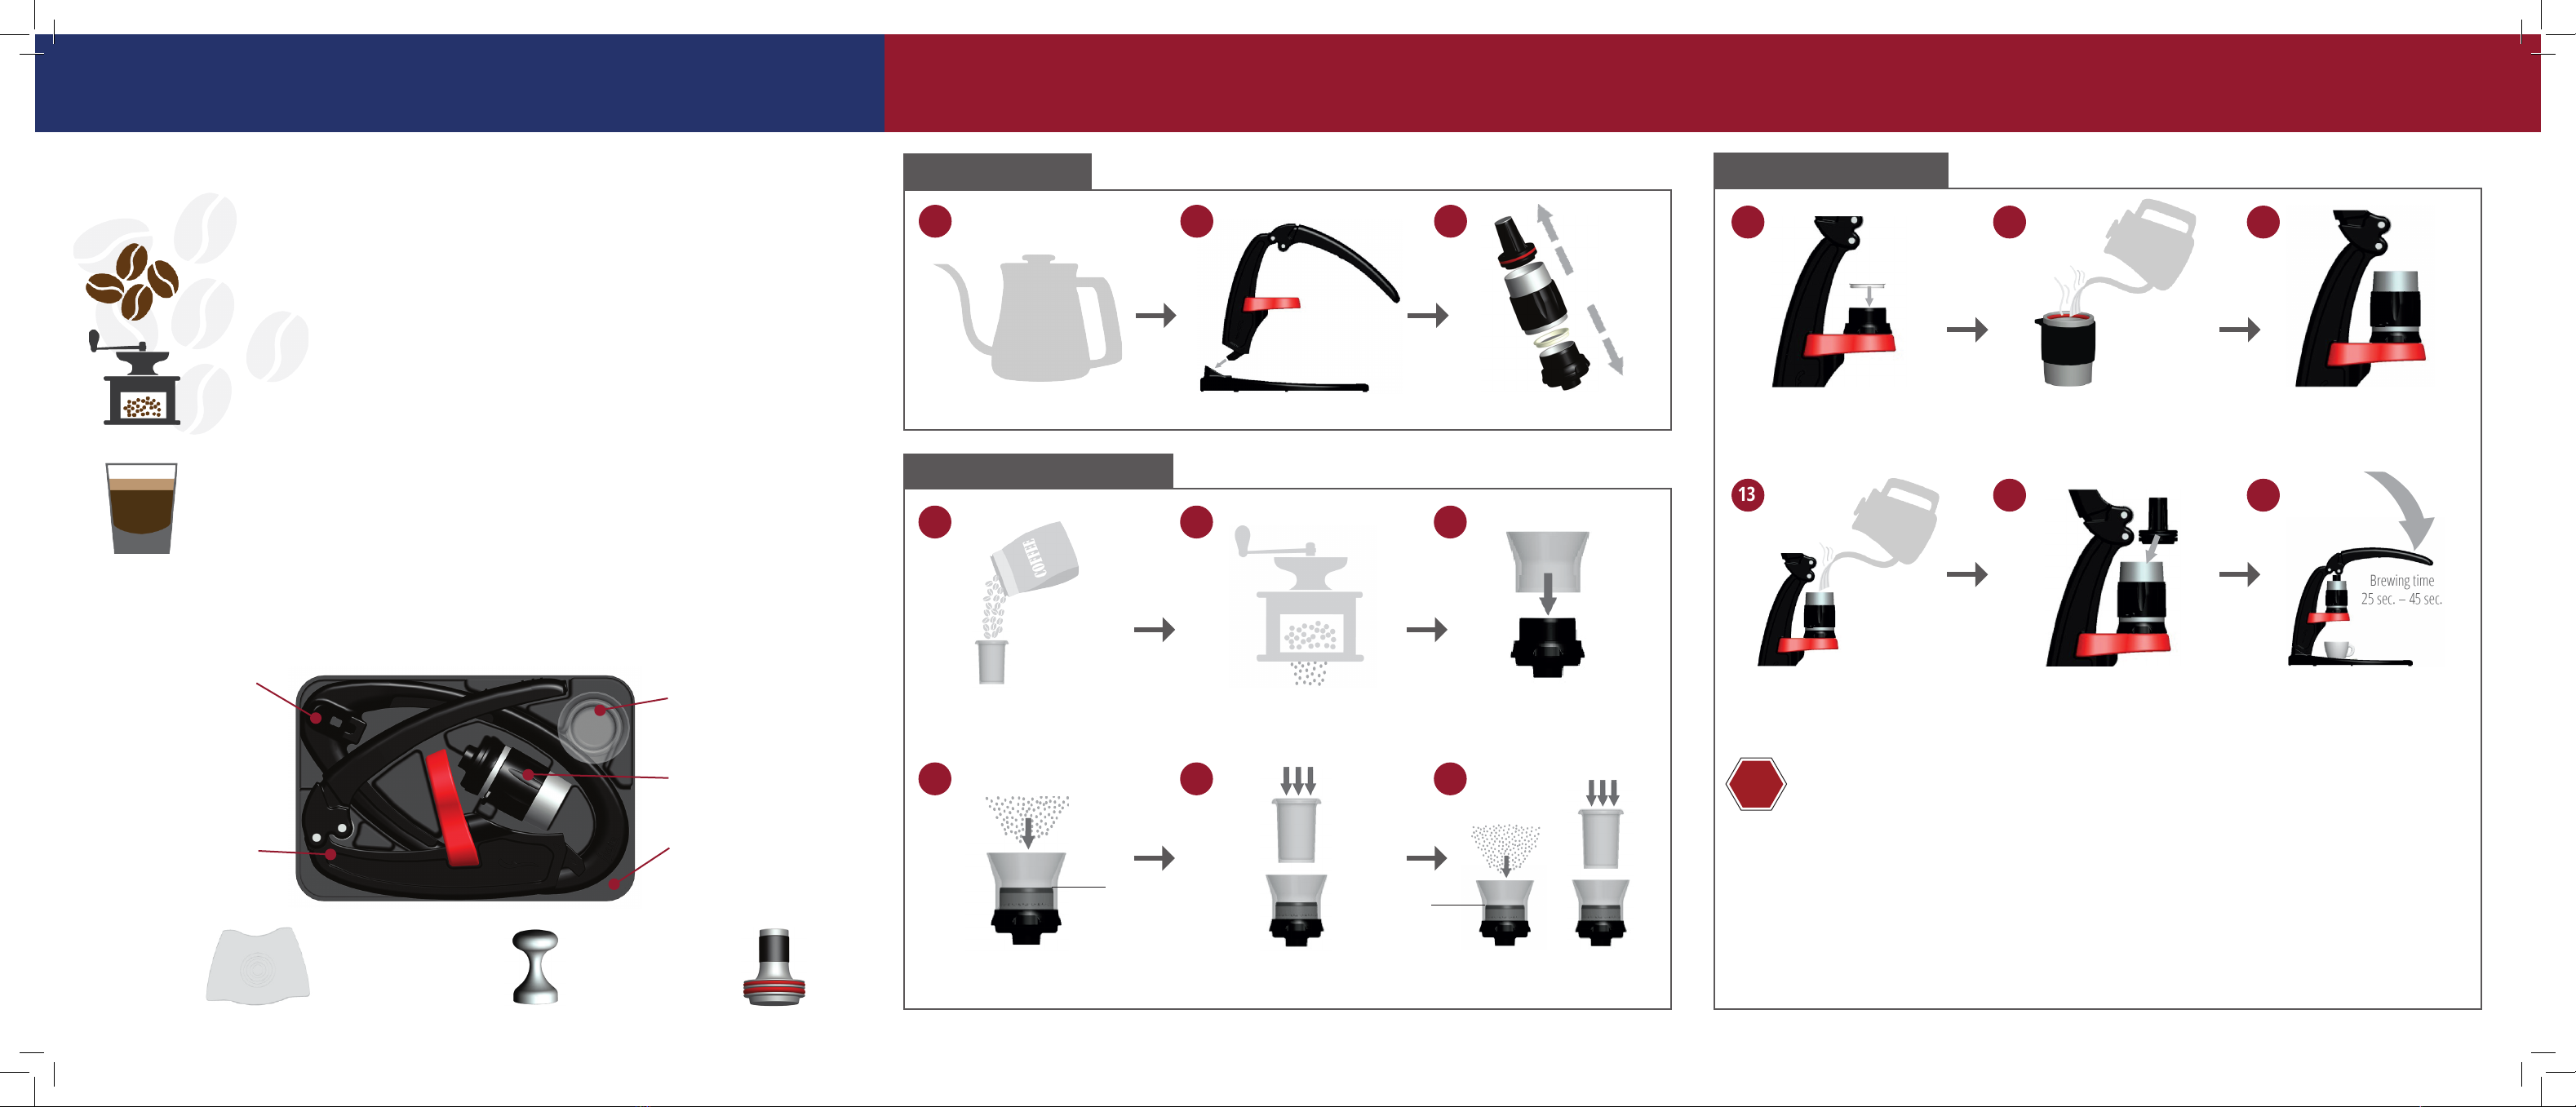
Brewing with Your FlairBefore You Brew
Preparing to Brew
Boil Water
1
Insert Post into Base
2 3
Take Apart Brewing Head
Grinding & Tamping Coee
Brewing Your Espresso
Measure Coee
*not an exact measurement,
15-17 grams of coee
4
Grind Beans
with Burr Grinder
5 6
Place Funnel on
Portalter
Add Ground Beans
to Portalter
7
Tamp Ground Beans
Firmly to Compact
8 9
Add More Grounds & Tamp
*Ensure to leave space to add the screen
and have it t ush to the top
Fill Line
CAUTION! MIND THE FORCE APPLIED TO THE LEVER!
This is not an exercise machine to build your muscles. To make good espresso, you need
to press the lever rmly, but excessive force will not make a better espresso, and may
break the machine. When lowering the lever, if you feel excessive resistance or you see
that nothing is coming out into your cup, STOP! Do not put more force onto the lever. Your
coee grounds are too ne, and/or it has been tamped too hard. Remove the brewing
head and discard the grind in the portalter to start over with coarser grounds and a lighter
tamp. To get more coarse grounds, adjust the grind setting on your burr grinder.
!
10 11 12
Add Cylinder to
Portalter on the Base
13
Insert the Piston into
the Cylinder
*If you have the stainless steel
piston, preheat this as well
14 15
Place Filled Portalter
on Base & Add Screen
Press Down the Lever to Brew
*Brew time should be between 25-45 seconds
**Do not exceed 70lb (32kg) of force
Brewing with Your Flair
Brewing espresso is a mixture of science and art. Brewing with the Flair - by hand - is craftsmanship. The
Flair is like a hand tool; it will follow your decisions and actions. Your espresso’s taste and crema is most
dependent on the quality and freshness of your coee beans and the size of your grinds.
Espresso Beans - We recommend using espresso beans roasted within a few weeks of use and
grinding immediately before brewing. Pre-ground beans will not yield crema!
Grinding Your Beans - For espresso, always use a burr grinder. A burr grinder creates more uniform
grounds than a bladed grinder and allows you to control your grind size. When
starting, we recommend you grind your coee a notch or two coarser than the
normal range for espresso. If you don’t see any crema when brewing, gradually
grind your coee ner, until you get the espresso you want. If you change the
type of coee beans, you may need to change the grind setting.
What is Crema? - Crema is the natural foam that appears on top of your espresso when brewed
correctly. It may take a few tries to get it right. Ensure your water is boiling, your
beans are freshly roasted and ground and that you experiment with dierent
grind sizes. Don’t forget, we’re here to help!
&
Fill Line
Invert Cylinder in Sink
or Bowl and Preheat
(Fill) with Boiled Water
Fill Cylinder to Line with
Boiled Water
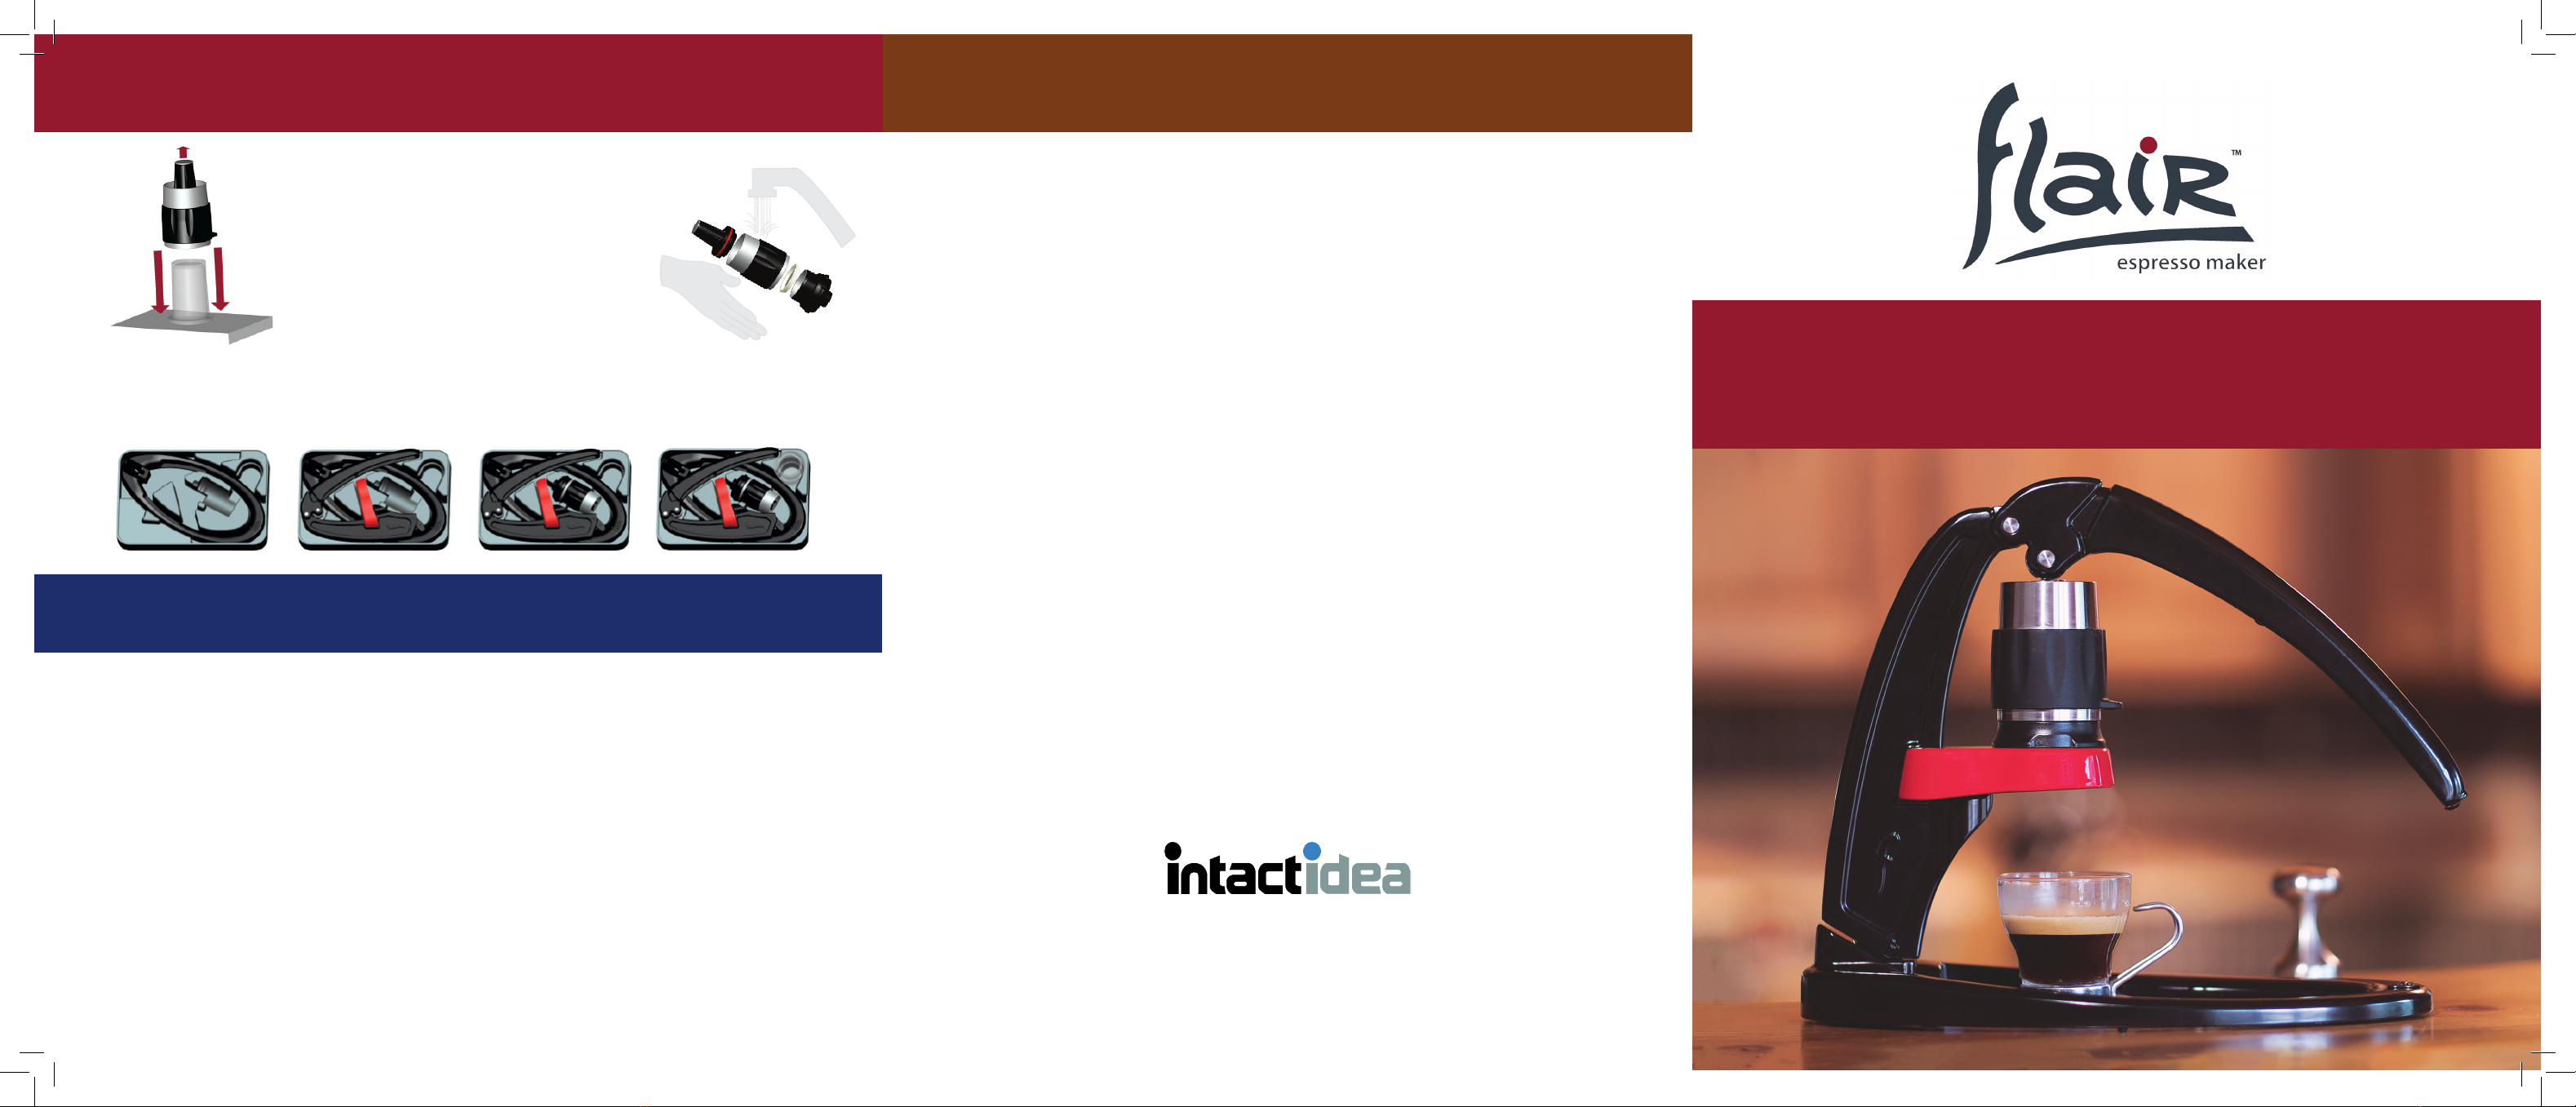
Contents of your Carrying Case
Measuring Cup &
Funnel
Brewing Head
Travel CaseMain Post & Lever
Base
Stainless Steel
Tamper (optional) Stainless Steel
Piston (optional)
Drip
Plate


