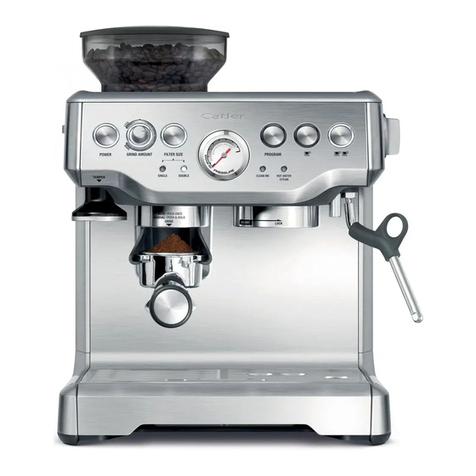
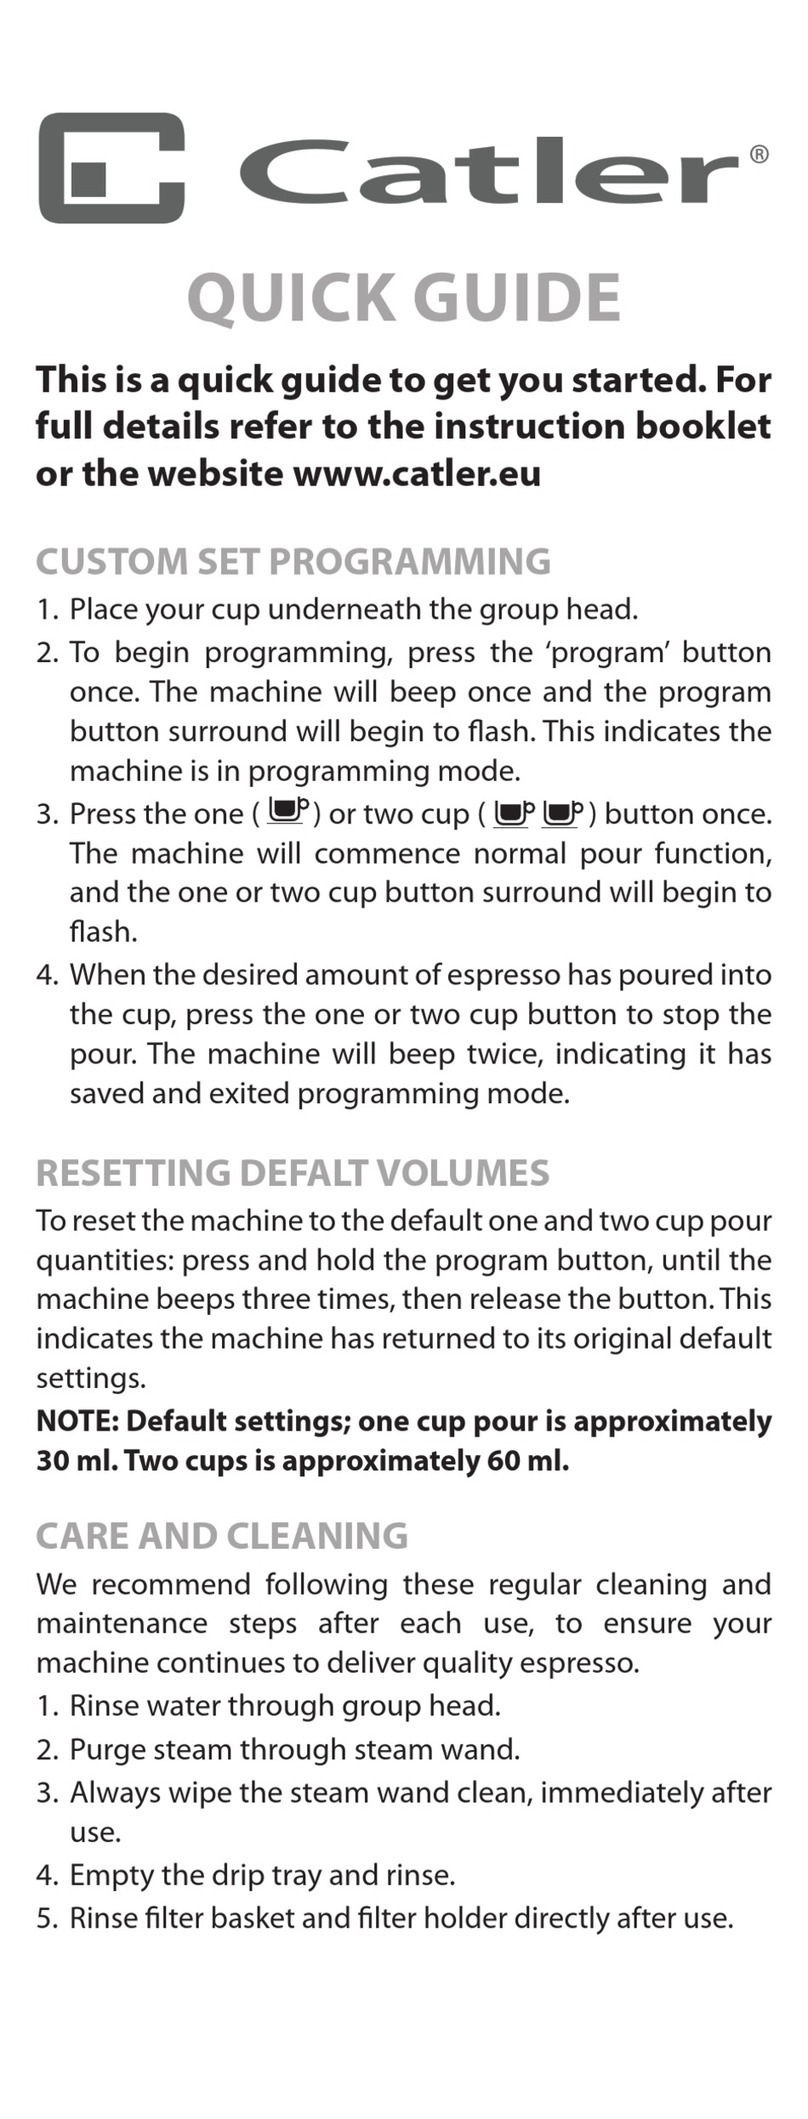
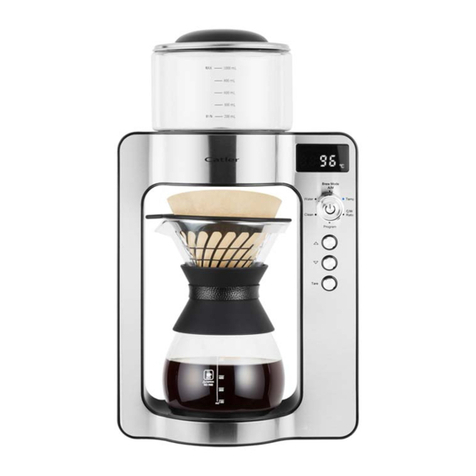
Catler ES 8011 User manual

Instructions
for use
ES 8011
ESPRESSO
MACHINE

ESPRESSO
MACHINE

CONTENTS
4 Congratulations
6 Catler recommends safety first
8 Key features of your Espresso Machine ES 8011
10 Know your Espresso Machine ES 8011
12 Before first use
13 Assembling your Espresso Machine ES 8011
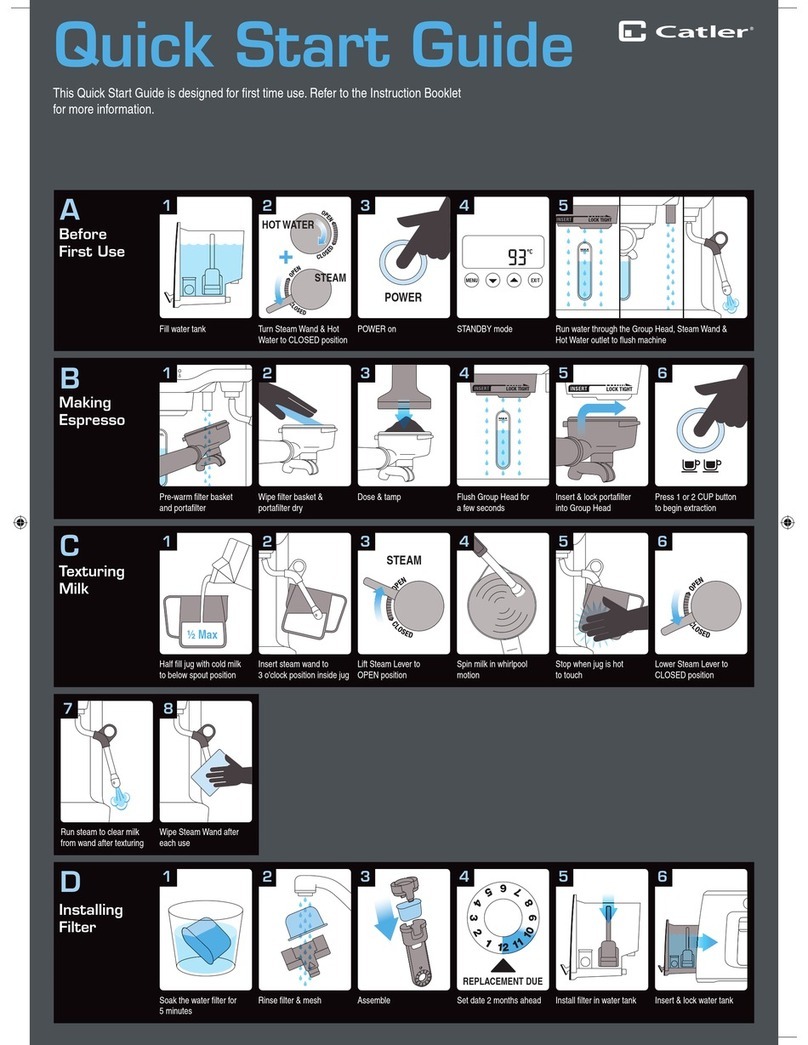
15 Operating your Espresso Machine ES 8011
18 Programming your Espresso Machine ES 8011
20 How to froth milk for a Cappuccino or Latté
22 Using the hot water function
23 Coffee making tips
25 Care and cleaning
28 Trouble Shooting guide
31 Coffees to try
R1 Recipes
3
3
CONTENTS

44 CONGRATULATIONS
Congratulations
on the purchase of your new Espresso Machine ES 8011.

At Catler, we know that coffee lovers will go to great lengths to refine the
art of making coffee. They will experiment with different types of coffee, the
tamp and grind of the beans in search for the perfect espresso.The Espresso
Machine ES 8011 has been designed for the novice through to the experi-
enced barista.
After extensive research and rigorous testing, this Espresso Machine
ES 8011 boasts key features such as custom set programming, a premium
brew process and a quality espresso pressure gauge.
We hope this Espresso Machine brings you the unique pleasure
of preparing a good quality espresso...
and wish you a lot of wonderful experience with your new Espresso
Machine ES 8011.
5
5
CONGRATULATIONS

CATLER RECOMMENDS SAFETY FIRST
We at Catler are very safety conscious. We design and manufacture consumer products with the safety of you, our valued customer foremost in mind.
In addition we ask that you exercise a degree of care when using any electrical appliance and adhere to the following precautions:
IMPORTANT SAFEGUARDS FOR YOUR ESPRESSO MACHINE ES 8011 AND FOR ALL ELECTRICAL APPLIANCES
6CATLER RECOMMENDS SAFETY FIRST
• This appliance is not intended for use by per-
sons (including children) with reduced physi-
cal, sensory or mental capabilities, or lack
of experience and knowledge, unless they
have been given supervision or instruction
concerning use of the appliance by a person
responsible for their safety.
• Children should be supervised to ensure that
they will not play with the appliance.
• Carefully read all instructions before operat-
ing and save for future reference.
• Remove any promotional stickers before us-
ing the Espresso Machine for the first time.
• Do not place the Espresso Machine near the
edge of a bench or table during operation.
Ensure the surface is level, clean and free of
water.
• Do not place the Espresso Machine on or
near a hot gas or electric burner, or where it
could touch a heated oven.
• Do not use the Espresso Machine on metal
surfaces, for example, a sink drain board.
• Always make sure the Espresso Machine is
properly assembled before connecting to
power outlet and operating.
• Warning: The appliance is not intended to
be operated by means of an external timer or
separate remote control system.
• Use only cold water in the water tank. Do not
use any other liquid.
• Never use the Espresso Machine without wa-
ter in the water tank.
• Warning: Do not remove the Water Tank
while the Espresso Machine is in use.
• Ensure the filter holder is firmly inserted and
secured into the brewing head before using
the machine.
• Never remove the filter holder during the
brewing operation as the machine is under
pressure.
• Do not leave the Espresso Machine unat-
tended when in use.
• Do not touch hot surfaces. Allow the Espres-
so Machine to cool down before moving or
cleaning any parts.
• Do not place anything, other than cups for
warming, on top of the Espresso Machine.
• Always switch the Espresso Machine off by
pressing the Power button to ‚Off‘, then
switch off at the power outlet and unplug if
appliance is to be left unattended, if not in
use, before cleaning, before attempting to
move the appliance, disassembling, assem-
bling and when storing the appliance.
• Keep the appliance and accessories clean.
Follow the cleaning instructions provided in
this book.

• Unwind the cord before use.
• To protect against electric shock, do not im-
merse cord, plug or appliance in water or
any other liquid.
• Do not let the cord hang over the edge of
a table or counter, touch hot surfaces, or be-
come knotted.
• Do not use this appliance for anything other
than its intended use. Do not use in moving
vehicles or boats. Do not use outdoors.
• It is recommended to inspect the appliance
regularly. Do not use the appliance if power
supply cord, plug or appliance becomes
damaged in anyway. Return the entire appli-
ance to the nearest authorised Catler service
centre for examination and/or repair.
• Any maintenance other than cleaning should
be performed at an authorised Catler Ser-
vice Centre.
• The installation of a residual current device
(safety switch) is recommended to provide
additional safety protection when using
electrical appliances.
• It is advisable that a safety switch with a ra-
ted residual operating current not exceed-
ing 30mA be installed in the electrical circuit
supplying the appliance. See your electri-
cian for professional advice.
7
CATLER RECOMMENDS SAFETY FIRST
IMPORTANT SAFEGUARDS FOR ALL ELECTRICAL APPLIANCES

KEY FEATURES OF YOUR ESPRESSO MACHINE ES 8011
Programmable Function
This espresso machine oers a convenient
choice between the Manual Operation or the
intelligent Programmable Function that can be
personalised with the user’s favourite espresso
setting.
Espresso Pressure Gauge
The espresso pressure gauge assists in obtaining
the most favourable extraction pressure, guid-
ing the user to create their ideal espresso. This
is achieved by measuring the pressure at which
the water is being forced through the ground
coffee in the filter holder.
White Zone – Ideal Espresso
The gauge needle when positioned within the
recommended White Zone during pouring indi-
cates that the espresso will be produced at the
ideal pressure. The brewed espresso should have
a generous layer of fine textured and evenly co-
loured golden créma.
Green Zone – Under Extracted
The gauge needle when positioned within the
Green Zone during pouring indicates that the
espresso will be produced with insufficient pres-
sure resulting in an ‘under extracted’ espresso.
This occurs when the water flow through the
ground coffee in the filter is too fast. As a result
the optimal flavour will not be extracted and the
coffee will be watery and lack thick créma on the
top. Possible other cause for under extraction
are: coffee grind is too coarse and/or insufficient
coffee in filter and/or under tamping.
Red Zone – Over Extracted
The gauge needle when positioned within the
Red Zone during pouring will indicate that the
espresso will be produced with too much pres-
sure resulting in an „over extracted“ espresso.
This occurs when the water flow through the
ground coffee in the filter is too slow. As a re-
sult the coffee will be very dark and bitter, with
a mottled and uneven créma on top. Possible
other causes for over extraction are: ground cof-
fee is too fine and/or too much ground coffee in
filter and/or over tamping.
NOTE:
To help reach the white zone use the
Advanced Dual Wall Créma System Filters.
These filters are designed to intentionally
slow the water flow rate during brewing
allowing you to easily pour your espres-
so at the ideal pressure.
Hot Water Wand
The dedicated hot water wand is ideal for mak-
ing your favourite hot drinks. For convenient use
the wand has a commercial style 360° ball joint.
KEY FEATURES OF YOUR ESPRESSO MACHINE ES 8011
8

9
KEY FEATURES OF YOUR ESPRESSO MACHINE ES 8011
Commercial Style Steam Wand
The swivel-action steam wand, with stainless
steel frothing attachment, easily adjusts to the
perfect position for texturing milk. The wand has
a commercial style 360° ball joint.
Advanced Dual Wall Créma System
Filters
Advanced Duall Wall Créma System Filters (one
and two cup) are supplied with this Espresso
Machine.
The Advanced Duall Wall Créma System Filters
are designed to intentionally slow the water
flow rate during brewing, allowing you to easily
pour your espresso at the ideal pressure, for the
perfect créma.
The filters are suited to both pre-ground vacuum
packed coffee and freshly ground coffee.
Electronic Temperature Control
The electronic temperature control system ac-
curately maintains the optimal brewing tem-
perature of the water. This helps ensure the user
gets the best possible extraction each time an
espresso is made.
Energy Saving Features
The Espresso Machine will enter the „Power
Save Mode“ if not used for one hour, and will
automatically switch off if not used for a further
three hours. The „Power Save Mode“ uses 45%
less power than when the machine is in „Stand
by“ Mode. During „Power Save Mode“ only the
POWER button surround will be illuminated. All
other button and light surrounds will not be il-
luminated.
To re-activate the machine during „Power Save
Mode“, simply press the program or one-cup
or two-cup buttons. The POWER button
surround will then illuminate and flash while the
machine quickly reheats to operational tempe-
rature. When the correct temperature has been
reached, all the buton surrounds on the control
panel will illuminate.
To switch off the espresso machine whilst it is
in „Power Save Mode“, simply press the POWER
button once.
9

Extra large cup height
for coffee mugs
Power button
surround illuminates when
the button is pressed to„On“
„Power Save Mode“
Drip tray full indicator
Removable 1 litre drip tray
and stainless steel grid
Extra large cup warming plate
15 bar pump
Italian-designed and made
Electronic temperature control
KNOW YOUR ESPRESSO MACHINE ES 8011
Hot water light
illuminates to indicate hot
water function is selected
Hot water wand
provides instant hot water
Pre-brew function
for optimal coffee
extraction pressure
Auto purge function
for optimal coee
extraction temperature
Steam light
illuminates to indicate that
the steam function is selected
Custom designed accessories
(not shown):
Stainless steel frothing jug
Stainless steel measuring/
tamping spoon
Cleaning Tool
Quick Guide
1 & 2 cup dual wall stainless
steel filters
KNOW YOUR ESPRESSO MACHINE ES 8011
10

11
Other accessories
(not shown)
Cord storage
Storage tray
located behind the drip tray
for storage of accessories
Thermoblock heating system
ensures coffee is extracted
at the correct temperature
Program button
Intelligent programmable function
that can be personalised with your
favourite espresso setting
Advanced dual wall créma system
for the ideal créma
External viewing back-lit
water windows
Removable 2.2 litre water tank
filled from the front of the machine
Selector control
for steam or hot water
Espresso pressure gauge
assists in obtaining the most
favourable extraction pressure
Programmable features:
1 cup button and 2 cup button
Solid chrome brass filter holder
Group head
for easy fitment of the filter holder
Swivel steam wand
and stainless steel
frothing attachment
easily adjusts to perfect
positioning for frothing milk
KNOW YOUR ESPRESSO MACHINE ES 8011 11

BEFORE FIRST USE
Your Espresso Machine will be almost set up
when you unpack it from the box. The drip tray,
water tank and storage tray will be in place.
The storage tray is located at the base of the
machine behind the drip tray. The drip tray, the
water tank as well as the storage tray are easy to
access.
The drip tray is located in the base of the ma-
chine towards the front of the machine.
The water tank is located in the centre of the ma-
chine towards the back wall.
Ensure you have removed all parts and accesso-
ries before discarding the packaging.
Remove the drip tray, water tank and storage
tray. Disassemble the drip tray by removing the
stainless steel grid and„Empty Me!“ full indicator.
Wash all parts and accessories in warm, soapy
water using a non-abrasive washing liquid. Rinse
and dry thoroughly.
Wipe the outer housing with a soft damp cloth
and dry thoroughly. Do not immerse the outer
housing, power cord or plug in water or any
other liquid.
NOTE:
Do not clean any of the parts or acces-
sories in the dishwasher.
BEFORE FIRST USE
12

13
ASSEMBLING YOUR ESPRESSO MACHINE ES 8011
STEP 1
Insert the storage tray into the base of the ma-
chine and slide towards the back wall. The stor-
age tray conveniently stores the cleaning tool,
stainless steel filters, measuring/tamping spoon
and Quick Guide when not in use, so they are not
misplaced.
STEP 2
Insert the„Empty Me!“ full indicator into position
in the drip tray and place the stainless steel grid
on top. Slide the drip tray into position in the
base of the machine in front of the storage tray.
STEP 3
Slide the water tank over the drip tray and into
the front opening of the machine and into po-
sition above the storage tray. Ensure the water
tank aligns flush with the sides of the machine.
NOTE:
Before each use it is recommended to
complete a water flushing operation,
without ground coffee, to ensure that all
internal piping has been preheated.
ASSEMBLING YOUR ESPRESSO MACHINE ES 8011 13

Operating

15
15
OPERATING YOUR ESPRESSO MACHINE ES 8011
STEP 1 – FILLING THE WATER TANK
• Ensure the Power button is in the„Off“ posi-
tion and the Selector Control, on the side of
the machine, is set to the Standby position.
• Switch the machine off at the power outlet
and unplug the power cord.
• Remove the filter holder if locked into the
brew head and move the steam wand to the
side of the machine.
• Remove the water tank by sliding out using
the handle insert in the front of the water
tank.
• As the water tank is removed, a black tube
slides and extends out from the water tank
storage area. Do not touch or try to remove
this tube, it will automatically slide back into
position when the water tank is re-inserted.
• Fill the water tank with cold, tap water to the
maximum mark on the water window and
slide the water tank carefully back into posi-
tion in the machine.
• Ensure the Selector Control is in the„Stand-
by“ position and plug the power cord into
a 230 V power outlet and switch on.
• Press the POWER button to„On“, the POWER
button surround will flash while the machine
is heating. When the correct temperature
has been reached, all the button surrounds
on the control panel will illuminate.
NOTE:
Check the water level before use and
replace the water daily. The water tank
should be refilled with fresh, cold tap
water before each use. Do not use mi-
neral or distilled water or any other liq-
uid.
STEP 2 – PRE-WARMING THE CUPS
• The Cup Warming Plate will start to warm as
the machine heats.
• Pre-warm the espresso cups by placing on
the Cup Warming Plate. This will help main-
tain the coffee’s optimal temperature when
brewed into the cups.

16 OPERATING YOUR ESPRESSO MACHINE ES 8011
STEP 3 – PREPARING THE COFFEE
• Place the 1 or 2 cup filter into the filter holder
(use the smaller filter for 1 cup and the larger
filter for 2 cups). When brewing for a mug of
coffee always use the 2 cup filter and only
extract 60 ml. If you require a larger coffee,
add the hot water first and then brew the
coffee.
• Preheat the filter holder by placing under-
neath the group head. Rinse with hot water
from the wand using the hot water function
or from the group head and rinse with hot
water using the manual pour function. Dry
the filter and filter holder thoroughly before
use.
• Use 1 level measure of ground espresso cof-
fee for the 1 cup filter and 2 level measures
for the 2 cup filter. It is important to use the
correct amount of coffee for each filter as the
filter perforations have been constructed to
utilise the pressure in the machine to extract
optimal flavour with each brewing. (Refer to
„The Coffee Making Tip“, page 23).
NOTE:
When using a 1 cup filter holder, for op-
timal flavour, you should only extract
approximately 30 ml. When using a 2
cup filter holder, for optimal flavour,
you should only extract approximately
60 ml. STEP 4 – TAMPING THE GROUND
COFFEE
• Distribute the ground coffee evenly in the
filter and press down lightly with the tamp-
ing end of the measuring spoon. (Refer to
„Coffee Making Tips“, page 23).
• Clean any excess ground coffee from the rim
of the filter holder to ensure a proper fit into
the group head.

17
17
OPERATING YOUR ESPRESSO MACHINE ES 8011
STEP 5 – PRIMING THE GROUP HEAD
• Before placing the filter holder into position,
it is recommended to run a short flow of wa-
ter through the group head.
• Place a container or empty cup under the
group head.
• With the filter holder removed, prime the
group head by pressing and holding down
the single or double cup button for approxi-
mately 5 seconds. Refer to „Manual Espres-
so“, page 19.
A pumping noise will be heard during this
operation, and water will run through the
group head.
STEP 6 – INSERTING THE FILTER HOLDER
• Place the filter holder underneath the group
head so that the handle is aligned with the
insert graphic. Insert the filter holder up into
the group head and rotate the handle to the
right until resistance is felt, this will be at an
approximate 90° angle to the machine.
STEP 7 – BREWING THE COFFEE
• Ensure all the button surrounds on the con-
trol panel are illuminated, indicating the ma-
chine has reached the correct temperature
for brewing, and is ready for use.
• Ensure the drip tray and filter holder are in
place.
• Place one or two pre-warmed cups beneath
the filter holder outlet.
PROGRAMMED ESPRESSO – ONE CUP
Press the one cup button once. After a few
seconds, aromatic coffee will begin to pour into
the cup. A pumping noise will be heard in this
operation. The machine will automatically stop
once the preset pour has been delivered.

18 PROGRAMMING YOUR ESPRESSO MACHINE ES 8011
PROGRAMMED ESPRESSO
– DOUBLE CUP
Press the two cup button once. After a few
seconds, aromatic coffee will begin to brew into
the cup. A pumping noise will be heard in this
operation. The machine will automatically stop
once the preset pour has been delivered.
NOTE:
The minimum pour for one cup and
two cups is set at 15 ml.
NOTE:
Pressing the one cup or two cup
buttons during a programmed
espresso will immediately stop the
pour.
PROGRAMMING SINGLE ESPRESSO
1. Prepare to make a single cup of espresso by
following steps 2 to 6 in „Operating your Es-
presso Machine“, pages 15–17.
2. Place your cup underneath the group head.
3. To begin programming, press the „PRO-
GRAM“ button once. The machine will beep
once and the program button will begin to
flash. This indicates the machine is in pro-
gramming mode.
4. Press the one cup button once. The ma-
chine will commence normal pour function
and the one cup button surround will
begin to flash.
5. When the desired amount of espresso has
poured into the cup, press the one cup
button to stop the pour. The machine will
beep twice, indicating it has saved your
measured pour quantity and exited pro-
gramming mode.
PROGRAMMING DOUBLE ESPRESSO
1. Prepare to make a two cup of espresso by
following steps 2 to 6 in „Operating your Es-
presso Machine“, pages 15–17.
2. Place your cup underneath the group head.
3. To begin programming, press the „PRO-
GRAM“ button once. The machine will beep
once and the program button will begin to
flash. This indicates the machine is in pro-
gramming mode.
4. Press the two cup button once. The
machine will commence normal pour func-
tion and the two cup button sur-
round will begin to flash.
5. When the desired amount of espresso has
poured into the cup, press the two cup but-
ton to stop the pour. The machine will beep
twice, indicating it has saved and exited pro-
gramming mode.
RESETING DEFAULT VOLUMES
To reset the machine to the default one and two
cup pour quantities, press and hold the PRO-
GRAM button, until the machine beeps three
times. Release the PROGRAM button. This indi-
cates the machine has returned to its original
default settings.
NOTE:
Default settings: one cup pour is ap-
proximately 30 ml. Two cups is
approximately 60 ml.
PROGRAMMING YOUR ESPRESSO MACHINE ES 8011

19
19
PROGRAMMING YOUR ESPRESSO MACHINE ES 8011
MANUAL ESPRESSO
Press and hold the single or two cup
button. Release the button once sufficient coffee
has flowed into the cup.
NOTE:
PRE – BREW FUNCTION
When a single or double coffee is se-
lected, the machine will pump water
momentarily, followed by a pause then
continues to pump the water through to
the ground coffee in the filter holder. The
ground coffee is moistened by a small
amount of water before full extraction
then expands resulting in greater pres-
sure build-up to extract all the oils and
full flavour from the ground coffee.
STEP 8 – EMPTYING THE FILTER HOLDER
Remove the filter holder from the group head
by rotating the filter holder to the left until it re-
leases. To empty the used coffee grounds, turn
the filter holder upside down in a bin and gently
tap out the coffee (used coffee grounds should
be thrown away with domestic waste and not
down the sink which may block drains). Remove
the filter by using the indents on the side of the
filter holder. Rinse the filter and filter holder with
water and allow to dry.
WARNING:
THE METAL PARTS OF THE FILTER HOLD-
ER MAY STILL BE VERY HOT. COOL THESE
PARTS IN COLD WATER.

20 HOW TO FROTH MILK FOR A CAPPUCCINO OR LATTÉ
HOW TO FROTH MILK FOR A CAPPUCCINO OR LATTÉ
The Espresso Machine comes complete with
a Commercial Style Swivel Steam Wand and
Stainless Steel Frothing Attachment. When us-
ing the frothing attachment on the steam wand
a large amount of froth is easily created.
If less texture is required, remove the frothing at-
tachment from the steam wand and steam the
milk using the steam wand. To remove the froth-
ing attachment, ensure it is cool then simply pull
down and remove. The frothing attachment can
be stored in the storage tray inside the machine
if not used regularly.
To refit the frothing attachment ensure it is se-
curely attached to the steam wand by inserting
it, from either opening, onto the steam wand
and pushing firmly upwards onto the rubber sur-
round. Ensure the fine steam holes on either end
of the frothing attachment are clean to achieve
optimal texturing.
• Press the POWER button to„On“.
• The first step in making a cappuccino or latté
is to make a short espresso. Refer to„Operat-
ing your Espresso Machine“, pages 15–17.
• Then fill the stainless steel frothing jug
1⁄3 full with cold, fresh milk.
• Turn the Selector Control to the„Steam“ po-
sition . The steam light will start to
flash indicating that the Thermoblock Heat-
ing System is heating and preparing to cre-
ate steam.
• For improved results, purge the steam wand
of water before placing into the milk.
NOTE:
When the espresso machine creates
steam, a pumping noise can be heard.
This is the normal operation of the
15 Bar pump.
• When the steam light stops flashing, quickly
insert the steam wand into the jug of milk so
that the froth attachment is just immersed
into the milk.
NOTE:
If steam starts coming from the steam
wand before it is immersed in the milk,
pause the steam by turning the Selector
Control back to the „Standby“ position.
This will avoid the steam pressure blow-
ing milk out of the jug.
This manual suits for next models
1
Table of contents
Other Catler Coffee Maker manuals

Catler
Catler CM 4012 User manual

Catler
Catler CM 413 User manual

Catler
Catler ES 300 User manual

Catler
Catler ES 8013 User manual

Catler
Catler ES 8011 User manual

Catler
Catler ES 8010 User manual

Catler
Catler ES 8011 SE User manual

Catler
Catler 400 series User manual

Catler
Catler ES 8014 User manual

Catler
Catler ES 700 PORTO BG User manual