IndashPC Car2PC User manual

Car2PC
- 1 – rev 2.0
Installation Instructions
Chapter 1 – Getting Started
1.1 Subject
Car2PC adapter for Car PC / laptop integration into car stereo and AUX Interface for MP3 player
1.2 Introduction
Thank you for purchasing Car2PC Car PC Digital Interface. The Car2PC Interface is designed to
provide seamless integration between Car PC / Laptop and car stereo. It will allow you to listen to the
sound from the PC through the car stereo speakers, control your audio files, browse and select them
with car stereo buttons.
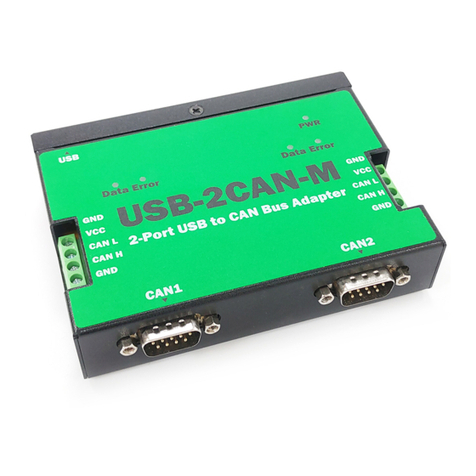
Car2PC adapter will allow you to connect your Car PC / laptop to the car stereo that is CD changer
capable.
1.3 Precautions
Proper mounting location
Securely install the interface in a location free from; heat, humidity, moving parts or direct sunlight.
Beware of hot-air flow from your vehicle’s climate control system. We recommend securing the
interface to a suitable location, free of sharp metal edges, using double sided tape, Velcro or wire ties.
1.4 Disclaimer
Modifying the radio may void any outstanding warranty it may have.
•This product is not affiliated with any of the OEM manufactures
•There are no warranties expressed or implied by purchase of this product
•While every care has been taken to provide a quality product, we cannot guarantee the Car2PC
adapter to function correctly if installation is not done according to the instructions in this guide
•We’re not liable for misuse of this product. Misuse includes improper installation, damage to the
board or radio while trying to install, and illegal use of the modified radio
1.5 Package content
Car2PC interface (1) USB + 3.5 mm audio cable (2) Vehicle specific cable (3) Drivers / Plugins Disk (4)

Car2PC
- 2 – rev 2.0
Basic wiring diagram
1.6 Important Compatibility Notes
If your vehicle is equipped with an external factory CD changer, you must disconnect it in order to be
able to install the interface. You will lose the use of the external CD changer to gain the use of your Car
PC or MP3. Build-in CD changer will remain working.
For a full version of the Car2PC application guide please visit
Chapter 2 – General Installation
2.1 Installation location
Most installations will require you to remove the factory radio in order to plug in the vehicle specific
harness.
For some vehicles you will also have an option to connect the interface to the factory pre-run CD
changer cable located in the trunk.
2.2 Tools needed
In many cases there are no any special tools required in order to remove the stereo out. For some
stereos it is better to use car stereo removal tools. Please consult your local car audio shop or your
vehicle’s dealership for instructions or assistance if necessary.
2.3 Preparation and adapter installation
1. Turn off car engine and remove key from ignition
2. If your radio uses a Security Code, make sure that you have the code before unplugging the
radio.
3. Un-mount your radio from the dash in order to get access to the back side of the radio. Some
vehicles require the special tools to remove the radio. Please consult your vehicle’s dealership
or a local car audio professional if necessary.

Car2PC
- 3 – rev 2.0
4. Attach the car harness connector to the back of the stereo to the CD changer port. Be sure to
make a firm connection but do not force it. Connect the other end to the interface.
5. If there is a black single cable on the vehicle specific harness (3) you will need to attach it
to the back bolt of the car stereo.
Note: Without attaching the black cable to the chassis of the stereo GROM adapter will not
work!
6. For AUDI vehicles only: For some AUDI headunits the additional part required in order to gain
the access to the CD changer port. Please refer to the instructions on that webpage:
http://gromaudio.com/pie-audi-how-to.html
7. For BMW vehicles only: Please refer to the installation insert for the special guidelines for
BMW dashboard installation.
8. For Pioneer interface only: Attach yellow wire to the ground (car’s frame) and red one to the
battery +12V
9. Now that the interface is connected to the radio, you will need to test the operation of the
interface before re-assembling the dash.
10. Turn you car stereo on and switch it over to CD Changer mode. It should show Disk 1, Track 01
on a display.
11. Note: On most Lexus and Toyota cars you have to turn ignition off and then on for device
to work.
12. Find a place where you can place Car2PC. In many cars there is enough room in the dash to
place Car2PC.
Note: Make sure you mount Car2PC in a place with enough room so when you mount the car
stereo back you do not break the adapter.
13. You may use glove box or other spaces in a dash to direct the USB and Audio cables out.
14. Mount your car stereo back into the dash, make sure it’s clips are securely fastened
Adapter mounting in the trunk
(for VW and BMW only)
1. Locate trunk mounting cable in your car
2. Usually it is located at the left side of the car in the back
3. Disconnect existing CD changer if any
4. Attach audio cable and trunk cable
Congratulations! You have installed Car2PC adapter and you may use it right away with your PC /
laptop or MP3 player.

Car2PC
- 4 – rev 2.0
Chapter 3- Software Installation
3.1 Introduction
Car2PC adapter allow PC to be controlled by the car stereo via USB connection. It is not required that
you install the drivers and software in case if you want to hear music from your computer on your car
stereo. In this case CAR2PC can be used as a regular Auxiliary adapter.
In order to utilize most of the CAR2PC features you will need to install the following: drivers, software
(winAmp,Wmp etc), plugins.
3.2 Driver installation
15. Make sure CAR2PC adapter is connected to the car stereo and it is in working order (see
installation instructions)
16. Connect Y cable to your PC/laptop. Use USB and audio jack for that
17. Attach another side of the cable to the CAR2PC
18. Once connected, the PC running Windows 2000 or XP will prompt
And then the dialog below will appear:
19. Insert driver’s disk into CD drive and click Next

Car2PC
- 5 – rev 2.0
20. When Windows comes up with the message below, just click “Continue Anyway” button
21. Shortly after installing the driver, Windows will prompt for another device found
22. Repeat the same steps above to install the CAR2PC serial device
23. If no errors were prompted by Windows, your installation is complete and you may need to
install plugins for the Windows Media Player or WinAmp.
3.3 Software installation
WinAmp
24. Locate the directory D:\winamp2\ and run the winamp295.exe file. Follow the instructions on a
screen
25. Once installed make sure to run the plug-in installation located in D:\hump3_plugin directory
Windows Media Player
Usually Windows Media Player already preinstalled in a system. If not, visit the following link and install
the WindowsMedia Player according to instructions on a web page:
http://www.microsoft.com/windows/windowsmedia/default.mspx
Once you have Windows Media Player installed, you may run the following file:
D:\wmp_plugin\wmphump_1_5_1.exe and install the plugin for Car2PC adapter.
3.4 Configuring Car2PC under WinAmp
WinAmp plug-in included on a disk supports simple concept of playlists. Whenever you select
buttons 1 through 6 on your headunit the plugin will load the appropriate playlist and start playing it from
the position it remembers.
In order to configure which playlist will be playing upon button press, do the following:
1. Open WinAmp

Car2PC
- 6 – rev 2.0
2. Click Options->Preferences->Plug-ins->General Purpose->”HU -> WinAmp Remote Control” as
shown below:
3. Click on Configure button
4. On the dialog below you will be able to choose the playlist for each button from 1 to 6
5. There are some other options which you can use in plugin
a. SCAN->REPEAT - many stereos do not have Repeat button. Usually they have SCAN
button instead. This option allow you to turn Repeat option on in WinAmp by using the
SCAN button on a car stereo

Car2PC
- 7 – rev 2.0
b. Autorepeat ON – turn the Repeat option in WinAmp regardless of the state of the
Repeat button on car stereo
c. Text Enable – Some car stereos may display text. In case if you own such a car (consult
with your dealer to see if your car supports that) you may enjoy seeing artist, album track
and some other info on your display. The way text is displayed dependent on a stereo.
d. Separate title – Some car stereos do support separate fields for artist, album and track
title. If your stereo supports that (usually Toyota, Honda, Pioneer stereos), you may
enjoy seeing the information in such format on your stereo
e. Text Refresh Interval – usually it is not needed, but on some cars (such as BMW) it will
help to leave text on screen after pressing navigation or mode buttons.
3.5 Configuring Car2PC under WMP
The WMP plug-in on CD disk supports very simple concept of playlists. Whenever you select
buttons 1 through 6 on your head unit the plug-in will load the appropriate playlist and start playing it
from the position it remembers in the configuration file.
In order to configure which playlist will be playing upon button press, do the following:
1. Open Windows Media Player
2. Click Tools->Plugins->Background->wmpp plugin” as shown below:
3. Click on Properties button

Car2PC
- 8 – rev 2.0
4. On the dialog below you will be able to choose the playlist for each button from 1 to 6
3.6 Troubleshooting
Symptom Cause Remedy
Radio is not
recognizing
Car2PC interface
Bad cables or cables are
not connected properly
between the interface box
and car radio.
Check connection and cables, push in firmly.
For VAG only:
Radio is not
recognizing
Car2PC interface
Single black wire on the
vehicle specific harness (3)
is not attached to the
stereo chassis ( stereo
body)
Read paragraph 2.3 p. 5 of this guide. Attach the black cable
to the car stereo body.
For Pioneer
Interfaces only:
Low sound volume
Refer to the post here:
http://www.indashpc.org/vbullettin/viewtopic.php?p=2388
For BMW only:
Radio is not
recognizing
Car2PC interface
iBus wire may get loose
Sometimes using T-Tap
clips, the IBus wire may
not receive proper
connection due to its wire
size.
Make sure the IBus wire is securely attached by using
multimeter or slightly tight up the T-Tap connector so its slot
get smaller.

Car2PC
- 9 – rev 2.0
3.7 Support
For all technical questions please e-mail to info@car2pc.com. For technical support please visit
http://car2pc.com/support.html and fill in the web form or visit the car2pc support forum at
http://indashpc.org/vbullettin/.
Your question will be answered within 24 hours.
3.8 Manufacturer Warranty
One year limited warranty
This warranty covers any supplied or manufactured parts of the product that, upon inspection by
Car2PC authorized personnel, is found to have filed in normal use due to defects in the material or
workmanship. This warranty does not apply to the installation expenses.
Attempting to service or modify this unit, operating this unit under conditions other than the
recommended will render this warranty void.
Unless otherwise prescribed by law, Car2PC and its affiliates shall not be liable for any personal injury,
property damage and or any incidental or consequential damages of any kind (including water damage)
resulting from malfunctions, defects, misuse, improper installation or alteration of this product.
All parts of this product are guarantied for a period of 1 year as follows:
Within the first 12 months form the date of purchase, subject to the conditions above, Car2PC will
repair or replace the product at their discretion, if it is defective in the material or workmanship.
All customers should contact GROM Audio support team at http://gromaudio.com/support.html and
obtain an RMA number. All defective adapters returned to Car2PC within warranty period must be
accompanied by the original invoice (or copy).
All shipping handling charges are non-refundable. Warranty does not cover normal tear and wear,
damages due to negligence, improper installation and operation.
Table of contents
