7
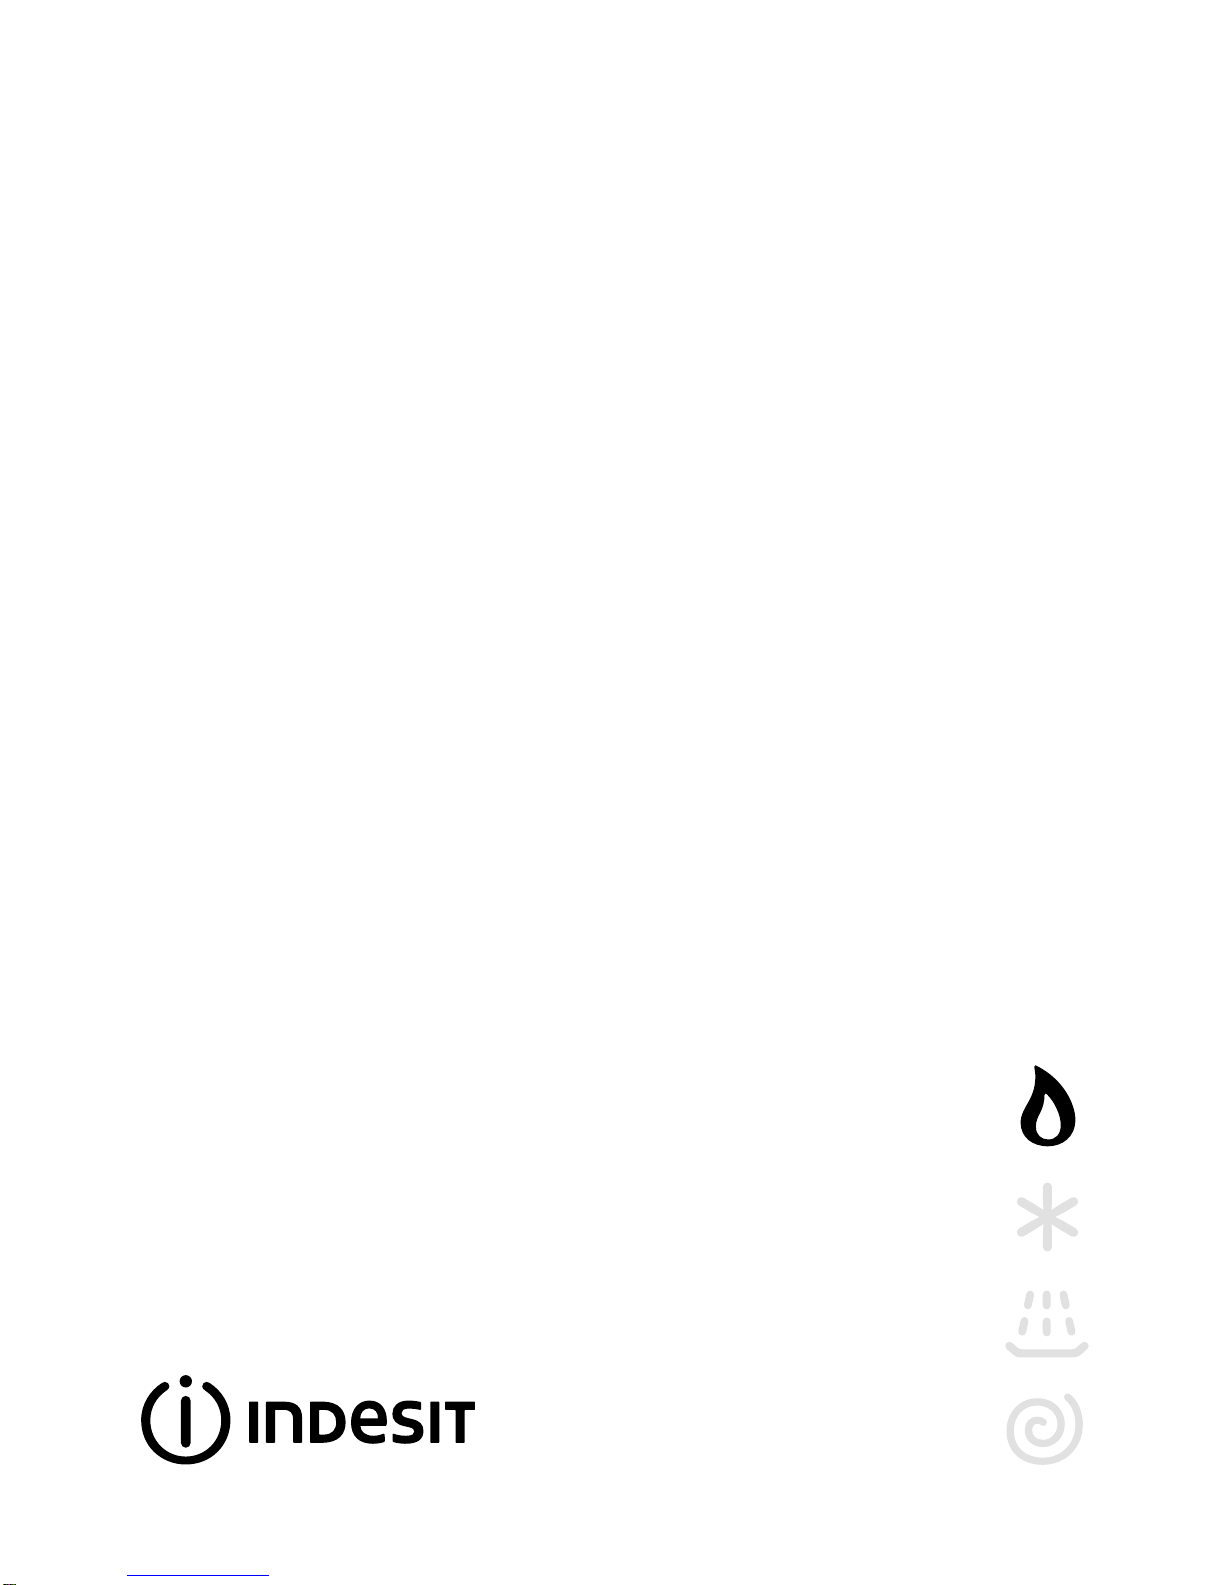
560 mm.
45 mm.
When installing the cooktop above a built-in oven without
forced ventilation, ensure that there are air inlets and
outletsforventilatingtheinterior of the cabinet adequately.
Gas Connection for Cooktop
Thecooktop should be connected to thegas supply by an
authorized installer.During installation of this product it is
essential to fit an approved gas tap to isolate the supply
fromtheappliancefortheconvenience ofanysubsequent
removal or servicing. Connection of the appliance to the
gas mains or liquid gas tanks must be carried out
according to the safety standards currently in force, and
only after it is ascertained that it is suitable for the type of
gas to be used. If not, follow the instructions indicated in
the section entitled, “Adapting the Cooktop for Different
Types of Gas”.If the cooktop is to be connected to tanks
containingliquidgas,use pressureregulators that comply
with current safety standards.
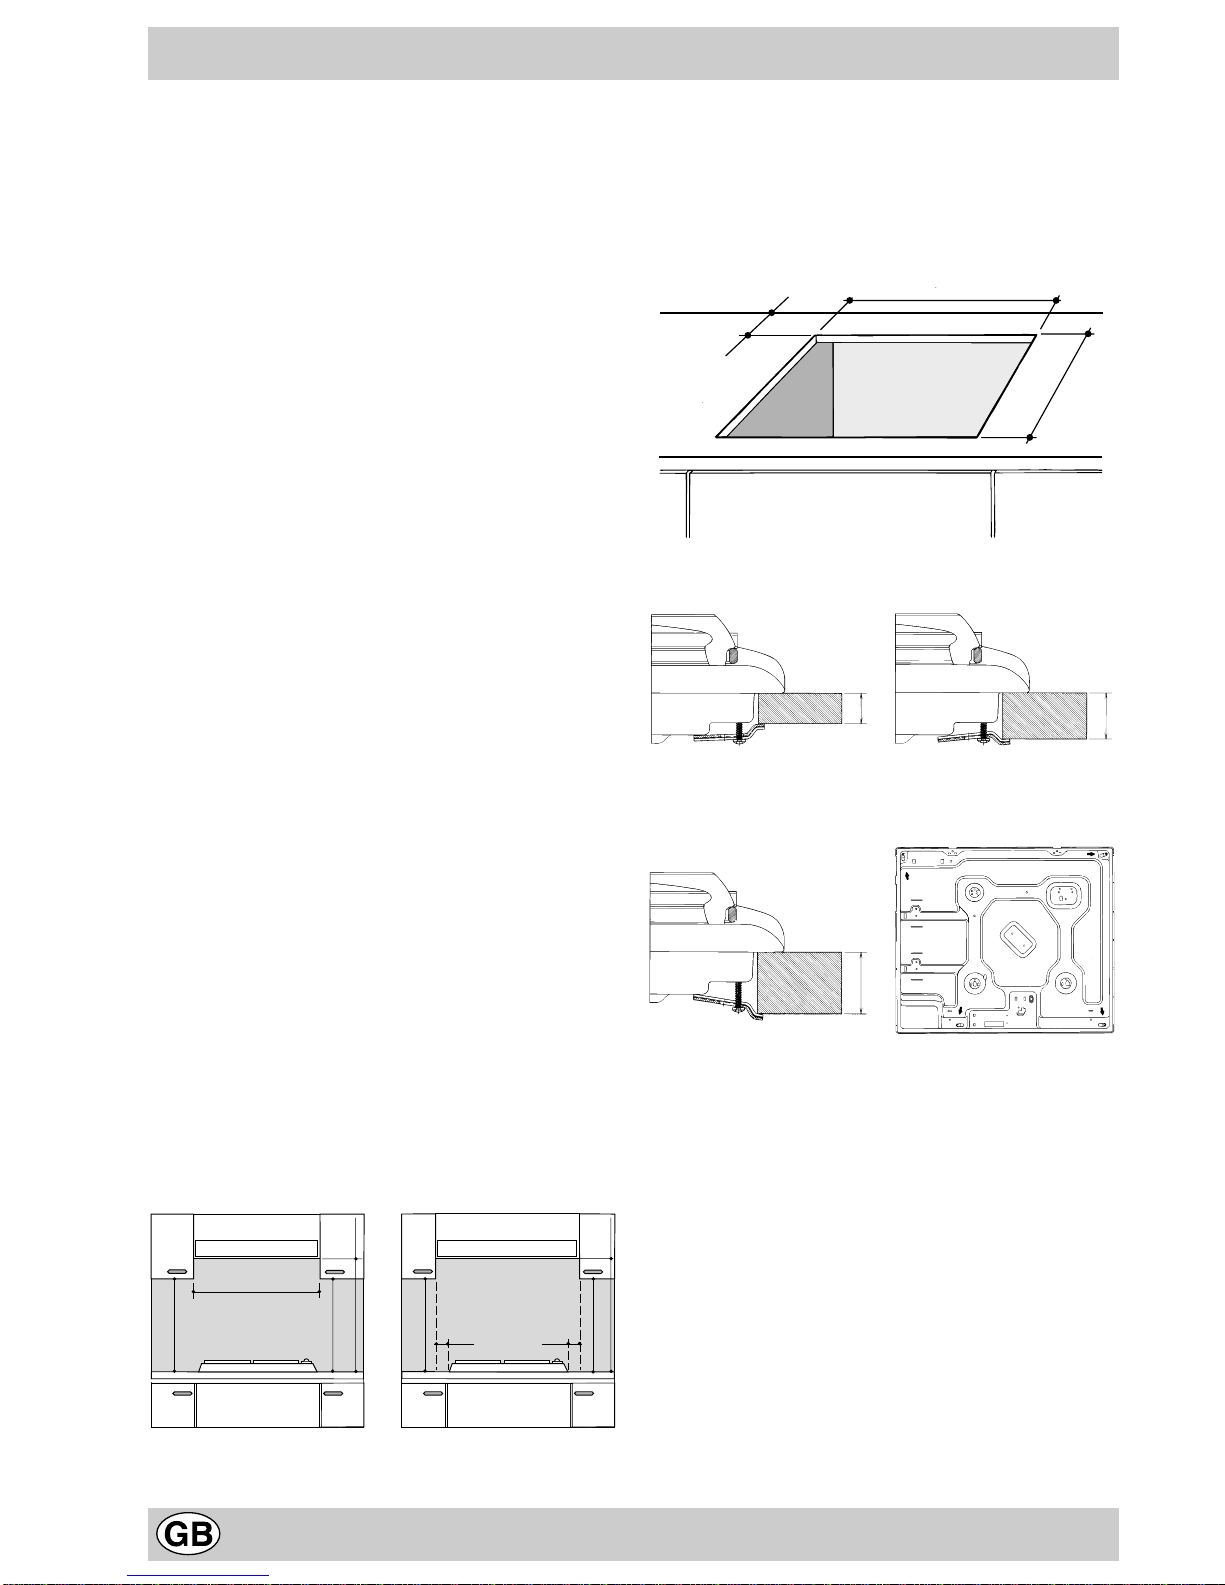
Important: To insure that the appliance operates safety,
the gas is regulated correctly and your appliance lasts
over time, makesure that gas pressurelevels comply with
the indications given in Table 1, “Nozzle and Burner
Specifications”.
Gas Connection to Non-flexible Pipe
(copper or steel)
Connectionto the gas source must be done in sucha way
as to not create any stress points at any part of the
appliance.
The appliance is fitted with an adjustable, "L" shaped
connector and a gasket for the attachment to the gas
supply.Shouldthisconnectorhavetobeturned,thegasket
must be replaced (supplied with the appliance).
The gas feed connector to the appliance is a threaded,
male 1/2" connector for round gas pipe.
Gas Connection to Flexible Steel Pipe
The gas feed connector to the appliance is a threaded,
male 1/2" connector for round gas pipe. Only use pipes,
tubes and gaskets that comply with current safety codes.
Themaximumlength of the flexiblepipes mustnotexceed
2000 mm. Once the connection has been made, ensure
that the flexible metal tube does not touch any moving
parts and is not crushed.
Check the Seal
Once the appliance has been installed, make sure all the
connections are properly sealed, using a soapy water
solution.Never use a flame.
Electrical Connection
The cooktops fitted with a tripolar electrical supply cord
are designed to be be used with alternating current
according to the indications on the rating plate located
under the cooktop.The earthing wire can be identified by
its yellow-green colour.
In the case of installation over a built-in electric oven,
the electrical connections for the cooktop and oven
should be independent, not only for safety purposes, but
also to facilitate removal of one or both in the future.
Electrical Connection for Gas Cooktop
Fit the supply cord with a standard plug for the demand
rate indicated on the rating plate or connect it directly to
theelectrical mains.In thelatter case,a singlepole switch
must be placed between the appliance and the mains,
with a minimum opening between the contacts of 3 mm in
compliance with current safety codes (the earthing wire
must not be interrupted by the switch).The power supply
cord must be positioned so that it does not reach a tem-
perature in excess of 50°C above room temperature at
any point.
Before making the actual connection, make sure that:
•The fuse and electrical system can withstand the load
required by the appliance;
•That the electrical supply system is equiped with an
efficient earth hook-up according to the norms and
regulations prescribed by law;
•That the plug or switch is easily accessible.
Important: the wires in the mains lead are coloured in
accordance with the following code:
Green &Yellow - Earth
Blue - Neutral
Brown - Live
As the colours of the wires in the mains lead may not
correspond with the coloured markings identifying the
terminals in your plug, proceed as follows:
Connect the Green &Yellow wire to the terminal marked
“E” or or coloured Green or Green &Yellow.
Connect the Brown wire to the terminal marked “L” or
coloured Red.
Connect the Blue wire to the terminal marked “N” or
coloured Black.
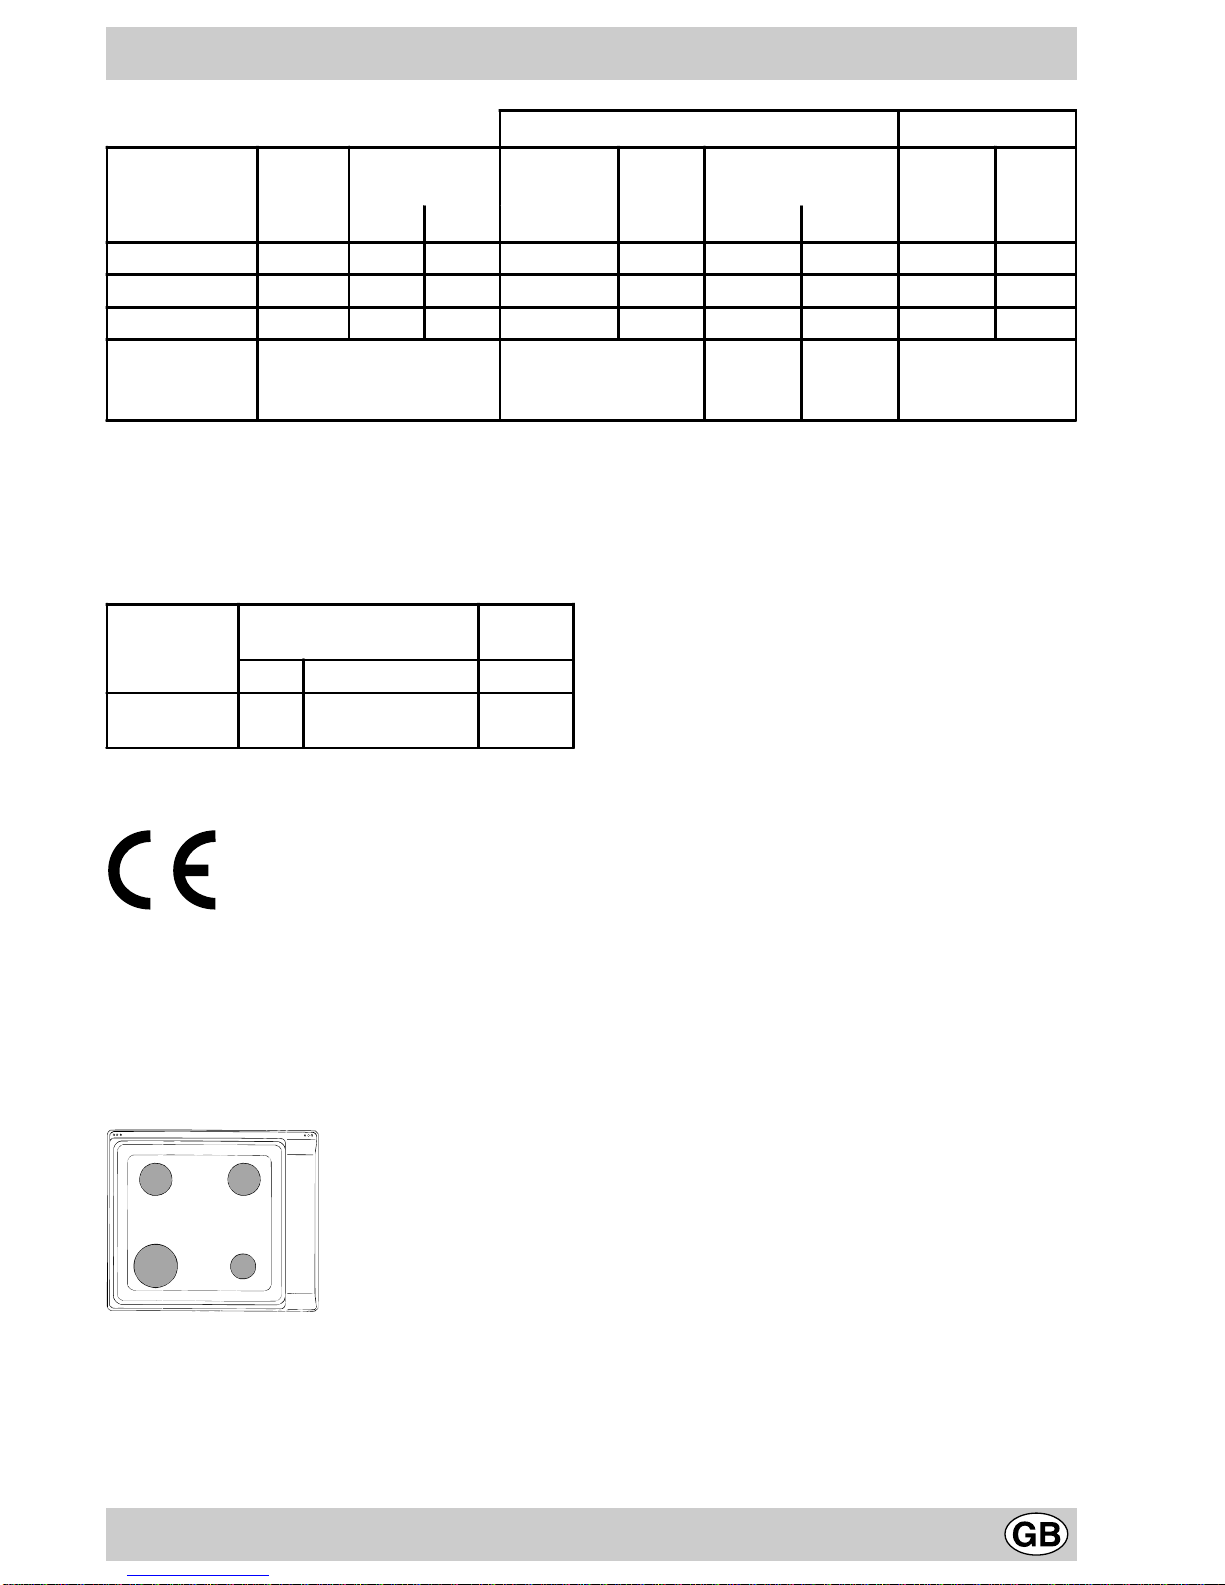
Adapting the Cooktop for DifferentTypes of Gas
To adapt the cooktop to a different type of gas than that
for which it was designed, (see the sticker under the hob
oron the packaging),theburnernozzlesmustbe changed,
as follows:
•Remove the pan supports and slide the burners out of
the cooktop.
•Unscrew the nozzles using a 7mm socket wrench and
replace them with those for the new type of gas.(See
table 1, “Burner and Nozzle Specifications”).