Indus MouseMonitor User manual

www.mousemonitor.com
MouseMonitor™
User’s Guide
Heart Rate •Respiration •ECG •Temperature •Warming
INDUS
INSTRUMENTS

TABLE OF CONTENTS
INTRODUCTION 1
PACKING LIST 2
SYSTEM SETUP 3
EXPERIMENTAL SETUP 5
OPERATING INSTRUCTIONS 7
INPUT AND OUTPUT CONNECTORS 8
DISPLAYS AND BUTTONS 9
MOUSEMONITOR SETTINGS
STUDY
PRESETS 10
INFORMATION 11
DISPLAY
WAVEFORM 12
NUMERIC 13
COMMENTS 14
HELP 15
ADVANCED 16
ECG
ELECTRODES 17
FILTERS & SCALING 18
ADVANCED 19
RESPIRATION
ELECTRODES 20
FILTERS & SCALING 21
ADVANCED 22
HOMEOTHERMIC HEATER 23
CORE TEMPERATURE 24
TABLE OF CONTENTS

ANALOG OUTPUT MODULE
CHANNEL ASSIGNMENT 25
FILTERS & SCALING 26
PULSE OXIMETER MODULE
SENSORS 27
FILTERS & SCALING 28
10.1” TOUCH DISPLAY QUICK REFERENCE 29
10.1” TOUCH DISPLAY WI-FI CONFIGURATION 30
TEMPERATURE CONTROL OPERATION 31
TECHNICAL SPECIFICATIONS 32
REVISION HISTORY 34
OTHER PRODUCTS 35
TABLE OF CONTENTS
TABLE OF CONTENTS

When mice are anesthetized either for non-invasive studies or for surgery, their tempera-
ture regulating mechanisms may not be adequate to maintain the required body tempera-
ture. This can lead to rapid drop in body temperature in a few minutes and can have adverse
results. The conventional solution to this problem is a cumbersome pad with circulating hot
water or an overhead heat lamp that can cause electrical interference with the ECG monitor-
ing equipment.
The MouseMonitor is a compact heated surgical platform that displays ECG, respiration and
plethysmogram waveforms as well as heart rate, breath rate, core temperature and SpO2. The
unique integrated operating platform supports magnetic accessories and incorporates ultra-low
noise, high-resolution ECG electronics and intelligent zone heating with a durable surgical stain-
less steel top. The included 10.1” touchscreen display ergonomically presents waveform and nu-
meric data in an intuitive and easily readable format, enabling you to quickly record and export
your acquired data. Indus Instruments is committed to adding functionality to the MouseMoni-
tor through new accessories and expansion modules. Current expansion modules include a Pulse
Oximeter module and an Analog Output module that is compatible with most data acquisition
systems.
INTRODUCTION
1
A Few Quotes from the NRC Guide for the Care
and Use of Animals, 8th edition, 2011
Careful monitoring and timely attention to problems increase the likelihood of a successful surgi-
cal outcome. Monitoring includes routine evaluation of anesthetic depth and physiologic func-
tions and conditions, such as body temperature, cardiac and respiratory rates and pattern, and
blood pressure, and should be appropriately documented... Maintenance of normal body tem-
perature minimizes cardiovascular and respiratory disturbances caused by anesthetic agents, and
is of particular importance in small animals where the high ratio of surface area to body weight
may easily lead to hypothermia. NIH Guide for the Care and Use of Animals, 8th ed., Pg.
119, 2011.
For anesthesia delivery, precision vaporizers and monitoring equipment (e.g., pulse oximeter for
determining arterial blood oxygen saturation levels) increase the safety and choices of anesthetic
agents for use in rodents and other small species. NIH Guide for the Care and Use of Ani-
mals, 8th ed., Pg. 122, 2011.
INTRODUCTION

Note: Replacement cables, ECG electrode crème and rat, mouse & neonatal mouse rectal
temperature probes can be purchased from Indus Instruments. Contact us at +1 (281) 286-1130
PACKING LIST
2
PACKING LIST
MouseMonitor
1 Heated Surgical Platform 1
2 Display Unit 1
3 Heated Surgical Platform Power Supply 1
4 Heated Surgical Platform AC Power Cord 1
5 Display Unit Power Supply & Cable 1
6 MouseMonitor Data Cable (USB Micro B to USB Mini B) 1
7 Display Unit Stand 1
8 Rectal Temperature Probe (Either Mouse or Rat) 1
9 Stainless Steel Needle Electrodes 4
10 File Transfer Cable (USB Type A to USB Micro B) 1
11 ECG Electrode Crème 1
12 Cotton Tipped Applicators 10
13 Cloth Tape 1
14 User’s Guide 1
Analog Output Module (Optional)
1 Analog Output Module 1
2 Analog Output Cable 2
3 MouseMonitor Module Connection Cable (USB Type A to USB Type B) 1
Description Quantity

SYSTEM SETUP
3
MOUSEMONITOR ASSEMBLED UNIT SETUP
2
1
Display Unit Connections:
1. MouseMonitor Data Cable Connector (Packing List Item #6)
2. Display Unit Power Supply Connector (Packing List Item #5)

SYSTEM SETUP
4
HEATED SURGICAL PLATFORM SETUP
43
21 5
Heated Surgical Platform Recessed Connectors:
1. Grounding Jack (Use this only if necessary)
2. Rectal Temperature Probe Connector (Packing List Item #8)
3. MouseMonitor Module Connector
4. MouseMonitor Module Connector
5. MouseMonitor Module Connector
6. MouseMonitor Module Connector
7. MouseMonitor Data Cable (Packing List Item #6)
8. Heated Surgical Platform Power Supply (Packing List Item #3)
6
910 11 12 13
Heated Surgical Platform Front Connectors:
9. External Electrode Connector, Right Upper Limb (Packing List Item #9)
10. External Electrode Connector, Right Lower Limb (Packing List Item #9)
11. External Electrode Connector, Left Lower Limb (Packing List Item #9)
12. External Electrode Connector, Left Upper Limb (Packing List Item #9)
13. Heated Surgical Platform Power Indicator.
7 8
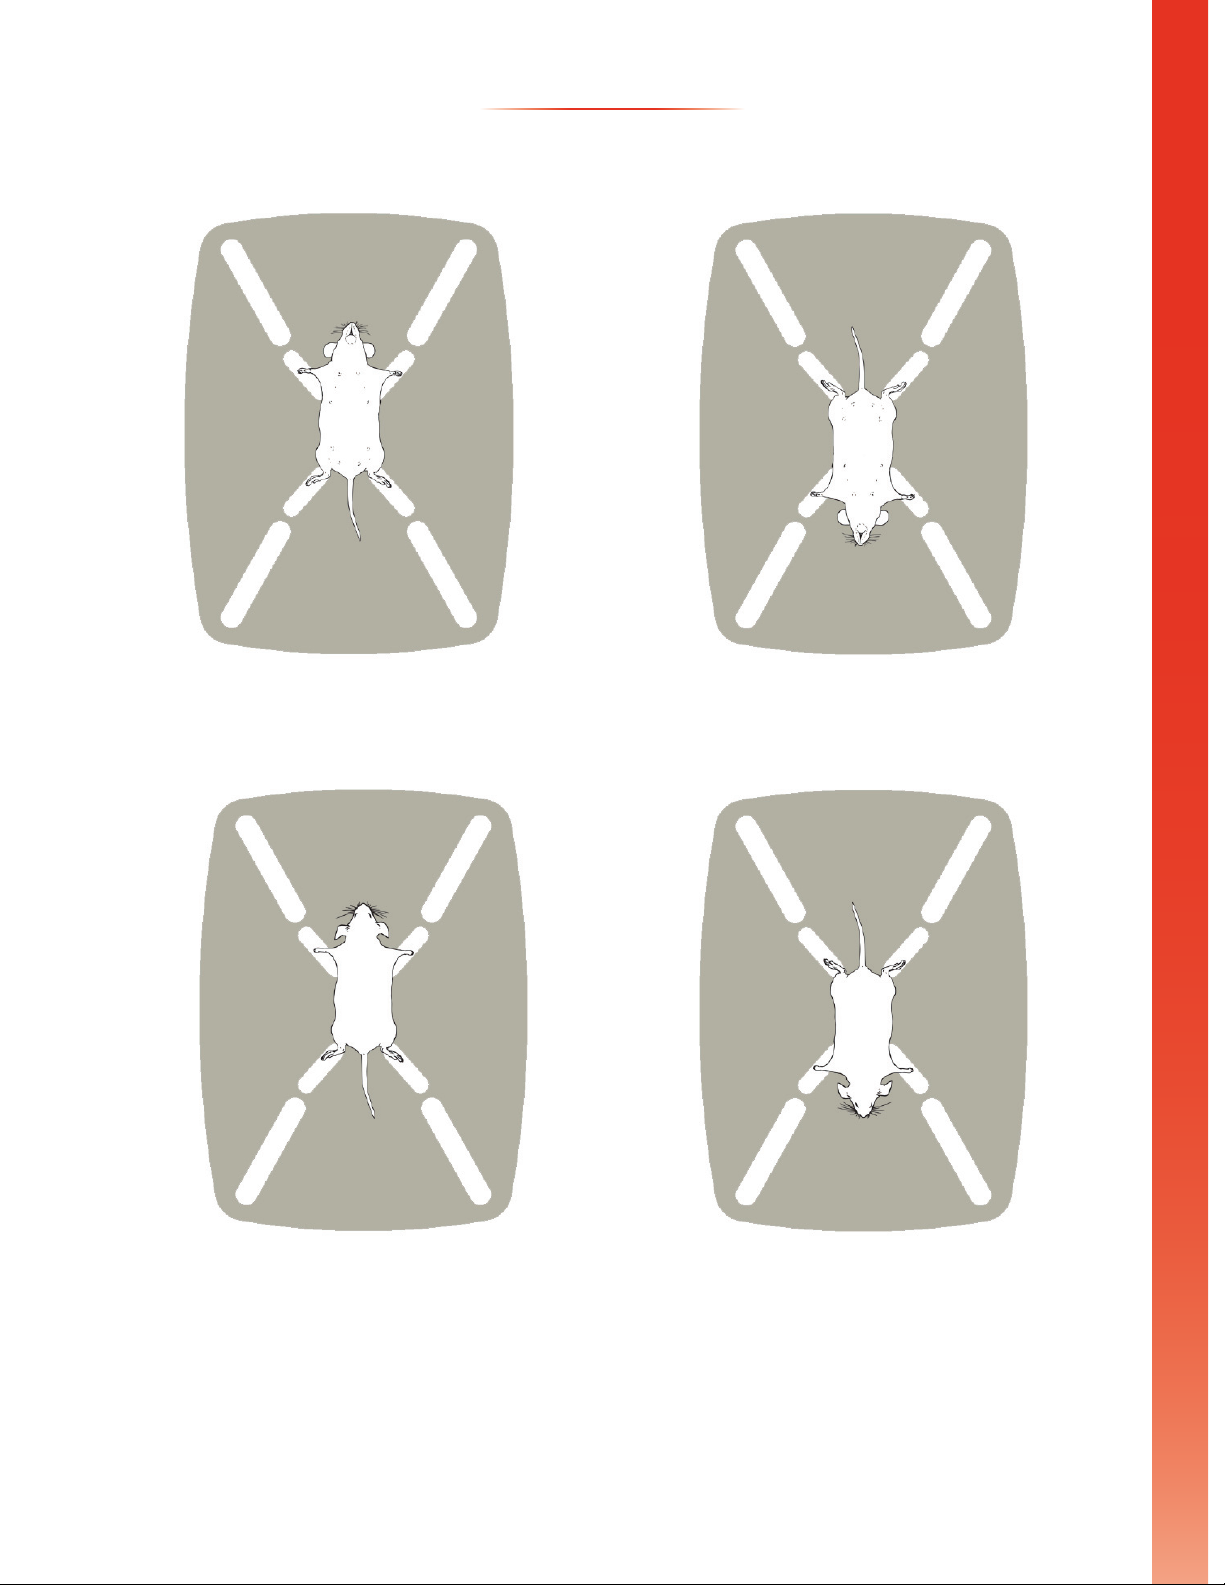
Supine position Cranial, head towards operating platform top
Caudal, tail towards operating platform top
Prone position Cranial, head towards operating platform top
Caudal, tail towards operating platform top
Supine
Prone
EXPERIMENTAL SETUP
5
Experimental Setup of MouseMonitor for Mice

Supine position Cranial, head towards operating platform top
Caudal, tail towards operating platform top
Prone position Cranial, head towards operating platform top
Caudal, tail towards operating platform top
Supine
Experimental Setup of MouseMonitor for Rats
Prone
OPERATING INSTRUCTIONS
6

OPERATING INSTRUCTIONS
7
GENERAL CONTROLS
Vertical Pinch in chart area changes vertical scaling. All waveforms of the same type have the
same scaling (Ex. ECG Lead I & ECG Lead III will have the same vertical scaling). Horizontal
pinch in chart area changes time scaling. All waveforms have the same horizontal time scale.
Touch the PAD TEMPERATURE button on the right of the screen to go to MouseMonitor SET-
TINGS - HOMEOTHERMIC HEATER.
ECG LEAD CONFIGURATIONS
Lead I (I = LA − RA)
This is the voltage between the (positive) left front limb (LFL) electrode and right front limb
(RFL) electrode.
Lead II (II = LL − RA)
This is the voltage between the (positive) left hind limb (LHL) electrode and the right front limb
(RFL) electrode.
Lead III (III = LL − LA)
This is the voltage between the (positive) left hind limb (LHL) electrode and the left front limb
(LFL) electrode.
POOR, LOW OR NO SIGNAL
The primary cause of poor signal quality is poor contact between the animal and the electrodes
on the heated surgical platform. A very small amount (a drop) of ECG electrode crème placed
on the animal’s paws before taping the paws to the platform will drastically improve signal qual-
ity. Shaving excess hair off of the animal’s paws can also help improve conductivity though this
is not usually required. All four limbs of the animal must be properly prepared and taped for the
MouseMonitor to detect high resolution ECG and respiration waveforms.
MOUSEMONITOR SAVED FILE TRANSFER
Saved screenshots and recordings are stored to the internal storage of the display unit. To access
these fi les, connect the display unit to your PC with the included fi le transfer cable. The display
unit will look like a hard drive or pen drive to your computer.
MOUSEMONITOR APP LOCATION
In case the MouseMonitor application is accidentally deleted, you can fi nd the MouseMonitor
program in Apps, located in the upper right hand corner of the Home Screen. Tap and hold the
icon until you are taken to the Home Screen, drag the icon to your preferred location and release
to place the shortcut.
CLEANING
The heated surgical platform can be cleaned with isopropyl alcohol. The display unit screen can
be cleaned with isopropyl alcohol or any LCD cleaner.
OPERATING INSTRUCTIONS

POWER SUPPLY CONNECTION
The MouseMonitor heated surgical platform utilizes a universal switching power supply that op-
erates between 100-240VAC, 50-60Hz for convenient worldwide operation.
DATA CONNECTION
The MouseMonitor heated surgical platform connects to the MouseMonitor Display Unit with a
custom USB cable. All of the data is transferred through this cable.
RECTAL TEMPERATURE PROBE CONNECTION
The rectal temperature probe connector is keyed to prevent incorrect connection of temperature
probes. Rectal temperature probes are available in a few different sizes (mouse, rat & neonatal
mouse). If you need to purchase an additional or replacement temperature probe, please contact
View of the Heated Surgical Platform Recessed Connectors
RECESSED CONNECTORS, FROM LEFT TO RIGHT
• Grounding Jack (Use this only if necessary)
• Rectal Temperature Probe Connector (Packing List Item #8)
• MouseMonitor Module Connector
• MouseMonitor Module Connector
• MouseMonitor Module Connector
• MouseMonitor Module Connector
• MouseMonitor Data Cable (Packing List Item #6)
• Heated Surgical Platform Power Supply (Packing List Item #3)
INPUT AND OUTPUT CONNECTORS
8
INPUT AND OUTPUT CONNECTIONS

Exit
• Press EXIT to leave the application.
Freeze
• Press FREEZE to stop data scrolling.
• Data continues recording if in RECORD mode.
Screenshot
• Captures a SCREENSHOT and saves it to internal storage.
• File will be saved to internal storage and named “your_fi lename-timestamp” where “your_fi le name” is
the name you entered in SETTINGS - STUDY - INFORMATION.
• Data continues recording if in RECORD mode.
Record
• Press RECORD to start data recording (maximum length of recording 2 hours)
• Press RECORD again to stop data recording.
• The COMMENT button is activated once in RECORD mode.
Comment
• Press COMMENT to place a custom comment or 1 of 7 user pre-defi ned comments.
• Comment is placed when OK is pressed from inside the comment menu.
• Data continues to be recorded in the background.
• See page 14 for additional information.
Waveform Display
• ECG Lead I (LA-RA)
• ECG Lead II (LL-RA)
• ECG Lead III (LL-LA)
• ECG Lead aVL
• ECG Lead aVR
• ECG Lead aVF
• Respiration
• Respiration (from ECG)
Numeric Display
• Heart Rate (Lead I) 200-999BPM
• Heart Rate (Lead II) 200-999BPM
• Heart Rate (Lead III) 200-999BPM
• Respiration Rate 60-300BrPM
• Respiration (from ECG) 60-300BrPM
• Core Temperature 25-50 ºC
• Pad Temperature 25-42 ºC
• SpO2 (with module) 80-100%
• R-R Interval (Lead I) 60-300ms
• R-R Interval (Lead II) 60-300ms
• R-R Interval (Lead III) 60-300ms
DISPLAYS
BUTTONS (left to right)
DISPLAYS AND BUTTONS
9
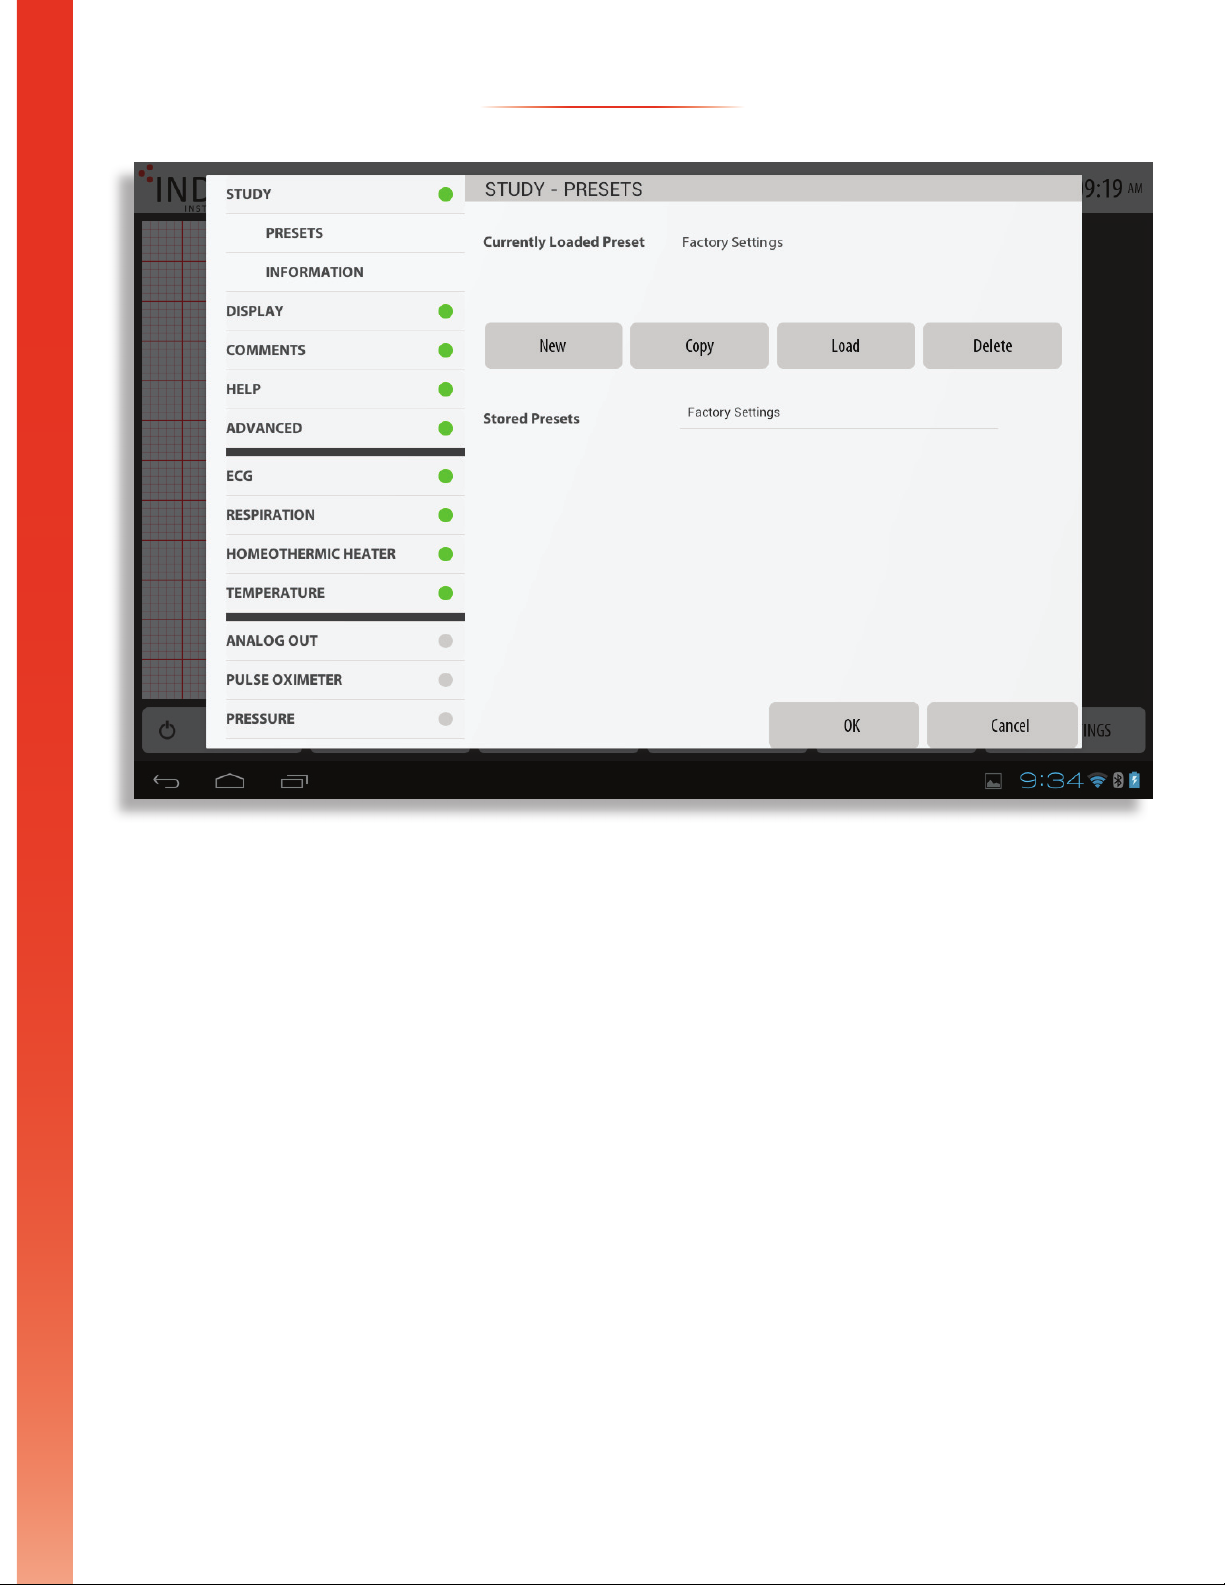
Presets - Multiple researchers can save their preferred settings as a preset profi le for easy re-
trieval at a later date. This way multiple researchers can share a single MouseMonitor and each
researcher can have their preferred setup.
• New - Creates a new set of presets from the Factory Default Presets.
•Copy - Creates a new set of presets from your Currently Loaded Preset.
• Load - Loads a preset to the Currently Loaded Preset
• Delete - Permanently deletes a preset. You must have at least one preset at all times.
Note: Click anywhere outside of the on-screen keyboard to exit keyboard text entry mode.
SETTINGS - STUDY - PRESETS
MOUSEMONITOR SETTINGS
10
STUDY-PRESETS
Saved Presets - This is a list of all presets that have been saved to the Display Unit.
Currently Loaded Presets - Displays the presets that are in use.

SETTINGS - STUDY - INFORMATION
MOUSEMONITOR SETTINGS
11
STUDY-INFORMATION
• Study Name - Touch to type your custom study name with the on-screen keyboard.
• Animal Identifi er - Touch to type your custom animal ID with the on-screen keyboard.
• File Name - Touch to type your custom fi le name with the on-screen keyboard.
All screenshots and recordings will use study name, animal ID, fi le name and the current date
and time as tags to allow you to fi nd saved fi les at a later date. Files will be saved in the internal
storage of the Display Unit until deleted by the user.
Note: Click anywhere outside of the on-screen keyboard to exit keyboard text entry mode.
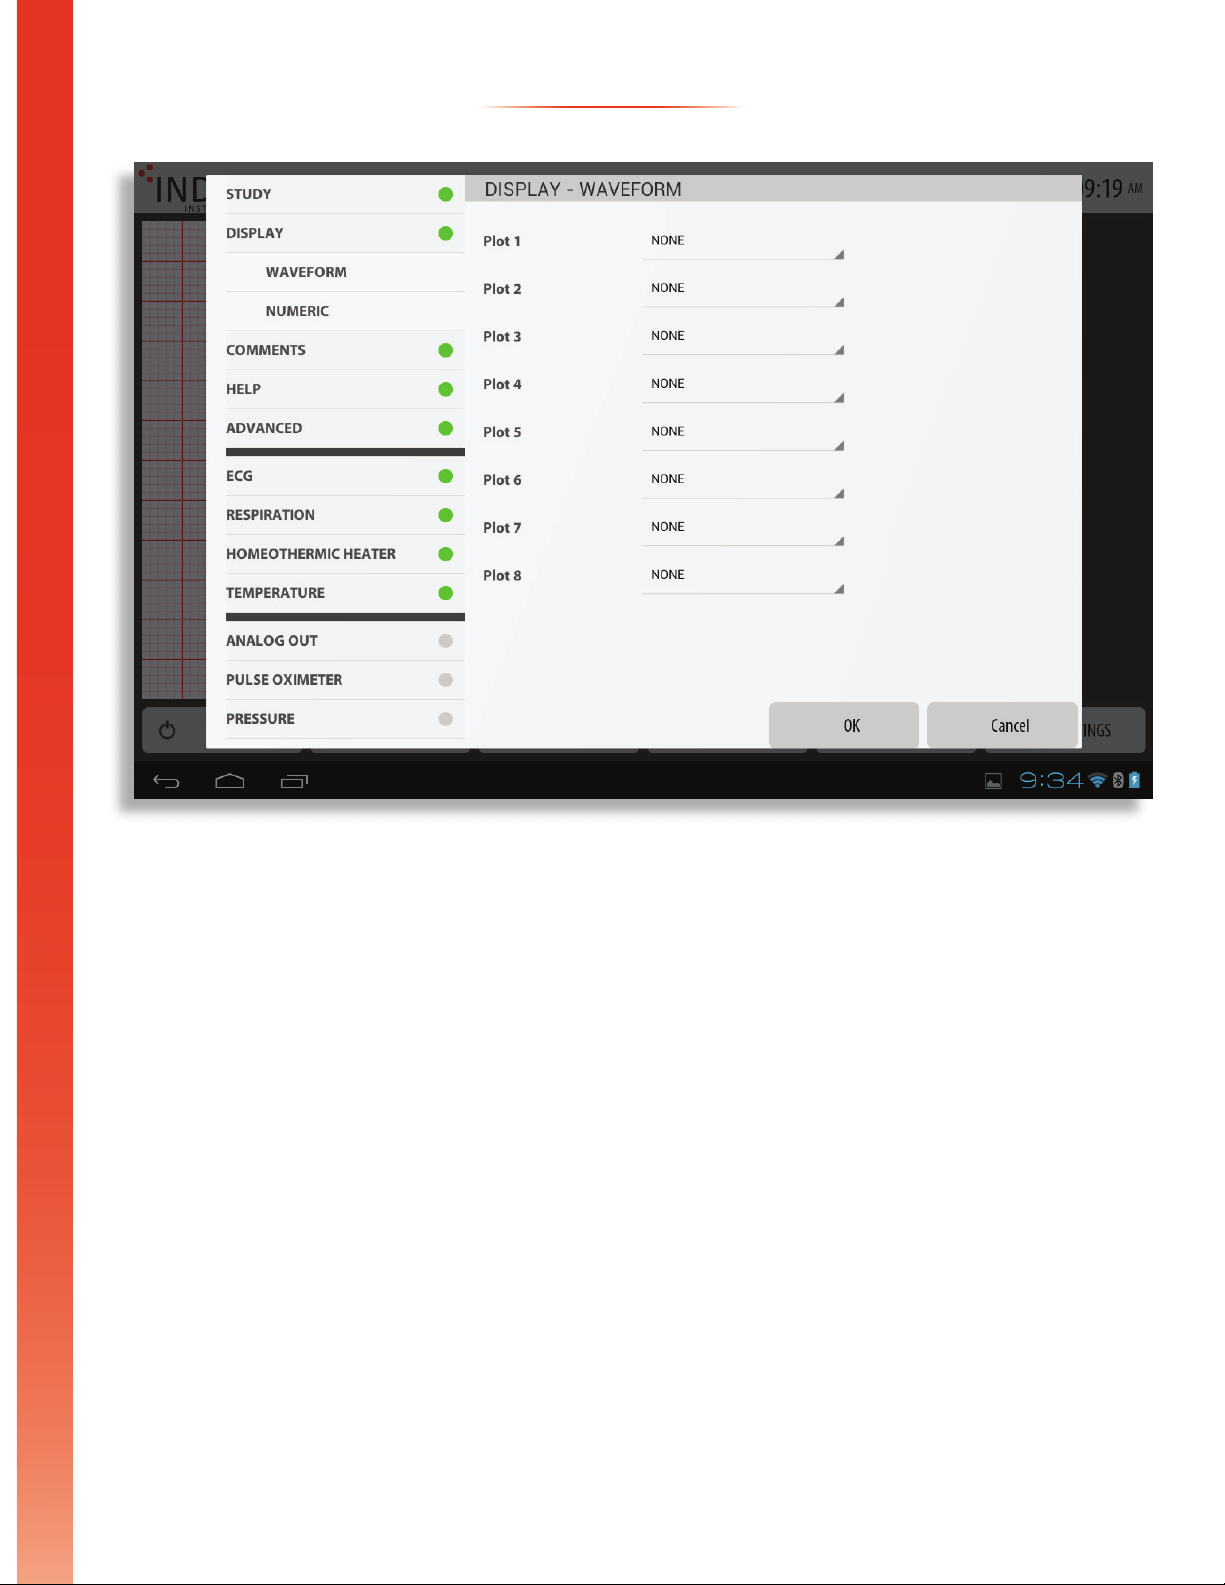
SETTINGS - DISPLAY - WAVEFORM
MOUSEMONITOR SETTINGS
12
DISPLAY-WAVEFORM
Waveform Assignment Drop Menus
• Plot 1 (choose from list on right)
• Plot 2 (choose from list on right)
• Plot 3 (choose from list on right)
• Plot 4 (choose from list on right)
• Plot 5 (choose from list on right)
• Plot 6 (choose from list on right)
• Plot 7 (choose from list on right)
• Plot 8 (choose from list on right)
Waveforms Available for Display
• ECG Lead I (LA-RA)
• ECG Lead II (LL-RA)
• ECG Lead III (LL-LA)
• ECG Lead aVL
• ECG Lead aVR
• ECG Lead aVF
• Respiration
• Respiration (from ECG)
Note: If you want to change the confi guration of the waveform display area you will need to con-
fi gure the Waveform Assignment Drop Menus as desired, then tap OK to exit settings and return
to the MouseMonitor App. Exit and re-open the MouseMonitor App for the waveforms to display
properly.
MOUSEMONITOR SETTINGS
13
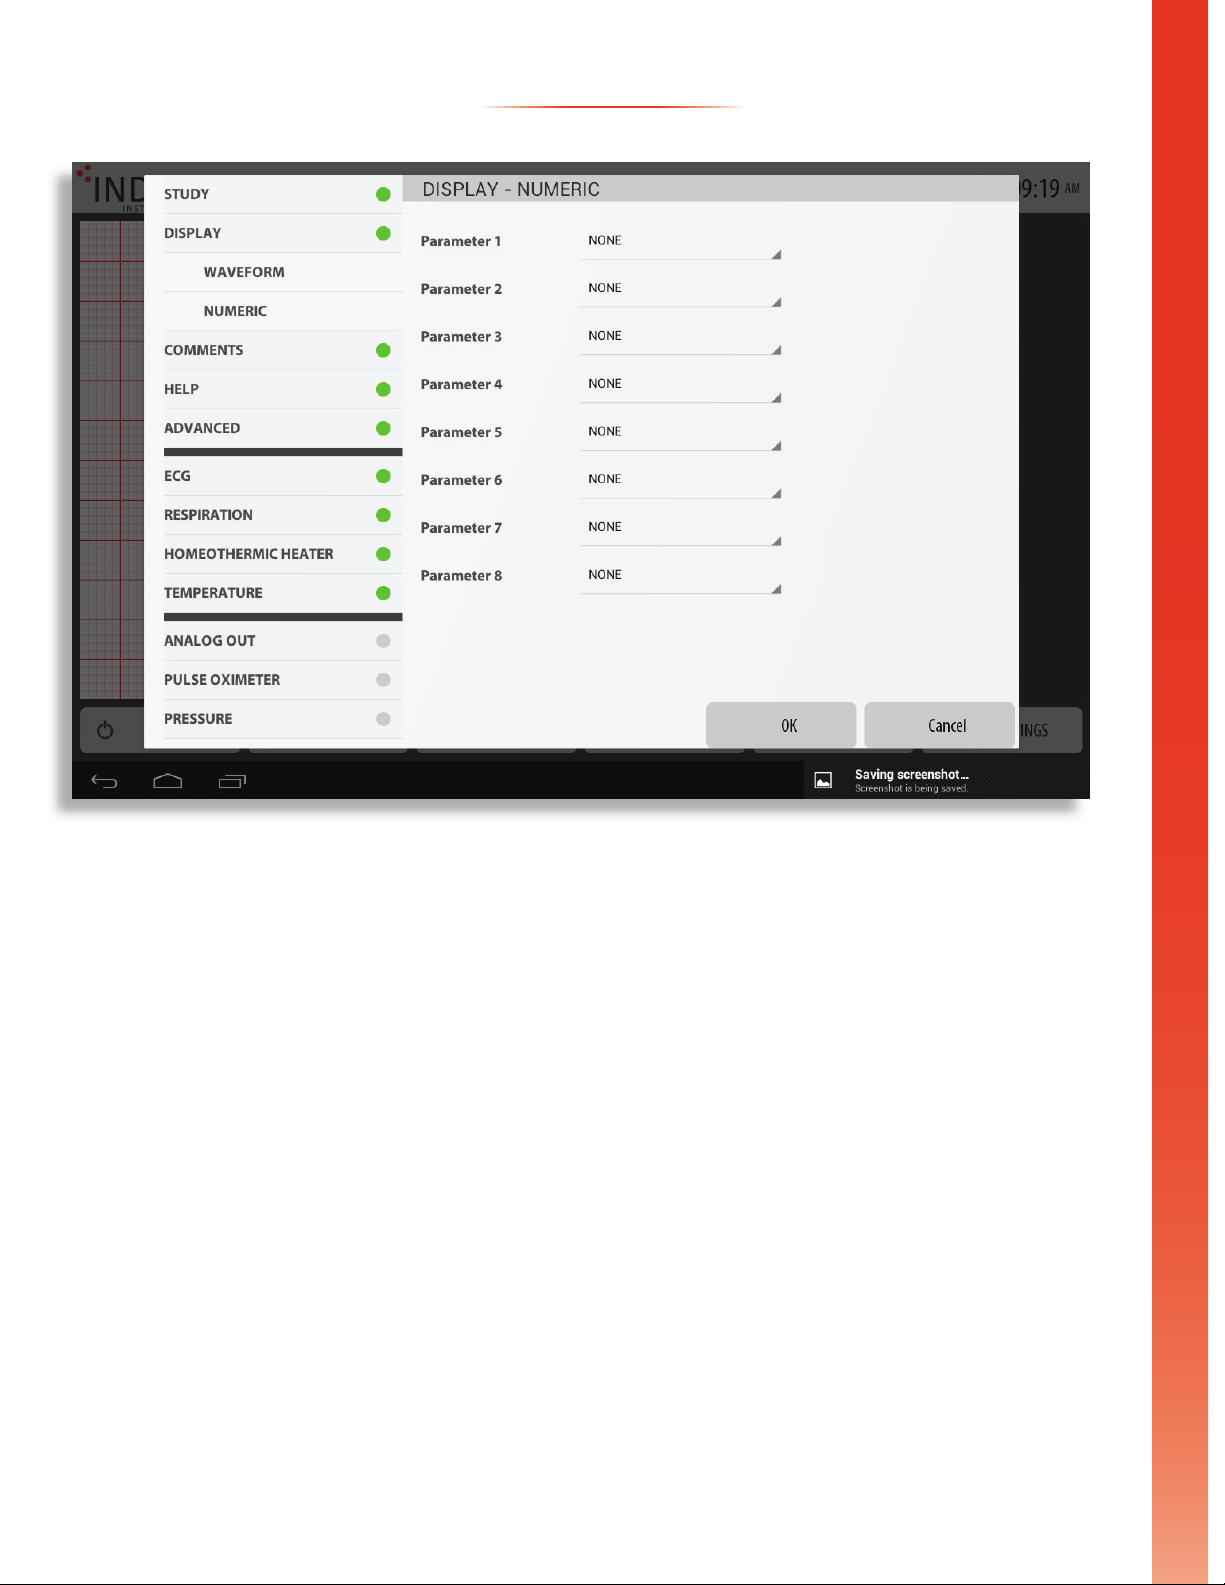
SETTINGS - DISPLAY - NUMERIC
DISPLAY-NUMERIC
Numeric Panel Drop Menus
• Parameter 1 (choose from list on right)
• Parameter 2 (choose from list on right)
• Parameter 3 (choose from list on right)
• Parameter 4 (choose from list on right)
• Parameter 5 (choose from list on right)
• Parameter 6 (choose from list on right)
• Parameter 7 (choose from list on right)
• Parameter 8 (choose from list on right)
Numeric Panels Available for Display
• Heart Rate (Lead I) 200-999BPM
• Heart Rate (Lead II) 200-999BPM
• Heart Rate (Lead III) 200-999BPM
• Respiration Rate 60-300BrPM
• Respiration (from ECG) 60-300BrPM
• Core Temperature 25-50 ºC
• Pad Temperature 25-42 ºC
• SpO2 (with module) 80-100%
• R-R Interval (Lead I) 60-300ms
• R-R Interval (Lead II) 60-300ms
• R-R Interval (Lead III) 60-300ms
Note: If you want to change the confi guration of the numeric panels you will need to confi gure
the Numeric Panel Drop Menus as desired, then tap OK to exit settings and return to the Mouse-
Monitor App. Exit and re-open the MouseMonitor App for the numeric panels to display prop-
erly.

MOUSEMONITOR SETTINGS
14
SETTINGS - COMMENTS
COMMENTS
The comments tab allows you to store 7 custom pre-defi ned comments that you can quickly place
during experiments. There is also a custom comment option that can be entered during the ex-
periment with any comment text.
Comments are placed when OK is pressed from inside the comment menu and can be viewed
when the saved recordings are opened.
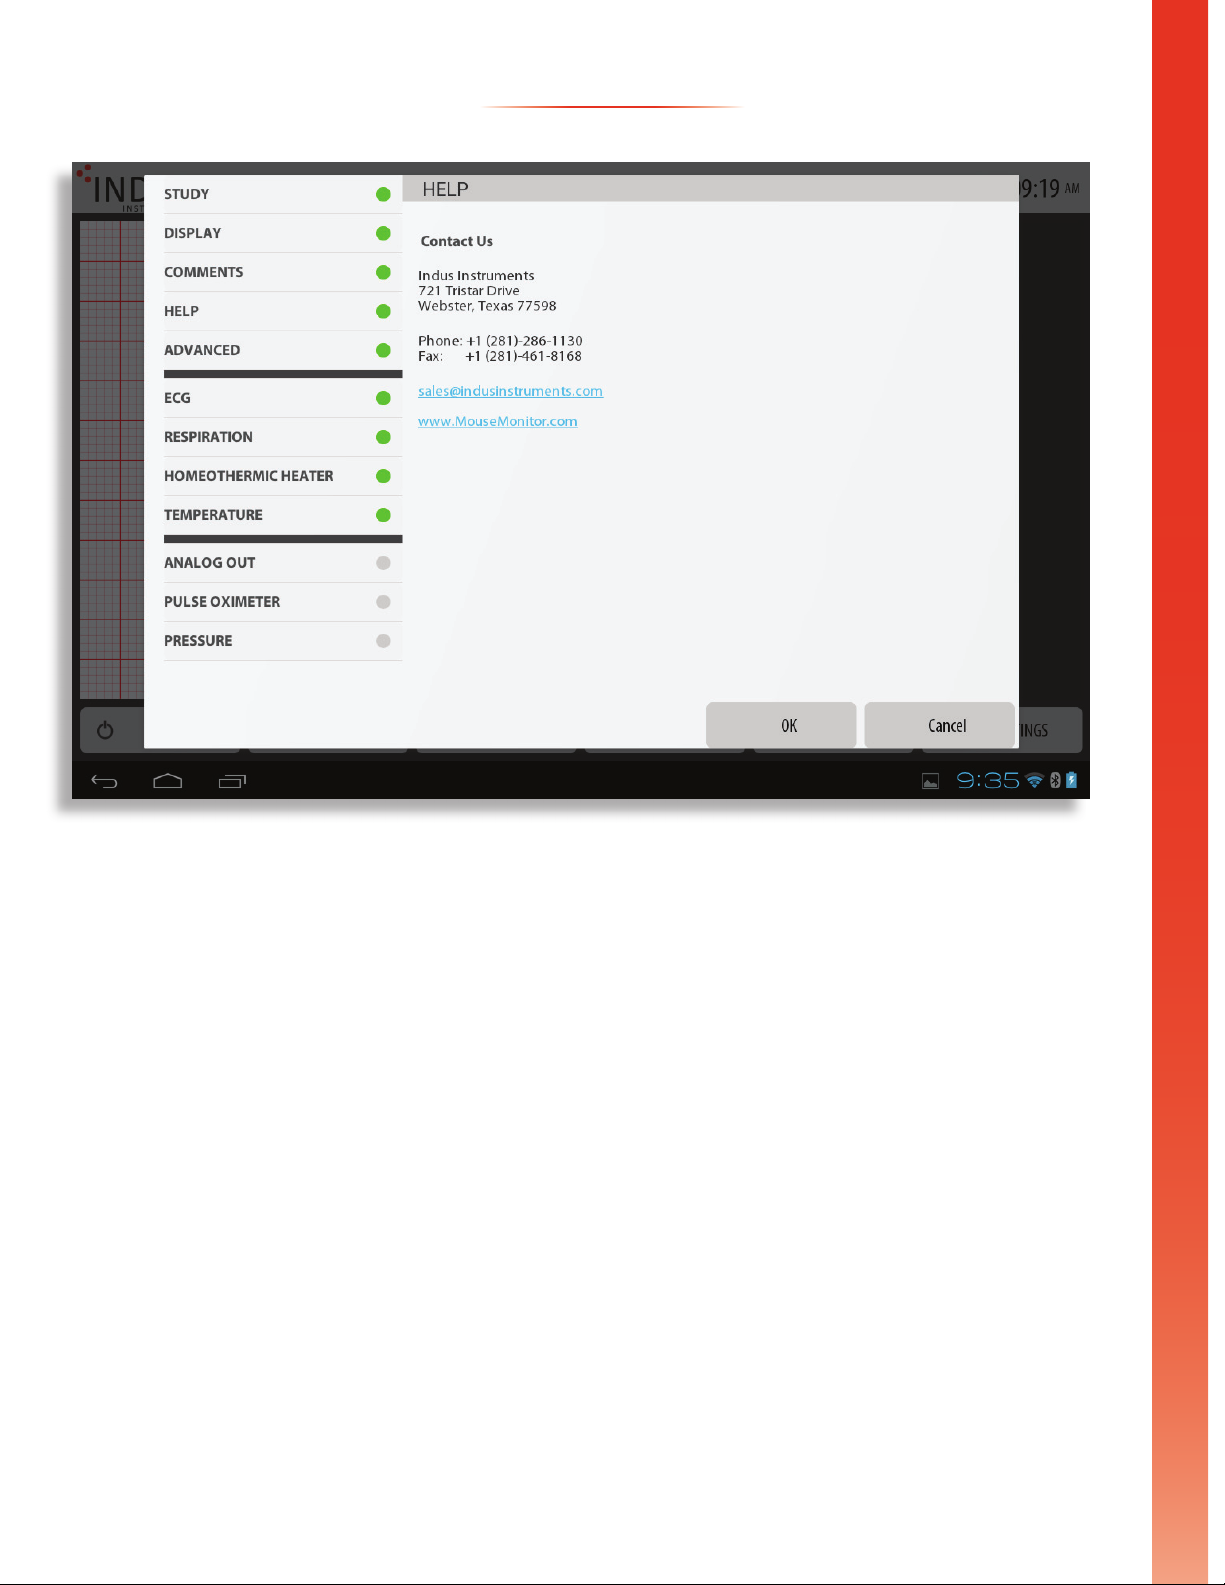
We are more than happy to assist you any way we can, please do not hesitate to contact us at
MouseMonitor was developed through close collaborations between Indus Instruments and our
customers; we rely on your feedback to further refi ne our products as well as get new ideas for
future products.
MOUSEMONITOR SETTINGS
15
SETTINGS - HELP
HELP
MOUSEMONITOR SETTINGS
16
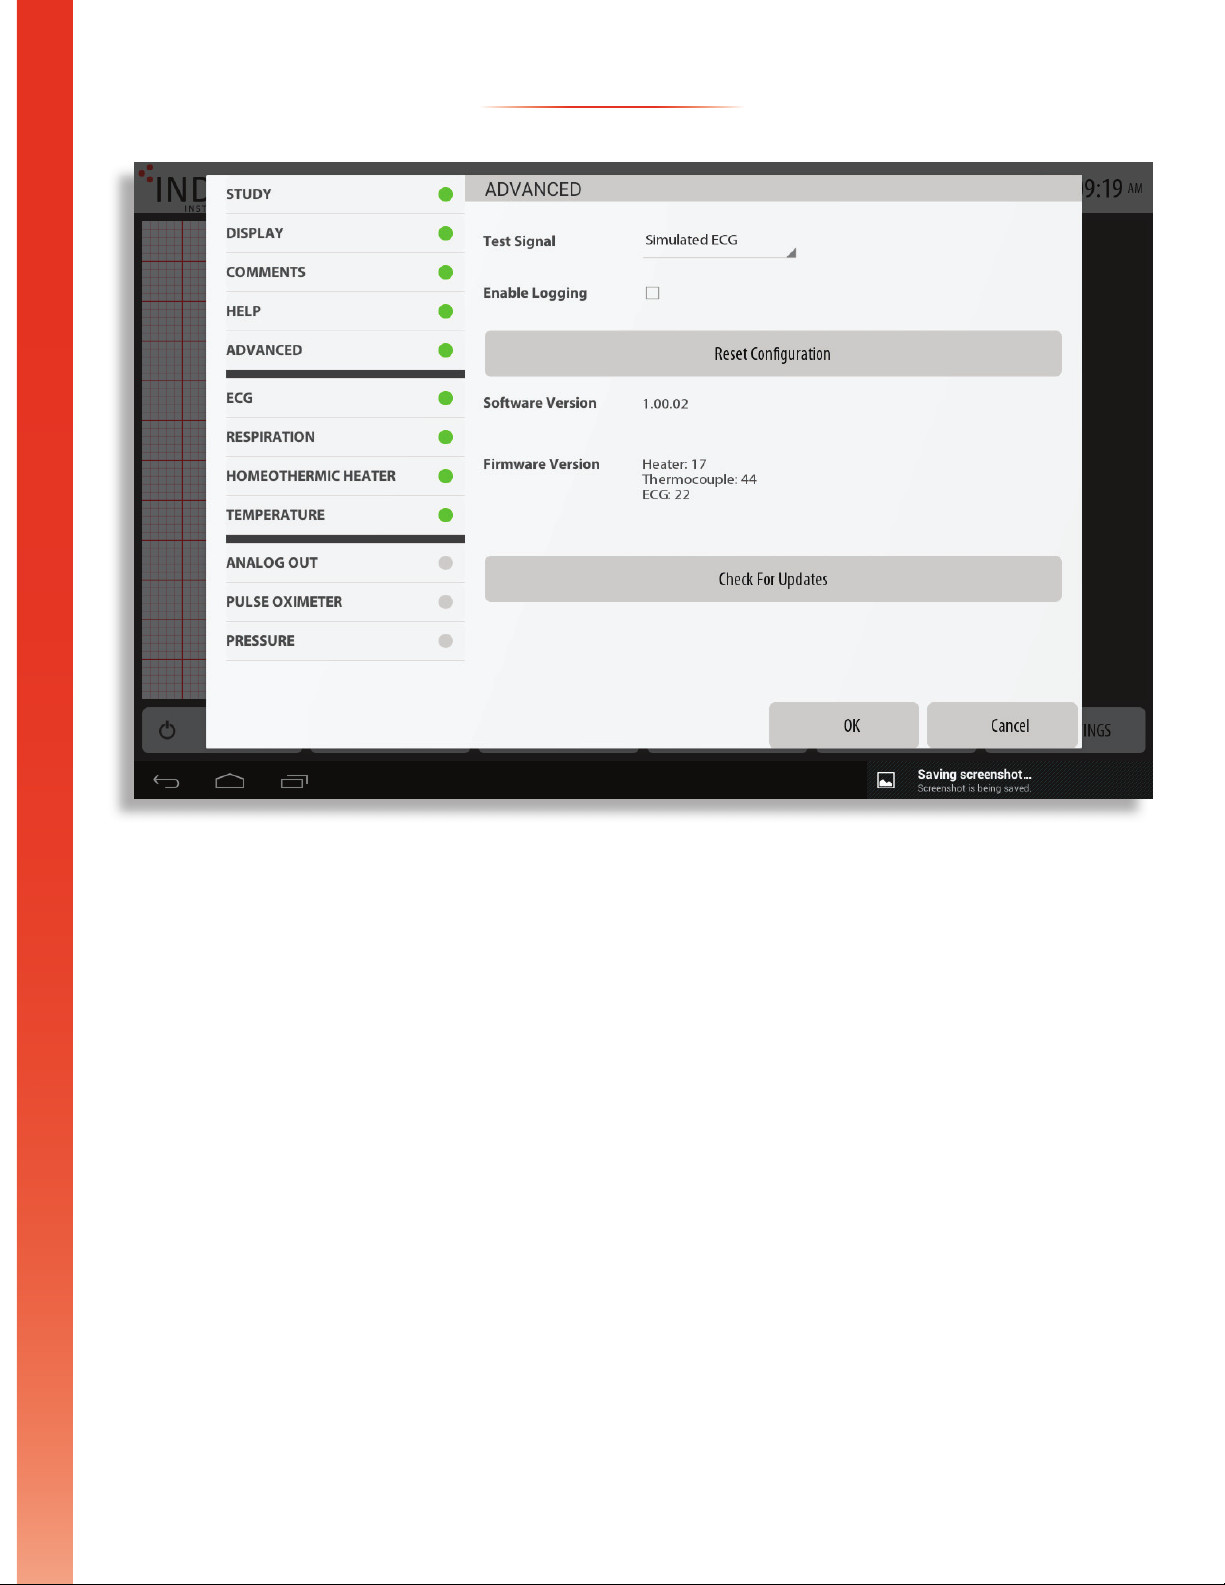
SETTINGS - ADVANCED
ADVANCED
• Test Signal - Can be set to None, Hardware, 10Hz, 50Hz, 60Hz, 100Hz, and 1000Hz or
Simulated ECG. Simulated ECG is a set of mouse signals captured in a lab.
• Enable Logging - Records all application and Android events to a log fi le for troubleshooting.
The factory setting for this is off.
• Reset Confi guration - This resets all settings to factory defaults.
• Software Version - Displays the current display unit software version.
• Firmware Version - Displays the current fi rmware version of the internal hardware compo-
nents.
• Check For Updates - This automatically updates the Display Unit software to the latest ver-
sion.
Note: Check For Updates will only update if the Display Unit is connected to the internet.

MOUSEMONITOR SETTINGS
17
SETTINGS - ECG - ELECTRODES
ECG-ELECTRODES
Electrode Set - Confi gure the set of active electrodes (Mouse, Rat or External).
Vertical Orientation - Confi gure the direction of the animal’s head (North, South or Custom).
Horizontal Orientation - Confi gure the direction of the animal’s chest (Prone, Supine or Cus-
tom).
External Electrodes - The MouseMonitor ships with a set of needle electrodes that can be
used on a wide variety of animals. Other electrodes are available including:
Note: Custom allows you to select a custom electrode confi guration. Not all features will work
with custom electrode confi gurations.
• Platinum Needle Electrodes (set of 4), Part Number 651-0003-01
• Stainless Steel Needle Electrodes (set of 4), Part Number 651-0003-02
• Silver/Silver Chloride Disc Electrodes (set of 4), Part Number 651-0003-03
Popular Pet Care Product manuals by other brands


Petsafe
Petsafe Big Dog Spray Bark ControlCollar operating guide

Unleashed
Unleashed Wireless Leash Guidance Trainer Series Operator's manual

TITO
TITO CANE-L manual

K9Safety
K9Safety K9Caller Operator's manual

Hobby
Hobby Terra Fix & Easy XL 3 Mounting instructions

Best Friend Mobility
Best Friend Mobility extra large-size wheelchair owner's manual