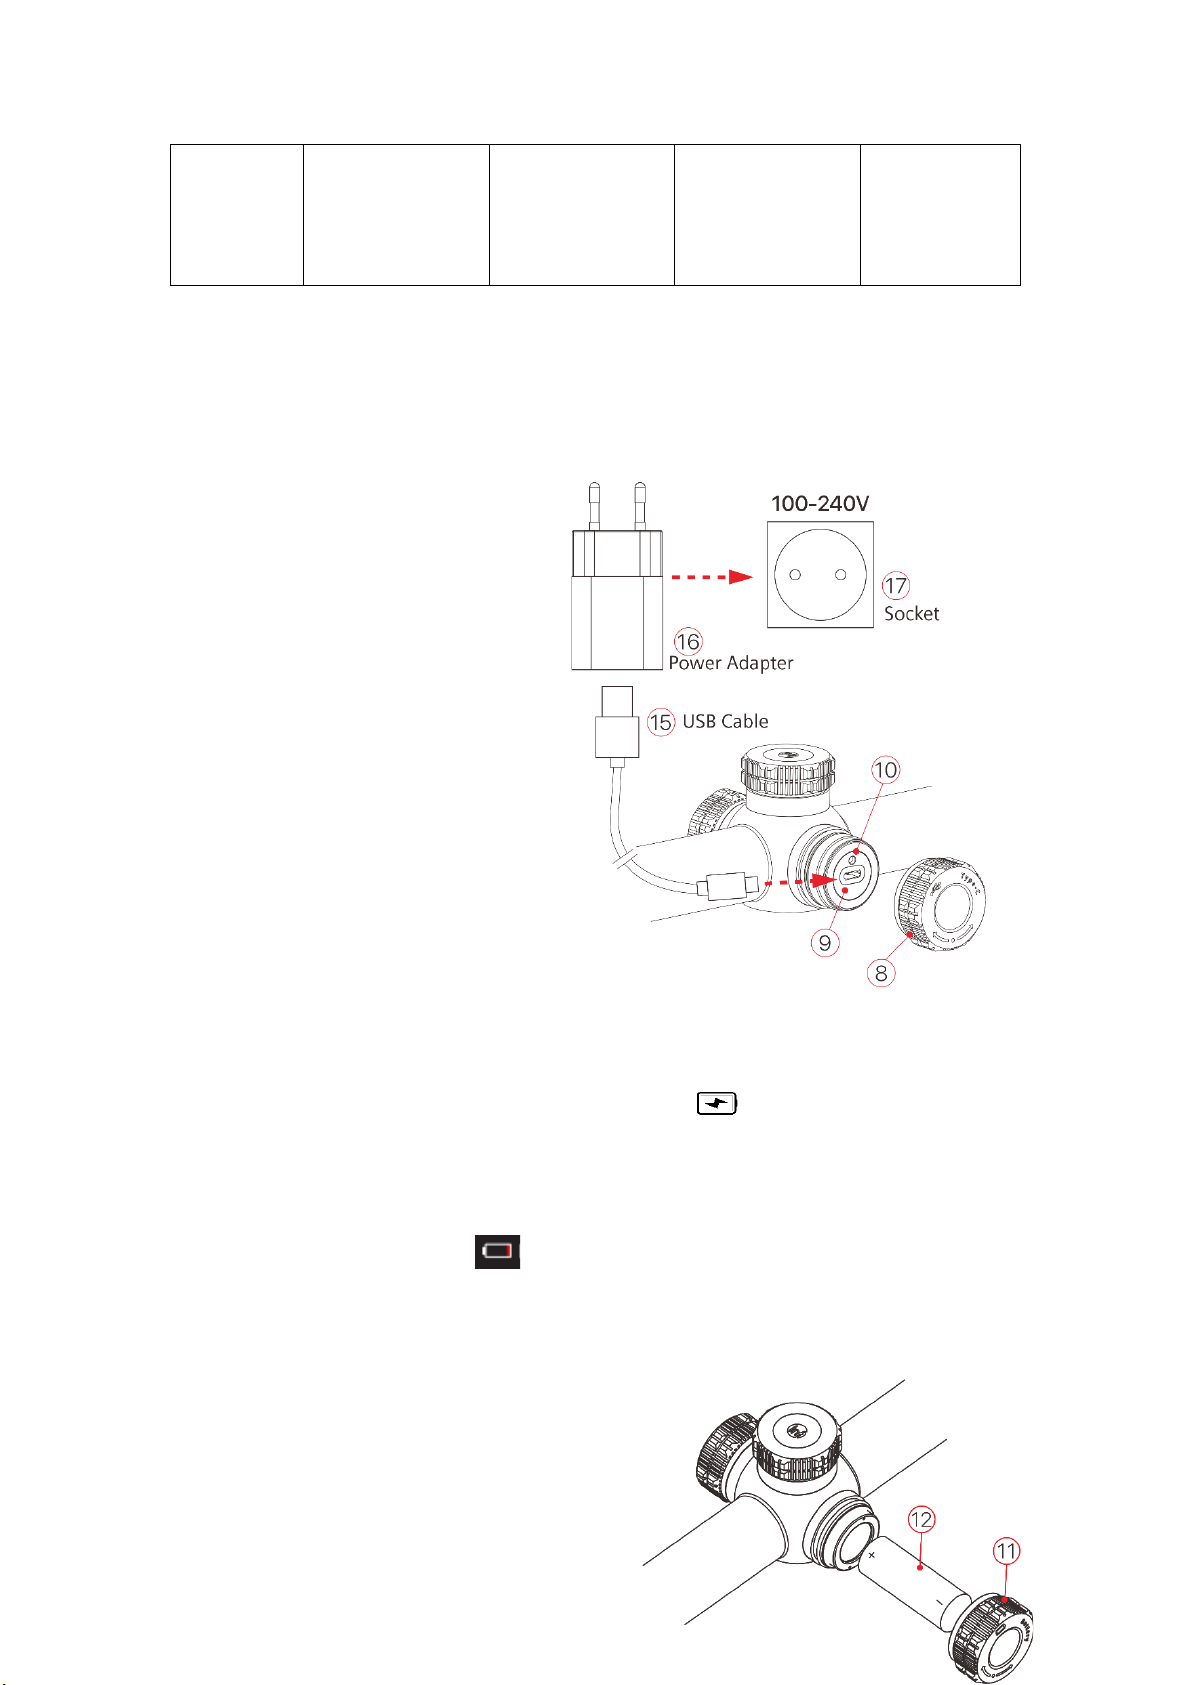
anti-clockwise to open it;
⚫ Following the sign inside battery compartment, install 18500 battery (12) as anode
electrode inward and negative electrode outward;
⚫ Put on the battery compartment lid and screw down it clockwise.
Safety Measures
⚫ Please charge with adapter as 5V2A in the package. Using other types of adapters may
lead to irreversible damage to battery or adapter;
⚫ If the device will be idle for a long time, it should be partial charged, avoid fully charged
or completely discharge.
⚫ When moved the device from cold environment to warm environment, wait for 30-40
minutes to warm up before charging the device, avoid charging instantly.
⚫ Avoid to use the charger which been modified or damaged;
⚫ Charge the scope in temperature range: 0℃~+40℃, otherwise the battery life will be
reduced significantly.
⚫ Please don’t leave the device unattended while charging;
⚫ After fully charged, avoid connecting battery and adapter for over 24 hours;
⚫ That is not recommended to connect with third device that has more power
consumption than maximum.
⚫ The device has short-circuited protection system, still, avoid circumstances of
short-circuit.
⚫ Recommend operation temperature range is -20℃~+50℃, avoid operating the device
out of this temperature range, otherwise may reduce the battery life.
⚫ When the device operating in subzero temperature, the capacity of battery drops, that is
common, not defect.
Switching Battery Power Supply
Tube series support double power supply system: Built-in lithium ion battery pack and
replaceable 18500 battery, also support USB port charging.
⚫ If there are two types of batteries in Tube, the status bar on top right of the image will