manuals.online logo
Brands
  1. Home
  2. •
  3. Brands
  4. •
  5. InFocus
  6. •
  7. Projector
  8. •
  9. InFocus Work Big IN35 Manual

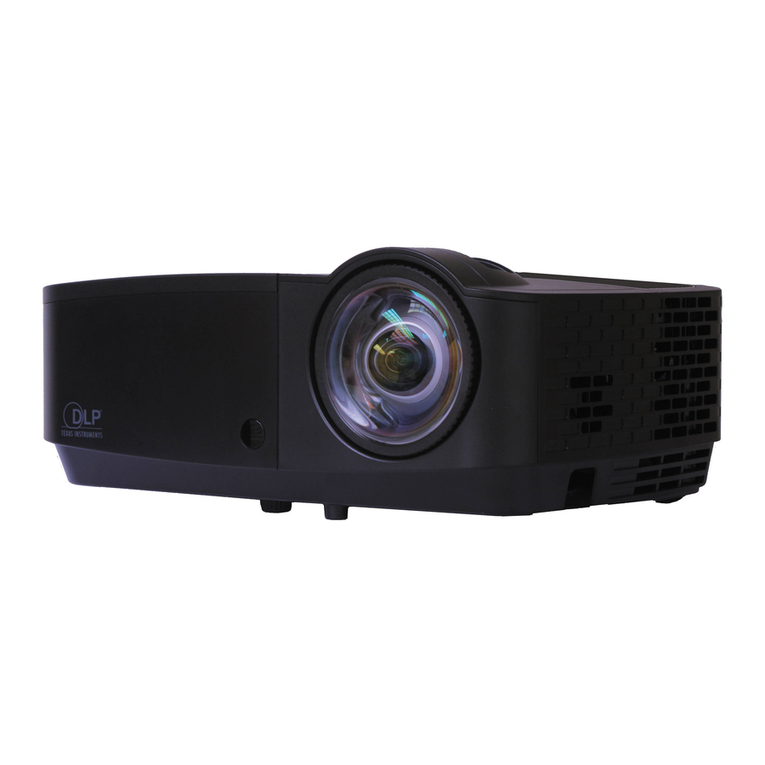
InFocus Work Big IN35 Manual

RS-232 Setup Instructions
Communication Configuration
Baud Rate 19,200bps
Data Bits 8
Parity None
Stop Bits 1
Flow Control None
Emulation VT100
Required Cables
Null modem cable - female to female DB9 connector (9-pin serial)
RJ45 to DB9 adapter - InFocus part# SP-RJ45-ADPT
See the end of document for wiring diagram and instructions.
2
Control Software
You can use any one of a variety of available RS-232 programs to control a projector. Hyperterminal, for
example, comes with all versions of Microsoft Windows. Also consider Look RS232 (available at
www.lookrs232.com/). Some programs will allow you to assign RS-232 strings to hot keys or buttons.
Companies such as Crestron (www.crestron.com) and AMX (www.amx.com) make RS-232 control boxes
that make it easier to control your projector.
Command Format
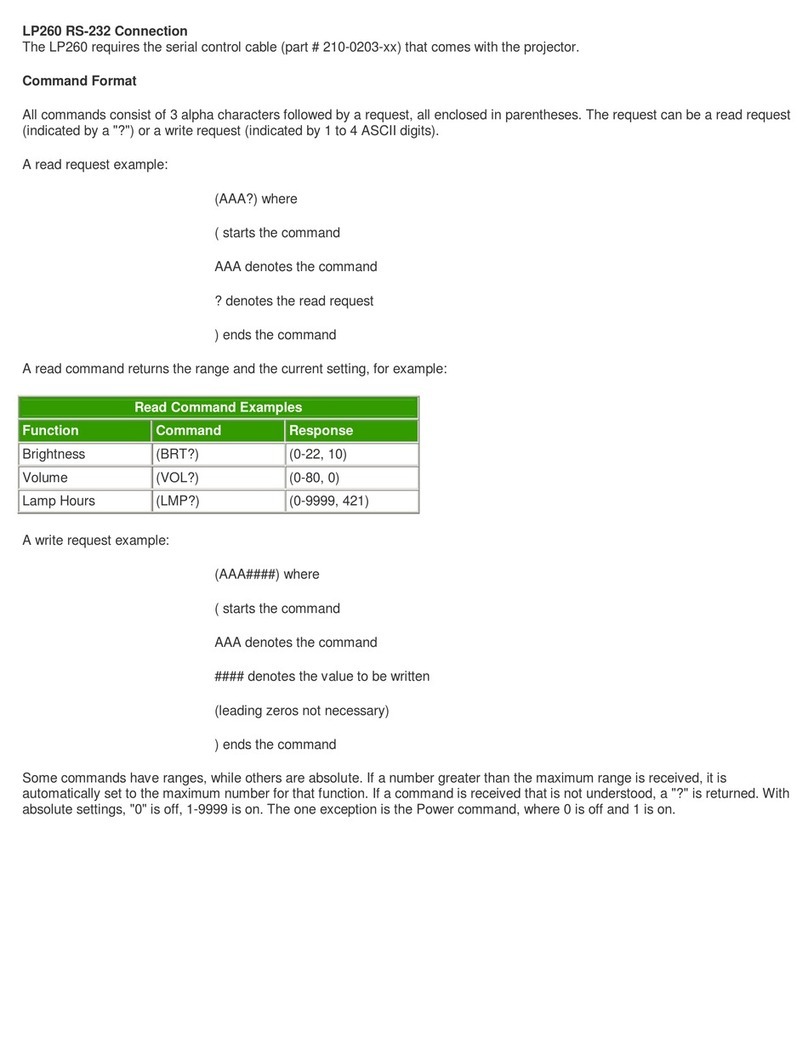
All InFocus projectors use ASCII format command format. All commands consist of 3 alpha characters
followed by a request and all enclosed by parentheses. The request can be a read request (indicated by a
“?”) or a write request (indicated by 1 to 4 ASCII digits).
A read request will report information to you, such as lamp hours. A write request is to tell the projector to
change a setting.
Command Examples
A read request example:
Command to request Brightness setting is (BRT?)
(starts the command
BRT denotes the brightness command
?denotes the read request
)ends the command
The response would appear as (0-22, 10), where
0-22 is the brightness range of the projector.
10 is the current brightness setting
Here are some other examples. To interpret the responses, you may need to refer to the actual list of
commands.
Function Command Response Description
Lamp Hours (LMP?) (0-32767, 250) 250 lamp hours
Aspect Ratio (ARZ?) (0-4, 1) 16:9 aspect ratio
Vertical Keystone (DKC?) (53-203, 60) Vertical keystone set to 60
A write request example:
Command to change Brightness setting to level 10 is (BRT10)
(starts the command
BRT denotes the brightness command
10 denotes the write request
)ends the command
3
Some commands have ranges, while others are absolute. If a number greater than the maximum range is
received, it is automatically set to the maximum number for that function. If a command is received that is
not understood, a "?" is returned. With absolute settings, "0" is off, 1-9999 is on.
Here are some other examples. Refer to the projector’s command list for other commands.
Function Command Response
Aspect Ratio (ARX2) Sets the aspect ratio to 4:3
Flip the image for
ceiling projection (CEL1) Enable ceiling projection
mode. Flips image.
Power up (PWR1) Powers up the projector.
Power down (PWR2) Powers the projector down.
NOTE To assure the projector can process a command, wait 3 seconds before entering the next
command.
Error Conditions
Not all commands are supported for all projectors. If an unsupported command is issued, the command
will be ignored. If a command is received that is not understood, a ? character will be returned indicating
the command was not understood.
Below is a list of common errors.
Function Command Response Reason
Aspect Ratio (ARZ2)A ? Too many characters
Flip the image (CEILING1) ? Too many characters.
Improper command.
Power Up (PWR99999) ? Invalid value. Too many 9s.
Most programs do not require a line feed after a command. Using a line feed, may cause the projector to
respond with a “?” indicating an invalid command. Commands should respond within seconds of entering
a command. If it does not, then there may issues with your connection, syntax or RS-232 software.
Limitations
The CLI cannot respond to commands coming in at a high-rate. Therefore, a delay must occur between
commands to ensure that the command gets properly executed. To assure the projector can process a
command, wait 3 seconds before entering the next command.
Some commands may only be valid when the projector is receiving an active computer or video signal. If
a setting is not an active feature in the menu, the CLI command will not work. For example: aspect ratio,
color and tint are functions that require an active source.
Source Dependent Settings
Cross reference of Input and associated Source ID
Connector Source ID Source type
M1 0 Digitial computer
M1 1 Digitial video
M1 2 Analog computer
M1 3 Analog component
VESA 4 Analog computer
VESA 5 Analog component
Composite 6 Composite video
S-Video 7 S-Video
Table values are in the format “[Range], Initial value”
Function Prefix SCR 0 SCR 1 SCR 2 SCR 3 SCR 4 SCR 5 SCR 6 SCR 7
Auto Color Space Enable ACS [0-1], 1 [0-1], 1 [0-1], 1 [0-1], 1 [0-1], 1 [0-1], 1
Auto Image AIM [0-1], 0 [0-1], 0 [0-1], 0 [0-1], 0 [0-1], 0 [0-1], 0 [0-1], 0 [0-1], 0
Aspect Ratio ARZ [1-3], 2 [1-3], 2 [1-3], 2 [1-3], 2 [1-3], 2 [1-3], 2 [1-3], 2 [1-3], 2
Auto Video Standard
Enable AVS [0-1], 1 [0-1], 1
Blue Gain BCG [0-100],
50 [0-100],
50 [0-100],
50 [0-100],
50 [0-100],
50 [0-100],
50 [0-100],
50 [0-100],
50
BrilliantColor Look BCL [0-1], 1 [0-1], 0 [0-1], 1 [0-1], 0 [0-1], 1 [0-1], 0 [0-1], 0 [0-1], 0
Blue Offset BCO [0-100],
50 [0-100],
50 [0-100],
50 [0-100],
50 [0-100],
50 [0-100],
50 [0-100],
50 [0-100],
50
Brightness BRT [0-100],
50 [0-100],
50 [0-100],
50 [0-100],
50 [0-100],
50 [0-100],
50 [0-100],
50 [0-100],
50
Color CLR [0-100],
50 [0-100],
50 [0-100],
50 [0-100],
50
Contrast CON [0-100],
50 [0-100],
50 [0-100],
50 [0-100],
50 [0-100],
50 [0-100],
50 [0-100],
50 [0-100],
50
Color Space CSM [0-3], 0 [0-3], 0 [0-2], 0 [0-2], 0 [0-2], 0 [0-2], 0
Green Gain GCG [0-100],
50 [0-100],
50 [0-100],
50 [0-100],
50 [0-100],
50 [0-100],
50 [0-100],
50 [0-100],
50
Green Offset GCO [0-100],
50 [0-100],
50 [0-100],
50 [0-100],
50 [0-100],
50 [0-100],
50 [0-100],
50 [0-100],
50
Horizontal Position HPS [0-100],
32 [0-100],
50 [0-100],
50 [0-100],
50
Phase MSS [0-100],
49 [0-100],
49 [0-100],
49 [0-100],
49
Audio Mute MTE [0-1], 0 [0-1], 0 [0-1], 0 [0-1], 0 [0-1], 0 [0-1], 0 [0-1], 0 [0-1], 0
Tracking MTS [0-100],
37 [0-100],
50 [0-100],
50 [0-100],
50
Overscan OVS [0-1], 0 [0-1], 0 [0-1], 0 [0-1], 0 [0-1], 0 [0-1], 0 [0-1], 0 [0-1], 0
Preset PST [1-
5,7,10-
12], 5
[1-
5,7,10-
12], 7
[1-
5,7,10-
12], 5
[1-
5,7,10-
12], 7
[1-
5,7,10-
12], 5
[1-
5,7,10-
12], 7
[1-
5,7,10-
12], 7
[1-
5,7,10-
12], 7
Red Gain RCG [0-100],
50 [0-100],
50 [0-100],
50 [0-100],
50 [0-100],
50 [0-100],
50 [0-100],
50 [0-100],
50
Red Offset RCO [0-100],
50 [0-100],
50 [0-100],
50 [0-100],
50 [0-100],
50 [0-100],
50 [0-100],
50 [0-100],
50
Sharpness SHP [0-4], 2 [0-4], 2 [0-4], 2 [0-4], 2 [0-4], 2 [0-4], 2 [0-4], 2 [0-4], 2
Sync Threshold Adjust STH [0-100],
77 [0-100],
77 [0-100],
77 [0-100],
77 [0-100],
77 [0-100],
77
Color Temp TMP [0-2,4],
1 [0-2,4],
0 [0-2,4],
1 [0-2,4],
0 [0-2,4],
1 [0-2,4],
0 [0-2,4],
0 [0-2,4],
0
Tint TNT [0-100],
50 [0-100],
50
Save User1 Preset US1 [0-1], 0 [0-1], 0 [0-1], 0 [0-1], 0 [0-1], 0 [0-1], 0 [0-1], 0 [0-1], 0
Save User2 Preset US2 [0-1], 0 [0-1], 0 [0-1], 0 [0-1], 0 [0-1], 0 [0-1], 0 [0-1], 0 [0-1], 0
Save User3 Preset US3 [0-1], 0 [0-1], 0 [0-1], 0 [0-1], 0 [0-1], 0 [0-1], 0 [0-1], 0 [0-1], 0
Audio Volume VOL [0-100],
50 [0-100],
50 [0-100],
50 [0-100],
50 [0-100],
50 [0-100],
50 [0-100],
50 [0-100],
50
Vertical Position VPS [0-100],
88 [0-100],
50 [0-100],
50 [0-100],
50 [0-100],
50
Video Standard VSU [1-2, 5],
1 [1-2, 5],
1
White Peaking WPK [0-100],
100 [0-100],
60 [0-100],
100 [0-100],
60 [0-100],
100 [0-100],
60 [0-100],
60 [0-100],
60
Source Independent Settings
Function Prefix Range Initial
Chime Enable ACE 0-1 1
Auto Power Enable APO 0-1 0
Auto Source Enable ASC 0-1 1
Blank Screen Enable BLK 0-1 0
Serial 1 Baud Rate BR1 4,7 4
Blank Screen Color BSC 0-2 2
Boot Version BVS 3 0
Computer Advance CAD 0-1 0
Color Coordinate Adjust Enable CCA 0-1 0
Source Enable 0 CE0 0-1 1
Source Enable 1 CE1 0-1 1
Source Enable 2 CE2 0-1 1
Source Enable 3 CE3 0-1 1
Ceiling CEL 0-1 0
Current Subsource CRS 0-7 0
Configuration Version CVS 3 0
Horizontal Keystone DKH 0-100 50
Vertical Keystone DKV 0-100 50
Display Messages Enable DMG 0-1 1
Power-up Source DSC 0-3 0
Startup Logo DSU 0-1 0
Echo Received Char 1 EC1 0-1 1
Echo Received Char 2 EC2 0-1 0
Custom Key Program EFK 0-1,3-6,8,10 8
System Error Condition ERR 0-7 0
Flash Mode Reset FMR 0-1 0
Freeze Enabled FRZ 0-1 0
Firmware Version FVS 3 0
Lamp Power IPM 0-1 0
Keycode Entry KEY 0-71 0
Language LAN 0-17 0
Lamp Hours LMP 0-65535 0
Number of lamp resets LMR 0-65535 0
Perform Lamp Reset LRT 0-1 0
Model Name MDL 4 0
Menu Enable MNU 0-1 0
Menu Navigation NAV 0-4 1
Notebook No Dose NND 0-1 1
Number Of PI Binary Connections NPB 0-255 0
OSD Offset OFF 6-46 6
Platform Name PLA 10 0
PI Response String Enable PRE 0-1 1
Power Save Enable PSV 0-1 1
PI Verbose Enable PVE 0-1 0
PI Version PVS 3 0
Power Enable PWR 0-1 0
Rear REA 0-1 0
Resolution String RES 9 0
Factory Reset RST 0-1 0
Source Advance SAD 0-1 0
System Power Enable SPE 0-1 0
Source 1 Program SR1 0-3 0
Source 2 Program SR2 0-3 1
Source 3 Program SR3 0-3 2
Source 4 Program SR4 0-3 3
Source SRC 0-3 0
Screen Save Time SSV 0-5 5
Sequence Version SVS 10 0
System State SYS 0-25 0
Test Pattern Enable TPE 0-1 0
Test Pattern Select TPS 0-21 0
User Preset 1 Saved Status UP1 0-2 0
User Preset 2 Saved Status UP2 0-2 0
User Preset 3 Saved Status UP3 0-2 0
Unit Part Number UPN 5 0
Unit Serial Number USN 12 0
Video Advance VAD 0-1 0
RJ45 Adapter Cable Pin-outs
Most RJ-45 to DB9 adapters ship fully assembled, however, some are available only partially assembled,
allowing them to be customized if necessary. Additionally, some organizations may wish to build their own
adapters. The pin-outs below are provided to enable the completion of these adapters.
DB-9 (Female) to RJ-45 (Male) RS-232 Serial Null Modem Adapter Wiring
RJ-45 (Male Connector) Pin Numbering
RJ-45 pins are numbered as shown on this male RJ-45 connector
DB-9 Serial pins are numbered as shown on the female DB-9 connector
==================================================
Wire Connector Cable as shown in the chart below
DB-9 RJ-45 Signal
8 8 CTS
2 6 RXD to TXD
5 4 Ground
3 5 TXD to RXD
7 7 RTS to CTS
Locking tab shown on bottom
Pin 1
Pin 5
Pin 6
Pin 9

Other manuals for Work Big IN35

3

This manual suits for next models

2

Other InFocus Projector manuals

InFocus LP340 User manual

InFocus

InFocus LP340 User manual

InFocus SP5000 User manual

InFocus

InFocus SP5000 User manual

InFocus IN82 Guide

InFocus

InFocus IN82 Guide

InFocus IN8606HD User manual

InFocus

InFocus IN8606HD User manual

InFocus Proxima Ovation+ 846 User manual

InFocus

InFocus Proxima Ovation+ 846 User manual

InFocus LitePro 720 User manual

InFocus

InFocus LitePro 720 User manual

InFocus LP330 Assembly instructions

InFocus

InFocus LP330 Assembly instructions

InFocus X1 Reference manual

InFocus

InFocus X1 Reference manual

InFocus IN1116 User manual

InFocus

InFocus IN1116 User manual

InFocus X2 multi-use perfomance User manual

InFocus

InFocus X2 multi-use perfomance User manual

InFocus LP 840 User manual

InFocus

InFocus LP 840 User manual

InFocus IN5312 User manual

InFocus

InFocus IN5312 User manual

InFocus IN3924 User manual

InFocus

InFocus IN3924 User manual

InFocus X1 Configuration guide

InFocus

InFocus X1 Configuration guide

InFocus IN3128HD User manual

InFocus

InFocus IN3128HD User manual

InFocus X3 User manual

InFocus

InFocus X3 User manual

InFocus IN146 User manual

InFocus

InFocus IN146 User manual

InFocus IN5312 User manual

InFocus

InFocus IN5312 User manual

InFocus LP130 User manual

InFocus

InFocus LP130 User manual

InFocus LP790 User manual

InFocus

InFocus LP790 User manual

InFocus IN5122 User manual

InFocus

InFocus IN5122 User manual

InFocus Work Big IN32 User manual

InFocus

InFocus Work Big IN32 User manual

InFocus IN5212a User manual

InFocus

InFocus IN5212a User manual

InFocus IN5533 User manual

InFocus

InFocus IN5533 User manual

Popular Projector manuals by other brands

LG CineBeam Laser HF80LG owner's manual

LG

LG CineBeam Laser HF80LG owner's manual

Christie GraphXMASTER RPMS-D100U user manual

Christie

Christie GraphXMASTER RPMS-D100U user manual

Epson EB-420  guide datasheet

Epson

Epson EB-420 guide datasheet

Vivitek D-635MX user manual

Vivitek

Vivitek D-635MX user manual

Acer U5200 Series manual

Acer

Acer U5200 Series manual

Epson brightlink quick start guide

Epson

Epson brightlink quick start guide

video xtreme VX-3000 Installation & operation manual

video xtreme

video xtreme VX-3000 Installation & operation manual

ViewSonic PJD7333 Specifications

ViewSonic

ViewSonic PJD7333 Specifications

Hitachi CP-X980W Specifications

Hitachi

Hitachi CP-X980W Specifications

Yamaha Digital Sound Projector HTY-750 owner's manual

Yamaha

Yamaha Digital Sound Projector HTY-750 owner's manual

Dukane ImagePro 9100HC user manual

Dukane

Dukane ImagePro 9100HC user manual

Cognex DataMan 100 Removal Instructions

Cognex

Cognex DataMan 100 Removal Instructions

XGIMI Halo user guide

XGIMI

XGIMI Halo user guide

Sony VPL-FHZ70 Quick reference manual

Sony

Sony VPL-FHZ70 Quick reference manual

Yamaha YSP 1000 - Digital Sound Projector Five CH... owner's manual

Yamaha

Yamaha YSP 1000 - Digital Sound Projector Five CH... owner's manual

Vivitek D964HD user manual

Vivitek

Vivitek D964HD user manual

Hitachi CP-X615W and user manual

Hitachi

Hitachi CP-X615W and user manual

Panasonic PT-TW331R Specifications

Panasonic

Panasonic PT-TW331R Specifications

manuals.online logo
manuals.online logoBrands
  • About & Mission
  • Contact us
  • Privacy Policy
  • Terms and Conditions

Copyright 2025 Manuals.Online. All Rights Reserved.