Ingersoll-Rand Zimmerman 700J Installation guide

Form MHD56209
PARTS, OPERATION AND MAINTENANCE MANUAL
for
JIB CRANE
MODELS
700J 800J 900J
(Dwg. MHP2035)
READ THIS MANUAL BEFORE USING THESE PRODUCTS. This manual
contains important safety, installation, and maintenance information. Make
this manual available to all persons responsible for the installation,
operation and maintenance of these products.
This equipment is intended for industrial use only and should not be used for lifting,
supporting, or transporting people or lifting or supporting loads over people.
Always operate, inspect and maintain this unit in accordance with applicable safety
codes and regulations.
Form MHD56209
Edition 2
April 2002
54031091
© 2002 Ingersoll-Rand Company

2MHD56209 - Edition 2
Description Page No.
Safety Information
Danger, Warning, Caution, and Notice ....................................... 3
Safety Summary .......................................................................... 3
Safe Operating Instructions
Warning Label .............................................................................. 4
Specifications ............................................................................. 5
Installation
Mounting....................................................................................... 9
Tool Requirements ...................................................................... 9
Erecting Column ......................................................................... 9
Anchoring the System ................................................................ 10
Wall Mount ................................................................................ 10
Column Mount ........................................................................... 11
Adjustable Rotation Stops .......................................................... 11
Pre-Installation Checklist ........................................................... 11
Air System ................................................................................ 12
Electrification System ................................................................ 12
Installation Test .......................................................................... 12
Operation
Description of Operation ........................................................... 13
General Operating Information .................................................. 13
Yarding ....................................................................................... 13
Inspection
Records and Reports ................................................................. 14
Frequent Inspections .................................................................. 14
Periodic Inspection .................................................................... 14
Units Not in Regular Use ........................................................... 14
Inspection and Maintenance Report ..................................... 15
Lubrication
Trolley ........................................................................................ 16
Troubleshooting ........................................................................ 16
Maintenance
Maintenance Intervals ................................................................ 17
Disassembly ............................................................................... 17
Cleaning, Inspection and Repair ................................................ 18
Assembly ................................................................................... 18
Air System Installation .............................................................. 19
Description Page No.
Electrification System Installation...............................................19
Testing ........................................................................................ 20
Parts Section
700J Jib Crane Wall Mount Assembly Parts Drawing .............. 22
700J Jib Crane Wall Mount Assembly Parts List ...................... 23
700J Jib Crane 220° Column Mount
Assembly Parts Drawing ..................................................... 24
700J Jib Crane 220° Column Mount
Assembly Parts List ............................................................. 25
800J Jib Crane 360° Column Mount
Assembly Parts Drawing ..................................................... 26
800J Jib Crane 360° Column Mount
Assembly Parts List ............................................................. 27
900J Jib Crane 360° Column Mount
Assembly Parts Drawing ..................................................... 28
900J Jib Crane 360° Column Mount
Assembly Parts List ............................................................. 29
Column Mount Pivot Assembly Drawing and Parts List .......... 30
Column Air Supply System
Assembly Drawing and Parts List ....................................... 31
Air Supply Assembly Parts Drawing ......................................... 32
Air Supply Assembly Parts List ................................................ 33
Electrification Assembly Parts Drawing ................................... 34
Electrification Assembly Parts List ........................................... 35
Adjustable Rotation Stops Parts Drawing .................................. 36
Adjustable Rotation Stops Parts List .......................................... 37
Trolley Parts Drawing ................................................................ 38
Trolley Parts List ....................................................................... 39
Parts Ordering Information
Return Goods Policy .................................................................. 41
Disposal .......................................................................................41
Warranty .................................................................................. 43
Office Locations ....................................................................... 44
Discontinued Jib Crane Models V2JF0550 and V2JF1100 are not covered in this
manual. Contact factory for information on either of these models.
TABLE OF CONTENTS

MHD56209 - Edition 2 3
SAFETY INFORMATION
This manual provides important information for all personnel
involved with the safe installation, operation, and proper
maintenance of this product. Even if you feel you are familiar with
this or similar equipment, you should read this manual before
operating the product.
Danger, Warning, Caution, and Notice
Throughout this manual there are steps and procedures which, if
not followed, may result in a hazard. The following signal words
Danger is used to indicate the presence
of a hazard which will cause severe
injury, death, or substantial property
damage if the warning is ignored.
Warningisusedtoindicatethepresence
of a hazard which can cause severe
injury, death, or substantial property
damage if the warning is ignored.
Cautionisusedtoindicatethepresence
of a hazard which will or can cause
injury or property damage if the warning
is ignored.
Notice is used to notify people of
installation, operation, or maintenance
information which is important but not
hazard-related.
are used to identify the level of potential hazard.
Safety Summary
Personal protective and safety equipment required by the
operator’s surrounding environment must be used and maintained
in accordance with manufacturer’s instructions.
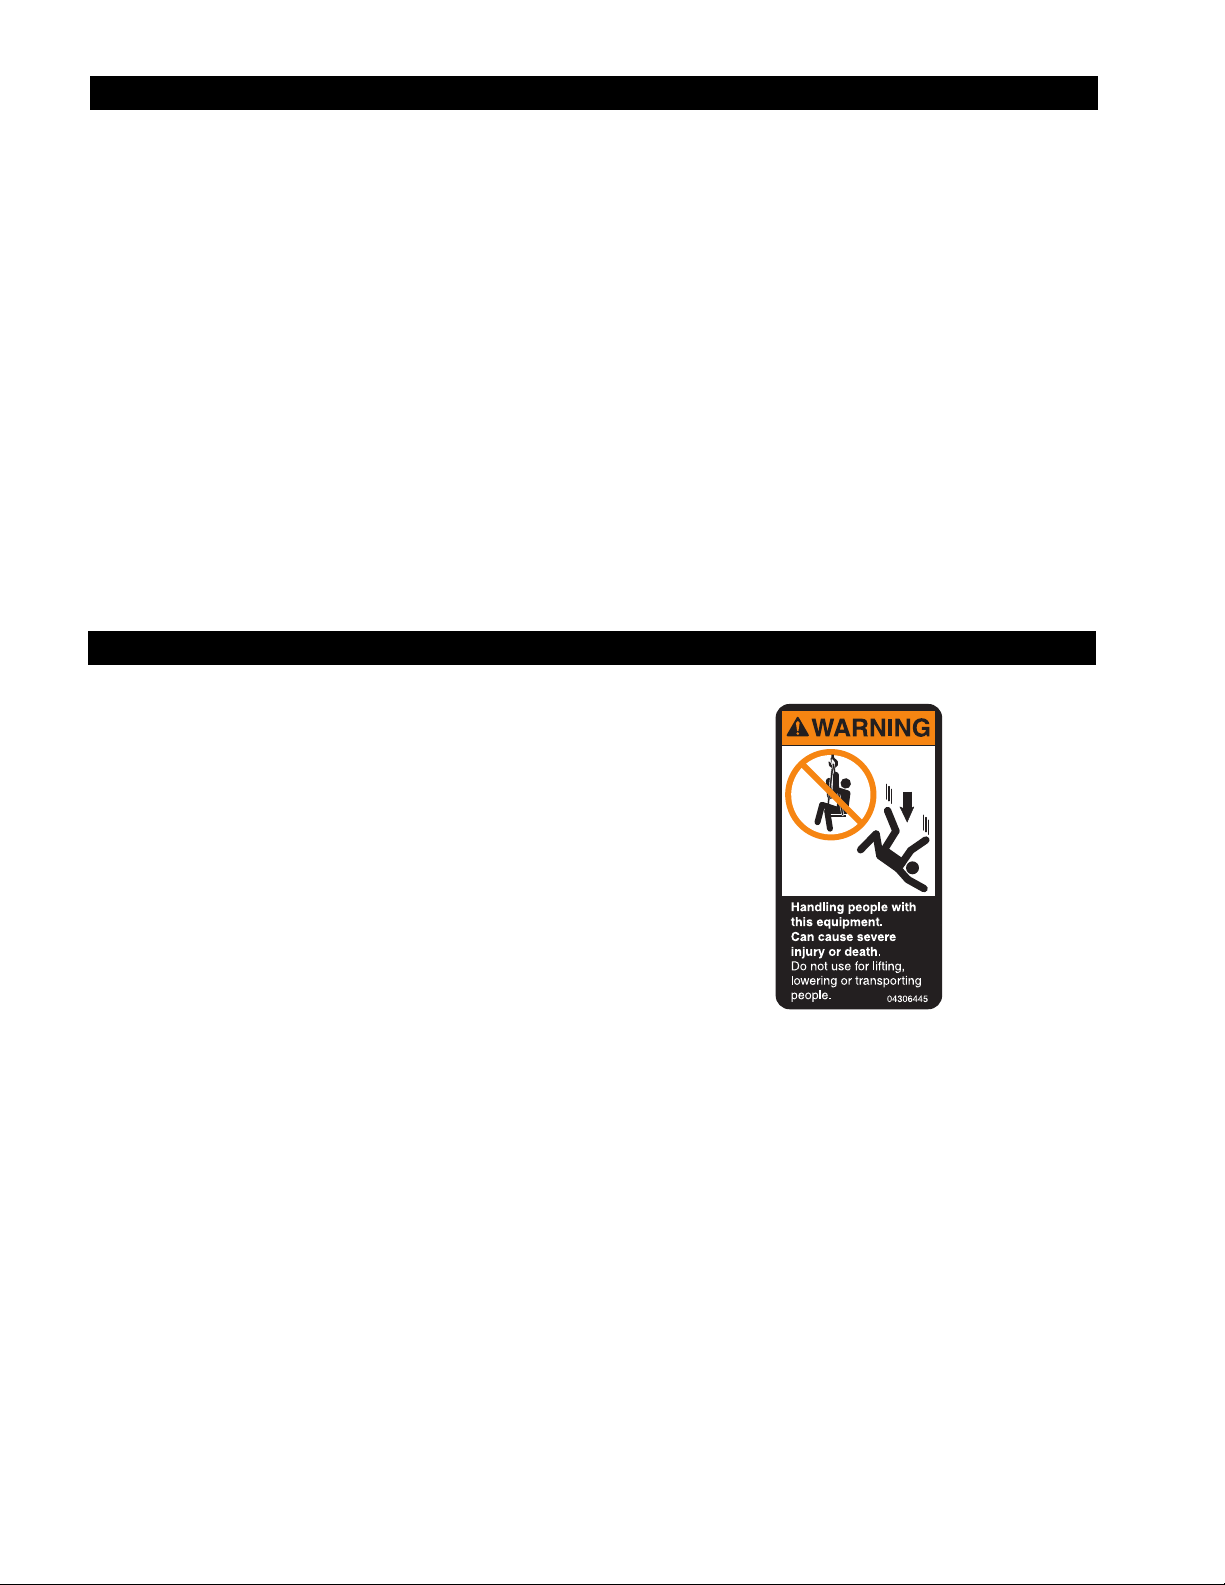
• Do not use this unit or attached equipment for lifting,
supporting, or transporting people or lifting or supporting
loads over people.
• The supporting structures and load-attaching devices used in
conjunction with these units must provide a safety factor of at
least three times the rated capacity of the unit. This is the
customer’s responsibility. If in doubt, consult a registered
structural engineer.
• Lifting equipment is subject to different regulations in each
country. These regulations may not be specified in this
manual.
The National Safety Council, Accident Prevention Manual for
Industrial Operations, Eighth Edition and other recognized safety
sources make a common point: Employees who work near
suspended loads or assist in hooking on or arranging a load should
be instructed to keep out from under the load. From a safety
standpoint, one factor is paramount: conduct all operations in such
a manner that if there were an equipment failure, no personnel
would be injured. This means keep out from under a raised load
and keep out of the line of force of any load.
The Occupational Safety and Health Act of 1970 generally places
the burden of compliance with the owner/employer, not the
manufacturer. Many OSHA requirements are not concerned or
connected with the manufactured product but are, rather,
connected with the final installation. It is the owner’s and user’s
responsibility to determine the suitability of a product for any
particular use. It is recommended that all applicable industry, trade
association, federal, state and local regulations be checked. Read
all operating instructions and warnings before operation.
This manual has been produced by Ingersoll-Rand to provide
dealers, mechanics, operators and company personnel with the
information required to install, operate, maintain and repair the
products described herein.
It is extremely important that mechanics and operators be familiar
with the servicing procedures of these products, or like or similar
products, and are physically capable of conducting the procedures.
These personnel shall have a general working knowledge that
includes:
1. Proper and safe use and application of mechanics common
handtoolsaswellasspecialIngersoll-Rand or
recommended tools.
2. Safety procedures, precautions and work habits established
by accepted industry standards.
Ingersoll-Rand cannot know of, or provide all the procedures by
which product operations or repairs may be conducted and the
hazards and/or results of each method. If operation or maintenance
procedures not specifically recommended by the manufacturer are
conducted, it must be ensured that product safety is not
endangered by the actions taken. If unsure of an operation or
maintenance procedure or step, personnel should place the product
in a safe condition and contact supervisors and/or the factory for
technical assistance.

4MHD56209 - Edition 2
SAFE OPERATION INSTRUCTIONS
The following warnings and operating instructions are intended to
avoid unsafe operating practices which might lead to injury or
property damage.
Ingersoll-Rand recognizes that most companies who use material
handling equipment have a safety program in force at their facility.
If you are aware that some conflict exists between a rule set forth
in this publication and a similar rule already set by an individual
company, the more stringent of the two should take precedence.
Safe Operating Instructions are provided to make an operator
aware of dangerous practices to avoid and are not necessarily
limited to the following list. Refer to specific sections in the
manual for additional safety information.
1. Only allow personnel trained in, safety and operation on this
product to operate and maintain the jib crane.
2. Only operate a jib crane if you are physically fit to do so.
3. When a “DO NOT OPERATE” sign is placed on the jib
crane, do not operate unit until sign has been removed by
designated personnel.
4. Before each shift, check unit for wear and damage. Never use
a unit that inspection indicates is worn or damaged.
5. Never lift a load greater than rated capacity of unit. Refer to
capacity labels attached to the unit.
6. Only operate the unit when the lifting device is centered over
the load. Do not “side pull” or “yard”.
7. Pay attention to the load at all times when operating the unit.
8. Make sure everyone is clear of the load path. Do not lift a
load over people.
9. Never use the unit for lifting or lowering people, and never
allow anyone to stand on a suspended load.
10. Never weld or cut a load suspended by the unit.
11. Do not operate the unit if noise, jamming, or binding occurs.
12. Shut off air or electrical supply before performing any
maintenance.
13. Avoid collision or bumping of the units.
14. Use good posture when operating the system.
15. Check air connections for leakage.
WARNING LABEL
Each Jib Crane is supplied from the factory with the warning label
shown. If the warning label is not attached to your Jib Crane, order
a new label and install it. Refer to parts list for part number. Read
and obey all warnings and other safety information attached to the
Jib Crane. Warning label may not be shown actual size. The
warning label must be clearly visible at all times.
Part Number 04306445

MHD56209 - Edition 2 5
SPECIFICATIONS
Jib cranes consist of a swinging boom which is attached to a
column or wall mount system that offers a large coverage area. Jib
cranes can be used to support a variety of lifting devices.
(Dwg. MHP2022)
Refer to Dwg. MHP2029 on page 9 for baseplate configuration.
Dimensional Notes:
ZRA1 (light)
U Standardcolumns6x6in.(152x152mm)designedfor144in.
(12 ft/3.7 m) under clearance or less.
P Baseplate3/4x18x18in.(19x457x457mm),8-holes7/8in.
(22 mm) diameter on a 16 in. (406.4 mm) bolt circle. 3/4 in.
(19 mm) stud anchors or bolts are to be supplied by the customer.
ZRA2, ZRS2 (medium)
U Standardcolumns8x8in.(203x203mm)designedfor144in.
(12 ft/3.7 m) under clearance or less.
P Baseplate3/4x24x24in.(19x610x610mm),8-holes7/8in.
(22 mm) diameter on a 20 in. (508 mm) bolt circle. 3/4 in. (19 mm)
stud anchors or bolts are to be supplied by the customer.
ZRA2, ZRS3 (heavy)
U Standardcolumns8x8in.(203x203mm)designedfor144in.
(12 ft/3.7 m) under clearance or less.
P Baseplate3/4x24x24in.(19x610x610mm),8-holes7/8in.
(22 mm) diameter on a 20 in. (508 mm) bolt circle. 3/4 in. (19 mm)
stud anchors or bolts are to be supplied by the customer.
Boom
Length
U
OAH
Boom Length + 9.5 inches (241.3 mm) = Light
Boom Length + 10.5 inches (266.7 mm) = Heavy
7
0
0
J
Boom Length + 10.5 inches (266.7 mm) = Medium
ZRA2 Boom Type 220° Rotation (heavy)
Part No. Boom Capacity OAH = U + Weight
ft mlbskg in mm lbs kg
7200JA2F04144 4 1.22
2000 909
39 991
910 413.6
7200JA2F06144 6 1.83 925 420.5
7200JA2F08144 8 2.44 940 427.3
7160JA2F10144 10 3.05 1600 727.3 955 434.1
7135JA2F12144 12 3.66 1350 613.6 970 441
7115JA2F14144 14 4.27 1150 522.7 985 447.7
7100JA2F16144 16 4.88 1000 454.5
51 1295
1000 454.5
7080JA2F18144 18 5.49 800 363.6 1065 484.1
7065JA2F20144 20 6.1 650 294.8 1080 491
ZRA1 Boom Type 220° Rotation (light)
Part No. Boom Capacity OAH = U + Weight
ft mlbskg in mm lbs kg
7090JA1F04144 4 1.22 900 409
38 965
375 170.5
7061JA1F06144 6 1.83 610 277 384 174.1
7046JA1F08144 8 2.44 460 208.7 391 177.7
7037JA1F10144 10 3.05 370 167.8 399 181.4
7030JA1F12144 12 3.66 300 136.4 407 185
7026JA1F14144 14 4.27 260 118 414 188.2
7023JA1F16144 16 4.88 230 104.3 423 192.3
7020JA1F18144 18 5.49 200 90.9 431 195.9
7016JA1F20144 20 6.1 160 72.6 439 199.5
ZRA2 Boom Type 220° Rotation (medium)
Part No. Boom Capacity OAH = U + Weight
ft mlbskg in mm lbs kg
7200JA2F04144 4 1.22 2000 909
39 991
660 300
7140JA2F06144 6 1.83 1400 636.4 675 307
7105JA2F08144 8 2.44 1050 477.3 690 313.6
7080JA2F10144 10 3.05 800 363.6 705 320.5
7070JA2F12144 12 3.66 700 318.2 720 327.3
7060JA2F14144 14 4.27 600 272.7 735 334.1
7050JA2F16144 16 4.88 500 227.3 782 355.5
7045JA2F18144 18 5.49 450 204.5 797 362.3
7040JA2F20144 20 6.1 400 181.8 812 369.1
ZRS2 Boom Type 220° Rotation (medium)
Part No. Boom Capacity OAH = U + Weight
ft mlbskg in mm lbs kg
7200JS2F04144 4 1.22 2000 909
39 961
660 300
7140JS2F06144 6 1.83 1400 636.4 675 306.8
7105JS2F08144 8 2.44 1050 477.3 690 313.6
7085JS2F10144 10 3.05 850 385.6 705 320.5
7070JS2F12144 12 3.66 700 318.2 720 327.3
7060JS2F14144 14 4.27 600 272.7 735 334.1
7053JS2F16144 16 4.88 530 240.4 782 355.5
7048JS2F18144 18 5.49 480 217.7 797 362.3
7042JS2F20144 20 6.1 420 190.5 812 369.1
ZRS3 Boom Type 220° Rotation (heavy)
Part No. Boom Capacity OAH = U + Weight
ft mlbskg in mm lbs kg
7200JS3F04144 4 1.22
2000 909
40 1016
910 413.6
7200JS3F06144 6 1.83 927 421.4
7200JS3F08144 8 2.44 944 429.1
7160JS3F10144 10 3.05 1600 727.3 961 436.8
7135JS3F12144 12 3.66 1350 613.6 978 444.5
7115JS3F14144 14 4.27 1150 522.7 995 452.3
7100JS3F16144 16 4.88 1000 454.5
52 1321
1062 482.7
7080JS3F18144 18 5.49 800 363.6 1079 490.5
7060JS3F20144 20 6.1 600 272.7 1096 498.2

6MHD56209 - Edition 2
Refer to “INSTALLATION” section on page 9, and ‘Wall Mount’
on page 10 for additional mounting information.
1/2 inch (13 mm) Plate
Boom
Length
10 inches
(254 mm)
6 inches
(152.4 mm)
ZRA1
7 inches
(177.8 mm)
ZRS2
Section A
Section A
OAH
ZRA1 and ZRS2
(Dwg. MHP2024)
5/8 inch (16 mm) Plate
Boom
Length
Section A
Section A
12 inches
(304.8 mm)
8 inches
(203.2 mm)
OAH
ZRA2 and ZRS3
(Dwg. MHP2025)
Contact Factory for Model 900J Jib Crane Specifications.
ZRA1 Boom Type Wall Mount (light)
Part No. Boom Capacity OAH Weight
ft mlbskg in mm lbs kg
7100JA1W04 4 1.22
1000 454.5
44 1118
120 54.5
7100JA1W06 6 1.83 131 59.5
7100JA1W08 8 2.44 142 64.5
7080JA1W10 10 3.05 800 363.6 153 69.5
7050JA1W12 12 3.66 500 227.3 164 74.5
7036JA1W14 14 4.27 360 163.3 175 79.5
7026JA1W16 16 4.88 260 117.9 186 84.5
7020JA1W18 18 5.49 200 90.9 197 89.5
7016JA1W20 20 6.1 160 72.6 208 94.5
ZRS2 Boom Type Wall Mount (medium)
Part No. Boom Capacity OAH Weight
ft mlbskg in mm lbs kg
7200JS2W04 4 1.22
2000 909
44 1118
145 65.9
7200JS2W06 6 1.83 163 74.1
7200JS2W08 8 2.44 181 82.3
7190JS2W10 10 3.05 1900 868.6 199 90.5
7160JS2W12 12 3.66 1600 727.3 217 98.6
7100JS2W14 14 4.27 1000 454.5 235 106.8
7080JS2W16 16 4.88 800 363.6
56 1423
266 120.9
7060JS2W18 18 5.49 600 272.7 310 140.9
7045JS2W20 20 6.1 450 204.5 354 160.9
ZRA2 Boom Type Wall Mount (heavy)
Part No. Boom Capacity OAH Weight
ft mlbskg in mm lbs kg
7200JA2W04 4 1.22
2000 909
44 1118
145 65.9
7200JA2W06 6 1.83 154 70
7200JA2W08 8 2.44 181 82.3
7190JA2W10 10 3.05 1900 863.6 199 90.5
7160JA2W12 12 3.66 1600 727.3 217 98.6
7135JA2W14 14 4.27 1350 613.6 235 106.8
7100JA2W16 16 4.88 1000 454.5
56 1423
266 120.9
7080JA2W18 18 5.49 800 363.6 310 140.9
7060JA2W20 20 6.1 600 272.7 354 160.9
ZRS3 Boom Type Wall Mount (heavy)
Part No. Boom Capacity OAH Weight
ft mlbskg in mm lbs kg
7200JS3W04 4 1.22
2000 909
44 1118
146 66.4
7200JS3W06 6 1.83 166 75.5
7200JS3W08 8 2.44 186 84.5
7195JS3W10 10 3.05 1950 884.5 206 93.6
7160JS3W12 12 3.66 1600 727.3 226 102.7
7135JS3W14 14 4.27 1350 613.6 246 111.8
7100JS3W16 16 4.88 1000 454.5
56 1423
278 126.4
7080JS3W18 18 5.49 800 363.6 322 146.6
7060JS3W20 20 6.1 600 272.7 366 166.4

MHD56209 - Edition 2 7
(Dwg. MHP2023)
Refer to Dwg. MHP2029 on page 9 for baseplate configuration.
Dimensional Notes:
ZRA1, ZRA2 and ZRS2 (medium)
U Standardcolumns6x6in.(152x152mm)designedfor144in.
(12 ft/3.7 m) under clearance or less.
P Baseplate3/4x18x18in.(19x457x457mm),8-holes7/8in.
(22 mm) diameter on a 16 in. (406.4 mm) bolt circle. 3/4 in. (19 mm)
stud anchors or bolts are to be supplied by the customer.
ZRS2 Boom Type 360° Rotation
Part No. Boom Capacity OAH = U + Weight
ft mlbskg in mm lbs kg
8082JS2F04144 4 1.22 820 371.9
38 965
419 190.5
8055JS2F06144 6 1.83 550 250 435 197.7
8041JS2F08144 8 2.44 410 186 451 205
8033JS2F10144 10 3.05 330 149.7 467 212.3
8027JS2F12144 12 3.66 270 122.5 483 219.5
8023JS2F14144 14 4.27 230 104.3 499 226.8
8020JS2F16144 16 4.88 200 90.9 515 234.1
8018JS2F18144 18 5.49 180 81.6 531 241.4
8016JS2F20144 20 6.1 160 72.6 547 248.6
OAH
U
Boom
Length
Boom Length + 5-1/8 inches (130 mm)
8
0
0
J
ZRA1 Boom Type 360° Rotation
Part No. Boom Capacity OAH = U + Weight
ft mlbskg in mm lbs kg
8082JA1F04144 4 1.22 820 371.9
38 965
415 188.6
8055JA1F06144 6 1.83 550 250 423 192.3
8041JA1F08144 8 2.44 410 186 431 195.9
8033JA1F10144 10 3.05 330 149.7 439 199.5
8027JA1F12144 12 3.66 270 122.5 447 203.2
8023JA1F14144 14 4.27 230 104.3 455 206.8
8020JA1F16144 16 4.88 200 90.9 463 210.5
8018JA1F18144 18 5.49 180 81.6 471 214.1
8016JA1F20144 20 6.1 160 72.6 479 217.7
ZRA2 Boom Type 360° Rotation
Part No. Boom Capacity OAH = U + Weight
ft mlbskg in mm lbs kg
8082JA2F04144 4 1.22 820 371.9
38 965
419 190.5
8055JA2F06144 6 1.83 550 250 435 197.7
8041JA2F08144 8 2.44 410 186 451 205
8033JA2F10144 10 3.05 330 149.7 467 212.3
8027JA2F12144 12 3.66 270 122.5 483 219.5
8023JA2F14144 14 4.27 230 104.3 499 226.8
8020JA2F16144 16 4.88 200 90.9 515 234.1
8018JA2F18144 18 5.49 180 81.6 531 241.4
8016JA2F20144 20 6.1 160 72.6 547 248.6
(Dwg. MHP2046)
*Rail sections not shown to scale.
Contact Factory for Model 900J Jib Crane Specifications.
7.00
(177.8 mm) X
Y
1.31
(33 mm)
1.38
(35.1 mm)
3.74
(95 mm)
2.51
(64 mm)
3.26
(82.8 mm)
0.94
(23.9 mm)
4.13
(104.9 mm)
4.90
(124.5 mm)
X
Y
0.65
(16.5 mm)
0.71
(18.03 mm)
2.65
(67.3 mm)
0.94
(23.9 mm)
2.44
(62 mm)
5.91
(150.1 mm)
1.03
(26 mm)
3.07
(78 mm) 3.70
(94 mm)
1.28
(32.5 mm)
X
Y
3.76
(95.5 mm)
7.13
(181.1 mm)
0.94
(23.9 mm)
1.28
(32.5 mm)
X
Y
3.76
(95.5 mm)
ZRS2
ZRA2 ZRA1 ZRS3

8MHD56209 - Edition 2
Model 700J, 800J and 900J Jib Crane Model Driver
Example = 7 080 J S2 F 08 144
Style:
7 (220° Rotation)
8 (360° Rotation)
9 (360° Rotation)
Capacity:
080 = 800 lbs (364 kg)
Refer to charts in “SPECIFICATIONS” section on page 5
for available capacities.
Jib:
Rail Type:
A1 = ZRA1
A2 = ZRA2
A2T = ZRA2T
S2 =ZRS2
S3 = ZRS3 or ZRS3T
Mount Type:
F=Floor
W=Wall
Boom Length:
04 = 4 ft (1.22 m)
06 = 6 ft (1.83 m)
08 = 8 ft (2.44 m)
10 = 10 ft (3.05 m)
12 = 12 ft (3.66 m)
14 = 14 ft (4.27 m)
16 = 16 ft (4.88 m)
18 = 18 ft (5.49 m)
20 = 20 ft (6.10 m)
Underclearance:
144 =144 in (3657.6 mm) Column Mount Only

MHD56209 - Edition 2 9
INSTALLATION
Prior to installing unit, carefully inspect it for possible shipping
damage.
• Owners and users are advised to examine specific, local or
other regulations, including American National Standards
Institute and/or OSHA Regulations which may apply to a
particular type of use of this product before installing or
putting the unit into use.
• A falling load can cause injury or death. Before installing,
read “SAFETY INFORMATION” on page 3.
Mounting
Make certain unit is properly installed. A little extra time and
effort in doing so can contribute a lot toward preventing accidents
and helping you get the best service possible.
Always make certain the existing structure, that the unit is
mounted to, is strong enough to support the weight of the unit plus
the weight of a maximum rated load plus a generous factor of at
least 300% of the combined weights. Always contact a registered
structural engineer.
Space Requirements
Take the necessary time to determine the best installation location
to optimize the system’s capability. Allow adequate space, clear of
system and attachments, for safe traffic flow of personnel and
materials to and from the area. Allow clearance for the height of
transported loads and necessary work space. For optimum system
life, install the system indoors, or under shelter to reduce exposure
to weather.
Visually define where to install the system by marking the boom
pivot point on the work space floor, and marking off the boom tip
radius. This mock-up allows you to walk off the proposed load
path and direction of travel.
Tool Requirements
Typical Installation
• Socket set 1/2 in. drive
• Ladders / man lifts
• Leveling tools
• Lifting device to lift column and boom
•Mallet/hammer
• Chalk line
• Tape measure
• Torque wrench (up to 108 ft-lbs (147 Nm))
• Steel shims
• Anchor bolts (3/4 in. dia. max.)
• Non-shrinking grout
• Ensure ladders or scaffolding used by installation personnel
are reliable and capable of supporting the combined weight of
theinstallerandequipment.
• DO NOT replace self-locking nuts with standard nuts and
lockwashers. DO NOT reuse self-locking nuts. All fasteners
for jib crane must be grade 5 or better.
• Do not overtighten fasteners or bolts. Overtightening may
weaken fasteners.
Refer to ‘Safety Information’ section on page 3 before installing
rail system.
Erecting Column
1. Mark jib crane column location on mounting surface with
chalk.
2. Install footings (if required) per registered structural
engineer’s instructions. If footings are not required, install
anchors per the engineer’s and manufacturer’s specifications.
Referto“AnchoringtheSystem”onpage10.
3. Positioncolumninplace.
4. Plumb and level the column using the appropriate method as
described in either the Nut Leveling Method or the Shim
Leveling Method, then tighten anchor bolts to
manufacturer’s torque specifications.
(Dwg. MHP2029)
Torque Specification Table
Bolt Dia.
inches
Grade 5 Tightening Torque
Dry Lubricated
ft-lb Nm ft-lb Nm
1/4 - 20 8 11 6 8
5/16 - 18 17 23 13 18
3/8 - 16 31 42 23 31
1/2 - 13 76 103 57 77
5/8 - 11 150 203 112 151
A
A
C
B
Jib Crane Models
700J, 800J and 900J

10 MHD56209 - Edition 2
Use 3/4 in. Grade 5 or better bolts.
Anchoring the System
• For proper installation of a floor supported jib crane system
a minimum of a 6 in. (15.2 cm) thick reinforced concrete floor
is required. Ingersoll-Rand assumes no responsibility for the
conditions of the mounting surface. Consult a registered
structural engineer before installing the jib crane.
• Column anchorages should be designed by a registered
structural engineer who is licensed in the state the system is
being erected. This is required to ensure local building codes
and laws, possible seismic loading considerations and variance
in concrete slab and soil conditions are addressed.
Nut Leveling Method
1. Thread the 8 bottom hex nuts with washers onto the anchor
bolts so the top of the washers are 1 inch (25 mm) above the
mounting surface.
2. Set column on anchor bolts and thread remaining 8 hex nuts
and washers down hand tight.
3. Place a level on one face of the column and plumb vertical by
adjusting hex nuts on that side of the base plate up or down as
needed.
4. Repeat step 3 on an adjacent side.
5. Recheck the side of the column plumbed in step 3 and repeat
steps 3, 4 and 5 until both sides are plumb.
6. Tighten upper hex nuts to the anchor bolt manufacturers
recommended torque while making sure lower hex nuts
remain fixed.
7. Pack remaining void below base plate with non-shrinking
grout until grout is flush with all sides of base plate
.
(Dwg. MHP1609)
Shim Leveling Method
1. Set column on anchor bolts and thread 8 hex nuts and
washersdownhandtight.
2. Place a level on the face of the column and plumb vertical by
loosening anchor bolt nuts as necessary and placing shims
under base plate on that side of the column as needed.
3. Repeat step 2 on an adjacent side.
4. Recheck the side of the column plumbed in Step #2 and
repeat steps 2, 3 and 4 until both sides are plumb.
5. Tighten the hex nuts to anchor bolt manufacturers
recommended torque.
6. Pack remaining void below the base plate with non-shrinking
grout until grout is flush with all sides of base plate.
(Dwg. MHP1859)
• If complete rigidity of the system is required, then additional
bracing (not included) is necessary.
Wall Mount
Model 700J
Zimmerman Handling Systems assumes no responsibility for the
strength of structures to which the Jib is mounted. Any structure to
which the Jib is mounted should be certified for this purpose by a
registered structural engineer.
Model
Dimensions
ABC
ins mm ins mm ins mm
700J Light Duty
18 457
0.875 22.2
16 406800J Light Duty
900 J Light Duty
700J Medium and
Heavy Duty
24 610 20 508
800J Medium and
Heavy Duty
900J Medium and
Heavy Duty
(3/4 in. dia. max.)
1.00 in.
(25 mm)
(3/4 in. dia. max.)

MHD56209 - Edition 2 11
1. Bolt brackets to structurally adequate wall, pipe or column.
Bracket (17) and angle clamps (15) are drilled to
accommodate 5/8 in. diameter bolts or studs. Refer to Dwg.
MHP2112onpage11forpositionofholes.
2. Make sure the mounting bracket is vertical. Plumb through the
pivot bracket holes. Note: Do not attempt to level via the
boom assembly. When the boom is leveled properly the
distance from the bottom of the boom to the floor should not
vary more than 1/640 of the span over the length of the boom.
(Dwg. MHP2112)
3. Slide festoon gliders, festoon clamp (if applicable) and the
hoisttrolleyintotheopenendoftheboomtrack.Ifusing
festoon gliders be sure that they are inserted into the track
before the hoist trolley, to insure proper operation when using
electrification. Install the end stop through bolts immediately
so the trolley does not roll out of the end of the track.
4. Carefully swing boom through entire travel to insure the boom
is clear of any obstructions.
Column Mount
Models 700J and 800J
1. Place the boom assembly onto the column.
2. Be sure the boom is leveled properly. Level by adjusting the
tie rod. When the boom is leveled properly the distance from
the underside of the boom to the floor, should not vary more
than 1/640 of the span over the length of the boom.
3. Slide festoon gliders (if applicable) and the hoist trolley into
the open end of the boom track. If using festoon gliders be
sure that they are inserted into the track before the trolley to
insure proper operation when using electrification. Install the
end stop through bolt immediately so the trolley does not roll
out of the end of the track.
4. Carefully swing boom through entire travel to insure the boom
is clear of any obstructions.
Model 900J
Providing column is correctly installed and vertical, boom level
adjustments should not be required. Follow steps 3 and 4 for
festoon installation and boom clearance information.
Adjustable Rotation Stops
Models 700J, 800J and 900J (Optional Feature)
220° Swivel (Reference Dwg. MHP2012 on page 36.)
1. Install adjustable stop plate (101) on column with angle
brackets (102). Loosely clamp plate and angle brackets to
column with threaded rod (103), nuts (105) and washers
(104).
2. Position adjustable stop plate just above the top of the boom.
Swing boom through its full rotational travel to ensure there is
no contact.
3. Install bumpers (110) with capscrews (111), nuts (112) and
washers (113) to bumper brackets (106).
4. Install assembled bumper brackets to plate (101) with
capscrews (107), nuts (108) and washers (109).
5. Position bumpers toward the boom. Select required hole
positions to limit the range of boom movement.
6. Once rotation stops are correctly positioned tighten all
capscrews and nuts.
7. Recheck boom rotation to ensure there is no interference and
only bumpers contact boom.
360° Swivel (Reference Dwg. MHP2013 on page 36.)
1. Install lower stop plate (122) between column and pivot
assembly (52). Ensure attached stop plate is up.
2. Install pivot assembly (52) and upper stop plate (121). Install
boom mount (13).
3. Install bumpers (124) with capscrews (125), nuts (126) and
washers (127) to bumper brackets (123).
4. Install assembled bumper brackets to upper stop plate (121)
with capscrews (128), nuts (129) and washers (130).
5. Position bumpers toward the boom. Select required hole
positions to limit the range of boom movement.
6. Once rotation stops are correctly positioned tighten all
capscrews and nuts.
7. Recheck boom rotation to ensure there is no interference and
only bumpers contact boom.
Pre-installation Checklist
1. Is the proposed system location away from normal personnel
traffic patterns?
2. Will the operator be able to clearly see the load along its path
of travel at all times?
3. Is the location within easy and safe reach of the load receiving
area?
4. Do personnel and materials have clear access to and from the
system?
Model
Jib Boom Type
ZRA1 ZRS2 ZRA2/ZRS3
in mm in mm in mm
A“ColumnWidth” 6 152.4 7 177.8 8 203.2
E10
254 10 254 12 304.8
F6.75
171.5 7.75 196.8 8.75 222.2
Dimensions
Jib Boom Length
Less than 15 ft. More than 15 ft.
in mm in mm
C44
1117.6 56 1422.4
C1 33 838.2 45 1143
3.50
(89 mm)
8.00
(203.2 mm)
12.00
(304.8 mm)
…-20
2 Places
1.25
(31.7 mm)
C
C1
C1
E
F
3.25
(82.6 mm) 1.5
(38.1 mm)
D
0.69
(17.5 mm)
8 Places
8.00
(203.2 mm)
0.69
(17.5 mm)
2 Places
F
E
A
5.00
(127 mm)
5.00
(127 mm) 1.5
(38.1 mm)
D + 3.00
(76.2 mm)
3.00
(76.2 mm)
0.25 (Ref)
(6.4 mm)
0.25 (Ref)
(6.4 mm)

12 MHD56209 - Edition 2
5. Has the Jib Crane’s anchorage been designed by a registered
structural engineer to suit the installation?
6. Will the Jib Crane conflict with utility supply lines, overhead
electrical conduit or any utility that could represent a
potential danger?
7. Does the proposed location allow enough space for
maximum load travel in the direction you propose?
8. Istheproposedlocationinanareaeasilykeptcleanandfree
of obstruction?
9. Does the proposed location and installation meet all
applicable code requirements?
If you answered no to any of these questions, please copy and
fax this checklist to Ingersoll-Rand at 248-293-5800 for a free
initial consultation.
•
• Check the installation area for conflicts with utility supply
lines, overhead electrical conduits or any utility that could
present potential danger to the system or personnel.
• System installation, maintenance and disassembly
procedures require at least two people. Parts are too large and
heavy for one person to safely handle.
The following should be adhered to during installation:
1. All bolted constructions must be completely tightened and
torquedtospecificationsasshownintheTorque
Specification Table on page 9.
• Before starting installation, clear workspace or set-up area of
debris or obstructions. Always keep system workspace clear of
obstruction, debris, spills and standing water.
Air System
Most handling devices will require an air supply which is clean
and free from water, water vapor and oil. 6.9 bar/690 kPa (100 psi)
at the handling device is normally required to provide rated
capacity. Do not exceed 6.9 bar/690kPa (100 psi).
• Do not use an air line lubricator of any kind. Oil may damage
internal components.
Check handling device manufacturer’s specifications for correct
air supply requirements.
1. Install handling device on Jib Crane.
2. Install air system as described in “MAINTENANCE” section
on page 17.
3. Connect air supply to handling device.
4. Turn on air supply and check system for leaks.
5. Operate handling device.
Referto“AIRSUPPLYASSEMBLY”onpage33inpartssection
for air supply kits.
Electrification System
1. Install handling device on Jib Crane.
2. Install electrification system as described in
“MAINTENANCE” section on page 17.
3. Connect electrical power supply to handling device.
4. Turn on power.
5. Operate handling device.
Refer to “ELECTRIFICATION ASSEMBLY” on page 35 in parts
section for electrification kits.
Installation Test
Step 1
Verify that jib crane boom, hoist, positioner or handling device
move freely throughout entire intended work space without
binding.
Step 2
Lift a test load while standing clear of the system. This load
should be 1/4 the maximum load. Notice any problems that may
occur while lifting this load. Repeat step 1 with this load. At each
testing step, correct any problems that may occur while testing
system, and retest if necessary before continuing to the next step.
Step 3
Repeat steps 1 and 2, lifting the maximum rated load. Correct any
problems that may occur while lifting this load, and retest if
necessary before putting system into service. If you encounter a
problem you do not know how to correct, call your nearest
Ingersoll-Rand office or distributor.

MHD56209 - Edition 2 13
OPERATION
Description Of Operation
The Jib Crane is an integrated group of components designed to
maximize the interaction of man and machine.
Positioning a load is best accomplished by the operator, when
moving away from the Jib Crane pivot point. Jib Crane will freely
follow.
General Operating Information
Operate the Jib Crane and trolley from a position that allows you
to observe the load and intended path of movement of the load.
Do not walk in the path of a moving load, or walk backwards
when moving a load.
Refer to the handling device Parts, Operation and Maintenance
manual for specific instructions on raising and lowering the load.
Always look in the direction you are moving.
Ya r d in g
• Do not operate the unit if load is not centered under the
lifting device. Yarding can result in uncontrolled load
movement.
Load should not be yarded more than 10 degrees in any direction
from the center line of the lifting device.
Excessive yarding will cause increased wear on the unit and may
decrease the working life of the components.

14 MHD56209 - Edition 2
INSPECTION
• All new, altered or modified equipment should be inspected
and tested by personnel instructed in safety, operation and
maintenance of this equipment to ensure safe operation at
rated specifications before placing equipment is service.
• Never use a unit that inspection indicates is damaged.
Frequent and periodic inspections should be performed on
equipment in regular service. Frequent inspections are visual
examinations performed by operators or personnel trained in
safety and operation of this equipment and include observations
made during routine equipment operation. Periodic inspections are
thorough inspections conducted by personnel trained in the safety,
operation and maintenance of this equipment. Inspection intervals
depend upon the nature of the critical components of the
equipment and the severity of usage.
Careful inspection on a regular basis will reveal potentially
dangerous conditions while still in the early stages, allowing
corrective action to be taken before the condition becomes
dangerous.
Deficiencies revealed through inspection, or noted during
operation, must be reported to designated personnel instructed in
safety, operation and maintenance of this equipment. A
determination as to whether a condition constitutes a safety hazard
must be decided, and the correction of noted safety hazards
accomplished and documented by written report before placing
the equipment in service.
Records and Reports
Inspection records, listing all points requiring periodic inspection
should be maintained for all load bearing equipment. Written
reports, based on severity of service, should be made on the
condition of critical parts as a method of documenting periodic
inspections. These reports should be dated, signed by the person
who performed the inspection, and kept on file where they are
readily available for authorized review.
Frequent Inspections
For equipment in continuous service, frequent inspections should
be made by operators at the beginning of each shift.
1. OPERATION. Check Jib Crane for full range of motion,
smooth operation and ease of movement. Locate the source
of any binding or rough operation and repair.
2. THREADED CONNECTIONS. Check all threaded
connections for tightness. Tighten if loose or replace if
damaged.
3. MOUNTING. If any loose or missing hardware is detected,
tighten or replace.
4. AIR SYSTEM. Visually inspect all connections, fittings,
hoses and components for indication of air leaks. Repair any
leaks or damage, tighten any loose connections.
5. ELECTRICAL SYSTEM. Visually inspect all connections
and components for indication of damage or loose
connections. Shut off and disconnect power prior to
removing inspection covers, repairing any damage or
tightening connections.
Periodic Inspection
Frequency of periodic inspection depends on the severity of usage:
Disassembly may be required for HEAVY or SEVERE usage.
Keep accumulative written records of periodic inspections to
provide a basis for continuing evaluation.
Inspect all the items in “Frequent Inspection” on page 14. Also
inspect the following:
1. FASTENERS. Check all cotter pins, capscrews and nuts.
Replace if missing or tighten if loose.
2. ALL COMPONENTS. Inspect for wear, damage,
deterioration, deformation and cleanliness. If external
evidence indicates the need, disassemble. Check bearings,
rollers, and plates. Replace worn or damaged parts. Clean,
lubricate and reassemble.
3. PIVOT ASSEMBLY. Inspect pivoting connections for
looseness, bearing wear, and smooth operation. Repair or
replace any loose or worn components.
4. SUPPORTING STRUCTURE. Check for distortion, wear
and continued ability to support load.
5. LABELS AND TAGS. Check for presence and legibility of
labels. Replace if damaged or missing.
6. HANDLING DEVICE. Inspect in accordance with
recommendations in manufacturers Parts, Operation and
Maintenance manual.
Units Not in Regular Use
1. Units which have been idle for a period of one month or
more, but less than one year, should be given an inspection
conforming with the requirements of “Frequent Inspection”
on page 14 prior to being placed into service.
2. Unitswhichhavebeenidleforaperiodofmorethanoneyear
should be given an inspection conforming with the
requirements of “Periodic Inspection” on page 14 prior to
being placed into service.
3. Standby units should be inspected at least semiannually in
accordance with the requirements of “Frequent Inspection”
on page 14. In abnormal operating conditions, units should be
inspected at shorter intervals.
NORMAL HEAVY SEVERE
yearly semiannually quarterly

MHD56209 - Edition 2 15
INSPECTION AND MAINTENANCE REPORT
Ingersoll-Rand Jib Crane
This page may be photocopied and used as an Inspection/Maintenance record.
Model Number: Date:
Serial Number: Inspected By:
Reason for Inspection: (Check Applicable Box)
1. Scheduled Periodic Inspection
( ______ Quarterly ______ Semiannually ______ Yearly)
Operating Environment:
2. Discrepancies noted during Frequent Inspection
3. Discrepancies noted during Maintenance Normal _______ Heavy _______ Severe _______
4. Other:
_____________________________________________________
Refer to the Parts, Operation and Maintenance Manual “INSPECTION” section on page 14 for general inspection criteria. Also, refer to
appropriate National Standards and codes of practice. If in doubt about an existing condition, contact the nearest Ingersoll-Rand
Distributor or the factory for technical assistance.
COMPONENT CONDITION CORRECTIVE NOTES
Pass Fail Repair Replace
Column
Boom/Rail
Fasteners
Bearings ---
Trolley
End Stops
Pivot Assembly
Tie Rod
Air System
Rollers
Supporting Structure
Electrical System
Labels and Tags ---
Other Components
(list in NOTES section)

16 MHD56209 - Edition 2
LUBRICATION
Pivot assembly (52) is pre-packed with grease at the factory and
should not require any additional lubrication.
If after time it becomes necessary to disassemble the pivot
assembly, all parts should be cleaned with a mineral spirit solution
and the bearings repacked with grease. Recommended lubricant
(10885) is available through Ingersoll-Rand.
Trolley
Trolley wheels have anti-friction bearings which are lubricated for
life and only require replacement under extreme conditions. If
these wheels must be replaced, they can be ordered separately.
TROUBLESHOOTING
The following table is for Jib Crane specific problems. This section provides basic troubleshooting information. Determination of specific
causes to problems are best identified by thorough inspections performed by personnel instructed in safety, operation and maintenance of this
equipment. The chart below provides a brief guide to common problems, probable causes and remedies. Refer to manufacturers Manual for
specific lifting device problems.
Symptom Possible Cause Remedy
Jib Crane movement is stiff. Swivel assembly bearings require
lubrication.
Check locknut adjustment and lubricate bearings.
Clevis bushings are worn or require
lubrication.
Inspect bushings and replace if worn.
Change in rolling effort or erratic
operation.
Dirt or obstruction in rail. Clean all parts and inspect for wear.
Damaged or bent rail. Inspect rail and replace if damaged or bent.
Determine cause of damage prior to operation.
Worn or damaged trolley wheels and/or
guide rollers.
Inspect wheels and rollers. Replace damaged parts.
Unusual noises. Broken trolley guide roller and/or wheel. Inspect and replace damaged parts.
Dirt or obstruction in rail. Clean all parts and inspect for wear.
Load creeping. Jib boom not level. Level components to specifications.
Jib crane overloaded. Reduce load to within rated capacity.
Hoist, positioner or handling device
malfunctioning.
Leaking or damaged air hose, fittings or
electrical cable.
Check and repair leaks. Tighten fittings if loose.
Replace electrical cable. Refer to hoist, positioner or
handling device service manual for additional repair
instructions.

MHD56209 - Edition 2 17
MAINTENANCE
• Use of other than genuine Ingersoll-Rand replacement parts
couldresultindamagetotheunitandvoidthewarranty.
• Never perform maintenance on the Jib Crane while it is
supportingaload.
• Before performing maintenance, tag unit:
WARNING - DO NOT OPERATE -
EQUIPMENT BEING REPAIRED.
• Only allow service personnel trained in safety and
maintenance on this unit to perform maintenance.
• After performing any maintenance on the unit, adjust and
test unit in specified application before returning to service.
Maintenance Intervals
The Maintenance Interval chart is based on intermittent operation
of the unit eight hours each day, five days per week. If unit
operation exceeds eight hours per day, or use is under HEAVY or
SEVERE conditions, more frequent maintenance should be
performed. Refer to ‘Periodic Inspection’ in the “INSPECTION”
section on page 14 for interval guidance.
Disassembly
700J Jib Crane
Refer to Dwg. MHP1993 on page 22 and MHP1996 on page 24.
1. Turn off all power to lifting device and disconnect power
source.
2. Remove lifting device from Jib Crane trolley.
3. Remove capscrews (31), nuts (32) and end caps (30) and (34)
from boom (41) tip.
4. Remove cotter pin (20) then loosen nuts (21) on tie rod (39).
5. Support the weight of the boom (41) and remove shoulder
screw (11) and nut (10) from suspension clevis (25).
6. Remove capscrew (2), nut (8) and washer (7) from lower
boom clevis (40).
7. Slide boom from mounting bracket (17) or column (12) and
carefully lower to the floor. Save thrust bearing (6) and thrust
washer (3) which will come loose when boom is removed.
8. Remove capscrew (2), nut (8) and washer (7) from top clevis
(5).
9. Remove tie rod and top clevis assembly. Save thrust bearing
(6) and thrust washer (3) which will come loose when tie rod
and top clevis assembly is removed.
10. Remove shoulder bolt (9) and nut (10) from top clevis (5) and
separate parts.
11. Loosen nuts (27) on suspension clevis and slide suspension
brackets (24) from boom (41).
800J Jib Crane
Refer to Dwg. MHP1994 on page 26.
1. Turn off all power to lifting device and disconnect power
source.
2. Remove lifting device from Jib Crane trolley.
3. Remove capscrews (31), nuts (32) and end cap (30) from
boom (41) tip.
4. Remove cotter pin (20) then loosen nuts (21) on tie rod (39).
5. Support the weight of the boom (41) and remove shoulder
screw (11) and nut (10) from suspension clevis (25).
6. Remove capscrews (36) and nuts (35) from upper mast (13).
7. Slide boom from upper mast mounting bracket and carefully
lower to the floor.
8. Remove shoulder screw (11) and nut (10) from upper mast.
9. Remove tie rod assembly.
10. Remove capscrews (9), nuts (8) and lockwashers (7) which
secure upper mast (13) to pivot assembly (52). Remove upper
mast.
11. Remove capscrews (2), nuts (8) and lockwashers (7) from
lower column (12). Remove pivot assembly from lower
column.
900J Jib Crane
Refer to Dwg. MHP1995 on page 28.
1. Turn off all power to lifting device and disconnect power
source.
2. Remove lifting device from Jib Crane trolley.
3. Remove capscrews (36) and nuts (35) from boom (41) at
column end.
4. Support the weight of the boom (41) and slide boom from
upper mast mounting bracket (13). Carefully lower to the
floor.
5. Remove capscrews (9), nuts (8) and lockwashers (7) which
secure boom mount (13) to pivot assembly (52). Remove
boom mount.
6. Remove capscrews (9), nuts (8) and lockwashers (7) from
column (12). Remove pivot assembly (52) from column.
INTERVAL MAINTENANCE CHECK
Start of each shift
(Operator or
Maintenance
Personnel)
Make a thorough visual inspection of
the Jib Crane and attached components
for damage. Do not operate the unit, or
components, if damaged.
Operate the unit through the normal
range of movements. Unit must operate
smoothly without sticking, binding or
abnormal noises.
3 months
(Maintenance
Personnel)
Check operation of lifting device. Refer
to manufacturer’s manual for
maintenance information.
Yearly
(Maintenance
Personnel)
Inspect pivot assembly.
Check all the supporting members,
including the clamps, fasteners, nuts,
etc. for indications of damage or wear.
Repair or replace as required.

18 MHD56209 - Edition 2
Pivot Removal and Disassembly
Refer to Dwg. MHP1566 on page 30.
1. Remove pivot assembly (52) from Jib Crane column.
2. Bend locking tang on lockwasher (65) away from nut (66).
3. Use a 3-5/8 in. spanner with a 0.360/0.365 in. (9.1/9.3 mm)
slot and remove spanner nut (66).
4. Remove lockwasher (65).
5. Remove bearing hub (64) from bearing post (61). Removal
may require the use of a hammer and brass or non-marring
punch to lightly tap bearing and hub from bearing post.
6. Remove bearings (62) from bearing hub (64).
7. Inspect bearing assemblies (62) for smooth rotation, binding,
rust, and corrosion. None should be present or visible.
Cleaning, Inspection and Repair
Examine disassembled components and fasteners for wear or
damage. If worn or damaged, do not reuse. During reassembly all
damaged and worn components should be replaced to prevent
component failure which may result in injury or property damage.
It is recommended that lockwashers be discarded and replaced
with new ones after each use.
Use the following procedures to clean, inspect and repair the Jib
Crane and associated components.
Cleaning
Thoroughly clean all Jib Crane components in solvent. The use of
a stiff bristle brush will facilitate the removal of accumulated dirt
and sediments on the column and boom. Wipe off each part after
cleaning. Remove all old Loctite® residue.
Inspection
All disassembled parts should be inspected to determine their
fitness for continued use. Pay particular attention to the following:
1. Inspect all threaded items and replace those having damaged
threads.
2. Inspect all bearings for freeness of rotation and wear. Replace
bearings if rotation is rough or bearings are worn.
3. Inspect bushings. Replace worn bushings.
4. Inspect stop pins, stop plates and bumpers for damage.
Replace if worn or deformed.
5. Inspect clevis brackets for wear. Replace if damaged or worn.
6. Inspect air lines for cracks, cuts and leakage.
7. Inspect air fittings for cracks, leakage and security.
Repair
Actual repairs are limited to the removal of small burrs and other
minor surface imperfections. Use a fine stone or emery cloth for
this work.
1. Worn or damaged parts must be replaced. Refer to the parts
section for specific replacement parts information.
2. Inspect all remaining parts for evidence of wear or damage.
Replace or repair any part which is in questionable condition.
The cost of the part is often minor in comparison with the
cost of redoing the job.
3. When fastening components, always use Loctite® 243 on
capscrew threads.
Assembly
700J Jib Crane
Refer to Dwg. MHP1993 on page 22 and Dwg. MHP1996 on page
24.
1. On ZRA1 and ZRA2 booms, loosely assemble nuts (27),
suspension clevis (25) and suspension brackets (24). Slide
assembly into boom.
2. Install capscrews (26) and nuts (28) to position suspension
bracket in boom.
3. Press bushings (4) into top clevis (5) and boom clevis (40) if
removed during disassembly.
4. Install shoulder bolt (9), nut (10) and tie rod clevis (37) to top
clevis (5).
5. Install assembled parts in support bracket with thrust bearing
(6) at the bottom and thrust washer (3) on top. Secure with
bolt (2), washer (7) and nut (8).
6. Install boom clevis (40) in support bracket with thrust
bearing (6) and thrust washer (3). Secure with bolt (2),
washer (7) and nut (8).
7. Ensure redundant end stop (34) is installed in boom at pivot
end with bolts (36) and nuts (35).
8. Keeping boom parallel to the floor, slide boom (41) onto
boom clevis (40). Secure with bolts (36) and nuts (35).
9. Install shoulder screw (11) and nut (10) through suspension
clevis (25).
10. Install tie rod (39) with rod coupler (19) and adjust nuts (21)
on tie rod (39) to level boom. Refer to “INSTALLATION”
section on page 9. Install cotter pin (20) after adjustment is
complete.
11. Install trolley.
12. Install capscrews (31), nuts (32) and end cap (30) in boom
(41) tip.
13. Verify all fasteners are tight and secure. Install lifting device
on Jib Crane trolley.
14. Turn on power to lifting device and test operation.
800J Jib Crane
Refer to Dwg. MHP1994 on page 26.
1. Install air supply line in column if required and connect to
pivot assembly (52).
2. Install pivot assembly (52) on top of lower column (12).
Secure with capscrews (2) and lockwashers (7).
3. Install upper mast (13) on pivot assembly (52) and secure
with capscrews (9), lockwashers (7) and nuts (8). Check
upper mast rotates freely.
4. On ZRA1 and ZRA2 booms, loosely assemble nuts (27),
suspension clevis (25) and suspension brackets (24). Slide
assembly into boom.
5. Install capscrews (26) and nuts (28) to position suspension
brackets in boom.
6. Install shoulder bolt (11), nut (10) and tie rod clevis (37) to
upper mast (13).
7. Ensure redundant end stop (34) is installed in boom at upper
mastendwithbolts(36)andnuts(35).
8. Keeping boom (41) parallel to the floor, slide boom onto
upper mast (13) boom bracket.
9. Install tie rod (39) with rod coupler (19) and adjust nuts (21)
on tie rod (39) to level boom. Refer to “INSTALLATION”
section on page 9. Install cotter pin (20) after adjustment is
complete.
10. Install trolley.
11. Install redundant end stop (34) and end cap (30) in boom (41)
tip. Secure with capscrews (31), nuts (32).

MHD56209 - Edition 2 19
12. Verify all fasteners are tight and secure. Install lifting device
on Jib Crane trolley.
13. Turn on power to lifting device and test operation.
900J Jib Crane
Refer to Dwg. MHP1995 on page 28.
1. Install air supply line in column if required and connect to
pivot assembly (52).
2. Install pivot assembly (52) on column (12). Secure in
position with capscrews (9), lockwashers (7) and nuts (8).
3. Install boom mount (13). Secure boom mount (13) to pivot
assembly (52) with capscrews (9), nuts (8) and washers (7).
Check boom mount rotates freely.
4. Ensure redundant end stop (34) is installed in boom at boom
mount end with bolts (36) and nuts (35).
5. Support the weight of the boom (41) and keeping boom
parallel to the floor slide boom onto boom mount (13).
Secure in position with capscrews (36) and nuts (35).
6. Install trolley.
7. Install redundant end stop (34) and end cap (30) in boom (41)
tip. Secure with capscrews (31) and (36) and nuts (32).
8. Verify all fasteners are tight and secure. Install lifting device
on Jib Crane trolley.
9. Turn on power to lifting device and test operation.
Pivot Assembly and Installation
Refer to Dwg. MHP1566 on page 30.
1. Clean bearings (62) with mineral spirit solution to remove all
grease. Dry bearings.
2. Re-pack bearings with grease (Zimmerman P/N 10885 –
referto“LUBRICATION”Sectiononpage16).
3. Install bearings to bearing hub (64) and bearing post (61).
4. Install bearing hub (64) on bearing post (61).
5. Install lockwasher (65) on bearing post (61).
• The following torque procedure must be followed to ensure
that spanner nut torque is correct, bearings have been seated,
and nut will not lose torque. Failure to follow these
instructions will decrease performance of the pivot and may
cause damage to the jib boom.
6. Tighten spanner nut (66) to 200 ft.-lbs. (271 Nm)
7. Rotate pivot assembly left and right to seat bearings.
8. Torque spanner nut to 200 ft.-lbs. (271 Nm)
9. Rotate pivot assembly left and right to seat bearings.
10. Torque spanner nut to 200 ft.-lbs. (271 Nm)
11. Rotate nut clockwise until a lockwasher tang is aligned with a
slot on spanner nut. Bend tang into slot.
12. Install pivot assembly on column.
13. Torque pivot mounting bolts to 50 ft.-lbs. (68 Nm)
• Ensure the tang on the lockwasher in the upper housing
engages a slot on the pivot pin.
• Tighten pivot spanner nut securely, but not so much that the
lower housing assembly will not swivel.
Air System Installation
Refer to Dwg. MHP2051 on page 32.
1. Assemble swivel compression fittings (148) to pre-coiled
tubing (149).
2. Install hose fittings (151) to each end of the rubber hose
(152).
3. Install adapter-fitting (153) to one end of the rubber hose
(152).
4. Connect adapter (150) to one end of the pre-coiled tube
(149).
5. Align bracket (83) with each end of the jib boom.
6. Determine which side of the bracket to install the
filter/regulator (55). The regulator should be installed at the
pivot end of the boom, to the column or wall side of the
bracket.
7. Install filter/regulator (55) to bracket (83).
8. Install elbow fitting (147) to bracket (83).
9. Install eye bolt and nut assemblies (94) to brackets (83). The
eye portion of the bolts will face each other when the
brackets are installed.
10. Install thimble (93) to eyebolt (94).
11. Thread cable (91) through the center of the pre-coiled tube
(149).
12. Thread cable (91) through the eyebolt (94) and thimble (93).
13. Install clamps (92) to cable (91). Do not tighten, rather snug
the bolts so cable will not slip through clamp.
14. Install brackets (83) to top of jib boom with the eyebolts
toward each other, using bolts (80), washers (82),
lockwashers (81) and plates (84).
15. Tighten clamps (92) at one end of cable.
16. At opposite end of cable thread excess cable through clamps
increasing tension until cable supports the weight of the pre-
coiled tube.
17. Tighten clamp (92).
18. Connect adapter-fitting (152) to lifting unit inlet.
19. Rotate shut off valve to the closed position.
20. Connect plant air supply or column air supply to regulator
(55) inlet.
21. Rotate shut valve to the open position.
22. Adjust regulator to 100 psi (6.9 bar).
Electrification System Installation
Refer to Dwg. MHP2050 on page 34.
1. Align bracket (83) with each end of the jib boom.
2. Determine which side of the bracket to install the anchor
bracket (96). The anchor bracket must be installed closest to
the pivot or wall end.
3. Install eye bolt and nut assemblies (94) to brackets (83). The
eye portion of the bolts will face each other when the
brackets are installed.
4. Install thimble (93) to eyebolt (94).
5. Thread cable trolleys (90) and towing trolley (86) onto cable
(91). Ensure towing trolley is nearest the handling device.
Wheels of towing trolley sit below cable.
6. Tread cable (91) through the eyebolt (94) and thimble (93).
7. Install clamps (92) to cable (91). Do not tighten, rather snug
the bolts so cable will not slip through clamp.
8. Install brackets (83) to top of boom with the eyebolts toward
each other, using bolts (80), washers (82), lockwashers (81)
and plates (84).

20 MHD56209 - Edition 2
9. Tighten clamps at one end of cable.
10. At opposite end of cable thread excess cable through clamps
increasing tension until cable can support the weight of the
trolleys and electrical cable.
11. Tighten clamp (92).
12. Connect electrical supply and test handling device.
Testing
Prior to initial use, all new, altered or repaired Jib Cranes shall be
tested to ensure proper operation.
1. Check Jib Crane movement through full operational range.
Ensure movement is smooth and without binding. Ensure
there are no obstructions through the operation range.
2. Install lifting device to be used. Check position and power
connections.
3. Check operation of lifting device. Ensure lifting device
responds correctly to control operation.
This manual suits for next models
2
Table of contents
Other Ingersoll-Rand Construction Equipment manuals