manuals.online logo
Brands
  1. Home
  2. •
  3. Brands
  4. •
  5. Ingersoll-Rand
  6. •
  7. Power Screwdriver
  8. •
  9. Ingersoll-Rand QX Series Owner's manual

Ingersoll-Rand QX Series Owner's manual

Other manuals for QX Series

9

Other Ingersoll-Rand Power Screwdriver manuals

Ingersoll-Rand 5 series Setup guide

Ingersoll-Rand

Ingersoll-Rand 5 series Setup guide
Ingersoll-Rand 1R Series User manual

Ingersoll-Rand

Ingersoll-Rand 1R Series User manual

Ingersoll-Rand 371 User manual

Ingersoll-Rand

Ingersoll-Rand 371 User manual

Ingersoll-Rand QX Series User manual

Ingersoll-Rand

Ingersoll-Rand QX Series User manual

Ingersoll-Rand QS1L Series User manual

Ingersoll-Rand

Ingersoll-Rand QS1L Series User manual

Ingersoll-Rand QP1P Series Setup guide

Ingersoll-Rand

Ingersoll-Rand QP1P Series Setup guide

Ingersoll-Rand QS Series User manual

Ingersoll-Rand

Ingersoll-Rand QS Series User manual

Ingersoll-Rand QS1L Series User manual

Ingersoll-Rand

Ingersoll-Rand QS1L Series User manual

Ingersoll-Rand QA1L High Torque Series Setup guide

Ingersoll-Rand

Ingersoll-Rand QA1L High Torque Series Setup guide

Ingersoll-Rand QX Series User manual

Ingersoll-Rand

Ingersoll-Rand QX Series User manual

Ingersoll-Rand 3R-EU Series User manual

Ingersoll-Rand

Ingersoll-Rand 3R-EU Series User manual

Ingersoll-Rand QX Series User manual

Ingersoll-Rand

Ingersoll-Rand QX Series User manual

Ingersoll-Rand QS1P Series User manual

Ingersoll-Rand

Ingersoll-Rand QS1P Series User manual

Ingersoll-Rand 41PA16PSQ4-EU User manual

Ingersoll-Rand

Ingersoll-Rand 41PA16PSQ4-EU User manual

Ingersoll-Rand 5L Series User manual

Ingersoll-Rand

Ingersoll-Rand 5L Series User manual

Ingersoll-Rand 5L-EU Series User manual
Ingersoll-Rand

Ingersoll-Rand 5L-EU Series User manual

Ingersoll-Rand LD22 Series User manual

Ingersoll-Rand

Ingersoll-Rand LD22 Series User manual

Ingersoll-Rand 5 series User manual

Ingersoll-Rand

Ingersoll-Rand 5 series User manual

Ingersoll-Rand QiS Series User manual

Ingersoll-Rand

Ingersoll-Rand QiS Series User manual

Ingersoll-Rand EL 24V DC Series Setup guide

Ingersoll-Rand

Ingersoll-Rand EL 24V DC Series Setup guide

Ingersoll-Rand 41 Series User manual

Ingersoll-Rand

Ingersoll-Rand 41 Series User manual
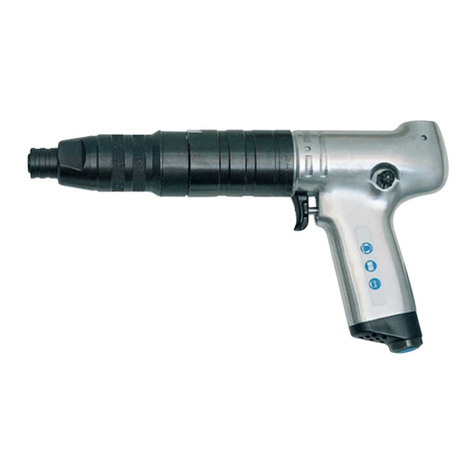
Ingersoll-Rand 5RALC1-EU User manual

Ingersoll-Rand

Ingersoll-Rand 5RALC1-EU User manual

Ingersoll-Rand 1RL Series Setup guide

Ingersoll-Rand

Ingersoll-Rand 1RL Series Setup guide

Ingersoll-Rand QS1L Series User manual

Ingersoll-Rand

Ingersoll-Rand QS1L Series User manual

Popular Power Screwdriver manuals by other brands

Ryobi HP53LK Operator's manual

Ryobi

Ryobi HP53LK Operator's manual

DeWalt DCF621 instruction manual

DeWalt

DeWalt DCF621 instruction manual

Bosch PSR 12-2 Original instructions

Bosch

Bosch PSR 12-2 Original instructions

Chicago Pneumatic CP2755 Operator's manual

Chicago Pneumatic

Chicago Pneumatic CP2755 Operator's manual

Makita BFR540 instruction manual

Makita

Makita BFR540 instruction manual

Makita DFT085F instruction manual

Makita

Makita DFT085F instruction manual

Parkside 345138 2004 instructions

Parkside

Parkside 345138 2004 instructions

Makita DFL650F instruction manual

Makita

Makita DFL650F instruction manual

AEG BST 18BLX2-0 Original instructions

AEG

AEG BST 18BLX2-0 Original instructions

BGS technic 956 manual

BGS technic

BGS technic 956 manual

Hilti SD 6000 operating instructions

Hilti

Hilti SD 6000 operating instructions

Festool TI 15 operating manual

Festool

Festool TI 15 operating manual

Matatakitoyo Torque Tools MTD Operation manual

Matatakitoyo Torque Tools

Matatakitoyo Torque Tools MTD Operation manual

Skil 2346 Operating/safety instructions

Skil

Skil 2346 Operating/safety instructions

Festool DWC 18-2500 operating manual

Festool

Festool DWC 18-2500 operating manual

Stanley SCD2 manual

Stanley

Stanley SCD2 manual

EINHELL TE-CD 12/1 Li Series Original operating instructions

EINHELL

EINHELL TE-CD 12/1 Li Series Original operating instructions

Makita BFT043F instruction manual

Makita

Makita BFT043F instruction manual

manuals.online logo
manuals.online logoBrands
  • About & Mission
  • Contact us
  • Privacy Policy
  • Terms and Conditions

Copyright 2025 Manuals.Online. All Rights Reserved.

Programming a QX Connect Series Tool from the Keypad
1. Plug in the battery and navigate to the Mode Selection Screen (Basic or Normal).
2. Press the check button to get to the Password screen (0000).
3. Press the check button to enter the edit screen.
4. Use the left/right arrows to move the cursor under each digit. Use the up/down arrows to
change each digit.
5. Once the Password is entered, the edit mode is exited.
6. Press the left arrow button to get to the Mode Selection edit screen.
a. By default the Password is 0000, so you do not have to enter a Password. Just press the
left arrow key when you see the 0000 on the Password screen.
7. Use the right arrow key to navigate to the Normal Mode selection.
8. Press the check button to exit the edit mode.
9. Press the down arrow to navigate to the Pset selection screen. This is where you will select
which Pset you want to program.
10. Press the check button to enter to the edit screen.
11. Use the arrow keys to select the Pset you want to edit.
12. Press the check button to exit the edit screen.
13. Press the left arrow button to get to the Password screen.
14. Press the check button to get to the Password edit screen.
15. Use the left/right and up/down arrow keys to enter the Password.
16. Once the Password is entered, the edit mode is exited.
17. Press the left arrow to navigate to the settings screens.
18. Press the up arrow to navigate to the Strategy screen (Angle or Torque).
19. Press the check button to enter the edit mode.
20. Use the left/right arrow keys to make the strategy selection.
21. Press the check button to exit the edit mode.
22. Press the up arrow to navigate to the Direction selection screen (CCW or CW).
23. Press the check button to enter the edit mode.
24. Use the left/right arrow keys to make the Direction selection.
25. Press the check button to exit the edit mode.
26. Press the up arrow to navigate to the Units selection screen.
27. Press the check button to enter the edit mode.
28. Use the up/down arrows to select the desired Torque Units.
29. Press the check button to exit the edit mode.
30. Press the up arrow to navigate to the Torque Mode selection screen (Direct Drive or ETS).
31. Press the check button to enter the edit mode.
32. Use the left/right arrow keys to make the Torque Mode selection.
33. Press the check button to exit the edit mode.
34. Press the down arrow 4 times to navigate to the Target screen.
35. Press the check button to enter the edit mode.
36. Use the left/right and up/down arrow keys to enter the Target Torque or Angle.
37. Press the check button to exit the edit mode.
38. Press the down arrow to navigate to the High Torque Limit screen.
39. Press the check button to enter the edit mode.
40. Use the left/right and up/down arrow keys to enter the High Torque Limit.
41. Press the check button to exit the edit mode.
42. Press the down arrow to navigate to the Low Torque Limit screen.
43. Press the check button to enter the edit mode.
44. Use the left/right and up/down arrow keys to enter the Low Torque Limit.
45. Press the check button to exit the edit mode.
46. Press the down arrow to navigate to the High Angle Limit screen.
47. Press the check button to enter the edit mode.
48. Use the left/right and up/down arrow keys to enter the High Angle Limit.
49. Press the check button to exit the edit mode.
50. Press the down arrow to navigate to the Low Angle Limit screen.
51. Press the check button to enter the edit mode.
52. Use the left/right and up/down arrow keys to enter the Low Angle Limit.
53. Press the check button to exit the edit mode.
54. Press the down arrow button to navigate to the Torque Threshold for Counting Angle screen.
55. Press the check button to enter the edit mode.
56. Use the left/right and up/down arrow keys to enter the Torque Threshold for Counting Angle.
57. Press the check button to exit the edit mode.
58. Press the down arrow button to navigate to the Freespeed setting screen.
59. Press the check button to enter the edit mode.
60. Use the left/right and up/down arrow keys to enter the Freespeed.
61. Press the check button to exit the edit mode.
62. Press the down arrow button to navigate to the Torque Shiftdown Point screen. Note, if using
an ETS tool, this is the torque at which the tool will enter the ETS mode.
63. Press the check button to enter the edit mode.