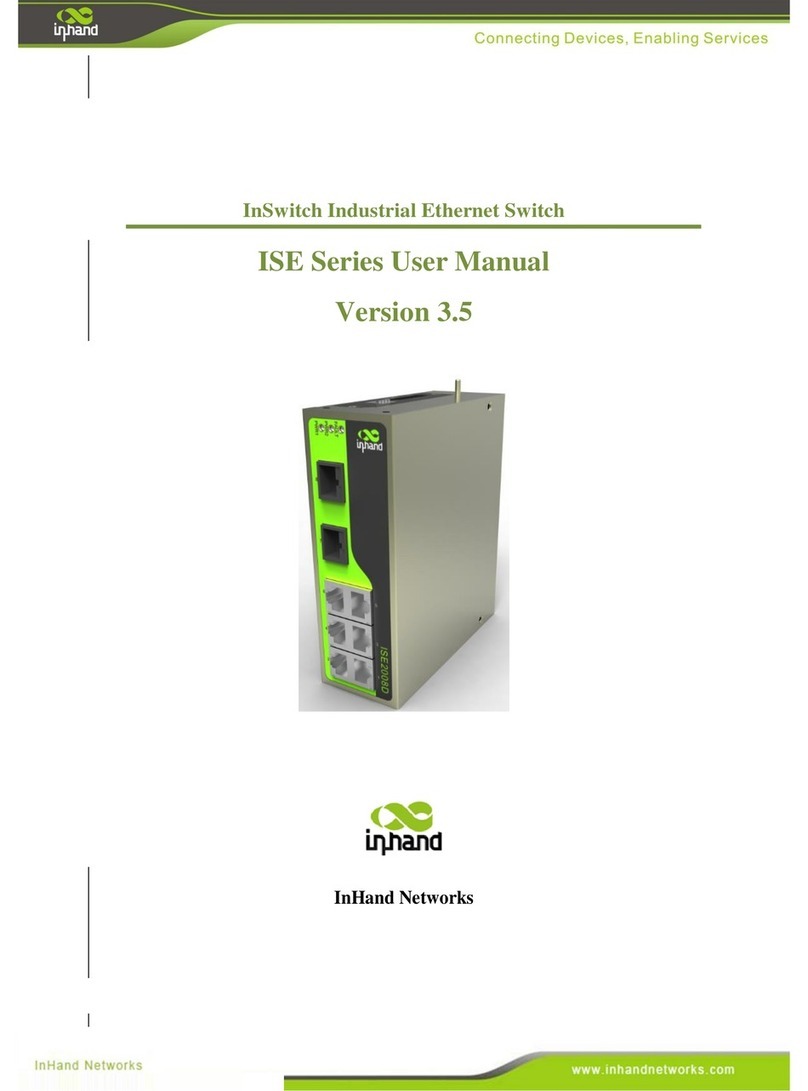
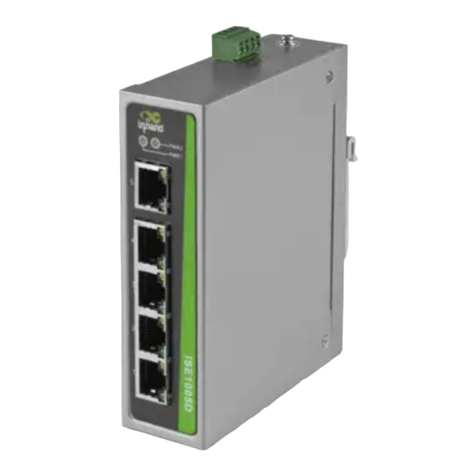
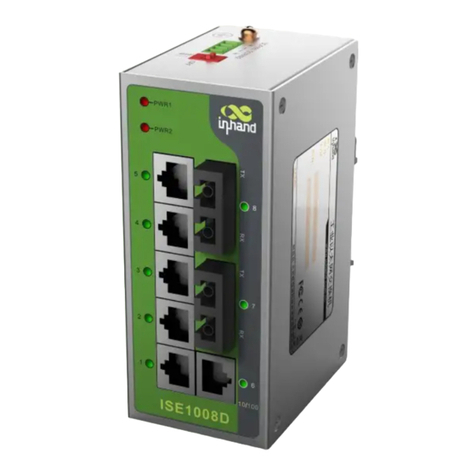
InHand InSwitch ISM-P Series User manual

InHand InSwitch
ISM-P Series
WEB Configuration Manual
V1.3—2022

I
Table of Contents
Chapter 1 Basic Configuration ............................................................................................................. - 1 -
1.1 HTTP protocol configuration..........................................................................................- 1 -
1.1.1 Language Selection.............................................................................................- 1 -
1.1.2 HTTP service port configuration..........................................................................- 1 -
1.1.3 Enabling the HTTP service..................................................................................- 1 -
1.1.4 HTTP access mode Configuration ......................................................................- 2 -
1.1.5 Setting the Max-VLAN number to display in Web page......................................- 2 -
1.1.6 Setting the IGMP-Groups number to display in Web page.................................- 2 -
1.2 HTTPS Configuration ....................................................................................................- 2 -
1.2.1 HTTPS Access Configuration..............................................................................- 2 -
1.2.2 HTTPS Service Port Configuration .....................................................................- 3 -
Chapter 2 Accessing Switch............................................................................................................... - 4 -
2.1 Accessing the Switch Through Web ...................................................................- 4 -
2.2 Initially Accessing the Switch.........................................................................................- 4 -
2.2.1 Upgrading to the Web-Supported Version ..........................................................- 5 -
2.3 Accessing Switch Through Secure Links............................................................- 5 -
2.4 Introduction of Web Interface ........................................................................................- 6 -
2.4.1 Top Control Bar ...................................................................................................- 6 -
2.4.2 Navigation Bar.....................................................................................................- 7 -
2.4.3 Configuration Display Area..................................................................................- 7 -
2.4.4 Bottom Control Bar..............................................................................................- 8 -
Chapter 3 Basic Configuration ......................................................................................................... - 9 -
3.1 System...........................................................................................................................- 9 -
3.2 Global Configuration Mode (Management Interface)....................................................- 9 -
3.3 Port Configuration........................................................................................................- 10 -
3.4 Auto-Shutdown............................................................................................................- 10 -
3.5 Software.......................................................................................................................- 11 -
3.6 Load/Save ...................................................................................................................- 11 -
3.7 Restart.........................................................................................................................- 12 -
3.8 Factory Settings...........................................................................................................- 12 -
Chapter 4 Security............................................................................................................................... - 13 -
4.1 User Management.......................................................................................................- 13 -
4.1.1 User Management.............................................................................................- 13 -
4.1.2 Group Management ..........................................................................................- 14 -
4.1.3 Password Rule Management............................................................................- 14 -

Table of Contents
II
4.1.4 Author Rule Management .................................................................................- 15 -
4.1.5 Authentication Rule Management.....................................................................- 16 -
4.2 Management Access ...................................................................................................- 16 -
4.2.1 Server................................................................................................................- 16 -
4.2.2 SNMP Community Management (SNMPv1/v2 community)..............................- 17 -
4.2.3 SNMPv3 Configuration......................................................................................- 18 -
4.2.4 CLI ( Command Line Interface )........................................................................- 19 -
4.3 Port Security................................................................................................................- 20 -
4.3.1 IP MAC Binding.................................................................................................- 20 -
4.3.2 Static MAC Filter Mode .....................................................................................- 20 -
4.3.3 Static MAC Filter ...............................................................................................- 21 -
4.3.4 Dynamic MAC Mode .........................................................................................- 22 -
4.4 Switchport Protect .......................................................................................................- 22 -
4.5 Keepalive.....................................................................................................................- 23 -
4.6 802.1X Port Authentication..........................................................................................- 24 -
4.6.1 Global................................................................................................................- 24 -
4.6.2 Authentication List.............................................................................................- 25 -
4.4.3 Port Configuration .............................................................................................- 25 -
4.6.4 Statistics............................................................................................................- 26 -
4.7 RADIUS.......................................................................................................................- 26 -
4.7.1 Global................................................................................................................- 26 -
4.7.2 Service ..............................................................................................................- 26 -
Chapter 5 Time................................................................................................................................... - 28 -
5.1 Basic Setting................................................................................................................- 28 -
5.2 NTP..............................................................................................................................- 28 -
Chapter 6 Network Security.............................................................................................................. - 29 -
6.1 DOS Configuration ......................................................................................................- 29 -
6.1.1 DOS Global Configuration.................................................................................- 29 -
6.2 DHCP Snooping Configuration .........................................................................- 29 -
6.2.1 DHCP Snooping Global Configuration..............................................................- 29 -
6.2.2 DHCP Snooping VLAN Configuration...............................................................- 30 -
6.2.3 DHCP Snooping Interface Configuration ..........................................................- 31 -
6.2.4 DHCP Snooping Bindings .................................................................................- 31 -
6.3 Access Control List......................................................................................................- 32 -
6.3.1 IPv4 Rules.........................................................................................................- 32 -
6.3.2 MAC Rules ........................................................................................................- 33 -
6.3.3 Assignment........................................................................................................- 33 -
6.4 Filter Function..............................................................................................................- 34 -

Table of Contents
III
Chapter 7 Switching........................................................................................................................... - 36 -
7.1 Storm Control ..............................................................................................................- 36 -
7.1.1 Broadcast Storm Control...................................................................................- 36 -
7.1.2 Multicast Storm Control.....................................................................................- 36 -
7.1.3 Unicast Storm Control.......................................................................................- 37 -
7.2 Port Rate Limits...........................................................................................................- 37 -
7.3 MAC Address Table.....................................................................................................- 38 -
7.4 IGMP Snooping.................................................................................................- 39 -
7.4.1 IGMP Snooping Configuration...........................................................................- 39 -
7.4.2 IGMP-Snooping VLAN ......................................................................................- 40 -
7.4.3 Static Multicast Mac Address Configuration......................................................- 40 -
7.4.4 Multicast list.......................................................................................................- 41 -
7.5 VLAN ...........................................................................................................................- 42 -
7.5.1 VLAN configuration ...........................................................................................- 42 -
7.5.2 VLAN Batch Configuration ................................................................................- 43 -
7.5.3 Port VLAN Configuration...................................................................................- 43 -
7.6 GMRP..........................................................................................................................- 44 -
7.6.1 VLAN List ..........................................................................................................- 44 -
7.6.2 Port Configuration .............................................................................................- 45 -
7.6.3 Multicast List......................................................................................................- 45 -
Chapter 8 Routing................................................................................................................................ - 47 -
8.1 VLAN Interface and IP Address Configuration..................................................- 47 -
8.2 VRRP Configuration ....................................................................................................- 48 -
8.3 IP Express Forwarding................................................................................................- 49 -
8.4 Static ARP ...................................................................................................................- 49 -
8.5 Static Route.................................................................................................................- 49 -
8.6 RIP Configuration ........................................................................................................- 50 -
8.6.1 RIP Configuration..............................................................................................- 50 -
8.6.2 RIP Router Entries ............................................................................................- 51 -
8.7 OSPF Configuration ....................................................................................................- 51 -
8.7.1 OSPF process...................................................................................................- 51 -
8.7.2 OSPF Router Entries.........................................................................................- 52 -
Chapter 9 QoS/Priority........................................................................................................................ - 53 -
9.1 Global ..........................................................................................................................- 53 -
9.2 Port Configuration........................................................................................................- 53 -
9.3 802.1D/p Mapping .......................................................................................................- 54 -
9.4 IP DSCP Mapping........................................................................................................- 54 -
9.5 Queue Management....................................................................................................- 55 -

Table of Contents
IV
Chapter 10 Redundancy..................................................................................................................... - 56 -
10.1 Link Aggregation Configuration .................................................................................- 56 -
10.1.1 Port Aggregation Configuration.......................................................................- 56 -
10.1.2 Port Channel Global Loading Balance............................................................- 57 -
10.2 Backup Link...............................................................................................................- 57 -
10.2.1 Backup Link Global Configuration...................................................................- 57 -
10.2.2 Link Backup Protocol Port Configuration ........................................................- 58 -
10.3 Spanning Tree...........................................................................................................- 59 -
10.3.1 Global..............................................................................................................- 59 -
10.3.2 MSTP ..............................................................................................................- 59 -
10.3.3 Spanning Tree Ports........................................................................................- 61 -
10.4 EAPS (ether-ring) ......................................................................................................- 61 -
10.5 MEAPS......................................................................................................................- 63 -
10.6 ERPS.........................................................................................................................- 64 -
Chapter 11 Diagnostics....................................................................................................................... - 65 -
11.1 System.......................................................................................................................- 65 -
11.1.1 System Information..........................................................................................- 65 -
11.2 Report........................................................................................................................- 66 -
11.2.1 Log Management.............................................................................................- 66 -
11.2.2 Log Query........................................................................................................- 67 -
11.3 Ports...........................................................................................................................- 67 -
11.3.1 Statistics Table.................................................................................................- 67 -
11.3.2 Error Packet Statistics .....................................................................................- 68 -
11.3.3 SFP..................................................................................................................- 68 -
11.3.4 Cable Diagnosis ..............................................................................................- 69 -
11.3.5 Port Mirroring...................................................................................................- 69 -
11.4 LLDP Configuration....................................................................................................- 70 -
11.4.1 LLDP Basic Configuration ...............................................................................- 70 -
11.4.2 LLDP Interface.................................................................................................- 70 -
11.4.3 Topology Discovery .........................................................................................- 70 -
Chapter 12 Advanced.......................................................................................................................... - 72 -
12.1 DHCP Server.............................................................................................................- 72 -
12.1.1 DHCP Server Global Configuration.................................................................- 72 -
12.1.2 DHCP Server Pool Configuration....................................................................- 72 -
12.2 SFlow.........................................................................................................................- 73 -
12.2.1 SFlow Global Configuration ............................................................................- 73 -
12.2.2 SFlow Statistics...............................................................................................- 74 -

Table of Contents
V
Chapter 13 Help................................................................................................................................... - 75 -
13.1 About .........................................................................................................................- 75 -

- 1 -
Chapter 1 Basic Configuration
1.1 HTTP protocol configuration
Switches support not only can be configured by CLI and SNMP protocol, it also supports being
configured by web. HTTP service port configuration and time configuration of abnormal message
overtime and etc are also supported.
1.1.1 Language Selection
Currently, there are two languages in ISM-P series Industrial Switch: you may choose English or
Chinese. User can set the language in the global configuration mode through the command line as
below:
Enter the command as shown as below in global configuration mode and then system language
changed.
Command
Description
[no] ip http language {english}
Setting the Web language to English. The
Web interface will turn into the English
version.
1.1.2 HTTP service port configuration
Generally, the HTTP port is port 80 by default, and users can access a switch by entering the IP
address directly; however, switches also support users to change the service port and after the
service port is changed you have to use the IP address and the changed port to access switches.
For example, if you set the IP address and the service port to 192.168.2.1 and 1234 respectively,
the HTTP access address should be changed to http:// 192.168.2.1:1234. You’d better not use
other common protocols’ ports so that access collision would not happen. For example, ftp-20,
telnet-23,dns-53,snmp-161. Because the ports used by a lot of protocols are hard to remember,
you’d better use port IDs following port 1024.
Command
Purpose
ip http port { portNumber }
Configuring HTTP service port
1.1.3 Enabling the HTTP service
Switches support to control the HTTP access. Only when the HTTP service is enabled can HTTP
exchange happen between switch and PC and, when the HTTP service is closed, HTTP exchange
stops. Configure global mode by the following command:
Command
Purpose

WEB Configuration Manual
- 2 -
ip http server
Enabling HTTP service
1.1.4 HTTP access mode Configuration
You can access a switch through two access modes: HTTP access and HTTPS access, and you
can use the following command to set the access mode to HTTP.
Command
Purpose
ip http http-access enable
Configuring HTTP access mode
1.1.5 Setting the Max-VLAN number to display in Web page
Setting a value between 1 and 4094 in the global configuration mode ( 4094 which is the max value,
default max-vlan value is 100) .
Command
Description
ip http web max-vlan
{ max-vlan }
Setting the Max-VLAN numbers to
display in Web page
1.1.6 Setting the IGMP-Groups number to display in Web page
Setting a value between 1 and 100 in the global configuration mode (100 is the max value, default
value is 15).
Command
Description
ip http web igmp-groups
{ igmp-groups }
Setting the IGMP-Groups number to
display in Web page
1.2 HTTPS Configuration
In order to improve the security of communications, switches support not only the HTTP protocol
but also the HTTPS protocol. HTTPS is a security-purposed HTTP channel and it is added to the
SSL layer under HTTP.
1.2.1 HTTPS Access Configuration
You can run the following command to set the access mode to HTTPS at global configuration
mode.
Command
Description
ip http ssl-access enable
Enable the HTTPS access mode

WEB Configuration Manual
- 3 -
1.2.2 HTTPS Service Port Configuration
As same as the HTTP service port, the service port in HTTPS is number 443. User can change
the port number through command line in global configuration mode. Suggesting the port number
is bigger than 1024 so as to avoid the port number collision.
Command
Description
ip http secure-port
{portNumber}
Setting the HTTPS port number

WEB Configuration Manual
- 4 -
Chapter 2 Accessing Switch
2.1 Accessing the Switch Through Web
When accessing the switch through Web browser, please make sure that the applied browser
complies with the following requirements:
⚫HTML of version 4.0
⚫HTTP of version 1.1
⚫JavaScriptTM of version 1.5
What's more, please ensure that the main program file, which is running on the switch, supports
Web access and your computer has already connected to the network which the switch is located.
2.2 Initially Accessing the Switch
When the switch is initially used, you can use the Web access without any extra settings:
1. Modify the IP address of the network adapter and subnet mask of your computer to
192.168.2.2 and 255.255.255.0 respectively.
2. Open the Web browser and enter 192.168.2.1 in the address bar. It is noted that
192.168.2.1 is the default management address of the switch.
3. If the IE browser is used, please enter the username and the password in the ID
authentication dialog box. Both the original username and the password are “admin”,
which is capital sensitive.
4. After successful authentication, the systematic information about the switch will
appear on the IE browser.

WEB Configuration Manual
- 5 -
2.2.1 Upgrading to the Web-Supported Version
If your switch is upgraded to the Web-supported version during its operation and the switch has
already stored its configuration files, then Web visit cannot be directly applied on the switch.
Perform the following steps one by one to enable the Web visit on the switch:
1. Connect the console port of the switch with the accessory cable, or telnet to the
management address of the switch through computer.
2. Enter the global configuration mode of the switch through the command line, the
DOS prompt of which is similar to “Switch_config#”.
3. If the management address of the switch is not configured, please create the VLAN
interface and configure the IP address.
4. Enter the ip http server command in global configuration mode and start the Web
service.
5. Run username to set the username and password of the switch. For how to use this
command, refer to the “Security Configuration” section in the user manual.
After the above-mentioned steps are performed, you can enter the address of the
switch in the Web browser to access the switch.
6. Enter write to save the current configuration to the configuration file.
2.3 Accessing Switch Through Secure Links
The data between the WEB browser and the switch will not be encrypted if you access switch
through common HTTP. To encrypt these data, you can use the secure links, which are based on
the secure sockets layer, to access the switch.
To do this, you should follow the following steps:
1. Connect the console port of the switch with the accessory cable, or telnet to the
management address of the switch through computer.
2. Enter the global configuration mode of the switch through the command line, the
DOS prompt of which is similar to “Switch_config#”.
3. If the management address of the switch is not configured, please create the VLAN
interface and configure the IP address.
4. Enter the ip http server command at global configuration mode and start the Web
service.
5. Run username to set the username and password of the switch. For how to use this
command, please refer to the “Security Configuration” section in the user manual.
6. Run ip http ssl-access enable to enable the secure link access of the switch.
7. Run no ip http http-access enable to forbid to access the switch through insecure
links.
8. Enter write to store the current configuration to the configuration file.
9. Open the WEB browser on PC that the switch connects, enter https://192.168.2.1 on
the address bar (192.168.2.1 stands for the management IP address of the switch)
and then press the Enter key. Then the switch can be accessed through the secure

WEB Configuration Manual
- 6 -
links.
2.4 Introduction of Web Interface
The Web homepage appears after login, the whole homepage consists of the top control bar, the
navigation bar, the configuration display area and the bottom control bar.
2.4.1 Top Control Bar
Save All
Write the current settings to the configuration file of the device. It is
equivalent to the execution of the write command.
The configuration that is made through Web will not be promptly
written to the configuration file after validation. If you click “Save”, the
unsaved configuration will be lost after rebooting.
English
The interface will turn into the English version.
Chinese
The interface will turn into the Chinese version.

WEB Configuration Manual
- 7 -
2.4.2 Navigation Bar
The contents in the navigation bar are shown in a form of list and classified according to types. By
default, the list is located at “system”. If a certain item need be configured, please click the group
name and then the sub-item. For example, to browse the flux of the current port, you have to click
“Diagnostics" and then “Ports”, “Statistics Table”.
Note:
The limited user can only browse the state of the device and cannot modify the
configuration of the device. If you log on to the Web with limited user’s permissions,
only “System” will appear.
2.4.3 Configuration Display Area
The configuration display area shows the state and configuration of the device. The contents of this
area can be modified by the clicking of the items in the navigation bar.

WEB Configuration Manual
- 8 -
2.4.4 Bottom Control Bar
The configuration area always contains one or more buttons, and their functions are listed in the
following table:
Set
Apply the modified configuration to the device.
The application of the configuration does not mean that the
configuration is saved in the configuration file. To save the configuration, you
have to click “Save” on the top control bar.
Reload
Refresh the content shown in the current configuration area.
Create
Create a list item. For example, you can create a VLAN item or a new
user.
Delete
Delete an item in the list.
Go Back
Go back to the previous-level configuration page.
Clear
Clear the content of current configuration, such as statistics of port.

WEB Configuration Manual
- 9 -
Chapter 3 Basic Configuration
3.1 System
If you click Basic Setting -> System in the navigation bar, the page appears as shown as below:
The system message will be displayed in the dialog box.
The default name of the device is “Switch”. You can enter the new hostname in the text box and
then click “Set” in the bottom control bar.
3.2 Global Configuration Mode (Management Interface)
If you click Basic Setting -> Global Network Config in the navigation bar, the page appears as
shown as below:

WEB Configuration Manual
- 10 -
⚫Setting the IP address of Interface VLAN 1 , in order to access the switch
⚫This page is used to set the IP address of Interface Vlan 1 in the management interface of
the device. In initial conditions, the MAC address of the device, the IP address, mask and
gateway of the interface will appear on this page.
3.3 Port Configuration
If you click Basic Setting -> Port Configuration in the navigation bar, the Port Configuration
page appears, as shown as below figure:
You can change the status, speed, duplex mode and flow control of a port on this page.
Note:
Port link switching might happen if modifying port’s speed or duplex mode. Network
communication might be affected.
3.4 Auto-Shutdown
Click Basic Setting -> auto-shutdown in the navigation bar, the auto-shutdown page appears, as
shown as bellow:

WEB Configuration Manual
- 11 -
This page set the auto-shutdown port and delay time of shutdown. Click the Set in the bottom
control bar to complete the configuration, and click the Save on the top. The corresponding port will
be shutdown in delayed time after the switch turned on.
3.5 Software
If you click Basic Setting -> Software in the navigation bar, the Software management page
appears, as shown as below figure:
Current running version and ROM version could be checked at this page. Click Export to export
current running version to computer. Choose the to-be-updated software version and click Update
to change system’s software version on Software Update Column.
Note: The updated system’s software will be valid only if the device is restarted.
3.6Load/Save
If you click Basic Setting -> Load/Save in the navigation bar, the page appears as shown as below
figure:
Click the “Export” then the current configuration of system will be exported to computer, click the
“ Import” then related configuration document will be imported to switch.

WEB Configuration Manual
- 12 -
3.7Restart
If you click Basic Setting -> Restart in the navigation bar, the page appears as shown as below
figure:
You can choose “Reboot” to reboot the switch, or choose “Clear MAC Address Table” , “Clear ARP
Table”, “Clear port counters”.
3.8 Factory Settings
On this page you can reset the equipment to factory setting, click the “Restore”button to reset to
factory setting.

WEB Configuration Manual
- 13 -
Chapter 4 Security
4.1 User Management
4.1.1 User Management
If you click Security -> User Management in the navigation bar, the page appears as shown as
below figure:
Click Modify to change user’s configuration at this page, and click Delete at the bottom bar to
delete the selected user.
Click Create at the bottom bar to enter the following page:

WEB Configuration Manual
- 14 -
Fill in configuration at every configuration column and click Set at the bottom bar to create new user.
Click Reload to refresh the user information. And click Go Back to go back to previous level page.
4.1.2 Group Management
Click Security -> User Management in order and then click Group Management to open
configuration page as following:
Click Modify to change user group’s configuration at this page. Select user and click Delete at the
bottom bar to delete the selected user group. Click Detail to check and configure members of group
as following:
Click Create at the bottom bar of group management page to enter the following page:
Fill in configuration at every configuration column and click Set at the bottom bar to create a new
user group.
4.1.3 Password Rule Management
Click Security -> User Management in order and then click Pass Management to open
configuration page as following:
This manual suits for next models
6
Table of contents
Other InHand Switch manuals
