InkSmith Orbit User manual

User Manual

Orbit User Manual
01
Table of Contents
1.0 Orbit 3D Printer Setup Guide............................................................................................
2.0 Overview................................................................................................................................
2.1 Safety......................................................................................................................................
2.2 Protection Measures........................................................................................................
2.3 Getting Started with 3D Printing.................................................................................
3.0 Launchpad Slicing Software Installation......................................................................
3.1 Accessing Launchpad Slicing Software....................................................................
3.2 Launchpad Quick Start Guide......................................................................................
3.3 Launchpad Tools..............................................................................................................
3.4 Launchpad Slicing Checklist........................................................................................
4.0 Basic Printer Functions.....................................................................................................
4.1 Motor Control Function.................................................................................................
4.2 Nozzle Preheat Function..............................................................................................
4.3 Platform Offset Value Function..................................................................................
4.4 WiFi Function.....................................................................................................................
4.5 Material Management Function.................................................................................
4.6 Firmware Update Function...........................................................................................
4.7 Extruder Disassembly......................................................................................................
4.8 Pre-saved Prints................................................................................................................
4.9 USB Drive Print..................................................................................................................
4.10 Last Print Function.........................................................................................................
5.0 Printer Maintenance..........................................................................................................
6.0 Troubleshooting.................................................................................................................
7.0 Index.......................................................................................................................................
7.1 List of products and accessories................................................................................
7.2ProductSpecications...................................................................................................
02
04
04
04
04
05
05
05
06
08
09
09
09
10
10
11
11
12
13
14
14
15
16
18
18
18

Orbit User Manual
02
1.0 Orbit 3D Printer Setup Guide
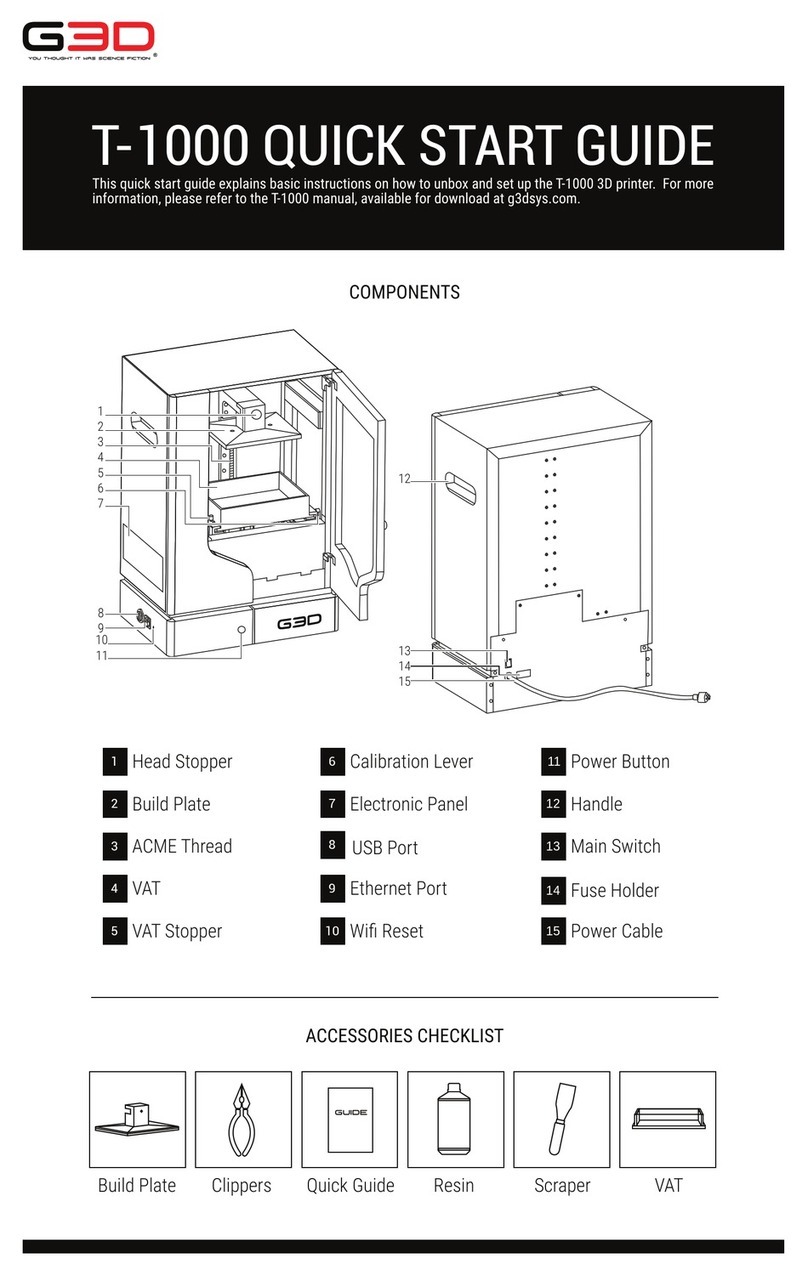
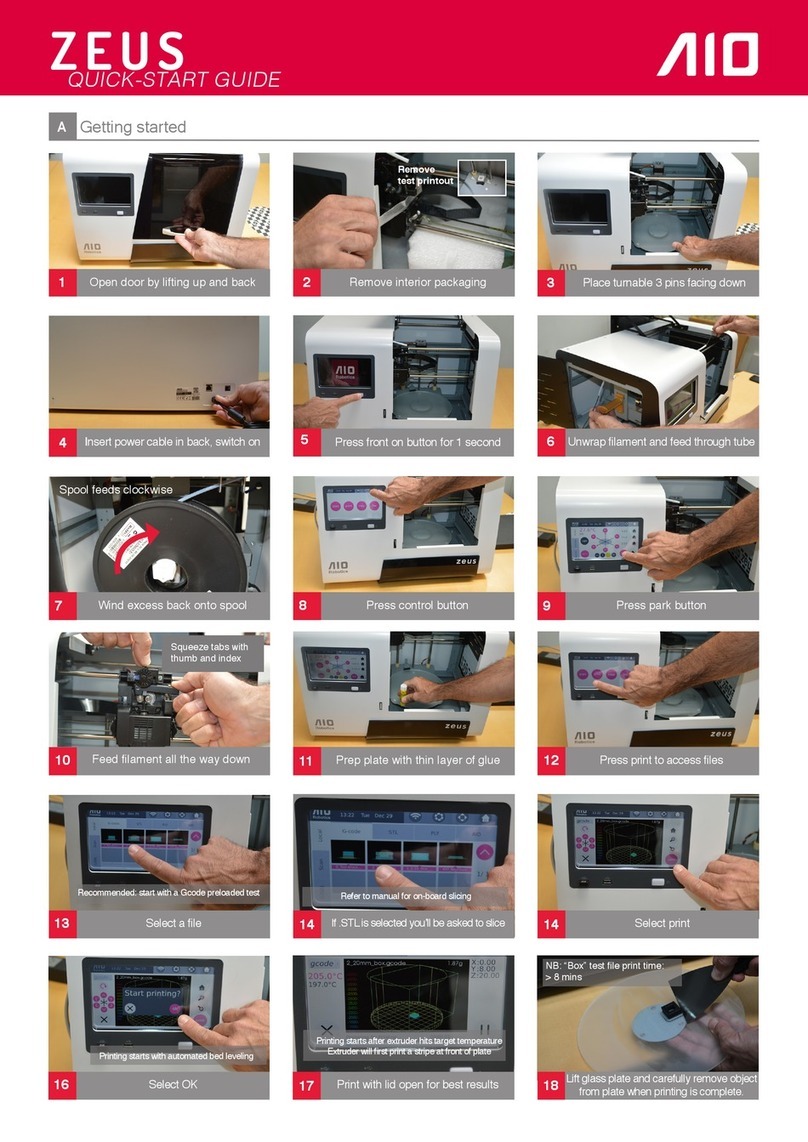
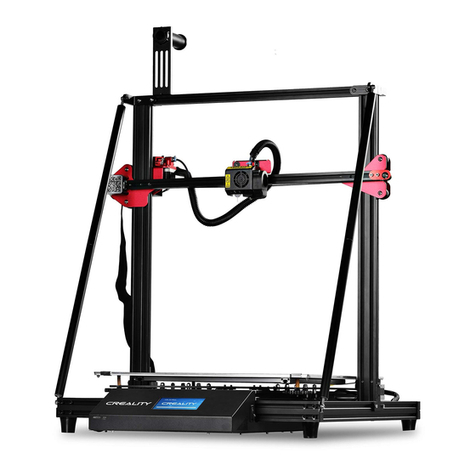
Step 1: Unpack the printer, dismantle internal and external packaging, open the front door
of the device, then remove its shockproof foam materials (three shockproof foam materials
servetoxnozzlemodule,XYZaxisandplatformprintingplaterespectively);
Step 2:Puttheprinteronaat,levelsurfaceandconnectthepoweradapterasshown;
Step 3: Open the front door of the printer and take out the printing plate from the accessory
box.AligntheABCmagneticpointsfollowingtheinstallationpicture;

Orbit User Manual
03
Step 4:Next,installthelamentandfeedingtube:
(A)Findthelamentfeedingtubeinsidethedevice(oneendofwhichhasbeeninstalledand
xedintheprinter),threadtheunxedendthroughholefrominsidetheprinter(asseenin
thepicturebelow).
(B)Takeouttheprinterlamentfromtheaccessorybox,dismantleinternalandexternal
package.
(C)Theprinterlamentwillbeplacedinsidetheprinter,ontheshelfontherightside.
(D)Feedtheendofthelamentintotheholeofthefeedingtube,fromtheinsideofthe
printer.Pushthelamentthroughthefeedintubeasseeninthepicturebelow,continue
pushingthelamentuntilitcomesouttheendofthefeedingtube.Then,taketheendofthe
lamentandinsertitintotheopeningatthetopoftheprintextruder.

Orbit User Manual
04
2.0 Overview
2.1 Safety
The Orbit 3D printer must only use the power adapter provided, or it may damage the device
orcauseriskofre.
To avoid burns or model distortion, please keep the printer door closed during operation.
Please do not touch the model, nozzle, print platform or other parts of the device during
operation.
We advise that you wear goggles when removing the support material. There may be a slight
odor during printing, this is normal and occurs as a result of extruder melting the plastic
lament.Weadviseyouusethedeviceinawell-ventilatedenvironment.Inaddition,keepthe
printerdoorclosedduringprintinginordertoisolatetheoutsideairow,asitmayhavean
impact on printing quality.
2.2 Protection Measures
• Keep the printer away from water, it can cause damage to the machine.
• Do not turn off the power or unplug the USB data connector during printing operation, or
the model may fail to print.
• The normal room temperature for operation of Orbit 3D Printer is ranged from 5°C to
30°C.Ifbeyondthisrange,themodel’smoldingqualitymaybeaffected.
2.3 Getting Started with 3D Printing
The Orbit 3D printer uses FDM technology, or Fused Deposition Modeling. This type of
technologyusesathermoplasticlament,whichisheatedtoitsmeltingpointandthen
extruded, layer by layer, to create a three dimensional object
Ifyou’venever3Dprintedbefore,therearethreebasicstepsfromstarttonish.Therst
stepistoobtaina3DCADmodel.YoucandesignthismodelyourselfusingaCADsoftware
likeTinkercad,orbydownloadinganopen-sourcelefromawebsitelikeThingiverse.After
you’veobtainedyour3Dmodelleyouneedto‘slice’it.Slicingisatermusedtodescribe
theprocessoftranslatingyourmodelleintoalanguageyour3Dprintercanunderstand.
YoucanaccessInkSmith’sLaunchpadSlicingsoftwarefreewithyourOrbit3Dprinter.After
your3Dmodellehasbeenslicedyoucantransferittoyourmachinetoprint.
Formoreinformationaboutthebasicsof3DprintingyoucandownloadInkSmith’s3D
PrintingGuideat:https://www.inksmith.co/3d-printing-guide

Orbit User Manual
05
3.0 Launchpad Slicing Software
3.1 Accessing Launchpad Slicing Software
Theterm‘slicing’describestheprocessoftakingyourcompleted3Dmodelandtranslating
it into a language your 3D printer can understand. During this slicinig process you can also
change the scale, position, and orientation of your model as well as add any necessary
supports.
YourOrbit3DprinterincludesfreeaccesstoInkSmith’sLaunchpadSlicingSoftware.This
software is cloud-based and requires no downloading or installation.
ToaccessLaunchpadsimplyvisit:www.launchpad3d.com
3.2 Launchpad Quick Start Guide
1. Goto:www.launchpad3d.catoaccesstheLaunchpadSlicingsoftware.
2. Oncetheprogramloads,therewillbeadefaultlepre-loadedonthebed.Selectthe
objectonthebed(itwillturngreenwhenselected)andthenpressdeleteonyour
keyboard.
3. Next,youwillneedtouploadyour.STLletoLaunchpad.Todothis,clickthe“AddFile”
button in the top right hand corner of the screen.
4. Locatethe.STLlefromyourcomputerandclick“Choose”touploadtheleto
Launchpad.Thelewillappearonthebedintheorientationinwhichitwasdesigned.
5. OnceyouhaveuploadedyourletotheLaunchpadsoftwareyoucannowbegin
preparingtheletoprint.
6. Whenyouareyounishedpreparingyourleyoucansliceitprintbyclickthe“Print”
buttonintheupperright-handcorner.Clickthe“DownloadPrintFile”buttonto
downloadtheletoyourcomputer.Thislecanthenbetransferredtoyour3Dprinter.

Orbit User Manual
06
3.3 Launchpad Tools
Arrange: Click on the object to move it around the bed. Click and drag to change
your viewpoint manually.
Preview: Previewyourslicedle.Usingthe‘printprogressslider’youcanseethe
progressionoftheprinter’stoolpath.Thisfunctiongivesyouanexactpreview
howyourlewillprint.Thisfunctionisusefultopreventprintingfailuresthat
occur as a result of poor supports or incorrect orientation.
View: This function allows you to quickly choose which angle or orientation you
are viewing the print bed from.
Duplicate:Theduplicatefunctionsallowsyoutocreatemultipleprintleswithout
needingtouploadanewle.Toduplicateanobject,selectit(itwillturngreen),
thenclickthe“Duplicate”button.Launchpadwillallowyoutoduplicateyourles
asmanytimesasyouwant,solongastheyalltonthebedspace.
Scale:Thistoolallowsyoutoincreaseordecreasethesizeofyourobject.Itis
importanttoensurethat“UniformScaling”isselectedtoensuretheobjectscales
evenly and does not become distorted.
Rotate: Rotation, in degrees, allows you to change the orientation of your object.
This step is important in order to ensure the maximum surface area of the object is
on the bed.
Delete: Todeleteanobject,selectit(itwillturngreen),andhitdeletetoremoveit
from the bed.
Help:Usethe“Help”buttontondmoreinformationontheLaunchpadsoftware.

Orbit User Manual
07
Inadditiontothetoolmenu,LaunchpadalsohasaSettingsMenuandaPrintingMenu.Both
of these menus can be accessed on the right-hand side of the Launchpad interface.
Settings Menu
• Supports: Enabling supports will automatically generate support structures on your
object where they are needed.
• Raft: Enabling rafts will automatically generate a raft structure underneath your print in
order to ensure maximum surface area is achieved. A raft is a thin layer of print material
which is used to increase the surface area of the object and ensure stability.
• Advanced Settings:Accessingthe“AdvancedMenu”willallowyoutocontrolspecic
variables such as, bed temperature, extruder temperature, layer thickness, etc. These
variablesshouldonlybemodiedbyadvancedusers.
Printing Menu
• Devices: The“Devices”menuallowsyoutoselectwhich3Dprinteryouareusing.Itis
important to select the correct 3D printer as the print settings and bed size vary between
different machines.
• Add File:The“AddFile”functionallowyoutoselectanduploadyourprintlestothe
Launchpad software.
• Print: Clickingthe“Print”buttonwillpromptapop-upwhereyoucanviewtheleoutput
information.Hereyoucanchangethelenameaswellasseethelesize,estimated
lamentusage,andapproximateprinttime.Theleoutputpop-upisalsowhereyoucan
downloadthe.gcodeletotransfertoyourprinter.

Orbit User Manual
08
3.4 Launchpad Slicing Checklist
Whenslicingan.STLlefor3Dprintingthereareafewnecessarystepsyoushouldfollowto
ensure a successful print.
□Correct Device Selected:Itisimportanttoensuretheproper3Dprinterisselectedunder
the“Devices”menu.Each3Dprinterisdifferent,thereforeifthewrongdeviceisselected
anerrormessagewillappearwhenattemptingtoprintyourle.
□Print File Loaded:An.STLleformatistheonlyacceptableletypethatcanbeuploaded
to the Launchpad software.
□Correct Orientation: With all 3D printed objects, it is extremely important to ensure there
is the maximum amount of surface area face down on the bed. The more surface area on
the bed, the more stable and adhered your object will be. The correct orientation for your
objectiswhicheversidehasthemostsurfaceareaatonthebed.
□Appropriate Supports Added: Supports are useful for objects where there is overhang or
poorbedadhesion.Foranobjectwherethereisoverhang,selectthe“Support”feature
in Launchpad. For objects that have few contact points on the bed (i.e. poor surface
areadistribution),selectthe“Raft”feature,thiswillcreateamorestablebaseaswellas
increase adhesion to the bed.
□File Previewed: Usethe“Preview”functiontocheckthetoolpathoftheprinter.Hereyou
canseeexactlyhowthelewillbeprinted.Thisfeatureisusefulforidentifyingwhereany
additionalsupportsmaybeneededandwhattheprintwilllooklikestarttonish.
□Print File Downloaded: After all of the previous steps have been completed, you can
downloadtheprintle.Oncedownloaded,thelewillbelocatedinyourDownloads
folder.ForCubiconprinterstheleextensionwillbe“.hvs”,fortheInkSmithOrbitprinter
theleextensionwillbe“.gsd”.NowyourprintleisreadytobetransferredviaUSBdrive
to your 3D printer.

Orbit User Manual
09
4.0 Basic Printer Functions
The following are basic functions of the Orbit 3D printer along with the scenarios where
these functions may be required.
4.1 Motor Control Function
The motor control function can be used to manually adjust the print bed or extruder.
4.2 Nozzle Preheat Function
The nozzle preheat function is used to manually adjust the printing temperature of the
nozzle. This function can be used when changing print material or during maintenance and
replacement of the nozzle.

Orbit User Manual
10
4.3 Platform Offset Value Function
The“platformoffsetvalue”functioncanbeusedtomanuallysettheheightofthenozzle
from the platform. This function may also be used to readjust the height of the nozzle from
the platform when it deviates from the set value.
4.4 WiFi Funtion
TheOrbit3DprinterusesaWiFiconnectiontoupdateandloadrmwareaswellasprint
wirelessly with cloud printing applications. To connect your printer to a WiFi network, please
follow the instructions below.

Orbit User Manual
11
4.5 Material Management Function
The Material Management function is used during the loading and unloading process of
lament.Loadingandunloadingispreformedwhenthelamentmaterialischangedor
duringaprinttochangethecolourofthelament.
4.6 Firmware Update Function
As soon as your printer is connected to WiFi, the device will automatically retrieve the latest
rmwareupdates.Itisrecommendedthatyoukeepyourdeviceuptodatewiththelatest
rmwaretoensuretheperformanceofyourprinter.

Orbit User Manual
12
4.7 Extruder Disassembly
The extruder of the Orbit 3D printer is removable for easy maintenance and cleaning.
(1)Openthetopcoverplateofthedevice,removethe3Mgluethatholdsthetopcoverplate
and FCC wire harness. Notice that it needs to be removed from right to left with care and
keeptheFCCwireharnessfrombeingpulledoutfromtheinstallationcardslot;
(2)Pressandpullouttheplugoftheextruder’sFFCwirefromthesocketattheleftsideof
thedevice’stopcover;
(3)AftertakingouttheFFCwire,grabthetwosidesoftheextruderandliftthewholemodule
gently to remove it from the machine.

Orbit User Manual
13
Pleasenote:toreassembletheprinterextruder,followthesestepsinreverse.
4.8 Pre-saved Prints
Pre-savedprintsarelesthathavesavedlocallyontheprinter’sinternalmemory.Toaccess
andprinttheseles,followthestepsbelow.

Orbit User Manual
14
4.9 USB Drive Print
ItisrecommendedthatyouuseaUSBdrivefortransferringlestotheOrbitforprinting.
4.10 Last Print
Whenprintingmorethanoneofthesamemodel,userscanusethe“LastPrint”functionto
quickly repeat the previous print.

5.0 Printer Maintenance
5.1 Printer Operating Environment
Pleaseensurethattheprinterispositionedonaat,stableplatform.Itisalsoimportantto
ensuretherearenoobstructionsthatcouldcausethelamentbowdentubetobecome
tangled.
5.2 Importance of a Clean Operating Environment
Itisimportanttohaveaprintingenvironmentthatisclearofdustorotherdebristhatmay
cause unnecessary damage to the printer. Excess dirt and dust can result in poor lubrication
of the printing platform which could cause the platform to become jammed.
5.3 Replacing Filament
Whentheprintinglamentisnearingtheendoftheroll,itisrecommendedthatitbe
replacedbeforeitiscompletelyusedup.Iftheremainingendoftheprintinglamentistaken
intotheprinteritmaybecomediculttoreplaceorremove.Forthisreason,itissuggested
thatyoureplacethelamentrollbeforeitcompletelyrunsout.
5.4 Loading Filament
Whenloadinglamentintotheprinteritisimportanttoensuretheendiscutwithasharp,
straightedgeandinsertedintotheopenholeontheextruder.Afterthelamentisinserted,
the printer will need to heat the nozzle to the correct temperature before extruding any
lament.Oncethecorrecttemperaturehasbeenreached,theprinterwillextrudetheplastic
lament.
5.5 STL Data File Considerations
Theprinterslicingsoftware3Dstar,onlysupports.STLletypes.Allprintmodelsimported
intothesoftwaremustbesavedas.STLletypes.
5.6 Print Platform Consideration
Beforeeachprint,itisimportanttoensurethattheprintbedisatandconnectedwiththe
threemagneticpoints.Iftheprintbedisstillnotcompletelylevel,itcanbemanuallyadjusted
usingthe“MotorControlFunction”foundinSection4.1.
5.7 Maintenance of guide rail
The Orbit printer extruder operates on four primary guide rails to move the print bed. These
rails come lubricated from the manufacturer but will need to be re-lubricated over time.
Ideallytheguiderailsshouldbelubricatedonceperyear.
Orbit User Manual
15

6.0 Troubleshooting
6.1 Filament gets stuck during printing
Ifyourprintextruderismakingaclickingnoiseandfailingtoextrudeanyplastic,thelament
maybestuck.Toxthis,releasethelamentfromtheextruder,thentrimtheendofthe
lamenttoensureaat,sharpedgethenre-insertit.Ifthereisstillaclickingsoundandthere
isnoextrusionyoumayneedtoremovetheprinter’snozzlemoduleandcleanit.
6.2 Setting the height of the platform
Ifyourextruderisnotprintingatonthebed,ortherearenozzlescratchesontheprinting
platformyoumayneedtomanuallyadjusttheheightoftheplatform,theZ-axis.Ifthe
distancebetweentheplatformandnozzleisgreaterthan2mm,youneedtosettheZ-axis
height, to do this, please refer to section 4.3 of this manual.
6.3 The lament layer does not stick to the print bed
Ifyoundthatyourprintmodelisnotstickingtothebedorthemodelhascurledupedges
youcantryadjustingthe“peelofffactor”inthe3dStarsoftwaretoimprovethis.Thepeel
offfactorisasettingthataffectshowrmlytherstlayeradherestotheprintbed-alower
valuewillallowtheprinttoadheremorermly.Itisrecommendedtotryadjustingthe
settingsbysmallincrementsandtestingeachtodeterminethebestpossibleresult.Youcan
also try increasing the nozzle temperature by 5-10°which can help to ensure good adhesion.
6.4 Filament clog
Filamentmaybecomecloggedintheextrudernozzleforavarietyofreasons.Ifthisoccurs,
removeanyexcessplasticlamentfromtheoutsideoftheextruder.Youmayalsowishto
heat the extruder up to printing temperature and use a brass brush to remove any excess
lament.
6.5 The USB drive cannot be read
IftheprinterfailstorecognizethelesonyourUSBdrive,pleaseensureitisinthecorrect
.gsdleformat.Onceyouhavethecorrectleformatyoucanselectthedesiredleonthe
printerandthelewillbecopiedontothedevice.Afterthelehasbeencopiedyoucan
removetheUSBle.
6.6 Poor or uneven surface quality
Ifyoundthatthesurfacequalityofyourprintisunevenorthickerinsomespotsand
thinnerinothersyourextrudermaybehavingtroublepullinginlament.Ifthelamentreel
becomes tangled the extruder will not be able to extrude any plastic, thus resulting in thin or
unevenlayers.Topreventthis,ensurethelamentreelisnottangled.Additionally,youcan
checkthelubricationoftheprintbedbymovingitmanuallyontheXandY-axes.Iftheguide
railsontheprintbeddonotmovesmoothlytheremaybeabuildupoflamentextrudedon
theplatform.Toxthis,lubricatetheplatformguiderails.
Orbit User Manual
16

6.0 Troubleshooting
6.7 Limit switch is broken
AttheendofeachX-axisandY-axisguiderailsthereisalimitswitchthatdetectswhenthe
print platform is at the end of the track. This switch may become broken during cleaning or
transportationoftheprinter.Ifthisswitchisbrokenyoumayhearanoisewhentheprinteris
turnedoff.Ifthisoccurs,thelimitswitchwillneedtobereplaced.
6.8 USB drive cannot be recognized
IftheprinterisunabletorecognizedyourUSBdrive,rstpullthedriveoutandtryreinserting.
Ifthisstilldoesnotwork,tryrestartingtheprinterandtryingagain.
Orbit User Manual
17

7.0 Index
7.1 List of products and accessories
Orbit User Manual
18
7.2 Product Specications
Table of contents
Other InkSmith 3D Printer manuals
