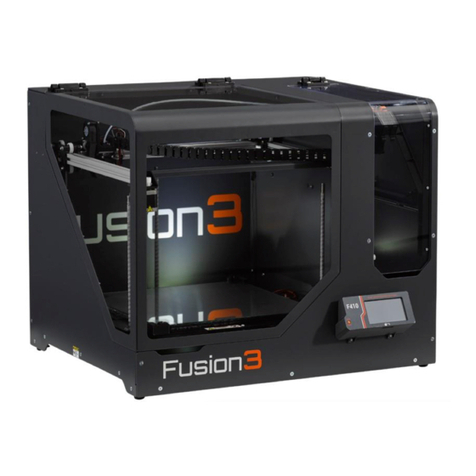
Fusion3 EDGE User manual

EDGE 3D Printer
QUICKSTART GUIDE
Revision 3/17/2022
PLEASE READ THIS DOCUMENT
BEFORE OPERATING YOUR NEW 3D PRINTER

TABLE OF CONTENTS
INTRODUCTION 3
UNPACKING YOUR EDGE 3D PRINTER 5
SETTING UP YOUR EDGE 3D PRINTER & FIRST PRINT 10
EDGE - LOADING FILAMENT 19
USING THE EXTRUDER 24
CLEANING & PREPARING THE PRINT BED 28
CAUTIONS, WARNINGS, & OPERATING NOTES 33
IF YOU ENCOUNTER AN ISSUE 34
NEXT STEPS - LEARN MORE ABOUT YOUR NEW 3D PRINTER 35
PAGE 2

INTRODUCTION
Thank You
Thank you for purchasing the Fusion3 EDGE 3D printer! We have worked hard to deliver the very best 3D
printer available on the market today, and the best user experience possible. We think you'll be surprised
and delighted by what your new 3D printer can do.
Current Fusion3 Owner?
If you're coming from a previous Fusion3 product, please approach EDGE with an open mind! This is a very
different machine than what you're used to, and it needs to be treated and used differently than our other
products. Also, there are subtle differences between EDGE and other Fusion3 3D printers as it relates to
consumables and warranty coverage.
Role Of The Quickstart Guide
This quick-start guide is designed to assist you with unpacking, setting up and walking you through your
first print with EDGE.
The Quickstart Guide is not a Comprehensive Manual
In the past, we at Fusion3 have published a Quickstart Guide, a User Manual, and Technical Bulletins for
individual repairs or maintenance items. With the introduction of EDGE we are taking a new approach.
While we are still producing this Quickstart guide to assist customers at the time of unpacking, all of our
documentation will be provided in individual modules around specific topics (not as an accumulated User
Manual) on our website Support > Manuals & Downloads > EDGE. This user documentation is a living,
constantly expanding corpus of knowledge so please always check our website for the most up-to-date
information.
Your 3D Printer Is A Complex Piece of Equipment: There is a Learning Curve
Involved
We at Fusion3 are always looking for ways to make 3D printing easier. However, you must still think of your
3D printer as a powerful machine tool, not a push-button appliance (like a microwave or coffee-maker).
Please be prepared to invest the time to learn how it works and how to get the most out of it.
PAGE 3

Fusion3 Is Here To Help You Get Through This Learning Curve
We provide a number of resources to help you learn how to use our 3D printers and also get the greatest
amount of performance from our systems.
1. Free Live Training Classes
Please ensure that all operators attend one of our live training classes offered each week. Not only is
this a condition to activate your 3D printer warranty, we have found that it drives much higher initial
customer satisfaction and 80% fewer customer service issues during the first months of customer
ownership. You are welcome to attend as often as you like at any time during your ownership of your 3D
printer. Please look for emails from our Technical Support team inviting you to sign up for these classes
that are held each week.
2. Selecting Materials
Fusion3 has compiled our Certified Materials List, found on the Fusion3 website (Materials >
Certified Materials List). If you are not sure how to select the right material for your task, please feel
free to reach out either to your sales representative or the Technical Support team (Support > Contact
Support) and we would be happy to suggest a type of material and a few different providers for you to
contact.
3. Technical Support
Fusion3’s Technical Support team is here to help you tackle any issues related to the operation of your
Fusion3 3D printer and software. The Technical Support team is available every Monday through Friday,
except public holidays, via phone (1+ 877-452-0010, extension 2) or via email at
suppor[email protected].
Please note: While customers find it reassuring to place a phone call to our Technical Support
representatives, for most issues, you may find faster resolution by starting your case via email. By
including with your email comprehensive information including pictures of your part and/or any
affected parts of the 3D printer, computer files, including your STL file, your REACTOR workspace file,
and G-CODE, our Support Team will be able to more quickly help identify the issue and suggest
solutions.
PAGE 4

UNPACKING YOUR EDGE 3D PRINTER
How to correctly unpack your EDGE 3D printer from its shipping packaging
IMPORTANT: Please carefully inspect the printer and packaging for damage and issues. Note
any packaging damage on the Bill of Lading (BOL) WHEN YOU RECEIVE THE SHIPMENT FROM
THE SHIPPER. If damage is not noted on the BOL then we cannot file a claim to cover any
shipping damage.
IMPORTANT: Please retain all packing materials. Your 3D printer is a sensitive piece of electrical
equipment and should always use this packaging when being transported or shipped.
1. Inspect the box for damage. Check for punctures or impacts from the side, check for crushing from
the top, and check the shockwatch to see if it's triggered.
If the shockwatch is triggered: Your shipment has experienced a shock > 25G. Your printer may be fine,
but the odds of shipping damage are higher.
PAGE 5

2. Cut the tie-down straps that
hold the box onto the pallet.
There may be just 2 straps,
that's ok.
3. Unfold the top of the box.
PAGE 6

4. Above the printer you will find a
cardboard tray. This contains
your toolkit, your filament, and
your print surfaces. Lift the tray
straight out of the box.
5. Remove the 4 foam corner
block sets.
PAGE 7

6. Lift the cardboard box straight
up and off of the printer and
pallet.
7. The printer is bolted down to the pallet using 2 metal clips. Remove the bolts using a 10mm driver.
PAGE 8

8. Remove the clips from the ribs
underneath the printer.
9. Use 2 people to carefully pick the printer up off its pallet and move it to a suitable location.
PAGE 9

SETTING UP YOUR EDGE 3D PRINTER & FIRST PRINT
How to set up your new EDGE 3D printer.
WHERE SHOULD I LOCATE MY EDGE 3D PRINTER?
Please select a surface that meets the following criteria:
- Capable of supporting 120 lb (55 kg)
- At least 31" x 30" in size
- Sturdy enough to resist vibration & shaking during the printer's operation
- Reasonably flat and level
- At least 2" of clearance on the rear side and left side of the printer, for exhaust fans
- Close proximity to a 120/110V power outlet capable of delivering 6 amps continuous power
In addition you may want to consider these optional criteria:
- Reasonably out of the path of foot traffic so that people do not accidentally bump or knock the printer
- A location where the noise of the printer (approximately equivalent to a printer or copy machine
running) will not bother anyone
- Close to a wired ethernet port if you intend to install the printer on your wired network
If you have purchased one of our
optional rolling carts, simply place the
printer on top of the cart with the front
and side edges of the printer aligned
with the cart.
PAGE 10

LIFTING & MOVING
EDGE requires 2 people to lift and
move it at all times. The unit weighs
approximately 100 lb.
NOTE: This is a delicate piece of
precision equipment; do not
subject it to bumps, drops, or other
shocks!
Use the cutouts on the right and left
sides, just below the "2 person lift"
warning labels, to pick up the printer.
REMOVE PROTECTIVE FILMS
Remove the protective films from the following areas:
- Top window, both inside & outside
- Outside of front door
- Outside of filament bay door
- LCD screen
PAGE 11

REMOVE SHIPPING FIXTURES
1. Open the main door. You will find 2
bright orange shipping fixtures
supporting the Z axis.
2. Use the 2.5mm hex drive included
in your operator's toolkit to unbolt
the fixtures from the base of the
printer.
PAGE 12

3. Slide the fixtures off of the front edge of the Z axis. You may need to lift the Z axis slightly by moving
the belt as shown in the picture.
PLEASE RETAIN THE FIXTURES WITH YOUR PACKING MATERIALS: You will need to reinstall
them if you need to transport or ship your EDGE 3D printer in the future
INSTALL FILAMENT SPOOL ROLLERS
Remove the filament spool rollers from
your toolkit and install them into the
holders in the bottom of the filament
bay as shown.
PAGE 13

CONNECT POWER & ETHERNET
IMPORTANT NOTE FOR INTERNATIONAL CUSTOMERS
1. FUSION3 IS UNABLE TO SUPPLY A POWER CORD FOR LOCATIONS OUTSIDE OF THE USA and
CANADA DUE TO THE VARIETY AND TYPES OF PLUGS IN YOUR LOCATION. PLEASE SOURCE
A 3-PRONGED DESKTOP COMPUTER PLUG (18 AWG)
2. YOU WILL NEED TO CHECK THE INTERNAL POWER SUPPLY’S VOLTAGE SELECT SWITCH
BEFORE POWERING ON YOUR EDGE. PLEASE CONTACT FUSION3 SUPPORT FOR
ASSISTANCE.
DO NOT POWER ON YOUR 3D PRINTER ON WITHOUT PERFORMING THESE STEPS!
To connect the power cord:
1. Make sure the power switch on the
front of the machine (under the
LCD) is set to "O" or "off".
PAGE 14

2. Open your operator's toolkit and
locate the power cord.
3. Insert the power cord into the
power outlet on the back of your
printer.
4. Insert the other end into a wall
outlet capable of delivering 6 amps
continuous power.
5. (Optional) Insert an ethernet cable
to connect your printer to your
wired network. If you wish to use
the onboard WiFi, configuring your
network is covered later.
FIRST POWER UP
1. Press the power switch to the "on"
or "I" position. Your printer may
take 1-2 minutes to boot fully.
2. You will see a short welcome video
play; this confirms your printer has
correctly booted up.
3. After the video, a "first run" wizard
will walk you through checking all
the printer's functions and making
sure everything is working
correctly. This should take less
than 10 minutes, but it's very
important you do not skip it! (This
wizard will only run the first time
you power on the machine.)
IMPORTANT: If you encounter a
problem during this first run script, contact Fusion3 Customer Support. PLEASE DO NOT attempt
to bypass or fix an issue yourself; what has likely happened is related to shipping damage and we
want to make sure we completely and thoroughly fix the problem for you.
PAGE 15

4. Once the script completes, you will
see the main status screen on the
LCD.
LOAD FILAMENT & PREPARE THE PRINT BED
Please refer to the Loading Filament section for instructions on loading filament.
Please refer to the Cleaning & Preparing the Bed section for instructions on preparing the bed for printing.
Make sure the main door is closed. By default, you cannot start a print with the main door open, for safety.
FIRST PRINT
On the main screen on the LCD, select
the "Start Print" button. You will see a
dialog box with all of the gcode files
available to print on it.
PAGE 16

Select one of the pre-sliced files from
the list. These are all sliced for the roll
of filament we sent with your printer
(ABS).
Confirm that you want to start the
print.
NOTE: The exact files you see on
your printer will vary from the ones
in the picture. Select any file you
want.
Your printer will begin the print, but it
may seem like nothing is happening at
first. Here's the beginning of print
sequence:
1. The bed heats to its target
temperature. Nothing else will
happen until the bed is up to
temperature. You will see the
bed temperature gauge pulse
orange to indicate it's heating,
and the UI will transition to its
print progress screen. For ABS,
heating the bed for the first
time may take up to 20
minutes.
PAGE 17

2. Once the bed is up to temperature, the printer will home its Z, Y, and X axes, in that order.
3. The printer will perform a self-calibration and bed leveling routine to ensure the bed is level and the
first layer height is correct. The print head will come up to temperature during this sequence. Watch
the screen for status updates and information on what the printer is doing.
4. Once the bed probing is complete, the print head will move to the front left corner, extrude some
filament in free air to prime the extruder, then the print will begin.
5. At the end of the print, the print head will move to the back-left corner and the bed will drop to the
bottom to make part removal easier.
6. For more information on part removal, see the Cleaning & Preparing the Bed section.
NOTE: If you open the main door during a print, the printer will automatically pause the print for
safety. To resume a print, close the main door and select "Resume" on the control panel.
PAGE 18

EDGE - LOADING FILAMENT
How to load filament into your EDGE 3D printer
1. Depending on the size of the spool, adjust the rear spool roller to fit the size of spool you are loading.
2. Place the filament spool onto the
rollers with the free end of filament
paying off the front and pointing
up.
IMPORTANT: NEVER allow the free
end of the filament to get loose
and out of control. When this
happens it can wrap under itself on
the spool and cause a tangle later.
This is rarely obvious immediately
after it happens, and inevitably
shows up in the middle of a 20+
hour print job and causes a feed
issue.
PAGE 19

3. Open the filament monitoring door
on the extruder.
4. Loosen the free end of filament
from the spool. Trim the end at a
diagonal as shown.
PAGE 20
Other manuals for EDGE
7
Table of contents
Other Fusion3 3D Printer manuals

Fusion3
Fusion3 EDGE Guide

Fusion3
Fusion3 EDGE Setup guide

Fusion3
Fusion3 F410 User manual

Fusion3
Fusion3 EDGE User manual

Fusion3
Fusion3 F410 User manual

Fusion3
Fusion3 EDGE Operating instructions

Fusion3
Fusion3 EDGE User manual

Fusion3
Fusion3 EDGE Guide

Fusion3
Fusion3 F410 User manual

Fusion3
Fusion3 F400 Operating manual