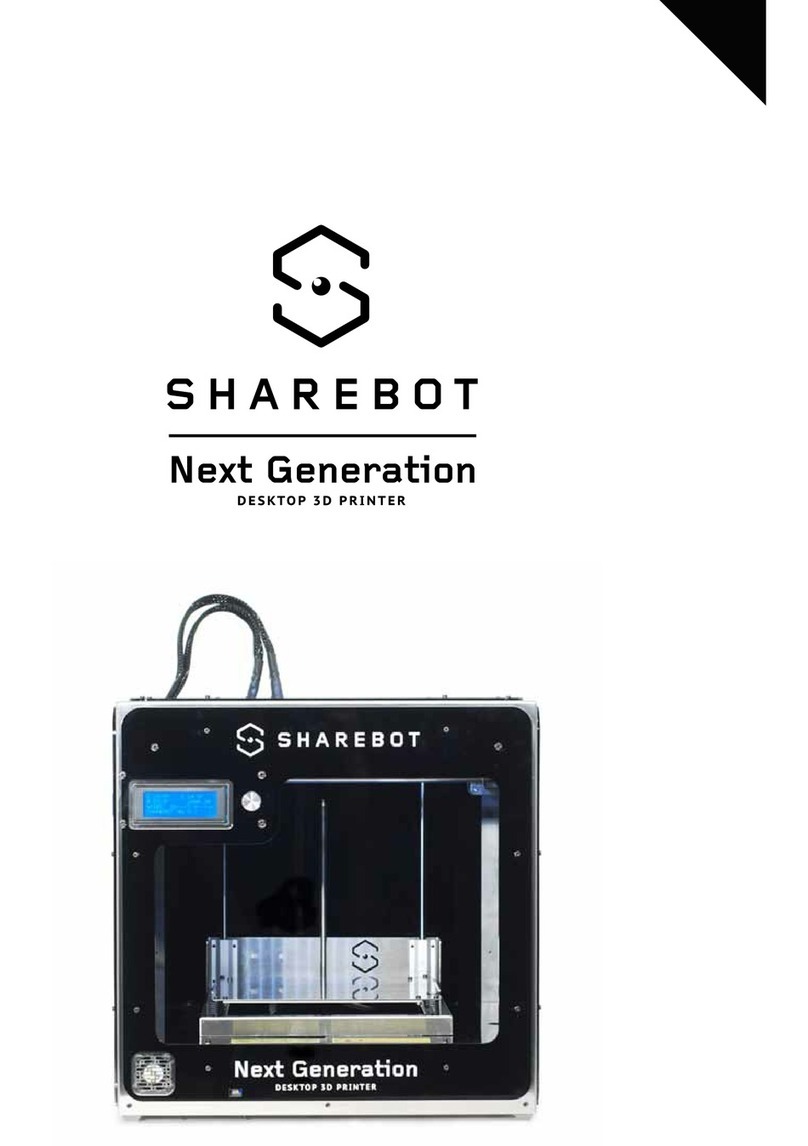
SHAREBOT BIG User manual

BIG
QUICK START GUIDE
Version 21/02/2019
1

Your new Sharebot BIG
Safety Guidelines
Package Contents
Resin management:
Support
Working with Sharebot BIG
Configuration
Installation and use of slicing software
Using the printer interface
Dashboard
Managing files
LCD interface
LCD interface structure:
Network configuration
Procedure for network configuration
By connecting the Ethernet cable, DHCP automatically assigns an IP
address to the machine.
Wifi configuration
First print
Removing the printed object, finishing and postcuring process
Remove the resin from the resin tank and cleaning
Replacing the tank film
SHAREBOX 3D
Sharebot Cure
Cure installation:
Using Sharebot Cure:
Tips & Tricks
Printing plate calibration
Check the Fep status
Check before launch a new printing job the status of the FEP on the bottom of the
tank;
Z axis misalignment
Crack in models
Delaminations
Holes in model
Lines on printed models
Fitting problem
2

Only support printed
Sticky model
Vat leak
Warping
Support part missing
Your new Sharebot BIG
Sharebot BIG introduces a lot of new features in the resin 3d printer panorama:
● Pixel size 0,137mm;
● Resolution 4K 3840x2160px;
● Printing area 468x239 mm Z 340mm;
● Resin tank with Fep 100uM;
● Sw slicing Pyramis;
● 7’ lcd interface;
● Lan;
● Wifi;
● Door security switch;
● Dimension (W) x (D) x (H) 820 × 490 x 740 mm;
● Weight 66Kg;
We hereby declare that the product above is in compliance with the essential requirements
of the following:
Low Voltage (LV) Directive 2009/95/EC, 2014/35EU.
Electromagnetic Compatibility Directive(EMC), 2004/108/EC,2014/30/EU.
Restriction of the use of certain hazardous substances (RoHS) Directive, 2011/65/EU
Commission Regulation (EU) No. 453/2010 and IEC 60950-1 Safety of ITE
Technical Documentation is stored at the manufacturer’s address below.
Sharebot Srl
Via montello, 18
23895 Nibionno (LC)
Italy
3

Safety Guidelines
Read the instructions carefully. Keep this document for future reference. Follow all
warnings and instructions marked on the product.
● Operate on a table or flat, stable surface, ensuring that the machine cannot fall and
is level;
● Do not operate outdoors;
● Do not allow resin or any liquids to get inside the chassis, wipe up any liquid spills
immediately;
● Do not use solvents to clean the printer as they may damage the screen. Use a little
detergent and warm water to clean any resin spills;
● Disconnect the printer from the power before storage or when not used for a long
period of time. This 3D printer is connected to the electrical network with an input of
110 or 240 V AC, 50/60 Hz;
● Do not allow anything to rest on the power cord. Do not locate this product where
people will walk on the cord;
● If an extension cord is used with this product, make sure that the total ampere rating
of the equipment plugged into the extension cord does not exceed the extension
cord ampere rating. Also, make sure that the total rating of all products plugged into
the wall outlet does not exceed the fuse rating;
● Do not overload a power outlet, strip or receptacle by plugging in too many devices;
● Use the product only with the supplied power cable. If you need to replace the
power cable, make sure that the new power cable meets the following
requirements: detachable type, UL listed/CSA certified, VDE approved or its
equivalent, 4.5 meters (15 feet) maximum;
● In case of malfunction, disconnect the printer immediately from the power;
● Do not attempt to fix this product by yourself, as opening or removing covers may
expose you to dangerous voltage points or other risks. Refer all repairs to qualified
service personnel. Please send an email to your national supplier or contact
4

technical service at: [email protected]
● Keep the printer and resins out of the reach of children;
● Printer requires two people to lift it from the packaging;
● The resin is an irritant to skin and eyes. Always wear gloves when coming into
contact with the liquid resin. Always use in a well ventilated room;
● Resins are classified as irritants, not harmful, but in exceptional circumstances
people can be sensitive to the resin and develop a skin irritation or rash. Avoid this
possibility by always wearing gloves and avoid breathing fumes;
● The printer should be operated on a stable and level surface, preferably away from
direct ambient light;
Unplug this product from the wall outlet and refer servicing to a qualified service personnel
if:
● The power cord or plug is damaged, cut or frayed;
● Liquid has been spilled in the machine;
● The machine was exposed to rain or water;
● The machine has been dropped or the case has been damaged;
● The machine does not operate normally after following the operating instructions;
Package Contents
Fist of all, check that there are no damages to the machine and that all items listed below
are included in the package or in the Sharebot toolbox.
Your package should contain:
● A box with the Welcome Kit;
● 3D printer Sharebot BIG;
● Sharebot Cure;
● Ultrasonic cleaner;
Welcome Kit
The Welcome Kit contains:
● Print Plate;
● Resin Tank;
● Corner tank funnel;
● Scraper;
● Allen Key;
● Funnel;
● Paper Strainer;
● Nitrile Gloves;
● Print Sample;
● Tank Fep Film;
● Tank gasket;
● USB stick with Slicing Software and manuals;
● power and Rj45 cable;
● Oil pen for Z axis;
5

Test materials
A sample bottle of Sharebot D-Hard resin is provided with the 3d printer.
A sample of C-Cleaner;
Assembly instructions
1. Unscrew the screws on the top and front panels of the crate and place them to one
side;
2. Remove the polystyrene from around the printer;
3. Remove the resin bottle from the crate;
4. Unscrew the platform, remove and put it to one side. Lift the ancillary box out of the
printer (To unscrew the bolts lift them up to disengage the lock and turn the bolt to
loosen it. Repeat this step until the bolts are fully loose so the platform can be
removed.);
5. Place the platform back into the printer and tighten the bolts;
6. With two people lift the printer out of the crate holding the printer at the bottom and
top corner on both sides;
7. Place the printer on a flat and sturdy worktop ready for set-up;
8. Level the printer;
9. Calibrate the building plate:
Warning
• Make sure you have the building plate and the bottom of the tray perfectly clean, any
debris residues could compromise the calibration / printing or even damage the printer;
• Be sure to use protective gloves and goggles if you are calibrating the printer with
resin in the tray;
• Plate calibration must always be done before each print;
A. Insert the construction plane and lock it with the 2 knobs A;
B. Unscrew the 4 Allen screws B and secure the body in the middle of the
building plate;
C. From the printer menu, send the printer to Home;
D. When the plate is in position, apply a soft pressure with hands on the
building plate towards the bottom and tighten the 4 Allen screws B;
6

Resin management:
Sharebot Big 3D printer uses a resin management system that prevents the machine use
when the availability of material is less than the required to print the desired object. The
consumables management system works by decreasing the amount of resin used for
each print succeeded by the amount of resin available in the bottle currently in use.
At the time of insertion of a new resin code the available quantity of that resin comes
set to the amount available in the bottle.
The materials management guidelines are the following:
● Each resin bottle is associated with one and only one printer;
● When a new bottle is open, is necessary to generate the corresponding activation
code and insert it into the 3D printer where the material will use.
The procedure to add a material consists of the following steps:
● Access to the web interface (Sharebox) of the printer;
● Generation of the activation code;
● Entry of the activation code into the machine.
Access to the printer
The printer to which the material should be associated must be reachable via browser,
opened the address shown in the corresponding section "Configuration" and inserting the
credentials you be able to open the "Configure" section, select "Resin".
7

Generation of the activation code
Connect to the web site https://resine.sharebot.it/
The following login page will be displayed:
Warning: Check that the lock that indicates a secure communication is green.
Once the correct credentials have been entered and the "Login" button is pressed, the
activation code generation page is displayed:
8

Enter in the "Bottle code", the code shown on the resin bottle label
Enter in the "Printer Code", the code indicated in the "Configure" - "Resin" section of the
printer in which to activate the resin.
Warning: If you own a single machine, the "Printer Code" field will be automatically
compiled.
Pressing the "Send data" button will generate the activation code.
The generated code is valid only for the printer identified by the entered code.
9

Select the text of the gray area, copy it and paste it in the "Activation code" section of the
"Configure" - "Resin" section of the printer:
Once the "Save" button is pressed, the resin volume will be set to the contents of the
new bottle.
Fill in resin
Warning
● Make sure you have the building plate and the bottom of the tray perfectly clean,
any debris residues could compromise the calibration / printing or even damage the
10

printer;
● Be sure to use protective gloves and goggles;
A. From the printer menu launch "Homing" ;
B. From the printer menu launch "plate up", the building plate will get up by
5cm;
C. Mix the resin into the bottle for 2/3 minutes, then pour the resin into the
printing tank, to cover all the bottom of the tank;
D. Finally, launch "Homing", well now you are ready to print.
Support
You can find useful documents on the Sharebot Support Page, along with a form to get in touch
with Sharebot Support.
Parts Replacement
All moving parts of the machine are excluded from warranty as they are subject to normal
wear and tear.
Printing plate and Resin tank are considered wear parts and excluded of warranty.
Covered by warranty and to be change all the parts with obvious manufacturing or
assembly defects.
The spare parts, as per regulations, are available for 5 years starting from the date on
which the machine is put on the market.
For any spare parts requirement, contact the Sharebot Authorized Centers network or use
the dedicated form on the sharebot.it website.
Before requesting technical assistance, please check the two sections: FAQ and HOW-TO
from the Sharebot.it website as well as the provided documentation.
Learn more:
www.sharebot.it/en/support
11

Working with Sharebot BIG
Configuration
The Sharebot BIG has an internal operating system using which you can manage
the printer.
There are two ways of accessing the printer interface, loading files and managing print
operations:
By Sharebox 3D or from the LCD interface.
You can choose this during the set-up.
Connect the power cables and the RJ45 cables into the printer, then turn on the power
using the power switch at the back. Turn on the screen using the switch on the front of the
printer.
Installation and use of slicing software
PC with Windows operating system for installing the slicing software with the following
requirements:
● I5 processor;
● at least 8GB RAM;
● Windows 10;
● 2GB graphics card (ideally NVIDIA);
● LAN network or a Windows PC with Ethernet port to send files and manage the 3D
printer;
Other information on the slicing software can be found in the Slicing Software Handbook
(Pyramis).
Using the printer interface
After you have chosen the desired access mode, you can access the printer’s
management interface (Sharebox 3D).
There are two main pages:
Via the »Dashboard« you can display the status of the printer and suspend the operation.
In the »Filemanager/CWS file« view you can manage print files, i.e. you can load the files
to ready the machine to process successive print operations.
Dashboard
If you are connected to the printer via the network, the dashboard is the first page that is
displayed once you have started up the printer. The status of the printer is shown on this
page. By clicking the Dashboard symbol you can return from the sub-menu to the
Dashboard at anytime.
In the »Overview« section the status of the print operation is shown. Here you can
suspend the print operation at any time by clicking »Stop«.
12

Overview of the fields displayed
● Object: Name of the print job;
● Current layer: Number of layers that have already been printed;
● Total layers: Total numbers of layers;
● Time elapsed: How long the printer has already been running;
● Total time: Expected time for the entire print;
● Progress: Percentage-based progress of the print operation;
There are two other displays at the top right:
The first display »ONLINE«, in green, indicates the printer is ready for operation. The
second display »PRINT« indicates that a print operation is currently underway as soon as
it lights up red.
Attention: If the »Online« display does not light up green, please contact the
Support service.
Managing files
If you select »file manager« menu and the symbol »CWS file«, you can access the file
manager. Here you can upload prepared print jobs, repeat or delete saved jobs. It is also
possible to transmit print jobs via USB stick.
Click on »Upload CWS« to load a file into the printer.
If you click on this button, the upload window is opened.
Click »Select file« to upload the desired object.
Via »Local«, »USB« and »All« you can display files in the internal printer memory, the
USB stick or by both media.
Each file can be printed via the »Print« button or deleted using »Delete«.
You can access additional functions via the »Service program« folder.
Z Homing: the building plate moves upwards into its end position
LCD interface
Sharebot BIG has a 7’ LCD interface located at the top front of the 3D printer.
This means independent use of the 3D printer is possible without a network connection.
You can set the NET parameters of the printer over the LCD, copy files to the memory,
and launch service programs or an order file.
The functions of the LCD interface may vary from one firmware version
to another.
LCD interface structure:
»Homepage« symbol (Sharebot logo)
● Dashboard page
»3D printer« symbol
● File from memory
13

● File from USB stick
»Setup« symbol
● Preparation
○ Auto Home
○ »Plate UP«
○ Cleaning Cycle
● File operations
○ Copy file Copy file from memory (... in memory / on USB stick)
○ Copy file from USB memory (... in memory / on USB stick)
● Delete file
○ File from memory
○ File from USB stick
● Configurations
○ Network configuration
○ Advanced settings:
■ Security PIN
■ Touch screen Calibration
»Software« symbol
● Software info
● Error logs
● Licenses
● Statistics
● Load SW update
Network configuration
The Sharebot BIG can be configured as a
network client with the assignment of a
static or dynamic IP address (via DHCP).
A Sharebot machine connected to the
network works as a network client
accessible from an IP address via a
browser (see Sharebox 3D), in order to
manage some functions.
For network configuration, the intervention
of the network administrator of your
company is recommended.
The gray color of the font indicates the automatic configuration of the network client
(DHCP).
By selecting AUTO the fonts and the IP for network configuration become black and
editable. The AUTO command becomes MAN, indicating Manual configuration.
14

Section
Select:
Configurations
Network Config
AUTO / MAN
Procedure for network configuration
By connecting the Ethernet cable, DHCP automatically assigns an IP address to the machine.
The addresses displayed become editable,
the message on the button changes to
MAN and the address triplets must be
entered:
● of the chosen static IP,
● of the LAN Netmask,
● of the router's Gateway (optional)
To save the settings, select the confirmation button.
Wifi configuration
To use the printer via the WIFI connection, it is first necessary to connect via a network
cable, as described in the previous paragraph.
To configure the WIFI connection it will now be necessary to access Sharebox 3D
and in
the specific menu choose and execute the configuration (see SHAREBOX 3D
)
First print
Attention: If you are working with liquid resin for the first time, please observe all
precautionary measures.
You can then fill the material tray with the corresponding resin.
Ensure that no resin is spilled out of the tray.
Take special care to ensure no resin drips into the machine.
If liquid resin does drip into the machine, disconnect the power cable from the printer and
refer to technical support.
After filling the tray properly, close the door of the printer.
Start a printint operation
Start a printing operation from management interface:
● Connect to the printer’s management interface;
15

● Select the »Filemanager« menu;
● Select the item »CWS file« or upload CWS file;
● Click the »Print« button;
● Confirm printing process;
Start a printing operation from the LCD interface:
● Click the »3D printer« symbol;
● Select File from memory or File from USB stick;
● Select the »CWS file«;
● Click the »Print« button;
● Confirm printing process;
Removing the printed object, finishing and postcuring process
1. Move the print plate up from the LCD interface. Allow the print to drain for a few
minutes to reduce the chance of drips;
2. Make preparations for cleaning the print. You will ideally need a large sink with a
good supply of hot water. The ambient light level should be low. Have a spray bottle
with in the C-CLEANER. Wear protective gloves at all times you come into contact
with liquids;
3. Loosen the bolts that secure the print plate to the drive carriages. Grip the print
plate L brackets firmly and take the weight of the print. Carefully slide the print plate
towards you and out of the machine. Close the printer door take care not to drip
resin;
4. When your print is finished remove the platform from the printer and lay it with the
object facing upwards in a large plastic tray. Spay the part throughouly to remove all
the unreacted surface polymer. When you have covered the entire surface, finish by
spraying with S-CLEANER. You can use a sponge or soft brush to clean detailed
parts. Alternatively use a large utrasonic cleaner;
16

5. Using a scraper detach the supports at the base to remove the part from the
platform. Handle it gently as it won’t achieve full strength until after full post
exposure. Note that for large models, we recommend post curing the model on the
build plate in order to minimize any possible warping. If your part is strongly
adhered to the build platform you can aide removal by heating the metal to expand
it by applying hot air gun to it;
6. Put the printed part(s) in the Sharebot Cure. Follow the Sharebot Cure instruction;
7. Clean the print plate thoroughly. Make sure all cured resin is removed from the
underside of the plate as this may cause damage to the vat or screen. Hot soapy
water and/or methylated spirits can be used to clean off uncured resin.Make sure
the print plate is completely dry before returning it to the printer;
8. Once the printed part(s) have been fully post-cured they should be removed from
the Sharebot Cure and dried thoroughly. Any support material can be removed
using clippers.The part can be sanded and postworked if necessary;
17

Remove the resin from the resin tank and cleaning
1. Before starting a print on the Sharebot BIG, the resin tank should be emptied and
cleaned. Wear protective gloves. Ensure that the ambient light level is not too high,
don’t work in direct sunlight and use low lighting where practical;
2. Prepare an area for cleaning the vat. You should have a smooth, flat, clean surface
with plenty of space. Lay down two layers of paper towel to protect the vat film from
scratches and soak up any spilled resin. Do not work on a surface that could be
stained or damaged by contact with resin;
3. Position a 5 litre resin bottle near the printer on a flat, stable surface and at a
convenient height. Be sure that there is enough space in the bottle for all of the
resin from the tank. Remove the lid of the bottle and insert the funnel (supplied in
the accessory box) into the top. Place a clean filter (supplied in the accessory box)
inside the funnel.
4. Remove the two tank bolts and set them aside.Grip the tank firmly by the handles
and lift it carefully out of the printer. The resin tank will be heavy, especially if there
is a large volume of resin remaining. Pour the resin gently into the funnel from one
corner of the resin tank. Pour at a steady rate and be careful not to over-fill the
funnel. Resin will flow over the flange of the tank; this is not a problem. Use a
plastic card to push resin down the vat film towards the funnel;
5. When most of the resin has drained from the vat, place it on the paper towels ready
for cleaning.When the funnel has drained, remove it from the resin bottle and
replace the lid;
6. Use paper towels to clean up the resin on the flange of the tank. Be particularly
careful to clean the resin out of the holes. If resin is allowed to cure in the holes it
can obstruct the nuts and make it difficult to re-skin the tank film. Methylated spirits
can be used to help clean the tank body;
18

7. Use paper towels to clean up any further resin inside the tank. At this point it is
important to remove any pieces of cured resin that remain in the resin tank.
Anything left inside the tank could cause damage to the tank or screen when the
printer is homed. It could also could prevent successful printing;
8. Once the tank is clean, inspect the film for any signs of damage or excessive wear.
If there is a puncture, or obvious damage, replace the tank film. You can cover tiny
holes in the tank film with clear tape. If the tank is in good condition, return it to the
printer. Replace the 2 tank bolts (do not tighten).
Replacing the tank film
1. Disassemble the tank, dispose of the film and gaskets, and clean all other parts
thoroughly. Check that any cured resin is removed. The resin tank parts will not be
damaged by cleaning solvents;
2. Place the tank bottom film frame;
3. Lay the new piece of film over the vat bottom film frame. Position it centrally. Grip
the film tightly on either side of one of the long bolts. Press the film down firmly to
puncture it;
4. Move to an adjacent long bolt and press the film down to puncture it again. Make
sure that the film is under tension as you create the new hole so that there are no
crease;
19

5. Carry out the same procedure for the short bolts, using the socket to puncture the
film;
6. Use scissors to cut away a triangular piece of film outside each of the bolts.
Carefully make two cuts from the edge of the film to the punched hole;
7. Widen each of the remaining holes by gripping the edge of the film near each long
bolt and stretching outwards slightly;
20
Table of contents
Other SHAREBOT 3D Printer manuals


