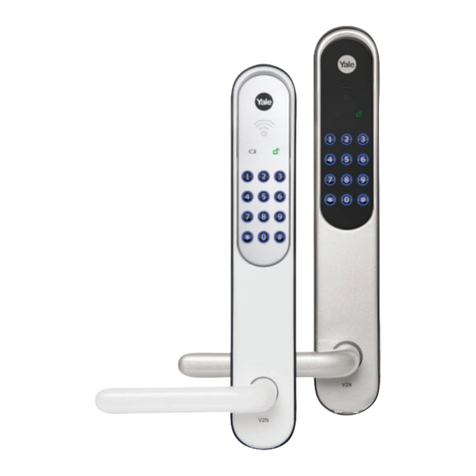
INOX EL60 User manual

ANSI/BHMA A156.2 Grade 1
User Manual
EL60 ELECTRONIC LOCK
User Manual
EL60 ELECTRONIC LOCK
PM-UMEL60-V140812

CODES
Codes may be 3, 4 or 5 digits long. The length of the Master Code determines all the codes format.
Once the numbers of digits are selected. It cannot be changes unless all programming is erased and the
default factory setting are reloaded.
No other programming commands will be accepted until default Master Code has been changed.
MASTER CODE and SUB-MASTER CODE
This unit is delivered with the Master Code set to 12345 (default).
The Master Code cannot be deleted.
Master Code performs all programming functions.
Sub-Master Code performs all programming functions except delete or change Master Code.
MANAGERS CODE
All Managers Code location ends in zero. (00. 10, 20, 30, 40, 50, 60, 70, 80, 90)
Manager Codes are capable of programming and deleting user codes under his Bank. Managers are also
capable of accessing the next higher Bank until another Manager Code appears.
USER CODES
Does not have programming privileges. Codes are used for entry only.
SERVICE CODES
Service Codes are one-time codes only. It cannot be used again. Once a service code is entered, the unit
will unlock but is will automatically delete the code.
VALID CODES and PASS TIME (DOOR UNLOCK)
Pass Time is the time the unit is unlocked after a valid code is entered.
BLUE LED will flash (with 2 beeps) after a valid code is entered.
Pass Time also determines the amount of time between two key presses. If the succeeding entry (or key
press) was pressed after the Pass Time, it is now considered as a new entry. Should this happen, wait 5
seconds for the unit to reset by itself then try entering the code again.
INVALID CODES
The RED LED will flash for 5 seconds with one beep after an invalid code is entered
01

CONNECTIONS
REMOTE SWITCH/RELEASE
OPTIONS
Keypad Anti-Tamper Lockout
• If and invalid Code is entered 3 times in
succession, the unit will turn off for 30 seconds
to prevent tampering.
• The unit will emit 2 beeps with flashing BLUE and
RED LED at the end of the anti-tamper period.
• EL60 will exit the anti-tamper period, even within
the 30 second duration, if the remote switch is
activated (REM1 or REM2).
Tones and LED Indicators
(Default Setting)
• Key press: A beep will sound and a BLUE LED
will flash.
• Access Granted: 2 beeps and BLUE LED will
flash. When Pass Time ends, the unit relocks
with a beep and a RED LED.
• Invalid Code Entered:
1 beep and 1 RED LED Flash.
• Disabled Code Entered: 1 beep and both RED
and BLUE LED flashes.
• New Access Code accepted: 2 beeps and 2
BLUE LED flashes.
• Programming Error: 1 beep and 1 RED LED flash.
• Return from anti-tamper lockout: 2 beeps and
both RED and BLUE LED will flash.
• Low Battery: 5 beeps and 5 RED LED flashes
before access is granted.
BATTERIES:
Use only 1.5 volt AA batteries, 4 pieces.
LOW BATTERY:
RED LED will flash five times with beep sound
before BLUE LED flashes to signify acceptance of
code. Batteries should be replaced as soon as this
happens.
The unit has 2 sets of terminals for remote release,
labeled REM1 and REM2 on the printed circuit
board.
REM1 can be connected to a push button.
Pushing the button will cause the unit to unlock.
The BLUE LED will light and at the same time a
beep can be heard twice.
REM2 is intended for alarm systems such as fire
alarms. When activated the unit will stay unlocked
for 30 minutes and RED LED will flash once every 2
seconds while an audible alarm sound will be heard
indicating that the unit is in the unlocked condition.
The lock will automatically revert to normal after 30
minutes. If necessary, the Master Code,
Sub-Master Code or Manager Code can be
programmed to revert the unit to normal before the
30-minute period ends..
02

03
PROGRAMMING
INITIAL SETUP:
1. Remove batteries. Press and hold (#) while connecting the batteries back.
Release after hearing 5 beeps. Within 3 seconds, press (#) keypad 3 times. The BLUE LED will
continuously light for 3 seconds and 2 beeps will be heard.
2. The unit is now clear of all programmed data and will have reverted to the factory default Master Code 12345.
NOTE: Please follow procedures above exactly otherwise unit will function abnormally. In this case,
please repeat the procedure.
No other programming commands will be accepted until default Master Code has been changed.

CODE LOCATOR FUNCTION:
PROGRAM 009
It is important to record all Codes in TABLE 1A for future reference. In the event of losing your
records, this feature will help you locate as to where a certain Code is located in the lock’s memory.
The unit will identify the Bank number (0-9) and User location (09) by flashing both the RED and BLUE
LED accompanied by a beeping sound.
[Master/Sub-Master/Manager Code] (#) (0) (0) (9) [Enter Code to be located]
EXAMPLE:
Assuming that the current Master, Sub-Master or Manager Code is (1) (2) (3) (4) (5) and you want to
search for code: (1) (2) (3) (4) (5).
1. Press (1) (2) (3) (4) (5) (#) (0) (0) (9) (1) (2) (3) (4) (5)
2. If the code entered is recognized, the following sequence will occur:
a) At the start of the Code Locator sequence, the unit will flash both the BLUE
and RED LED and emit one long beep.
b) The unit will identify the Bank number by flashing the BLUE LED (with beeps)
from 0 to 9 times.
c) To signify the end of the Bank ID sequence, the unit will flash both the BLUE
and RED LED with a long beep.
d) The unit will identify the User number by flashing the BLUE LED (with beeps)
from 0 to 9 times.
e) To signify the end of the Bank ID sequence, the unit will flash both the BLUE
and RED LED with a long beep.
3. If the Code is not recognized, the lock will sound one long beep with a RED LED.
NOTE: If the Bank or User Number is zero, the BLUE LED will not flash and no beep can be heard.
04

Codes may be 3, 4 or 5 digits long. The length of the Master Code determines all the codes format.
Once the numbers of digits are selected. It cannot be changes unless all programming is erased and the
default factory setting are reloaded.
No other programming commands will be accepted until default Master Code has been changed.
MASTER CODE and SUB-MASTER CODE
This unit is delivered with the Master Code set to 12345 (default).
The Master Code cannot be deleted.
Master Code performs all programming functions.
Sub-Master Code performs all programming functions except delete or change Master Code.
MANAGERS CODE
All Managers Code location ends in zero. (00. 10, 20, 30, 40, 50, 60, 70, 80, 90)
Manager Codes are capable of programming and deleting user codes under his Bank. Managers are also
capable of accessing the next higher Bank until another Manager Code appears.
USER CODES
Does not have programming privileges. Codes are used for entry only.
SERVICE CODES
Service Codes are one-time codes only. It cannot be used again. Once a service code is entered, the unit
will unlock but is will automatically delete the code.
VALID CODES and PASS TIME (DOOR UNLOCK)
Pass Time is the time the unit is unlocked after a valid code is entered.
BLUE LED will flash (with 2 beeps) after a valid code is entered.
Pass Time also determines the amount of time between two key presses. If the succeeding entry (or key
press) was pressed after the Pass Time, it is now considered as a new entry. Should this happen, wait 5
seconds for the unit to reset by itself then try entering the code again.
INVALID CODES
The RED LED will flash for 5 seconds with one beep after an invalid code is entered
NEXT AVAILABLE LOCATION FINDER:
PROGRAM 000
When programming a User Access Code and you are not sure of the next available location, you can
use this feature to exactly locate the next available slot using the same procedure as the “Code
Locator Feature”.
[Master/Sub-Master/Manager Code] (#) (0) (0) (0)
EXAMPLE:
Assuming that the current Master, Sub-Master or Manager Code is (1) (2) (3) (4) (5) and you want to
locate the next available location.
1. Press (1) (2) (3) (4) (5) (#) (0) (0) (0)
2. At the start of the “Next Available Location finder” sequence, the unit will flash both the BLUE
and RED LED and emit one long beep.
3. The unit will identify the Bank number by flashing the BLUE LED (with beeps) from 0 to 9 times.
4. To signify the end of the Bank ID sequence, the unit will flash both the BLUE and RED LED with
a long beep.
5. The unit will identify the User number by flashing the BLUE LED (with beeps) from 0 to 9 times.
6. To signify the end of the Bank ID sequence, the unit will flash both the BLUE and RED LED with
a long beep.
No flash or tone means the corresponding number is zero.
If no available location is found, the unit will a programming error tone.
05

KEY PRESS SOUND OPTION:
PROGRAM 971, 972, 973
• Normal Key press Sound + LED (Default)
[Master/Sub-Master/Manager Code] (#) (9) (7) (1)
• Click! Key press Sound + LED
[Master/Sub-Master/Manager Code] (#) (9) (7) (2)
• LED Only
[Master/Sub-Master/Manager Code] (#) (9) (7) (3)
DELETE SERVICE CODES:
PROGRAM 021, 022, 023, 024, 025
[Master, Sub-Master, Manager Code] (#) (0) [Service Code Number]
EXAMPLE:
Assuming that the current Master, Sub-Master or Manager Code is (1) (2) (3) (4) (5) and you want to
delete Service Code 1.
1. Press (1) (2) (3) (4) (5) • (#) (0) (2) (1) ••
2. Service Code 1 is now deleted.
3. Repeat procedure for other Service Codes. See table below for quick reference.
06

07
DELETE ALL SERVICE CODES:
PROGRAM 02#
Master, Sub-Master and Managers can delete all Service Codes.
[Master/Sub-Master/Manager Code] (#) (0) (2) (#)
EXAMPLE:
Assuming that the current Master, Sub-Master or Manager Code is (1) (2) (3) (4) (5) and you want to
delete all Service Codes.
1. Press (1) (2) (3) (4) (5) • (#) (0) (2) (#) ••
2. All Service Codes are now deleted.
ENABLE PASSAGE MODE:
PROGRAM 961
Master and Sub-Master can enable this feature. Once enabled, the unit is unlocked continuously.
[Master/Sub-Master Code] (#) (9) (6) (1)
EXAMPLE:
Assuming that the current Master or Sub-Master Code is (1) (2) (3) (4) (5) and you want to enable
passage mode.
1. Press (1) (2) (3) (4) (5) • (#) (0) (2) (1) ••
2. Unit is now unlocked until “Disable Passage Mode” is initiated.

DISABLE PASSAGE MODE:
PROGRAM 962
Master and Sub-Master can disable the “Passage Mode” feature. Once initiated, the unit is back to its
normal operation.
[Master/Sub-Master Code] (#) (9) (6) (2)
EXAMPLE:
Assuming that the current Master or Sub-Master Code is (1) (2) (3) (4) (5) and you want to disable
passage mode.
1. Press (1) (2) (3) (4) (5) • (#) (9) (6) (2) ••
2. Unit is now in its normal operation.
ENABLE USER CODES IN ONE BANK:
PROGRAM 4X#
This feature can be used by Master, Sub-Master or Manager Codes. Banks can only be enabled by
the Manager in charge of his Bank. Master and Sub-Master can enable all Banks.
[Master, Sub-Master, Manager Code] (#) (4) [1-digit Bank Number] (#)
EXAMPLE:
Assuming that the current Master, Sub-Master or Manager Code is (1) (2) (3) (4) (5) and you want to
enable Bank1.
1. Press (1) (2) (3) (4) (5) • (#) (4) (1) ••
2. Users at specified Bank are enabled.
08

ENABLE ALL:
PROGRAM 4 ##
[Master, Sub-Master, Manager Code] (#) (4) [1-digit Bank Number] (#)
EXAMPLE:
Assuming that the current Master, Sub-Master or Manager Code is (1) (2) (3) (4) (5).
Press (1) (2) (3) (4) (5) • (#) (4) (3) (#) ••
NOTE: If Master or Sub-Master Code was used to unlock the unit prior to the program sequence,
all 100 User/Manager Codes are enabled. (Service Codes must be reprogrammed)
If the Manager Code was used to unlock the unit prior to the program sequence,
only the 9 users under that manager is enabled.
PASS TIME (DOOR UNLOCK):
PROGRAM 902-920
Pass time determines the amount of time between two key presses. It can be set between 2 to 20
seconds. Factory default is 5 seconds.
[Master/Sub-Master Code] (#) (9) [Value between 02 to 20]
EXAMPLE:
Assuming that the current Master or Sub-Master Code is (1) (2) (3) (4) (5) and you want to set the
Pass time to 7 seconds.
1. Press (1) (2) (3) (4) (5) • (#) (9) (0) (7) ••
2. Pass time is now set to 7 seconds.
09

DISABLE USERS ONLY:
PROGRAM 93#
Disable all 90 Users and 5 Service Codes, while managers remain active. If a new user is added while
the unit is in “Disable Users” mode, the new user will overwrite the previous stored code and will
automatically be enabled.
[Master/Sub-Master Code] (#) (9) (3) (#)
EXAMPLE:
Assumign that the current Master or Sub-Master Code is (1) (2) (3) (4) (5) and you want to disable all
the Users.
1. Press (1) (2) (3) (4) (5) • (#) (9) (3) (#) ••
2. All Users are now disabled.
ADD SERVICE CODES:
PROGRAM 011, 012, 013, 014, 015
Service Codes are single-entry Codes. They can only be entered or used once. This unit can be
programmed to accept 5 Service Codes. It may be the same code used 5 times, or it may vary from
each. Service Code numbers are 011, 012, 013, 014, and 015.
Service Code 1:
[Master, Sub-Master, Manager Code] (#) (0) [Service Code Number]
[Enter new Service Code]
EXAMPLE:
Assuming that the current Master, Sub-Master or Manager Code is (1) (2) (3) (4) (5) and you want to
program Service Code 1 with (3) (4) (5) (6) (7).
1. Press (1) (2) (3) (4) (5) • (#) (0) (1) (1) •• (3) (4) (5) (6) (7) ••
2. Service Code 1 is now programmed for 1 entry with (3) (4) (5) (6) (7) passcode.
3. Repeat procedure for other Service Codes.
10

DISABLING A USER CODE:
PROGRAM 3XX
User Codes are located at locations 01-09, 11-19, 21-29, 31-39, 41-49, 51-59, 61-69, 71-79,
81-89 and 91-99 (see table 1A on page 04).
[Current Master/Sub-Master/Manager Code] (#) (3) [2-digit Location Code]
EXAMPLE:
Assuming that the current Master, Sub-Master or Manager Code is (1) (2) (3) (4) (5) and you want to
disable a User Code located at location 21.
1. Press (1) (2) (3) (4) (5) • (#) (3) (2) (1) ••
2. User Code at the specified location is disabled.
DISABLE USERS IN ONE BANK:
PROGRAM 3X#
Banks are designated as numbers from 0-9. For instance, Bank “0” will have its manager “00” and
users 01-09; Bank “1” has Manager “10” and Users 11-19 and so on.
[Current Master/Sub-Master/Manager Code] (#) (3) [1-digit Bank Number] (#)
EXAMPLE:
Assuming that the current Master, Sub-Master or Manager Code is (1) (2) (3) (4) (5) and you want to
disable “Bank 1”.
Press (1) (2) (3) (4) (5) • (#) (3) (1) (#) ••
NOTE: If Master or Sub-Master Code was used to unlock the unit prior to the program sequence,
all 9 Users and 1 Manager Code in that Bank are disabled.
If the Manager Code was used to unlock the unit prior to the program sequence,
only the 9 users in that bank are disabled.
11

DISABLE ALL:
PROGRAM 3##
If Master or Sub-Master Code was used to unlock the unit, it will disable all 100 Users/ Managers and
will clear all 5 Service Codes.
[Current Master/Sub-Master Code] •(3) (#) (#) ••
If Manager Code was used to unlock the unit, it will disable the users under that manager.
[Manager Code] •(3) (#) (#) ••
NOTE: Manager cannot disable themselves.
ENABLE ONE MANAGER OR USER CODE:
PROGRAM 4XX
This feature can be used by Master, Sub-Master or Manager Codes. User Codes can only be enabled
by the Manager in charge of his Bank.
Master and Sub-Master can enable all Manager and Users.
[Master, Sub-Master, Manager Code] (#) (4) [2-digit Location]
EXAMPLE:
Assuming that the current Master, Sub-Master or Manager Code is (1) (2) (3) (4) (5) and you want to
enable a User located at location 21.
1. Press (1) (2) (3) (4) (5) • (#) (4) (2) (1) ••
2. User Code at the specified location is enabled.
12

DELETING A MANAGER CODE:
PROGRAM 2XX
Manager Codes are located at locations 00, 10, 20, 30, 40, 50, 60, 70, 80, and 90 (see table 1A on
page 04).
[Current Master/Sub-Master Code] (#) (2) [2-digit Location Code]
EXAMPLE:
Assuming that the current Master or Sub-Master Code is (1) (2) (3) (4) (5) and you want to delete a
Manager Code located at location 20.
1. Press (1) (2) (3) (4) (5) • (#) (2) (2) (0) ••
2. Manager Code at the specified location is deleted.
DELETING A USER CODE:
PROGRAM 2XX
User Codes are located at locations 01-09, 11-19, 21-29, 31-39, 41-49, 51-59, 61-69, 71-79,
81-89 and 91-99 (see table 1A on page 04).
[Current Master/Sub-Master/Manager Code] (#) (2)
[2-digit User Location number]
EXAMPLE:
Asssuming that the current Master, Sub-Master or Manager Code is (1) (2) (3) (4) (5) and you want to
delete a User Code located at location 21.
1. Press: (1) (2) (3) (4) (5) • (#) (2) (2) (1) ••
2. User Code at the specified location is deleted.
13

ADD/CHANGE A USER CODE:
PROGRAM 1XX
User Codes are located at locations 01-09, 11-19, 21-29, 31-39, 41-49, 51-59, 61-69, 71-79,
81-89 and 91-99 (see table 1A on page 04).
NOTE: New User Codes must use the same number of digits as the (new) Master Code.
[Current Master/Sub-Master/Manager Code] (#) (1)
[2-digit User Location] [New User Code]
EXAMPLE:
Assuming that the current Master, Sub-Master or Manager Code is (1) (2) (3) (4) (5) and you want to
add a new User Code of (3) (4) (5) (6) (7) in location 21.
1. Press (1) (2) (3) (4) (5) • (#) (1) (2) (1) • (3) (4) (5) (6) (7) ••
2. The unit will unlock upon entering the Master Code and will remain unlocked while initiating the
program sequence.
3. Wait at least 5 seconds before trying your User Code
14
DISABLING A MANAGER CODE:
PROGRAM 3XX
Manager Codes are located at locations 00, 10, 20, 30, 40, 50, 60, 70, 80 and 90 (see table 1A on
page 04).
[Current Master/Sub-Master Code] (#) (3) [2-digit Location Code]
EXAMPLE:
Assuming that the current Master or Sub-Master Code is (1) (2) (3) (4) (5) and you want to disable a
Manager Code located at location 20.
1. Press (1) (2) (3) (4) (5) • (#) (3) (2) (0) ••
2. Manager Code at the specified location is disabled.

15
ADD/CHANGE A MANAGER CODE:
PROGRAM 1XX
Manager Codes are located at locations 00, 10, 20, 30, 40, 50, 60, 70, 80 and 90 (see table 1A on
page 04).
NOTE: New Manager Codes must use the same number of digits as the (new) Master Code.
[Current Master/Sub-Master Code] (#) (1)
[2-digit Location Code] [New Manager Code]
EXAMPLE:
Assuming that the current Master or Sub-Master Code is (1) (2) (3) (4) (5) and you want to add a new
Manager Code of (3) (4) (5) (6) (7) in location 20.
1. Press: (1) (2) (3) (4) (5) • (#) (1) (2) (0) • (3) (4) (5) (6) (7) ••
2. The unit will unlock upon entering the Master Code and will remain unlocked while initiating the
program sequence.
3. Wait at least 5 seconds before trying your Manager Code.

16

CHANGING THE MASTER CODE:
PROGRAM 991
Assuming that the current Master Code is (1) (2) (3) (4) (5) and you want to change it to (4) (4) (4) (4) (4)
[Current Master Code] (#) (9) (9) (1) [Length of new Master Code][New Master Code]
[Length of new Master Code][New Master Code]
EXAMPLE:
Assuming that the current Master Code is (1) (2) (3) (4) (5) and you want to change it to (4) (4) (4) (4) (4).
1. Press (1) (2) (3) (4) (5) • (#) (9) (9) (1) • (5) • (4) (4) (4) (4) (4) • (5) • (4) (4) (4) (4) (4)
2. Wait for at least 5 seconds before trying your new Master Code.
Note: The BLUE DOTS (•) indicates the flashing BLUE LED on the unit.
The unit will unlock upon entering the Master Code and will remain unlocked while initiating the
program sequence.
Once the number of digits is selected, it cannot be changed unless unit is reverted back to its
factory default settings.
ADD/CHANGE SUB-MASTER CODE:
PROGRAM 981
[Current Master Code] (#) (9) (8) (1) [New Sub-Master Code][New Sub-Master Code]
EXAMPLE:
Assuming that the current Master Code is (1) (2) (3) (4) (5) and you want to add a Sub-Master Code of
(2) (3) (4) (5) (6).
1. Press (1) (2) (3) (4) (5) • (#) (9) (8) (1) • (2) (3) (4) (5) (6) • (2) (3) (4) (5) (6) ••
2. The unit will unlock upon entering the Master Code and will remain unlocked while initiating the
program sequence.
3. Wait for at least 5 seconds before trying your new Sub-Master Code.
17

DELETING SUB-MASTER CODE:
PROGRAM 982
Assuming that the current Master Code is (1) (2) (3) (4) (5) and you want to delete a Sub-Master Code.
[Current Master Code] • (#) (9) (8) (2) • (9) (8) (2) ••
1. Press (1) (2) (3) (4) (5) • (#) (9) (8) (2) • (9) (8) (2) ••
2. Sub-Master Code is deleted.
18

19
2
3
4
5
6
13
14
15
16
17
18
19
23
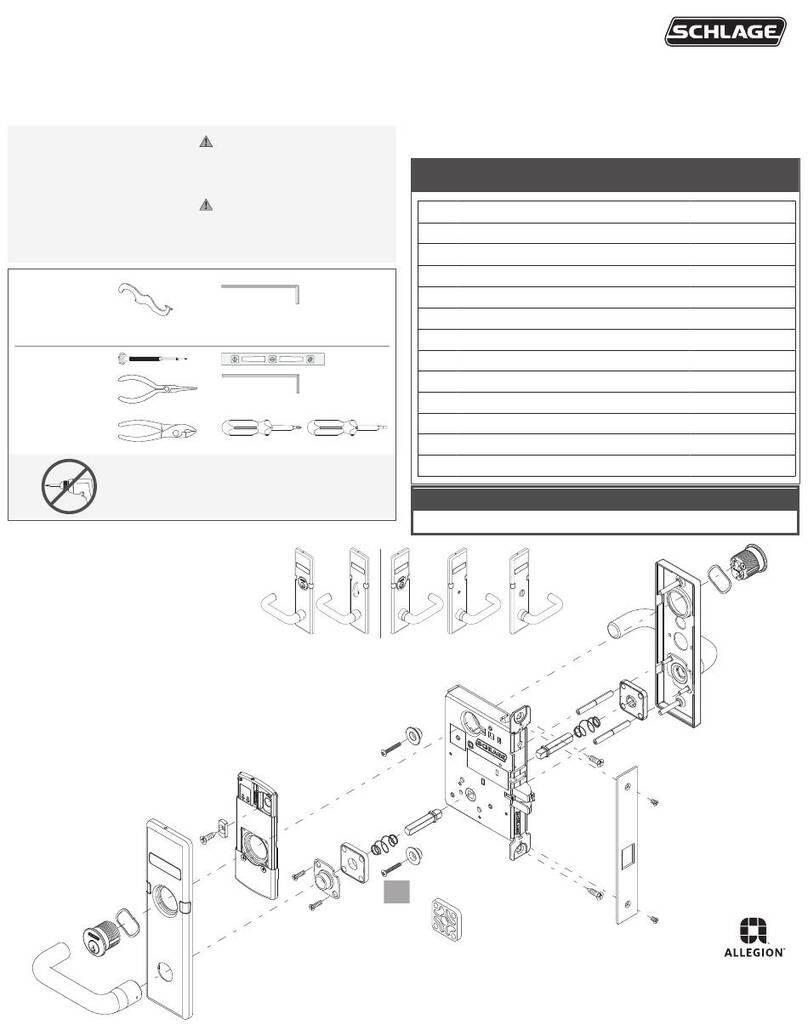
INSIDE ROSE MOUNTING PLATE
LATCH
BACK PLATE
BATTERY COVER SCREW
BATTERY COVER WITH FOAM INSERT
BACK PLATE SHORT MOUNTING BOLTS (X2)
INNER PLATE MOUNTING
BOLTS (X2)
BACK PLATE MOUNTING
BOLTS (X2)
ROSE MOUNTING BOLTS (X2)
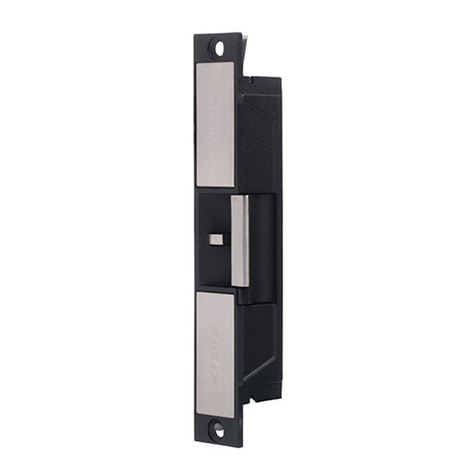
STRIKE PLATE
BATTERY HOLDER
INSIDE ROSE
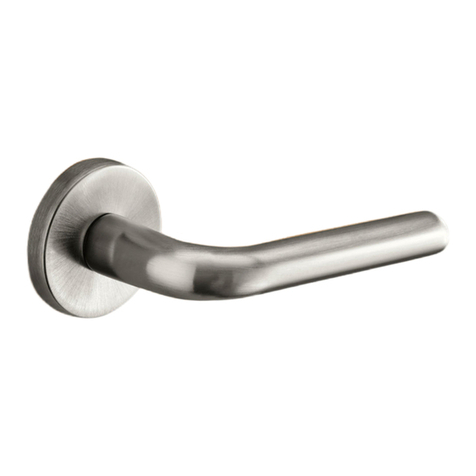
INSIDE LEVER
LEVER CATCH TOOL
DOOR
STOP
1
Table of contents
Other INOX Lock manuals


