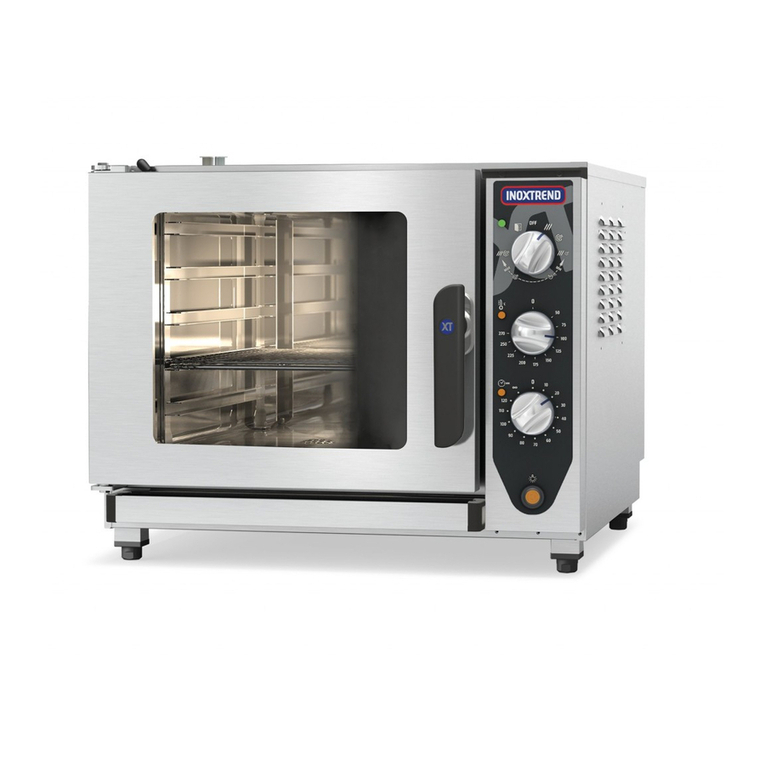
Inoxtrend Compact Series Specification sheet

EN CONVECTION OVENS - INSTRUCTIONS FOR USE AND MAINTENANCE
IT FORNI A CONVEZIONE - ISTRUZIONI PER L’USO E LA MANUTENZIONE
DE HEISSLUFTÖFEN - BEDIENUNGS-UND WARTUNGSANLEITUNG
FR FOURS MIXTES - INSTRUCTIONS POUR L’EMPLOI ET LA MAINTENANCE
ES HORNOS CONVECCIÓN-VAPOR - INSTRUCCIONES USO Y MANTENIMIENTO
NL CONVECTIEOVENS - INSTRUCTIES VOOR DIE GEBRUIK EN ONDERHOUD
B02.0034.12

USE AND MAINTENANCE USO E MANUTENZIONE BEDIENUNGS-UND WAR-
TUNGSANLEITUNG
4.0 Instructions for a safe use of
the oven Avvertenze per l’uso sicuro del
forno Anweisungen für sicheren Ge-
brauch des Ofens
4.0A Description of cooking cycle or
cooking program Denizione di ciclo o program-
ma di cottura Denition von dem manuellen
garen und automatischem gar-
programm
4.1 Starting the oven Messa in funzione del forno Inbetriebnahme
4.2 Description of control panel
components Descrizione componenti pan-
nello programmabile Beschreibung der bestandteile
programmierbarer bedientafel
4.3 Setting of CONVECTION mode
in manual cooking Impostazione di una cottura
manuale in modalità CONVE-
ZIONE
Einstellung manuelles garen in
HEISSLUFTMODALITÄT
4.4 Setting of STEAM mode in
manual cooking Impostazione di una cottura
manuale in modalità VAPORE Einstellung manuelles garen in
DAMPFMODALITÄT
4.5 Complementary functions Funzioni complementari Zusätzliche funktionen
4.6 Starting manual cooking Avvio di una cottura in modali-
tà manuale Anfang einer garphase in ma-
nuelles modalität
4.7 Fast cooling Rareddamento veloce Schnellabkühlung
5.0 Automatic cooking programs Programmi automatici di cot-
tura Automatische garprogramme
5.1 Starting an automatic cooking
programs Avvio di un programma auto-
matico di cottura Anfang eines automatischen
garprogramms
5.2 Modication of a cooking pro-
gram Modica di un programma
automatico di cottura Veränderung eines automati-
schen garprogramms
5.3 Creation of a new cooking
program Memorizzazione di un nuo-
vo programma automatico di
cottura
Speicherung eines neuen auto-
matischen garprogramms
5.4 Elimination of a cooking pro-
gram Cancellazione di un program-
ma automatico di cottura Storno eines automatischen
garprogramms
5.5 Elimination of a phase of cook-
ing program Cancellazione di una fase di un
programma automatico Storno einer phase eines auto-
matischen garprogramms
6.0A Automatic washing system
with liquid detergent Sistema di lavaggio automatico
con det. liquido Autom. Waschsystem mit Rei-
nigungsüssigkeit
7.0 Alarms Allarmi Alarme
7.1 Serious alarms Allarmi gravi Schwere alarmen
7.2 Non serious alarms Allarmi non gravi Unschwere alarmen
8.0 Settings and regulations Regolazioni Regulierungen
9.0 Maintenance Manutenzione Wartung
9.1 What to do in the case of a
breakdown and/or extended
period of non use
Comportamento in caso di
guasto e/o di un prolungato
non funzionamento
Anweisungen bei Störungen
und/oder längerem Gerätestill-
stand
10.0 Cooking tips Consigli per le cotture Nützliche Hinweise beim Garen
10.1 Remedies to cooking hitches Rimedi alle anomalie di cottura Abhilfe bei anormalem Garen
2

3
EMPLOI ET MAINTENANCE USO Y MANTENIMIENTO GEBRUIK EN ONDERHOUD
4.0 Instructions pour l’utilisation
sûre du four Advertencias para el uso segu-
ro del horno Instructies voor een veilig ge-
bruik van de oven
4.0A Dénition de cycle ou de pro-
gramme de cuisson Denición de ciclo o programa
de cocción Beschrijving van ovencyclus of
ovenprogramma
4.1 Mise en service du four Encendido del horno De oven opstarten
4.2 Description des composants du
panneau de commande Descripción componentes pa-
nel de control Beschrijving van onderdelen
van het bedieningspaneel
4.3 Conguration de la phase
CONVECTION en modalité
manuelle
Conguración de una cocción
manual en modo CONVECCIÓN Selectie van handmatig pro-
gramma in CONVECTIEMODUS
4.4 Conguration de la phase VA-
PEUR en modalité manuelle Conguración de una cocción
manual en modo VAPOR Selectie van handmatig
programma in STOOMMODUS
4.5 Fonctions complémentaires Funciones complementarias Bijkomende functies
4.6 Mise en marche du programme
manuel de cuisson Arranque de una cocción en
modo manual Een handmatig ovenprogram-
ma starten
4.7 Refroidissement rapide Enfriamiento rápido Snel afkoelen
5.0 Programmes automatiques de
cuisson Programas automáticos de
cocción Automatisch gaarprogramma
5.1 Mise en service avec les pro-
grammes automatiques Arranque de un programa au-
tomático de cocción Start van een automatisch
gaarprogramma
5.2 Modication d’un programme
automatique de cuisson Modicación de un programa
de cocción Wijzigen van een automatisch
gaarprogramma
5.3 Mémoriser une nouvelle pro-
gramme de cuisson automa-
tique
Memorización de un nuevo
programa de cocción au-
tomático
Een nieuw automatisch gaar-
programma opslaan
5.4 Annulation d’un programme de
cuisson automatique Cancelación de un programa
automático de cocción Verwijderen van een automa-
tisch gaarprogramma
5.5 Annulation d’une phase d’un
programme automatique Cancelación de una fase de
un programa automático de
cocción
Verwijderen van een fase van
een automatisch programma
6.0A Système de lavage automa-
tique avec détergent liquide Sistema de lavado automático Automatisch reinigingssysteem
met vloeibaar wasmiddel
7.0 Alarmes Alarmas Alarmen
7.1 Alarmes graves Alarmas graves Ernstige alarmen
7.2 Alarmes non graves Alarmas non graves Weinig ernstige alarmen
8.0 Réglages Ajustes Aanpassingen
9.0 Entretien Mantenimento Onderhoud
9.1 Que faire en cas de panne et/
ou de l’inutilisation prolongée
du four
Comportamiento en caso de
avería y/o de largo plazo de
inactividad
Handelen in geval van sto-
ringen of indien het apparaat
langdurig niet in gebruik is
10.0 Conseils de cuisson Consejos para las cocciones Tips voor het bereiden
10.1 Remèdes aux anomalies de
cuisson Remedios para las anomalías
de cocción Oplossingen voor problemen bij
het bereiden

4

4.0 INSTRUCTIONS FOR A SAFE USE OF THE OVEN
• Ensure the oven is on a stable position and safety devices installed upstream are ecient.
• Always use adequate protection gloves to introduce or pull out the trays.
• Always pay maximum attention to the oor, that due to cooking steam could be slippery.
• In order to avoid burns, never use trays or containers with liquids or uids over a level that can be easily con-
trolled at sight.
• Don’t put trays or other kitchen tools on the oven.
• Periodically have a check with technical service and replace eventual damaged parts, that could alter the proper
functioning of the oven or be a danger.
• Often clean the oven following the instructions stated in this manual.
MAX. FOOD LOADING
Number of trays Max. food loading
4 x 2/3 GN 6 Kg
4 x 1/1 GN 10 Kg
7 x 2/3 GN 10 Kg
7 x 1/1 GN 18 Kg
11 x 1/1 GN 25 Kg
For a correct comprehension of the terminology used in the following paragraphs, we underline that cooking
phase is the period of time in which the oven carries out one of the following cooking modes.
Convection hot forced air
(temperature range between 20 - 270°C)
Combi mode
(temperature range between 20 - 270°C)
Steam
(temperature range between 20 - 100°C)
The cooking phase can use following devices and automatisms:
Skewer probe to control the core temperature of the food to be cooked
Δt to control cooking chamber temperature
Cooking chamber release valve
High or low fan speed
Autoreverse
4.0A DESCRIPTION OF COOKING CYCLE OR COOKING PROGRAM
Manual cooking cycle or program:
Food can be cooked in a single phase.
During the cooking program you can activate or deactivate the above mentioned devices and automatisms, adjust
cooking chamber temperature, core probe temperature, humidication and cooking time.
Automatic cooking program or cycle:
Food can be cooked with more phases, and totally automatically.
During the program it’s possible to temporary modify the above mentioned devices and automatisms and adjust
cooking temperature, time and humidication.
5
EN

6
EN
4.1 STARTING OF THE OVEN
Switch on the water interception valves and the protection electric switch, installed upstream.
Press the ON/OFF key and wait few seconds for the lighting of the display.
ATTENTION! Turning the oven o through the button ON/OFF does not interrupt the power supply
to the electronic boards.
If the oven is not used we advise you to switch o electric power supply using the protection switch upstream.
4.2 DESCRIPTION OF PROGRAMMABLE CONTROL PANEL COMPONENTS
AON/OFF button NDisplay set button
C5” touch screen display PAutoreverse button
DCooking chamber temperature button RReduced ventilation button
EDelta T function button SCooking /programs starting button
FCooking time button TFast cooling button
GTemperature core probe button VRelease valve on/o button
HCook & Hold function button ZProgram cancellation button
MChamber lighting button
4.3 SELECTION OF A MANUAL COOKING IN CONVECTION MODE
To congure a manual cooking in convection mode, in the home page press the icon with the symbol
on the side. The display and the buttons on the control panel visualize the following info.
3 rectangular icons indicate the parameters used to control cooking process.
In the example shown on the side these parameters are the following:
• Cooking chamber temperature (the value shown indicates the real
temperature inside the cooking chamber).
• Humidication percentage (this value is by default 0).
• Cooking time (this value is by default 10 minutes).
The lighted leds next to the buttons cooking chamber temperature and
cooking time conrm the parameters used to manage cooking.
The switched o leds of the buttons autoreverse and low speed indi-
cate that these functions have not been activated. The switched o led
of the release valve button indicates that the release valve is closed.
Pressing the set button, the display will show the select-
ed values until the button is pressed.
In the example on the side the cooking time icon
shows the real temperature (23°C) and the selected
one (200°C).
The leds of the selected parameters (cooking chamber temperature
and cooking time) and of the activated additional functions (autorev-
erse, low speed and release valve) ash until the button “see set” is
pressed.

7
Fig. B. To modify the cooking chamber temperature set, press the rectangular icon with the symbol
shown on the side.
The display shows the numeric keyboard to select the new temperature value.
Digit the selected value and press OK.
The selected temperature must be between 20 and 270 °C.
NOTE: If you have activated low speed ventilation, the temperature range is between 20 and 230 °C.
Fig. C. To modify the percentage of humidication of the cooking chamber, press the rectangular
icon with the symbol on the side.
The display shows the numeric keypad to select the new value for humidication.
Digit the selected value and press OK.
The percentage of selected humidication must be between 0 and 99%.
Fig. D. To modify the cooking time, press the rectangular icon with the symbol shown on the side.
The display shows the numeric keyboard to select the new cooking time.
Digit the selected value and press OK.
The selected cooking time must be between 1 minute and 20 hours.
NOTE: For cooking times between 1 and 59 minutes, digit the value in minutes.
For cooking times between 60 minutes and 20 hours, digit hours and minutes.
For example, for a cooking time of 1 hour and a half, digit 130 (1 hour and 30 minutes). For an unlimited func-
tioning of the oven digit 0.
Fig. E. To eect a cooking process with core probe, press the button shown on the side, under the
display.
The lighted led next to the cooking time button switches o and the one of the core probe switches
on.
VERY IMPORTANT Every time core probe cooking is selected, the probe must to be connected to the oven.
If the probe is not connected, the warning W220 will appear on the screen advising to connect the probe.
If this happen, to close the warning press on the pop-up.
On the display, the cooking time will be replaced by the core probe.
The visualized value inside the core probe icon indicates the temperature detected by the core probe. If the
core probe is not connected to the oven, this value will be visualized as ERR (error).
Pressing the button “see set” inside the core probe icon, you will see both the real temperature detected by the
core probe and the set value.
The default value for the core probe is 60 °C.
Selecting the management of the cooking process with the core probe, the cooking will end when the tempera-
ture detected by the skewer in the core of the product will reach the set value.
EN
Fig. B Fig. C
Fig. D Fig. E

8
Fig. A. To modify the temperature set of the core probe, press the rectangular icon with the symbol
shown on the side. The display shows the numeric keyboard to select the new value for the temper-
ature. Digit the selected value and press OK.
The selected temperature must be between 20 and 99°C.
Fig. B. To eect a cooking process with Delta T device, press the button shown on the side under the
display. This control can be activated only if previously cooking mode with core probe has been se-
lected. The led that was switched on next to the cooking chamber temperature button, now switches
o and the led of Delta T button switches on.
In the display the cooking chamber temperature icon will be replaced by the Delta T icon. The visualized value
inside Delta T icon shows the selected temperature for this type of control. The default value for Delta T func-
tion is 100 °C.
Fig. C. To modify the temperature set for Delta T, press the rectangular icon with the symbol on the
side. The display shows the numeric keyboard to select the new value for the temperature. Digit the
selected value and press OK.
The selected temperature must be between 30 and 150 °C.
Setting a temperature value for Delta T, the cooking chamber temperature is directly related to the one detect-
ed by the probe. For example, if you choose for Delta T a value of 100 °C, cooking chamber temperature will
always remain 100 °C higher than the temperature detected by the probe.
In this way, cooking results are much more delicate and there is less loss of weight of the food compared to
traditional cooking.
This cooking method is particularly suitable to cook expensive food, in which the possibility to reduce the loss
of weight can be an essential factor for the economic return of the cooking.
VERY IMPORTANT: Take into consideration that the use of Delta T function makes the cooking time consider-
ably longer. Selecting a value less than 100 °C for the Delta T, the cooking time can be more than twice longer
than the same cooking without Delta T control.
In the table below you can nd the trend of the core probe temperature and the cooking chamber temperature
in the case of a cooking in which 65 °C for the probe and 100 °C for Delta T have been selected.
˚C
65
4
100
165
EN
Cooking chamber temperature
Fig. A Fig. B
Fig. C

9
4.4 SELECTION OF A MANUAL COOKING IN STEAM MODE
Fig. D. To congure a manual cooking in steam mode, in the home page press the icon with the
symbol shown on the side. The display and the buttons of the control panel show the following info.
3 rectangular icons indicate the parameters used for the control of cooking process. In the example
shown on the side the parameters are the following:
Cooking chamber temperature (the value indicates the real temperature).
Percentage of humidication (this value is 99% and cannot be modied).
Cooking time (this value is by default 10 minutes).
The lighted leds next to the buttons cooking chamber temperature and time conrm the parameters used to
manage cooking process.
The switched o led of the autoreverse button indicates that this function has not been activated. The lighted
led of low speed ventilation conrms that this function has been activated.
NOTE: in steam mode, by default, the oven proposes low speed.
The switched o led of the release valve indicates that the release valve is o.
NOTE: in steam mode, in order to maintain the maximum steam saturation inside the cooking chamber, it’s
not possible to open the release valve.
Fig. E. To modify the set of the cooking chamber temperature, press the rectangular icon with the
symbol shown on the side. The display shows the numeric keyboard to set the new temperature
value. Digit the selected value and press OK.
The selected temperature must be between 20 and 100 °C.
4.5 ADDITIONAL FUNCTIONS
Fig. F. In both cooking modes (convection with humidication adjustment and steam) it’s possible to activate
one or more additional functions, in order to improve cooking quality. The activation of these functions is ef-
fected by pressing some buttons above and under the display. If the leds above the buttons are switched on, it
means that the function has been activated. The additional functions are:
Low speed ventilation.
To be activated through the button R. Note: during the pause for speed changing, the led above the
button ashes. We suggest to use low speed to keep moist food in the cooking surface when you
cook with sauces and / or liquids or when there is not a dry, crispy nish.
Autoreverse.
To be activated through the button P. Note: during the pause for reversal of ventilation, the led
above the button ashes. The autoreverse function reverses the sense of fan rotation each 4 min-
utes. Its activation improves the cooking uniformity.
Keep in mind that the necessary pauses for fan reversal can increase cooking times of about 15%.
Release valve.
To be activated through the button V. Its opening permits the steam to go out from the cooking
chamber. We recommend to open the release valve when you want to obtain dry and crispy food. It
cannot be activated in steam mode, because it’s necessary to keep inside the cooking chamber the
biggest quantity of steam.
EN
Fig. D Fig. E
Fig. F

10
Cook & Hold.
To be activated through the button H.
The activation of this function, add at the end of the cooking cycle, an unlimited holding phase at a
temperature of 50 °C.
We recommend the use of this function when it’s not possible to pull out the food at the end of the cooking cy-
cle (for ex. Cooking at night). Its activation reduces bacterial proliferation typical of slow cooling process.
C&H function is not recommended when you cook using core probe.
Cooking chamber lighting.
To be activated through the button M.
Through this button chamber lighting turns on and o.
4.6 STARTING A MANUAL COOKING
Fig. A. After you have selected cooking parameters, it is necessary to eect pre-heating of the cook-
ing chamber, to achieve good cooking results.
Pressing Start button, the oven begins the pre-heating phase.
The starting of pre-heating is conrmed by lighting of the green led of the start button.
The default pre-heating temperature is 30 °C higher than the selected cooking temperature.
In this way the decreasing of temperature when you open the oven’s door will be compensated.
Fig. B. When pre-heating is activated, the icon that previously showed the selected cooking cham-
ber temperature, will show the real cooking chamber temperature during pre-heating.
Pressing the button “see set”, the icon will show the temperature at the end of pre-heating.
It’s possible to cancel pre-heating phase by pressing Start button again.
It is also necessary to insert rst the products to be cooked, because pressing the icon Start the
second time, the cooking process will begin.
Fig. C. After 10 seconds from starting of any cooking cycle, the display will modify the way to visualize cooking
parameters. The oven switches from operative screen to a simplied view.
The purpose of the simplied view is to make visible and instantly interpretable the working parameters of the
oven, also at a bigger distance than the one used for operative phases.
Touching the display the oven switches to operative screen.
Fig. D. At the end of pre-heating phase you will hear an acoustic signal.
Pressing the icon on the side you will interrupt the buzzer.
At the same time, the display shows a message to introduce the food to start the cooking phase.
When you close the door again, after you have inserted the tray, cooking starts.
Fig. E. Also in this case, after 10 seconds, the display switches to simplied view.
EN
Fig. A
Fig. B
Fig. C Fig. D
Fig. E Fig. F
ATTENTION!
CHAMBER TEMPERATURE
IS OK
INTRODUCE FOOD
TO BE COOKED.
CLOSING DOOR
COOKING STARTS.
ATTENTION!
END OF COOKING.

11
Fig. F. At the end of cooking cycle you will hear an acoustic signal.
Pressing the icon on the side, the buzzer will be interrupted.
At the same time, the display shows a message indicating the end of cooking cycle.
4.7 FAST COOLING
Fig. G. Pressing the button shown on the side, you start the fast cooling of the cooking chamber.
The starting of cooling cycle is conrmed by the led of the corresponding button.
If a cooking phase is on (the green led above the start button is also on) , it’s necessary to interrupt
it to start the fast cooling.
Pressing the start button, the green led will switch o, to conrm that cooking process has been interrupted.
If a pre-heating phase is on, it’s necessary to press the start button twice (with a rst touch it switches from
pre-heating to cooking, a second touch will interrupt cooking).
Fig. H. When you press fast cooling button you activate buzzer and a message warns to open the
door to facilitate fast cooling.
It’s possible to interrupt the buzzer by pressing the corresponding icon.
NOTE: the cooling cycle can be activated also without opening the door, but if you open the door the temper-
ature drops quicker. The cooling cycle stops automatically when the cooking chamber temperature reaches 45
°C but it can be interrupted at any time by pressing the correspondent button.
NOTE: the fast cooling is activated by default with high speed fan. It’s possible to activate also reduced venti-
lation during cooling cycle.
5.0 AUTOMATIC COOKING PROGRAM
Fig. L. From the home page, by pressing the icon shown on the side, you can access the groups of
automatic cooking programs.
The corresponding screen is the one shown on the side.
The automatic cooking programs are divided into 6 groups based on the type of food:
• Automatic cooking programs meat
• Automatic cooking programs sh
• Automatic cooking programs vegetables
• Automatic cooking programs pastry & bakery
• Automatic cooking programs rice & pasta
• Pre-cooked food regeneration programs
Fig. M. By pressing one among the icons corresponding to the 6 groups of automatic cooking pro-
grams, you can access the list of programs that form the selected group.
The possible operations in this screen are the following:
• Select a program from the list to eect a cooking cycle or modify it.
• Scroll the list pressing the icon “more” here below on the right side.
• Add a new program pressing the icon “new” here below on the left side.
• Go back to previous screen pressing the icon Back.
• Go back to previous screen pressing the icon Home.
EN
Fig. G Fig. H
Fig. L Fig. M
COOLING CYCLE
IS ON
OPEN THE DOOR
TO ACHIEVE
COOKING CHAMBER COOLING
NEW
MORE
1.5 KG ROAST CHICKEN
ROAST CHICKEN LEGS
ROAST CHICK.BREASTS
ROAST CHICKEN WINGS
CHICKEN CROQUETTES

12
Fig. A. Select a program from the list, the screen will visualize the info shown on the side. The info visualized
in this screen are the following:
• Name of the program
• Number of phases forming the program.
In the example shown on the side, the program is made up of 4 phases and the corresponding buttons are
light blue color.
The “+” button indicates the rst free phase and can be used to add an additional phase to the program.
The button “6” indicates a phase which is not used.
The total duration of a program.
Pressing the icon Back you go back to the list of programs.
Pressing the icon Home you go back to the Home page.
Fig. B. Pressing one among the phases that form the automatic program, the oven shows the scre-
en shown on the side.
In this screen you can see the cooking parameters of the selected phase:
• The drawing here above on the left side indicates the cooking mode (convection or steam).
• The temperature rectangular icon shows the real temperature and on a smaller scale the set temperature for
the selected phase.
This icon could visualize the Delta T parameter if you have congured this function for the control of cooking
chamber temperature.
• The rectangular icon for percentage of humidication and the corresponding set value. This value can go
from 0 to 99% in convection mode and it’s always 99% (not to be modied) in steam mode.
• The rectangular icon for the time and the corresponding value. This icon could visualize the core probe pa-
rameter if this function has been congured to control cooking duration.
NOTE: besides the cooking parameters shown by the screen, on the control panel also the leds of eventual
additional functions selected, activated for the selected phase light on (reduced speed ventilation, autoreverse,
and open release valve).
Fig. C. When you press one among the phases of the program and then the button “see set” the
control panel shows the info of the upside picture.
• The rectangular icons show only the selected values.
(the real cooking chamber temperature and eventually core probe temperature are not shown).
• The leds of the buttons for the parameters used to control cooking (in the example on the side cooking
chamber temperature and time) ash.
• The leds of the buttons for the additional functions activated in the selected phase (in the example here on
the side, low speed ventilation and open release valve) ash.
Fig. D. If instead of pressing one of the phases of the program, you press the rst free phase (“+”),
you will see a message to conrm the addition of a new phase.
The instructions to add a new phase are on paragraph 5.2.
EN
Fig. A Fig. B
Fig. C Fig. D
1.5 KG ROAST CHICKEN
ADD
NEW PHASE?

13
5.1 STARTING OF AN AUTOMATIC COOKING PROGRAM
Fig. E. To start an automatic cooking program, you just need to select it from the list and press the
start/stop button to start pre-heating of the cooking chamber.
If you don’t need to modify the automatic program, you don’t need to visualize one by one all the
phases that form the program.
Pressing start/stop button the pre-heating of the oven starts.
The lighting of the green led next to the start/stop button conrms the starting of pre-heating.
NOTE: if you have selected a program where at least one among the phases foresees the use of the core
probe, the screen visualizes the message:
ATTENTION!
THIS COOKING PROCESS REQUIRES THE CORE PROBE
ENSURE THE CORE PROBE IS CONNECTED TO THE OVEN
Fig. F. When the pre-heating is activated, the icon that previously showed the set temperature for
phase 1, will show the real cooking chamber temperature during pre-heating.
Pre-heating temperature will be 30°C higher than the one set for the rst phase of the program.
It’s possible to cancel pre-heating phase, pressing the start button again.
In this way, rst you have to insert the cooking products, because the second press of start button will begin
the cooking phase.
ATTENTION: starting a cooking phase (both manual or controlled by automatic program) without eecting
pre-heating of the oven, the cooking quality will be signicantly worsened. The cooking point, crispy and uni-
form cooking results could be less satisfactory than the expected ones.
Fig. G. At the end of pre-heating phase, you will hear the buzzer.
Pressing the icon here on the side, you can interrupt the buzzer.
At the same time, the display shows a message that warns you to introduce the cooking products to start cook-
ing phase.
The door closing, after you have introduced the trays, will start cooking phase.
Fig. H. Also in this case, after 10 seconds, the display switches to simplied view.
Fig. L. At the end of cooking cycle, you will hear the buzzer.
Pressing the icon on the side, the buzzer will be interrupted.
At the same time, the display shows a message indicating the end of cooking process.
EN
Fig. E Fig. F
Fig. G Fig. H
Fig. L
ATTENTION!
CHAMBER TEMPERATURE
IS OK.
INTRODUCE FOOD
TO BE COOKED.
CLOSING DOOR
COOKING STARTS
ATTENTION!
END OF
COOKING.

14
5.2 MODIFICATION OF AN AUTOMATIC COOKING PROGRAM
Fig. A. It’s possible to modify temporarily or permanently both factory programs and also the ones created by
the user.
After you have selected an automatic program, the possible modications are the following:
• Modication of the program’s name
• Parameters modication for one or more phases.
• Modication of additional functions for one or more phases.
• Add one or more phases at the end of the program (until max. 6 phases).
Fig. B. Pressing the name of the program, a keyboard appears on the display to enter the new name. After you
have entered the new name, press the icon OK.
If you press OK without digiting anything, the name will remain the same.
Pressing the icon Back, the oven switches to the previous screen without doing any modication.
Fig. C. After you have selected a program, if you press the number corresponding to a phase of the program,
you will visualize the set parameters for the selected phase.
The phases that make a program are the ones with a light blue frame.
The “+” phase is the rst free after the congured ones.
The phases with grey frame are unused.
On the control panel the leds are turned on next to the buttons of parameters used for the selected phase. In
the example shown, cooking chamber temperature and time have been selected.
Fig. D. Pressing the rectangular icon of one among the parameters, you will visualize the keyboard
to modify the value. In the example here on the side you can see the modication of the cooking
chamber temperature set. After you have introduced the new value, press OK to conrm and store
it. NOTE: if the selected phase is in steam mode, the value for the percentage of humidication
cannot be modied.
Fig. E. Besides the cooking parameters, it’s possible to activate or deactivate one or more additional functions.
The eventual additional functions activated in the selected phase are indicated by the lighted leds next to the
buttons:
• Autoreverse
• Low speed ventilation
• Open release valve
Fig. F. If some modications have been eected, pressing the start/stop button to start an auto-
matic program, the oven visualizes the message shown on the side.
Pressing the icon YES, the automatic program will be eected with the introduced modications and
at the end of the cooking cycle the modications will be maintained.
Pressing the icon NO, the automatic program will be eected with the introduced modications, but at the end
of the cooking cycle, the oven will re-establish the previous conguration.
Pressing the icon Back without starting the modied program, you will be asked to save modica-
tions.
NOTE: All programs, that have been modied compared with factory conguration, will be visual-
ized in the list of programs in a rectangular frame, dark blue color instead of light blue.
EN
Fig. A Fig. B
Fig. C Fig. D
1.5 KG ROAST CHICKEN 1.5 KG ROAST CHICKEN

15
Fig. G. The button “+” shows the rst free phase after the congured ones for the selected pro-
grams.
Pressing this button, you will visualize the message shown on the side where the user is asked if he
wants to add a new phase to the program.
NOTE: if a program is made up of 6 phases, it’s not possible to add more phases.
The addition of a phase could be useful for example to hold the food at a service temperature for a more or
less long time.
Fig. H. Pressing the icon YES to add a new phase to the program, the oven proposes to choose
cooking mode, that will be used to control the new phase.
To the phase previously indicated with “+”, the corresponding number is now assigned.
Pressing one of the 2 icons, convection or steam, the cooking mode that will control the new phase
will be selected.
Fig. L. Selecting for example convection mode, the oven proposes the default parameters of this
mode.
It’s possible to modify these parameters as previously described.
In the example shown on the side you can see the default parameters of convection mode:
• Cooking chamber temperature 200°C
• Percentage of humidication 0%
• Time 10 minutes
Besides the modication of these parameters it’s possible to activate (through the buttons under the display)
the control of cooking with core probe and eventually Delta T function.
NOTE: in the example on the side, the phase 6 that previously was unused and on a grey background, is now
the new “+” phase and can be added at the end of the program.
Fig. M. For the new phase of the program it’s possible to activate one or more additional functions:
• Autoreverse
• Low speed ventilation
• Open release valve
After you have completed the conguration of the new phase, press the icon Back to go back to the
list of programs.
As for the other modications brought to the automatic program, the user will be asked to save or not the ef-
fected modications.
Pressing the icon Home, the display switches to the home page.
EN
Fig. E Fig. F
Fig. G Fig. H
Fig. L Fig. M
SAVE RECIPE
AT END
OF COOKING CYCLE
ADD
NEW PHASE?
1.5 KG ROAST CHICKEN
1.5 KG ROAST CHICKEN

16
5.3 STORAGE OF A NEW AUTOMATIC COOKING PROGRAM
Fig. A. To store a new automatic cooking program, select among the 6 available groups of programs the one
where you want to add a new program.
Press the icon NEW here below on the left side.
Fig. B. Using the keyboard appearing on the display, digit the name for the new program.
Press OK to conrm.
Fig. C. The display now visualizes the name of the new program and the 6 phases it’s possible to congure.
Phase 1 has a green background to indicate that the user is conguring it.
The other phases are at the moment on a grey background (unused).
To go on, select the mode which will control the rst phase of the program (convection or steam).
Fig. D. After you have selected the mode, the display will propose the default values.
It’s possible to modify these parameters as described in the previous paragraphs.
In the same way it’s possible to select the core probe and eventually Delta T function to control the phase.
You can activate the available additional functions (autoreverse, reduced ventilation, open release valve).
If you have already congured at least 1 phase, the icon OK can be activated to store the new program.
After you have congured the parameters of the rst phase, press “+” to add a new phase and proceed with a
new conguration.
After you have congured the foreseen phases for the new program, press the icon OK to store them.
The new program will be added at the end of the list for the stored programs.
EN
Fig. A Fig. B
Fig. C Fig. D
NEW
MORE
1.5 KG ROAST CHICKEN
ROAST CHICKEN LEGS
ROAST CHICK.BREASTS
ROAST CHICKEN WINGS
CHICKEN CROQUETTES
NEW PROGRAM
NEW PROGRAM

17
5.4 CANCELLATION OF AN AUTOMATIC COOKING PROGRAM
Fig. E. To denitively cancel an automatic cooking program (both a factory one or the one created by the
user), scroll the list of the programs using the icon “more” until the program to be eliminated will appear on
the display.
Press the program to be cancelled and keep it pressed until the background turns red color.
When the background with the name of the program turns red color, the red led of the button “cancellation”
above on the left hand side switches on.
Fig. F. Pressing the button “cancellation” shown on the side, the program will be denitively can-
celled from the list.
ATTENTION! This operation is not reversible.
To restore the cancelled default programs, you need to upload the factory recipes using USB connection (see
paragraph 8.0).
5.5 CANCELLATION OF A PHASE OF AN AUTOMATIC PROGRAM
Fig. G. It’s possible to cancel one or more phases of an automatic cooking program.
This operation can be useful for example for a program where the rst phase is used to seal the product but
the chef prefers to eect this operation on the re.
If you eliminate the rst phase, it will be possible to do sealing on the re and then complete cooking using the
program without the rst phase.
To cancel a phase of a program, press the selected phase and keep it pressed until the background turns red
color.
At the same time the red led of the button “cancellation” above on the left hand side switches on.
Fig. H. Pressing the cancellation button shown on the side, the selected phase will be denitively
removed from the list.
ATTENTION! This operation is not reversible.
EN
Fig. E Fig. F
Fig. G Fig. H

18
6.0 AUTOMATIC WASHING SYSTEM WITH LIQUID DETERGENT
Fig. A. To access automatic washing programs, from the home page, press the
icon shown on the side.
The display shows the available programs.
Short washing cycle.
Particularly suitable when the oven is washed very often or when it’s not so dirty.
Long washing cycle.
Particularly suitable when the oven is not washed very often or when it is very dirty (in this case,
more than one washing cycle could be necessary).
Rinsing
This program eects a rinsing of the cooking chamber and doesn’t requires detergent.
Fig. B. Selecting for example the short washing program, on the display you will see the measuring
of detergent to use.
Fig. D. Pressing the Start/Stop button, the washing cycle begins.
NOTE: during the rst minutes of the washing cycles, the oven heats the cooking chamber in steam
mode, to remove the grease from the surfaces.
The water will start coming out from the washing arm only after few minutes.
EN
Fig. A Fig. B
Fig. C Fig. D
SHORT WASHING
CLOSE THE DOOR
PRESS START ICON
SHORT WASHING
00:31
00:31

19
NOTE: to facilitate the dissolution of dirt, we advise to spray the internal part of the cooking
chamber with a degreasing product suitable for oven cleaning.
In models equipped with automatic washing with liquid detergent, in the
back side of the ovens supplied with automatic washing system, there
are 2 small pipes for the suction of detergent and sparkling-aid.
The red color pipe must be inserted into the liquid detergent container.
The white color pipe must be inserted into the liquid sparkling-aid con-
tainer.
IMPORTANT NOTE: ensure that the liquid detergent and sparkling-aid
are specic for stainless steel cleaning.
Check frequently the level of the detergent and sparkling-aid inside their
containers, in order to avoid any damage to the pump if it works in vain.
Fig. E. If the chamber is too hot to start a washing cycle, the oven will show a message like the one shown on
the side.
The cooling cycle before the washing cycle can be eected both with open (in a shorter time) and with closed
door (in a longer time).
If you open the door to make cooling cycle quicker, wait for the following message (end of cooling) to close it
again.
Fig. F. Once the washing cycle has started, it’s necessary to complete it, to avoid eventual detergent residuals
can contaminate the food during the following cooking processes or damage the stainless steel surfaces, when
in touch with too high temperatures.
If the oven is stopped during an automatic washing cycle, when you turn it on again the display will show a
warning message shown on the side, to remind you that you need to remove eventual detergent residuals and
eect a rinsing cycle before any cooking cycle.
EN
Fig. E Fig. F
TEMPERATURE INSIDE THE
CHAMBER IS TOO HIGH
THE OVEN WILL START
FORCED COOLING
PLEASE WAIT
WASHING WILL START
AFTER COOLING
THE OVEN HAS BEEN
IRREGULARLY SWITCHED OFF
DURING A WASHING CYCLE
REMOVE EVENTUAL
DETERGENT RESIDUALS
DO A RINSING CYCLE

20
6.0A AUTOMATIC WASHING SYSTEM WITH TABLETS
In all ovens of this series, the container for the detergent and sparkling aid is located above the oven.
After a cooking process, the oven front panel and the top panel could be very hot.
It’s necessary to be very careful to avoid any contact with very hot surfaces and we
suggest you to use protection gloves.
ATTENTION!
Unscrew the caps of detergent and sparkling aid containers (this operation can be carried out simply by
hands), introduce detergent tabs, following the instructions on the screen.
Screw the caps again and close the oven’s door.
THE USE OF SPANNERS OR PLIERS TO SCREW AND UNSCREW THE CAPS IS FORBIDDEN.
TO HANDLE DETERGENT AND SPARKLING AID TABS, USE PROTECTION GLOVES AND MASK.
Recommended DETABINOX®and BRILLINOX®tabs measuring
Oven model 304 104 307 107 110
SHORT WASHING
Detergent tabs (Q.ty) 11111
LONG WASHING
Detergent tabs (Q.ty) 2 2 2 2 2
RINSING
Sparkling aid tabs (Q.ty) 1 1 1 1 1
VERY IMPORTANT: TO USE THE SPARKLING AID TAB, SELECT THE RINSING PROGRAM AND
INTRODUCE THE SPARKLING AID TABLE IN THE RECEPTACLE ABOVE THE OVEN.
EN
This manual suits for next models
1
Table of contents
Languages:
Other Inoxtrend Convection Oven manuals

Inoxtrend
Inoxtrend RDT-104E Parts list manual

Inoxtrend
Inoxtrend GUA 304 EB User manual
Inoxtrend
Inoxtrend CDA-107G Manual
Inoxtrend
Inoxtrend ER304-CAE User manual
Inoxtrend
Inoxtrend GUP 304 User manual
Inoxtrend
Inoxtrend GUP-304ES User manual
Inoxtrend
Inoxtrend GCA-GUA 304 User manual
Inoxtrend
Inoxtrend GCA-304E2 User manual
Inoxtrend
Inoxtrend GUA-304EB User manual
Inoxtrend
Inoxtrend RUA-110 Series Manual
