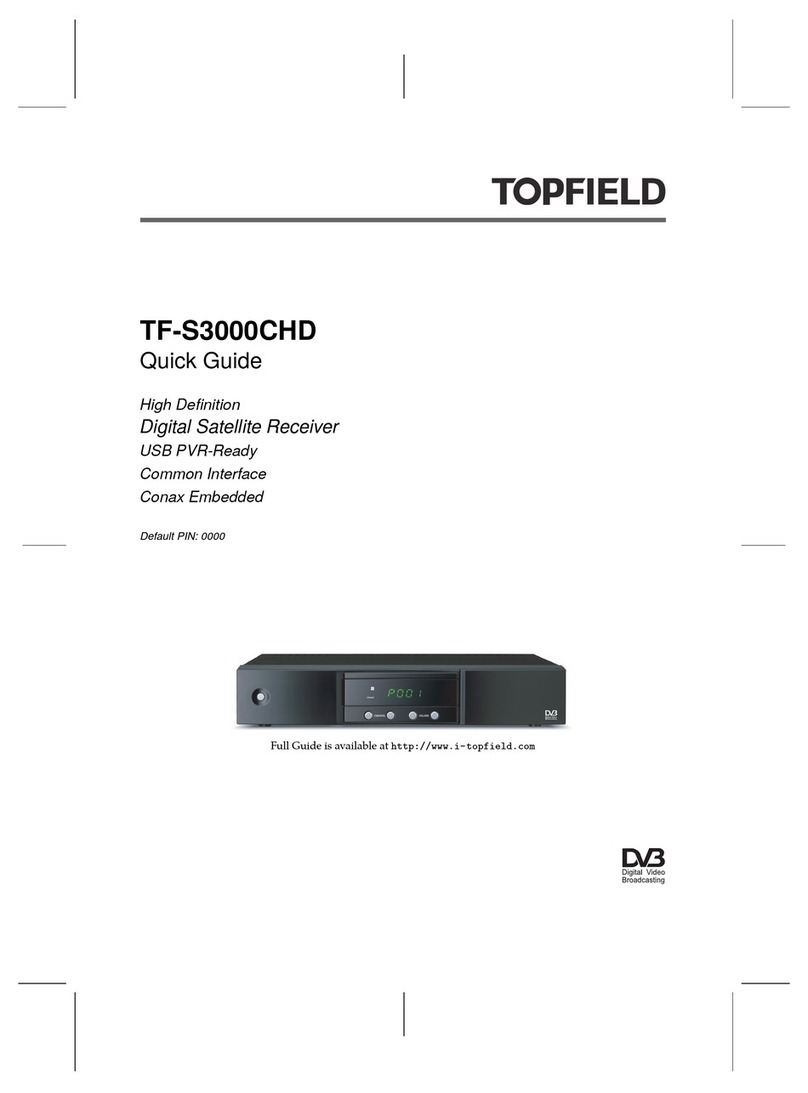
Inpax X-9100 User manual

- 1 -
X-9100
X-9100
X-9100
X-9100 Linux
Linux
Linux
Linux HD
HD
HD
HD PVR
PVR
PVR
PVR Receiver
Receiver
Receiver
Receiver
USER
USER
USER
USER MANUAL
MANUAL
MANUAL
MANUAL
Please read this user manual before using or connecting this product
.
And keep it handy for future reference
.

- 2 -
Table
Table
Table
Table of
of
of
of Contents
Contents
Contents
Contents
Safety
i
nstructions ............................................................... ...................... ................ ... ... 3
General Introduction .................................................................................. ................ ... ..
.
4
STB (Receiver) Set up
Front Panel ............................................................................. . . .......................... ... 5
Rear Panel ................................................................................... . . ................ ........ 6
Remote Control Unit ............................................................................. 7
Connecting to TV ................................................................................. 9
Connecting to Dish LNB ........................................................................ 10
Main Menu
1. Installation ................................................................. ..... ........... 11
2. 1.1 Antenna Setting ………………………………………………… ................... … .1 1
1.2 Fast Scan ………………………………………………………… .............. …… .1 4
1.3 USALS Setup ……………………………………………………………… ... … .. . ...1 4
1.4 CA Menu ……… .. ………………………………………………………………… 1 4
2. Channel Manager …………………………………………………………………… .1 5
3. 2. 1 Edit Channel …………………………………… ……………………………… ...1 5
2. 2 Edit Favorite ……………………………………………………………………… .1 5
2. 3 Sort Channel ……………………………………………………………………… 1 6
2. 4 Delete Satellite Channel ………………………………………………………… 1 6
2. 5 Factory Default …………………………………………………………………… 1 6
2. 6 User Channel List ………………………………………………………………… 1 6
3
3
3
3. System Settings ……………………………………………………………………… 1 6
3.1 Setting . ………………………………………………………………………… . … .1 6
3.2 OSD ……………… . ………………………………………………………… . …… 1 7
3. 3 Parental Lock ………………………………………………………………… .. .. … 1 7
3. 4 About STB …………………………………………………………………… . . . . . … 1 7
4.
4.
4.
4. Time Settings …………………………………………………………………… . . …… 1 8
4.1 Time Setup ……………………………………… . ………………………… .. …… 1 8
4.2 Event Timer ………………………………………………… . …………… . ……… 1 8
4.3 Sleep Timer ………………………………………… . …………………… . ……… 1 8
5
5
5
5 .
.
.
.Game ……………… . …………………………………………………………… . . …… 1 9
6
6
6
6 .
.
.
.USB Control …… .... ………………………………………… . ……………… . . ……… 19
6 .1 USB Menu ………………………………………………………………………… 20
6 .2 USB Manager ……………………………………………………………… .. …… 2 2
7. Network Setting … .. ………………………………………… . ……………… . ……… 2 2
8.
7 .1 Wireless Setting.. ………………………………………………………………… 2 2
7 .2 IP Setting …………………………………………………………………… .. …… 2 3
7 . 3 SMB File Setup …………………………………………………………… .. …… 2 3
8
8
8
8 .
.
.
.Network Application ………………………………………………………… . ……… 2 4
8 .1 VFTP ……… . ……………………………………………………………………… 2 4
8 . 2 Youtube …………………………………………………………………………… 2 4
8 . 3 Radio Online ……………………………………………………………………… 2 5
Trouble Shooting …………………………………………………………………… .2 6
Technical Specification ....................................... ................. ......................... ....... .......... 2 7
Glossary ......................................................................................................................... 2 8

- 3 -
Safety
Safety
Safety
Safety Instructions
Instructions
Instructions
Instructions
This STB unit has been designed and manufactured to comply with international safety
standards. Please read the following safety Instructions carefully before operating.
4 Power
Power
Power
Power Supply:
Supply:
Supply:
Supply:
Before operating this STB unit, please check the correct supply voltage is 90~250V AC
50/60Hz.
4 Overloading:
Overloading:
Overloading:
Overloading:
Do not overload a wall outlet, extension cord or adapter. Never a use damaged power
cord or touch it with wet hands as this may result in an electric shock.
4 Liquids:
Liquids:
Liquids:
Liquids:
To prevent damage, the STB shall not be exposed to any liquids.
4 Ventilation:
Ventilation:
Ventilation:
Ventilation:
Keep the slots on top of the STB uncovered to allow sufficient airflow to the unit. Do not
put the receiver on soft furnishings or carpets. Do not expose the STB to direct light or
do not place it near a heater or in humid conditions. Do not stack other e lectronic
equipment on top of the receiver.
4 Cleaning:
Cleaning:
Cleaning:
Cleaning:
Always disconnect the STB from the electricity supply before cleaning. Clean the STB
with a soft cloth or mild solution of washing-up liquid (no solvents).
4 Connection:
Connection:
Connection:
Connection:
In order to protect the LNB, always disconnect the STB from the electricity supply when
you either connect or disconnect it to a satellite LNB.
4 Location:
Location:
Location:
Location:
It is advisable to store the STB indoors in order not to prevent exposure to external
elements such as lightening, rain or sunlight. Use the apparatus only in moderate
climates (not in tropical climates). Always store the unit in a dry place.
4 WARNING:
WARNING:
WARNING:
WARNING:
Do not remove the cover; to do so may cause a risk of an electrical shock. Always use a
fully qualified and licensed engineer to repair the STB, or contact your local dealer.

- 4 -
General
General
General
General Introduction
Introduction
Introduction
Introduction
INTRODUCTION
INTRODUCTION
INTRODUCTION
INTRODUCTION
This manual will help you learn basic functions such as installation, selecting channels
and many other useful features of the STB. All functions can be operated by the remote
control.
You
can easily install the STB by selecting the “ Installation ” functio n.
Upgrading the software of this unit is possible by inserting any compatible USB device
,
located at the front behind the flap.
The remote control is specifically designed for the user to easily navigate around the
menu. It is pre-programmed to control
all
functions of the STB.
WARNING
WARNING
WARNING
WARNING
The use of unofficial software versions other than dealers or distributors official software
will void the manufacturer
’ s
warranty. It is advised that only the original software
released from authorized dealers or distributors should be used.
UNPACKING
UNPACKING
UNPACKING
UNPACKING
Unpack the unit and check to make sure that
all
of the following items are included in the
packaging.
�1 x Remote Control Unit (RCU)
�1 x User Manual
�2 x AAA batteries
�1 x Composite Cable (A/V RCA Cable)
�1 x HD Digital Satellite Receiver (STB) Unit

- 5 -
Front
Front
Front
Front Panel
Panel
Panel
Panel
Front
Front
Front
Front Panel
Panel
Panel
Panel
1)
1)
1)
1) Power
Power
Power
Power Button
Button
Button
Button
The POWER button is used to turn the power on or to put it in Standby
mode.
2)
2)
2)
2) Menu
Menu
Menu
Menu Button
Button
Button
Button
Activate the main menu in viewing mode.
3)
3)
3)
3) OK
OK
OK
OK Button
Button
Button
Button
Activate the highlighted sub menu in menu mode and activate the channel list in
viewing mode.
4
4
4
4 )
)
)
) CH+
CH+
CH+
CH+
/
/
/
/
CH-
CH-
CH-
CH- Button
Button
Button
Button
Change channel in viewing mode and move the cursor up/down in menu mode.
5
5
5
5 )
)
)
) 4-Digi
4-Digi
4-Digi
4-Digi Display
Display
Display
Display (7-Segment)
(7-Segment)
(7-Segment)
(7-Segment)
4-Digi displays channel information. In Standby mode the 7-segment displays local
time.
6
6
6
6 )
)
)
) Smart
Smart
Smart
Smart Card
Card
Card
Card Slot
Slot
Slot
Slot
Socket for a TV operator Smart Card.
7
7
7
7 )
)
)
) USB
USB
USB
USB port
port
port
port
USB2.0 port for connect to any external USB devices such as USB Disk or
HDD.

- 6 -
Real
Real
Real
Real Panel
Panel
Panel
Panel
Rear
Rear
Rear
Rear Panel
Panel
Panel
Panel
1)
1)
1)
1) LNB
LNB
LNB
LNB IN
IN
IN
IN
Connect the Satellite Dish LNB.
2)
2)
2)
2) LOOP
LOOP
LOOP
LOOP OUT
OUT
OUT
OUT
Output the Dish LNB IN signal.
3)
3)
3)
3) VIDEO,
VIDEO,
VIDEO,
VIDEO, AUDIO-L,
AUDIO-L,
AUDIO-L,
AUDIO-L, AUDIO-R
AUDIO-R
AUDIO-R
AUDIO-R
Connect to Audio/Video of TV. Connect Yellow to Video port, connect Red
and White to Audio Right and Audio Left.
4)
4)
4)
4) S/PDIF
S/PDIF
S/PDIF
S/PDIF
Digital Audio output via RCA connector.
5)
5)
5)
5) TV
TV
TV
TV SCART,
SCART,
SCART,
SCART,
Connect to TV set with Scart Output via Scart cable.
6)
6)
6)
6) RS-232
RS-232
RS-232
RS-232
Connection to serial port.
7)
7)
7)
7) HDMI
HDMI
HDMI
HDMI
HD signal output.
8)
8)
8)
8) LAN
LAN
LAN
LAN
RJ45 Output for connect to Ethernet.
9)
9)
9)
9) Power
Power
Power
Power Switch
Switch
Switch
Switch
To Turn ON or OFF the main power of this STB.

- 7 -
Remote
Remote
Remote
Remote Control
Control
Control
Control Unit
Unit
Unit
Unit (RCU)
(RCU)
(RCU)
(RCU)
1.TV/RADIO:
1.TV/RADIO:
1.TV/RADIO:
1.TV/RADIO: Switch between TV and RADIO.
2.
2.
2.
2. POWER:
POWER:
POWER:
POWER: Switch the receiver on or off.
3.
3.
3.
3. MUTE:
MUTE:
MUTE:
MUTE: Turn the sound On/Off.
4.
4.
4.
4. DISPLAY:
DISPLAY:
DISPLAY:
DISPLAY: Switch the TV type.
5.
5.
5.
5. MODE:
MODE:
MODE:
MODE: Switch 4:3 & 16:9 Screen Formats.
6.
6.
6.
6. TIME:
TIME:
TIME:
TIME: Setup event timer.
7.
7.
7.
7. SLEEP:
SLEEP:
SLEEP:
SLEEP: Setting the time for turning the receiver off
8.
8.
8.
8. NUMERIC
NUMERIC
NUMERIC
NUMERIC KEY
KEY
KEY
KEY (0~9):
(0~9):
(0~9):
(0~9): Change program or input
number.
9:
9:
9:
9: SUB:
SUB:
SUB:
SUB: Subtitle information.
10.
10.
10.
10. EPG
EPG
EPG
EPG (Electronic
(Electronic
(Electronic
(Electronic Program
Program
Program
Program Guide):
Guide):
Guide):
Guide): TV/Radio
electronic program guide information. *
*
*
*
12.
12.
12.
12. FAV:
FAV:
FAV:
FAV: Press to display favorite channel listing you
set before.
13.
13.
13.
13. TXT:
TXT:
TXT:
TXT: Press to Display the current channel
’
s
TELETEXT information. *
*
*
*
14.
14.
14.
14. RECALL:
RECALL:
RECALL:
RECALL: Press to show the previous viewed
channel.
15.
15.
15.
15. SAT:
SAT:
SAT:
SAT: Show the scanned satellite list.
16.
16.
16.
16. MENU:
MENU:
MENU:
MENU: Press to enter main menu or exit to live
channel.
17.
17.
17.
17. EXIT:
EXIT:
EXIT:
EXIT: Exit current menu step by step.
18.
18.
18.
18. CH
CH
CH
CH ⊳
⊳
⊳
⊳
/
�
�
�
�:
:
:
:Change TV Channels.
*
*
*
*EPG & TELETEXT Information may vary according to your satellite provider.

- 8 -
Remote
Remote
Remote
Remote Control
Control
Control
Control Unit
Unit
Unit
Unit (RCU)
(RCU)
(RCU)
(RCU)
19.
19.
19.
19. VOL
VOL
VOL
VOL
/
:
:
:
:Change volume in viewing mode.
20.
20.
20.
20. OK:
OK:
OK:
OK: Confirm the highlighted menu item, Open the program list.
21.
21.
21.
21. AUDIO:
AUDIO:
AUDIO:
AUDIO: Select or change the Audio.
22.
22.
22.
22. PAUSE:
PAUSE:
PAUSE:
PAUSE: Pause and Freeze the picture.
23.
23.
23.
23. ZOOM:
ZOOM:
ZOOM:
ZOOM: Zoom in current TV channel
24.
24.
24.
24. INFO:
INFO:
INFO:
INFO: Show the information of the current channel.
25.
25.
25.
25. VOL
VOL
VOL
VOL +/- :
:
:
:Change volume in viewing mode.
26.
26.
26.
26. FIND:
FIND:
FIND:
FIND: Quickly find channels
27.
27.
27.
27. :
:
:
:Activate Multi picture menu and select picture
28.
28.
28.
28. PAGE+/-:
PAGE+/-:
PAGE+/-:
PAGE+/-: Page up/down on menu.
29.
29.
29.
29. F1:
F1:
F1:
F1: Function key.
30.
30.
30.
30. USB:
USB:
USB:
USB: Access the USB menu. (Note: USB Device must be first connected)
30.
30.
30.
30. ��
��
��
�� :
:
:
:Fast forward.
31.
31.
31.
31. :
:
:
:Fast backward.
32.
32.
32.
32. �
�
�
�
:
Start playing
/
Release pause.
33.
33.
33.
33. ■
■
■
■:
:
:
:Stop recording.
34.
34.
34.
34.
I
I
I
I
:
Play previous item.
35.
35.
35.
35. ��
��
��
�� I
I
I
I
:
Play next item.
36.
36.
36.
36.
I
I
I
I I
I
I
I:
Pause/time shift.
37.
37.
37.
37. ●
●
●
●
:
Start recording.

- 9 -
Connecting
Connecting
Connecting
Connecting to
to
to
to TV
TV
TV
TV
Various equipment and TV
’
s/VCR
’ s
can be connected to this STB. The manual will
explain common ways to connect to the equipment, if you experience any problems,
please contact your sales agency.
1.
1.
1.
1.
How
How
How
How to
to
to
to connect
connect
connect
connect the
the
the
the STB
STB
STB
STB to
to
to
to a
a
a
a TV
TV
TV
TV set
set
set
set
•(1) Connect one end of the SCART cable to the TV SCART socket on the back
of the STB and the other end to the SCART input socket on your
TV.
•(2) Connect the Antenna cable to TV ANT IN collector of the STB.

- 10 -
Connecting
Connecting
Connecting
Connecting to
to
to
to DISH
DISH
DISH
DISH
2.
2.
2.
2.
How
How
How
How to
to
to
to connect
connect
connect
connect the
the
the
the STB
STB
STB
STB to
to
to
to DISH
DISH
DISH
DISH
(1) Connect one end of the F cable to the LNB IN socket on the back of the STB and the
other end to the LNB installed on your DISH.
(2)
You
can connect one fixed dish LNB directly to the LNB IN, or connect at least two
DISH LNB
’ s
by selecting the DiSEqC Switch, you can also connect to HH mount dish
LNB.

- 11 -
Main
Main
Main
Main Menu
Menu
Menu
Menu
Plug in the STB power, and turn on the STB, the beginning of the OSD screen will
appear, press MENU button to begin your INSTALLATION
The Main Menu displays various functions of the STB or you can select with
“ UP/DOWN ” buttons and the numeric buttons on the remote control.
To
proceed to the
next stage, press the “ OK ” button on the remote control.
Main
Main
Main
Main Menu
Menu
Menu
Menu
Press MENU button to activate main menu, this
consists of Installation, Channel manager, system
settings, Time Settings, Features, & CA System
Use UP/DOWN button to highlight your selection
and press OK to confirm. Sub menu options will
then follow. By pressing the EXIT button you can
return to the previous menu.
1.
1.
1.
1. INSTALLATION
INSTALLATION
INSTALLATION
INSTALLATION
The
The
The
The default
default
default
default password
password
password
password for
for
for
for this
this
this
this STB
STB
STB
STB MENU
MENU
MENU
MENU is
is
is
is “
“
“
“ 0000
0000
0000
0000 ”
”
”
”
Select Installation, press OK button to activate Installation menu, the Installation window
will be displayed.
1.1
1.1
1.1
1.1 Antenna
Antenna
Antenna
Antenna Settings
Settings
Settings
Settings
Press OK button to enter Antenna Settings; here you can make Satellite Search,
Satellite Edit, blind Search and other Functions.
Satellite
Satellite
Satellite
Satellite List
List
List
List
Press OK button, you can see the Satellite list, in
this menu, you can select, add, move, rename, &
delete Satellites .
Select
Select
Select
Select
In this menu, you can press the UP/DOWN keys
choose the satellite which you want to use, then
press the OK to confirm the settings, thereafter you
can set other parameters.

- 12 -
Main
Main
Main
Main Menu
Menu
Menu
Menu
Add
Add
Add
Add
Select the Add using the LEFT/RIGHT buttons
.
Here you can input new Satellite angle, Satellite
Direction (east, west), Band (Ku or C). Press OK to
confirm the setting, and this new satellite will be
added to the end of the Satellite list.
Move
Move
Move
Move
In this menu, you can select the satellite
that you want to move from the satellite list
using the UP/DOWN keys, then press OK.
You will be asked to move the satellite to
a specific position number, input the destination number and press OK. Then you can
move one satellite from one position to another.
Delete
Delete
Delete
Delete
You can delete the user satellite. Press the OK
button select the satellite that you want to delete
from the satellite list. You will be asked to confirm
whether delete the satellite or not. If you select YES ,
all the channels in the selected satellite an d
transponder will be deleted. Press the OK key, and
the selected satellite will be erased.
Rename
Rename
Rename
Rename Satellite
Satellite
Satellite
Satellite
You can also change the satellite name.
Select the Rename using the LEFT/RIGHT
keys. Press OK key and select the character
which you want to edit using the character display
panel.
Transponder
Transponder
Transponder
Transponder List
List
List
List
If you change the satellite, the transponder
will be changed automatically. You will find
the transponder list of the selected satellite here
In this menu you can select, Delete, Edit
and Add a Transponder. This operation is similar to
the one above, you can input the transponder frequency symbol rate, choose
polarization H or V (Horizontal,Vertical) and FEC (1/2, 2/3, 3/4, 6/5, 7/8, Auto).

- 13 -
Main
Main
Main
Main Menu
Menu
Menu
Menu
LNB
LNB
LNB
LNB frequency
frequency
frequency
frequency and
and
and
and power
power
power
power
Here you need to check the LNB frequency
according to your antenna, set the correct
frequency or define yourself, and keep LNB power
to be 13V/18V or 14V/19V.
22KHz
22KHz
22KHz
22KHz
In case you are using two antennas connected to a
22KHz tone switch box. You can supply either
22KHz by setting “ ON ” or “ OFF ” to select antenna.
DiSEqC
DiSEqC
DiSEqC
DiSEqC type
type
type
type DiSEqC1.1
DiSEqC1.1
DiSEqC1.1
DiSEqC1.1
If you connect antenna to DiSEqC Switch, you need to specify the DiSEqC input to
which your selected satellite have been configured.
USALS
USALS
USALS
USALS
If you use USALS and select the Motor Mode to
USALS, here one more option you can move the
dish to exact position of the satellite.
Before
Before
Before
Before you
you
you
you use
use
use
use USALS,
USALS,
USALS,
USALS, you
you
you
you should
should
should
should go
go
go
go to
to
to
to
Main
Main
Main
Main Menu
Menu
Menu
Menu →
→
→
→ Installation
Installation
Installation
Installation →
→
→
→ USALS
USALS
USALS
USALS Setup
Setup
Setup
Setup to
to
to
to set
set
set
set
you
you
you
you local
local
local
local position
position
position
position first
first
first
first
!
!
!
!
Scan
Scan
Scan
Scan Mode
Mode
Mode
Mode
In this menu, you can select all Channels & FTA Channels by setting the search
option
Start
Start
Start
Start Search
Search
Search
Search
In this menu, you can select Satellite & Multi-Sat &
Transponder or Blind Scan which you want to start
search When you press ok you will be asked
whether to search by network, you can choose
either yes or no.
Satellite
Satellite
Satellite
Satellite Search
Search
Search
Search
Selecting one satellite, and press OK to mark. You
can select more than one satellite at this
time, but make sure they are all configured to your DiSEqC Switch, after selecting,
Press OK will start the searching process. During searching the TV Channels and Radio
Channels will be listed separately.

- 14 -
Main
Main
Main
Main Menu
Menu
Menu
Menu
Transponder
Transponder
Transponder
Transponder
Here you need to select one satellite to where your dish is currently pointed, then select
the frequency, you need to setup the Polarization of that Selected Transponder, Symbol
Rate, FEC .Pressing OK will start searching. During searching process the TV channels
and Radio channels will be listed separately.
Blind
Blind
Blind
Blind Scan
Scan
Scan
Scan
A smart function which allows the user to search the desired Satellite without having to
know the TP data, but you are required to set up correct LNB settings first.
1.2
1.2
1.2
1.2 Fast
Fast
Fast
Fast Scan
Scan
Scan
Scan
In this menu, when you are in Astra (19.2) satellite,
base on the transponder (12515, 22000, H, 5/6),
you can fast search channels by different providers.
1.3
1.3
1.3
1.3 USALS
USALS
USALS
USALS Set
Set
Set
Set Up
Up
Up
Up
You can setup the Dish position to the satellite you want to search, you need to check
the detailed information from internet and input the accurate parameters about your
local position.
Press
Press
Press
Press the
the
the
the Red
Red
Red
Red button,
button,
button,
button, you
you
you
you can
can
can
can choose
choose
choose
choose
the
the
the
the desired
desired
desired
desired country,
country,
country,
country, press
press
press
press the
the
the
the OK
OK
OK
OK button
button
button
button again,
again,
again,
again,
you
you
you
you will
will
will
will then
then
then
then view
view
view
view the
the
the
the listed
listed
listed
listed city
city
city
city in
in
in
in this
this
this
this country
country
country
country
that
that
that
that you
you
you
you have
have
have
have selected.
selected.
selected.
selected.
1.4
1.4
1.4
1.4 CA
CA
CA
CA Menu
Menu
Menu
Menu
CA means Conditional Access, in this menu, it will show the Smart Card information
when a Smart Card is inserted into this STB

- 15 -
Main
Main
Main
Main Menu
Menu
Menu
Menu
CA
CA
CA
CA Menu
Menu
Menu
Menu is
is
is
is only
only
only
only valid
valid
valid
valid after
after
after
after a
a
a
a Smart
Smart
Smart
Smart Card
Card
Card
Card is
is
is
is inserted
inserted
inserted
inserted
2.
2.
2.
2. CHANNEL
CHANNEL
CHANNEL
CHANNEL MANAGER
MANAGER
MANAGER
MANAGER
2.
2.
2.
2. 1
1
1
1 Edit
Edit
Edit
Edit Channel
Channel
Channel
Channel
Here you can Select Channel and Delete/Un-delete
Channel, Rename Channel, Move Channel, Lock
Channel, Select TV Channels, you will get this
window. You also can group move the channel.
2.
2.
2.
2. 2
2
2
2 Edit
Edit
Edit
Edit Favorite
Favorite
Favorite
Favorite
Here you can set the channel into different favorite
category, such as News, Movies, Music, Sports,
Education, Weather, Children, Social, Culture.
Press different function color button select any sort
press OK
OK
OK
OK on viewing mode you can set the channel
type according your mind.
2.
2.
2.
2. 3
3
3
3 Sort
Sort
Sort
Sort Channel
Channel
Channel
Channel
In this menu you can sort the channels in different
order, such as language, FTA, satellite,
transponder, favor and Alphabet.

- 16 -
Main
Main
Main
Main Menu
Menu
Menu
Menu
2.
2.
2.
2. 4
4
4
4 Delete
Delete
Delete
Delete Satellite
Satellite
Satellite
Satellite Channel
Channel
Channel
Channel
In this view, you can delete satellite channels.
Press OK you will be asked to confirm. Select either
“ YES ” or “ NO ”
.
If you select “ yes ” all data under this
satellite will be lost.
2.5
2.5
2.5
2.5 Factory
Factory
Factory
Factory Default
Default
Default
Default
When you choose to set the unit to Factory Default,
your STB will be in the original status when you first
purchase d this product
.
You can erase all the
channels and settings. This can be made by
selecting All, then press OK you will be asked to
confirm, select either “ YES ” or “ NO ”
.
If you select
“ YES ” all data and current settings will be lost.
2.
2.
2.
2. 6
6
6
6 User
User
User
User channel
channel
channel
channel list
list
list
list
Nice feature allow user to save the channels and
satellite data into the memory of receiver, No need
external USB device at all !!!
In this menu, you can save and load the channel list
,
and you can have different channel list as well.
3.
3.
3.
3. SYSTEM
SYSTEM
SYSTEM
SYSTEM SETTINGS
SETTINGS
SETTINGS
SETTINGS
3.
3.
3.
3. 1
1
1
1 System
System
System
System
You can setup the menu language, audio language
according to the standard of your country. You also
can set the recall list, volume per channel function
on or off.

- 17 -
Main
Main
Main
Main Menu
Menu
Menu
Menu
3.
3.
3.
3. 2
2
2
2 OSD
OSD
OSD
OSD
Here you can setup the menu background,
transparency and colour, and help information for
menu. Time out means the duration of the
information bar. You also can setup the HDMI
resolution by pressing the Right /Left button, you
can change the HD format fro m 1080i to 720p/576I.
After you confirm, the TV format can also be
changed
3.
3.
3.
3. 3
3
3
3 Parental
Parental
Parental
Parental Control
Control
Control
Control
This function prevents children or unauthorized
persons from watching programs. You can set the
password for Installation, Edit Channel and System,
also you can change the Password, the default
password is 0000. When you choose yes, you can
change the pas sword option to unlock or lock some
menu enter
3.
3.
3.
3. 4
4
4
4 About
About
About
About STB
STB
STB
STB
In this window, you can get the information about
the STB, such as product name, software &
hardware ver sion
,
and so on.

- 18 -
Main
Main
Main
Main Menu
Menu
Menu
Menu
4.
4.
4.
4. TIME
TIME
TIME
TIME SETTINGS
SETTINGS
SETTINGS
SETTINGS
4.1
4.1
4.1
4.1 Time
Time
Time
Time Setup
Setup
Setup
Setup
The default time setup is auto, you also have the
option to select this manually, enter the time zone
of your country by pressing the LEFT/RIGHT
arrows and you will get the correct current time
which is based on TDT (Time and Data Table) in
the stream of the current channel service.
The
The
The
The time
time
time
time you
you
you
you set
set
set
set will
will
will
will be
be
be
be shown
shown
shown
shown on
on
on
on the
the
the
the front
front
front
front panel
panel
panel
panel when
when
when
when you
you
you
you set
set
set
set receiver
receiver
receiver
receiver
to
to
to
to standby
standby
standby
standby mode.
mode.
mode.
mode.
4.2
4.2
4.2
4.2 Event
Event
Event
Event Timer
Timer
Timer
Timer
Here you can set the channels that you like,
customized the time to jump to the designated
program. You can also customize time to record the
designated program, you set including both TV and
Radio, you can add, edit and delete the timer event.
You
You
You
You can
can
can
can add
add
add
add multi-groups
multi-groups
multi-groups
multi-groups in
in
in
in event
event
event
event
timer.
timer.
timer.
timer.
4.3
4.3
4.3
4.3 Sleep
Sleep
Sleep
Sleep Timer
Timer
Timer
Timer
You can set Sleep timer and this function will set receiver to go into Standby mode
automatically according to the time you set, user defined time is available as well.

- 19 -
Main
Main
Main
Main Menu
Menu
Menu
Menu
5.
5.
5.
5. GAMES
GAMES
GAMES
GAMES
Here you can find two highly playable internal
games for your entertainment purpose
!
Hexa Games and Mine !!
6
6
6
6 .
.
.
. USB
USB
USB
USB CONTROL
CONTROL
CONTROL
CONTROL
Here you can enter the USB menu, and also can set some net parameter and browse
web view
6
6
6
6 .1
.1
.1
.1 USB
USB
USB
USB Menu
Menu
Menu
Menu
This
This
This
This STB
STB
STB
STB is
is
is
is designed
designed
designed
designed to
to
to
to work
work
work
work with
with
with
with FAT
FAT
FAT
FAT &
&
&
& FAT32
FAT32
FAT32
FAT32 &
&
&
& Ext2,
Ext2,
Ext2,
Ext2, Ext
Ext
Ext
Ext 3,
3,
3,
3, and
and
and
and NTFS
NTFS
NTFS
NTFS
format
format
format
format USB
USB
USB
USB devices
devices
devices
devices
Plug any compatible USB device into this STB, and
enter USB menu, here you can play movies, listen
to music, and view your favorite pictures which are
installed on your USB device.
Supported V ideo formats: MP4/3GP/MPG/AVI
/
MKV /MOV/TS/ VOB/ DAT/ M2TS/ FLV/ ASF.
Supported A udio formats: MP3/PS.
Supported P icture formats: JPG/BMP/ PNG/GIF.
RCU
RCU
RCU
RCU Buttons
Buttons
Buttons
Buttons for
for
for
for USB
USB
USB
USB multimedia
multimedia
multimedia
multimedia function
function
function
function
OK
OK
OK
OK
:
View play list
/
Play the selected file in play list
:
Play the selected file in play list
/
Resume playing file
■
:
Stop playing file

- 20 -
Main
Main
Main
Main Menu
Menu
Menu
Menu
I
I
I
I
:
Play the previous item
I
I
I
I
:
Play the next item
:
Fast backward
:
Fast forward
II
II
II
II
/
/
/
/
PAUSE:
PAUSE:
PAUSE:
PAUSE: Pause the video or music
/
:
Adjust volume
【F1 】
:
Jump, you can jump to the specific time of one video.
【F3 】
:
Adjust the output of Video format, such as 16:9; 4:3
EXIT
EXIT
EXIT
EXIT
:
Exit play list menu
/
Exit playing state and return to file list menu.
Press B
B
B
B LUE
LUE
LUE
LUE button switch LOOP OFF/ON
,
so you can play the files in loop mode
Press G
G
G
G REEN
REEN
REEN
REEN button get HELP message.
Press Y
Y
Y
Y ELLOW
ELLOW
ELLOW
ELLOW button to download the STB database to your USB device.
Press RED
RED
RED
RED button to get the detailed information about the specific file.
You
You
You
You can
can
can
can
’
’
’
’
t
t
t
t play
play
play
play music
music
music
music file
file
file
file under
under
under
under a
a
a
a movie
movie
movie
movie folder,
folder,
folder,
folder, nor
nor
nor
nor in
in
in
in picture
picture
picture
picture folder,
folder,
folder,
folder, so
so
so
so
please
please
please
please always
always
always
always choose
choose
choose
choose correct
correct
correct
correct folder
folder
folder
folder for
for
for
for your
your
your
your multimedia
multimedia
multimedia
multimedia files.
files.
files.
files.
USB
USB
USB
USB PVR
PVR
PVR
PVR
Plug the USB device into your STB, simply press
RECORD button on the RCU, the Recording of one
specific channel is beginning, even you can still
change your channels if the recorded channel TP
contains other channels.
ATTENTION
ATTENTION
ATTENTION
ATTENTION FOR
FOR
FOR
FOR USB
USB
USB
USB DEVICE
DEVICE
DEVICE
DEVICE and
and
and
and PVR
PVR
PVR
PVR FUNCTION
FUNCTION
FUNCTION
FUNCTION
Supported Devices:
1) Most of the popular USB 2.0 Hard Drive Disks are supported by our STB, however
if you find one particular HDD that does not work with our STB, please kindly
provide us with some information about your hardware, so that we can solve
possible incompatibilit y issues.
2) System required: FAT, FAT32, NTFS
3) Minimum Speed required: 5400rpm
Table of contents
Other Inpax Receiver manuals

